Baseball Room Makeover (Step-by-Step Guide!)
/#MondayMakeoversWithFallon
I thought I would change it up this week and talk about my son’s baseball room makeover. He asked for a new baseball room for his 7th birthday, so my husband and I decided to surprise him while he was away on a small camping trip with his grandparent's. His room isn’t very big so I had to be strategic in the the design. I wanted to make it fun while also making it functional. I also wanted to make the room kid friendly, yet classy, so that he could enjoy it now and also as he gets older. Below is the before-and-after process and the steps we took to get the look!
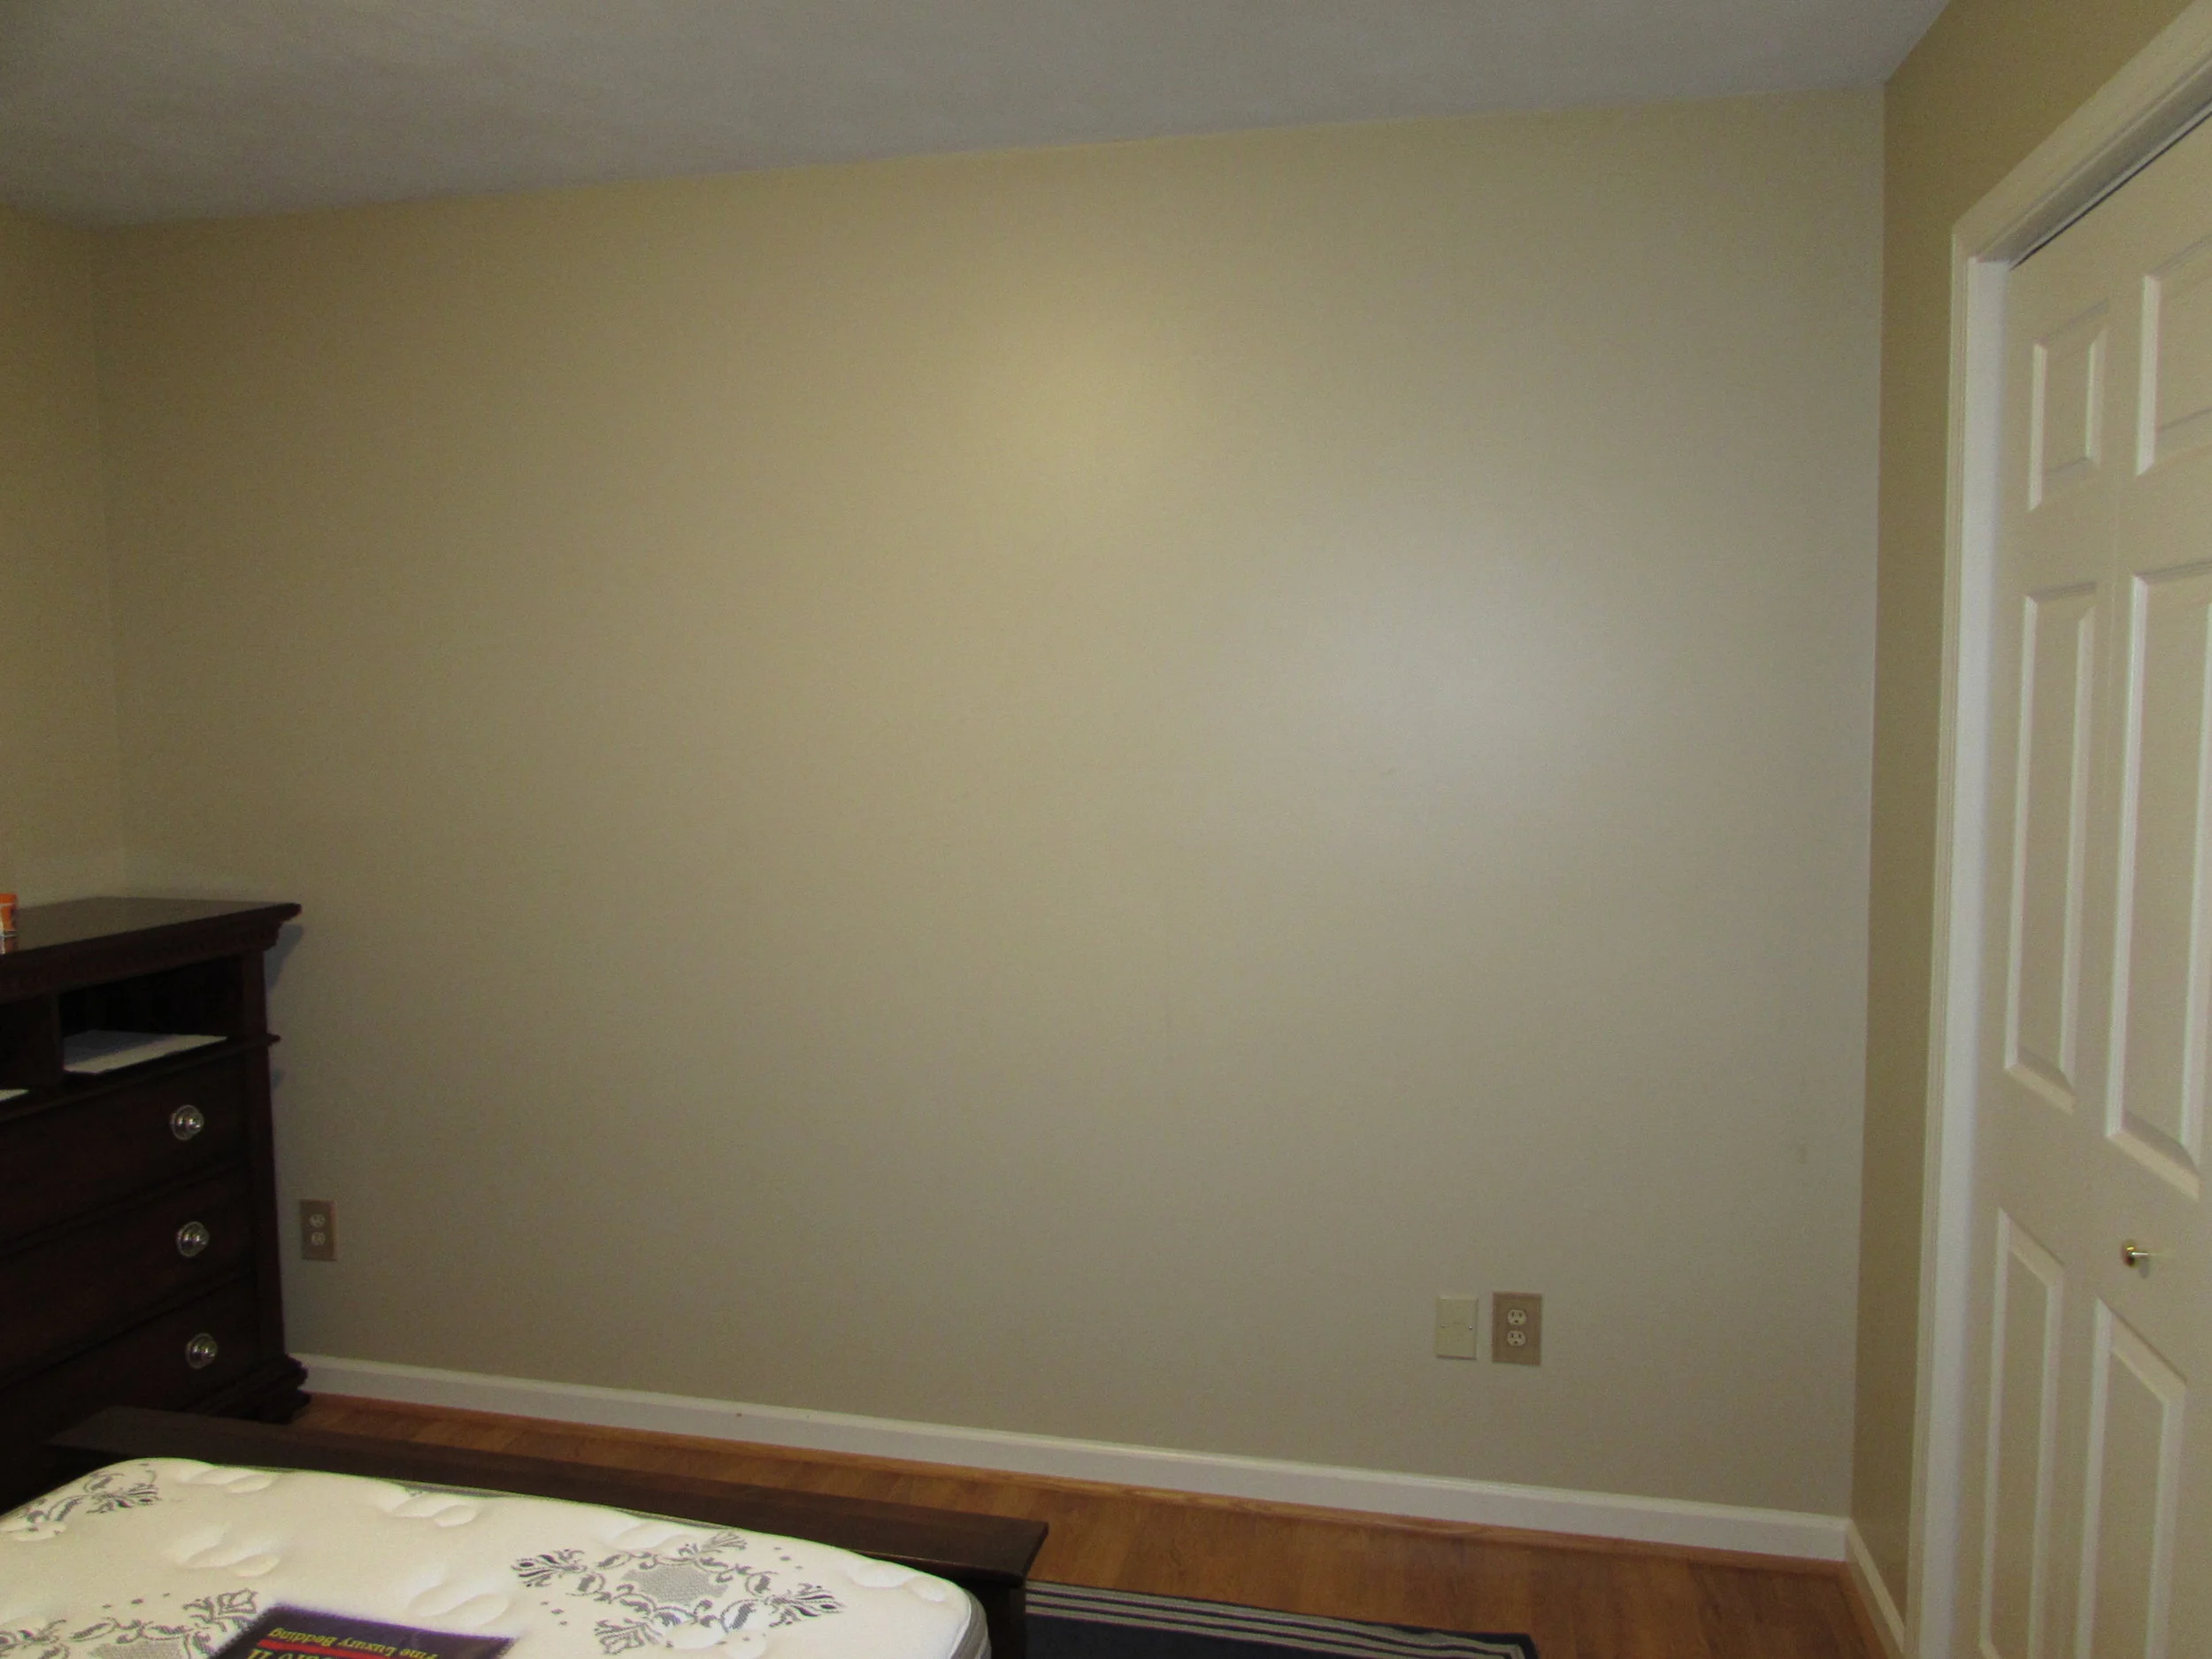
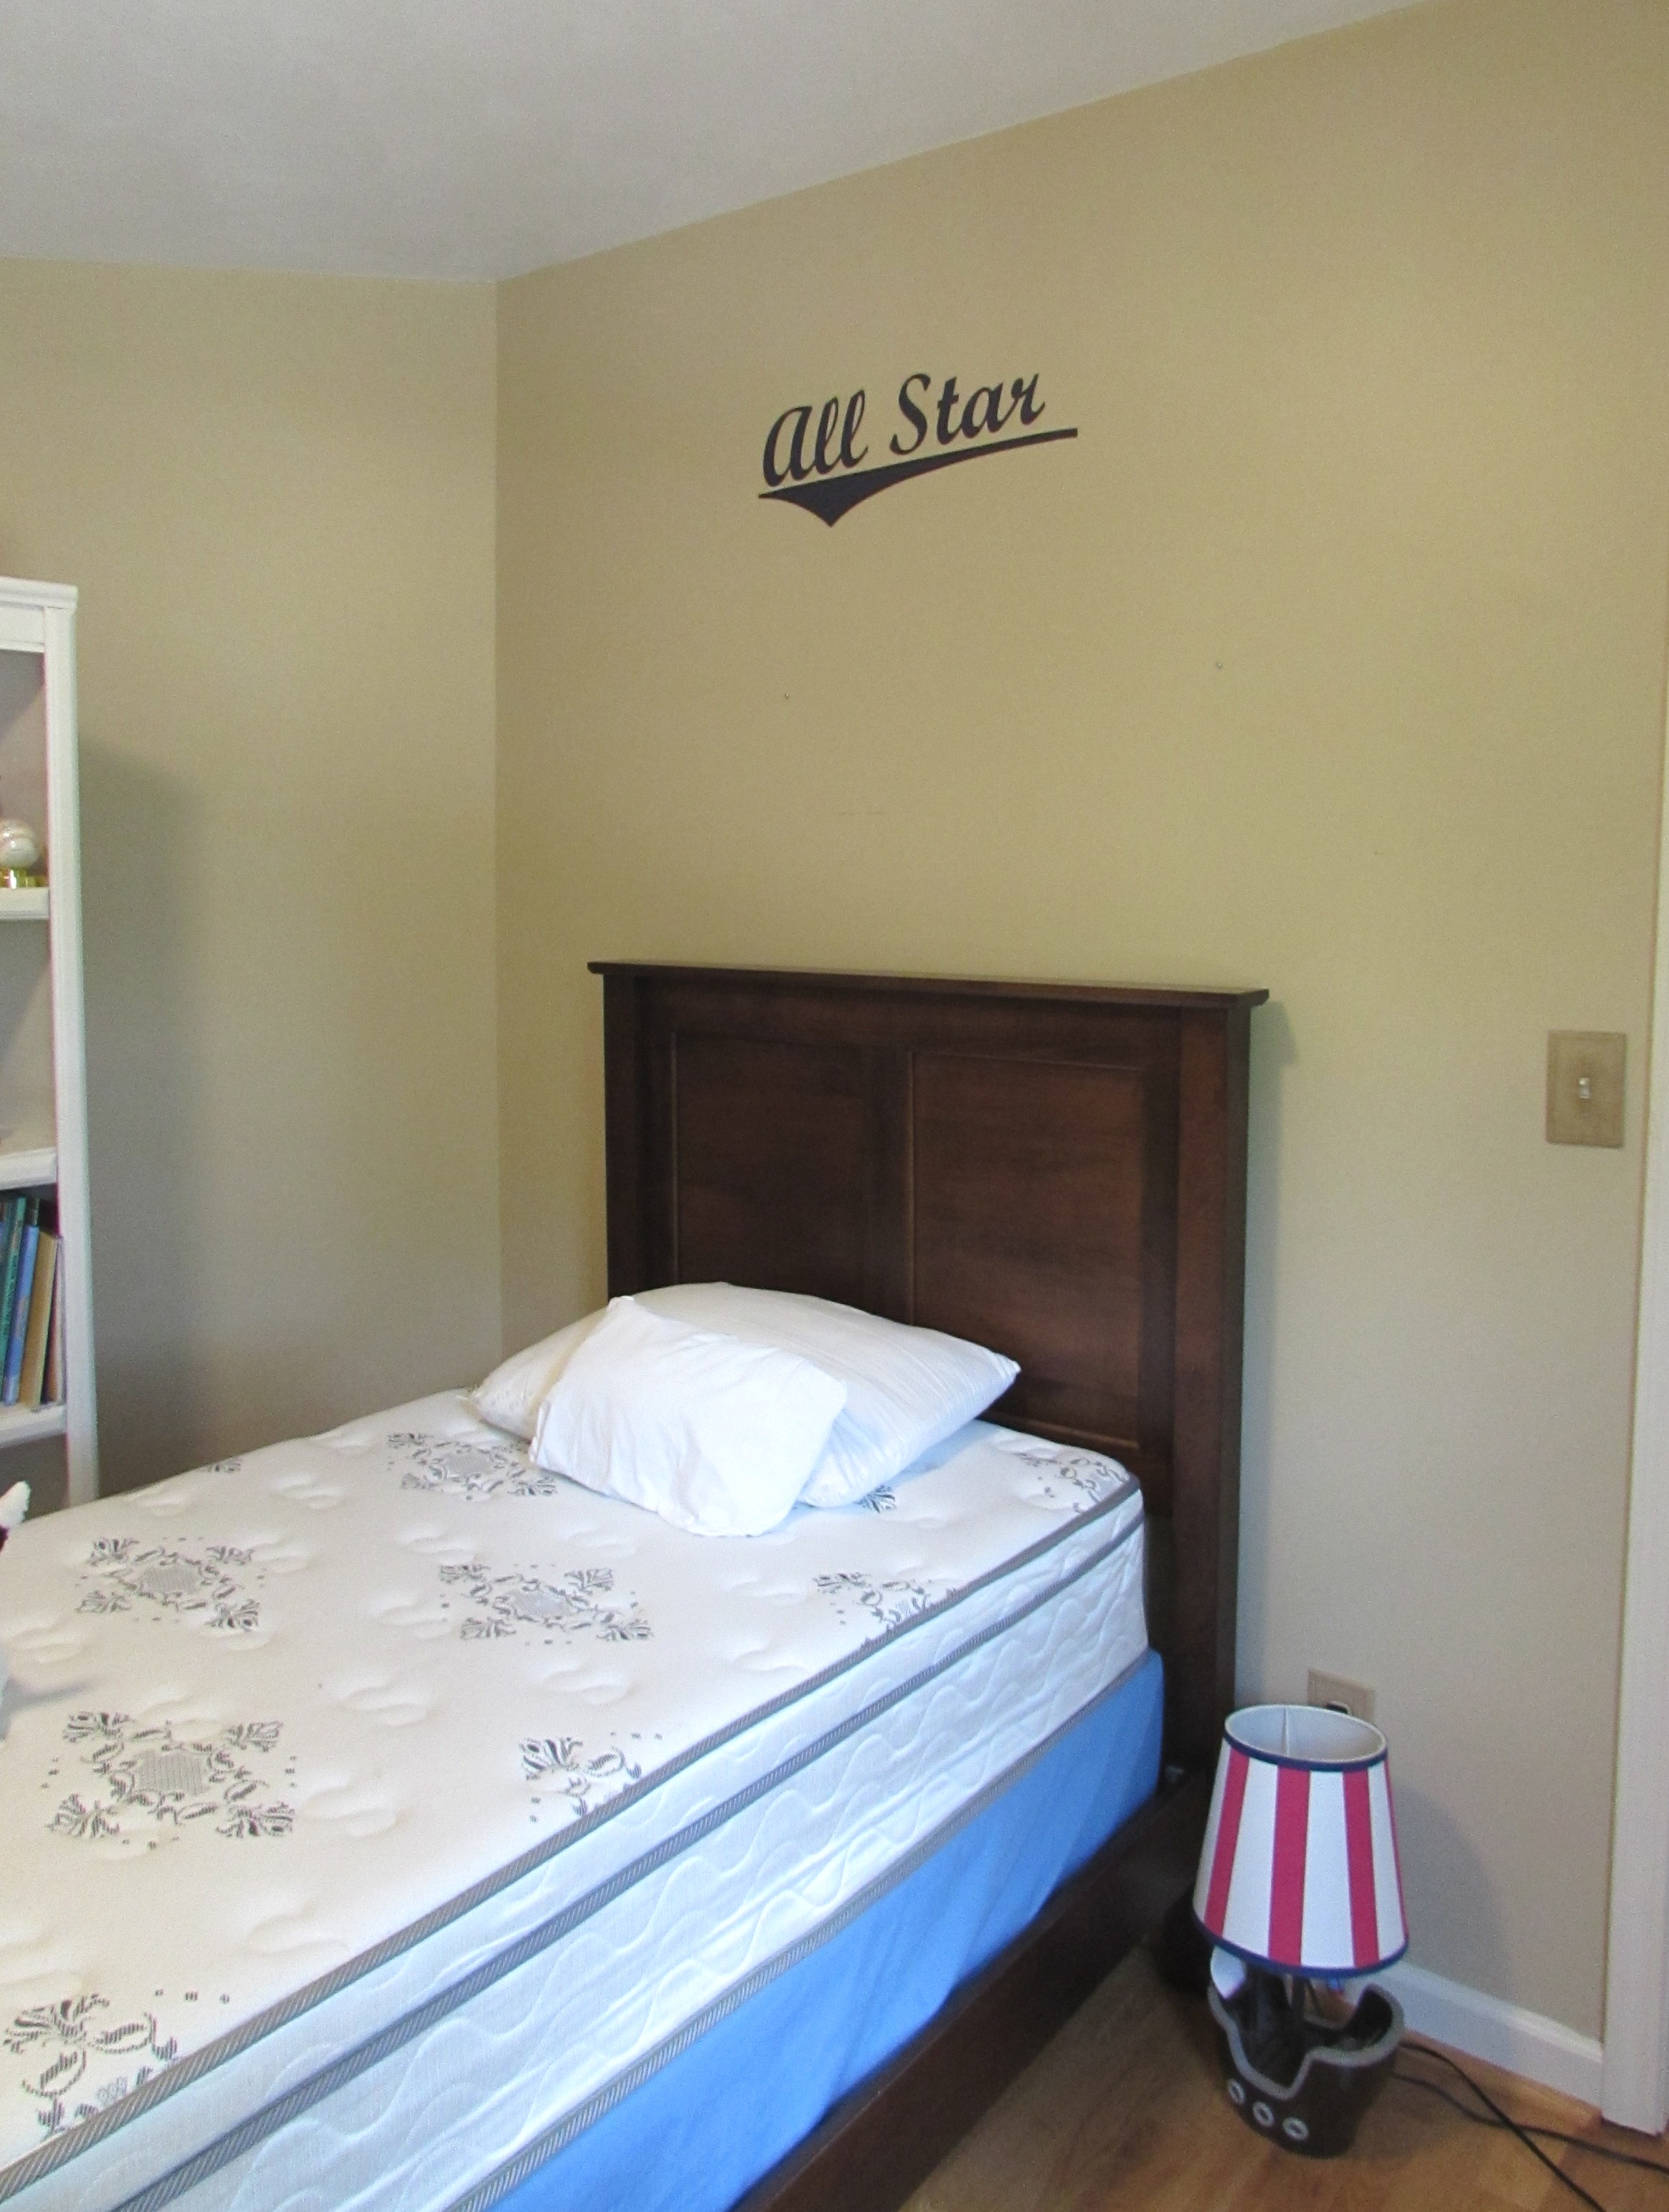
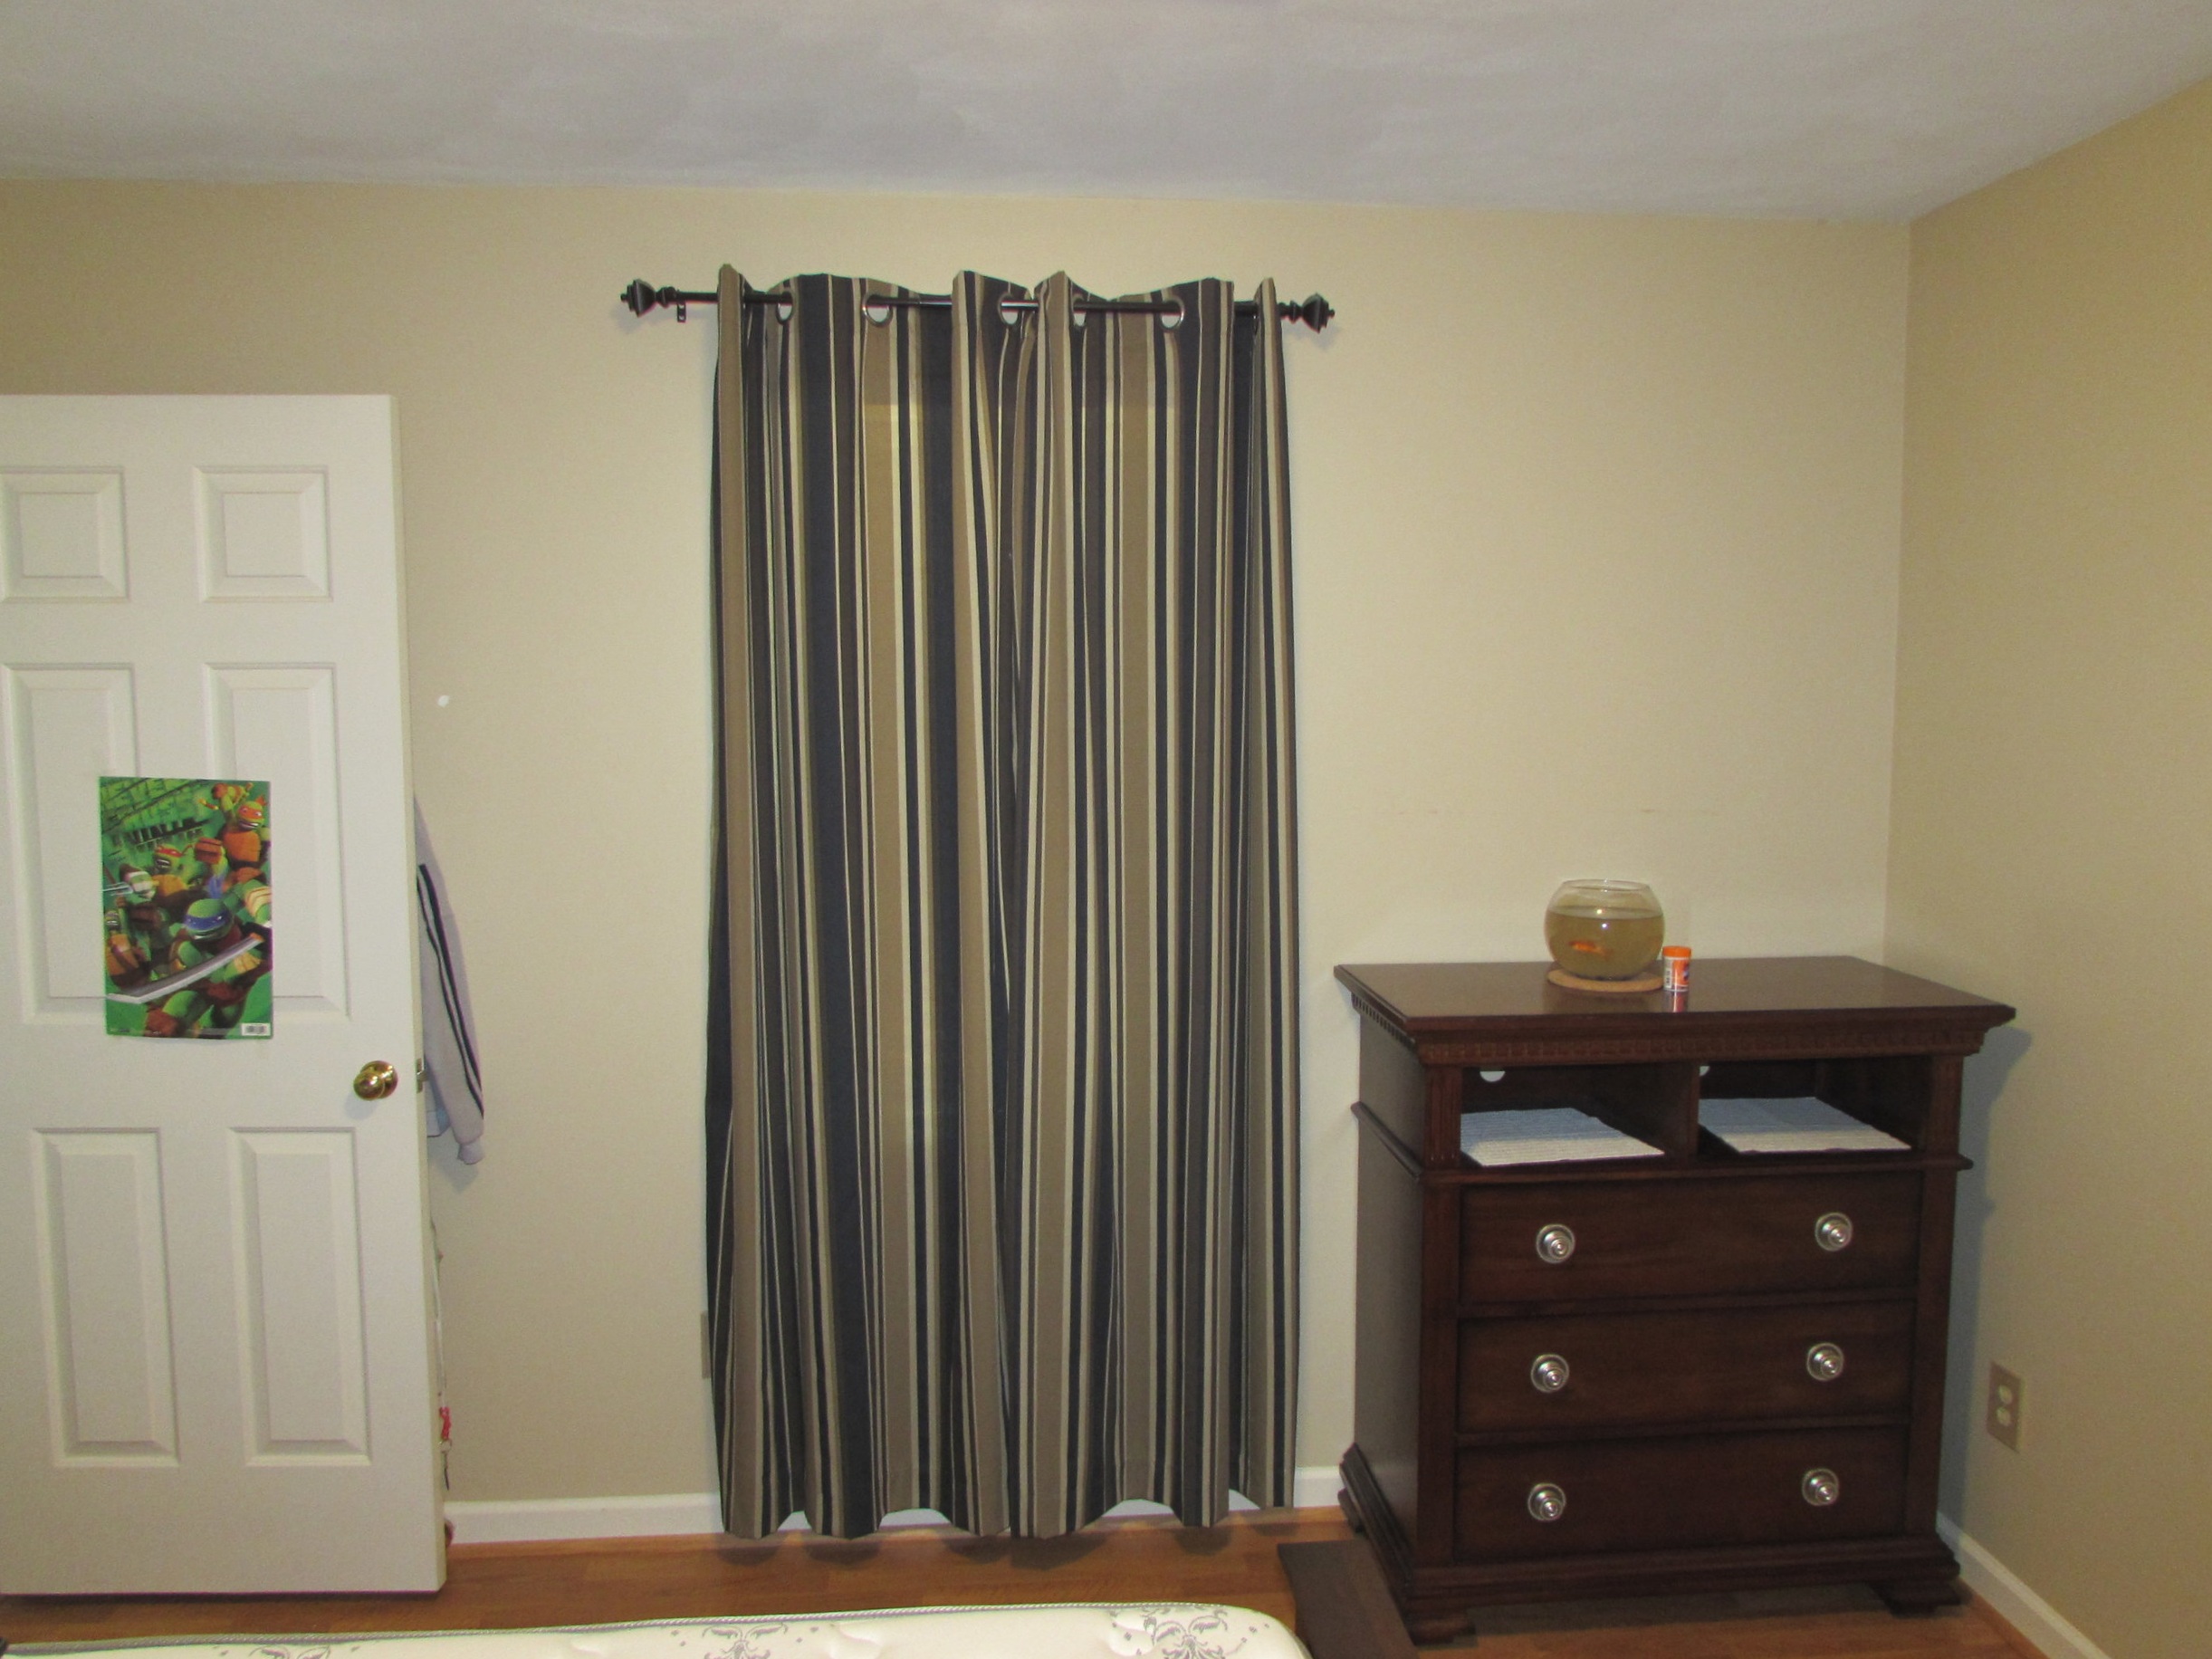
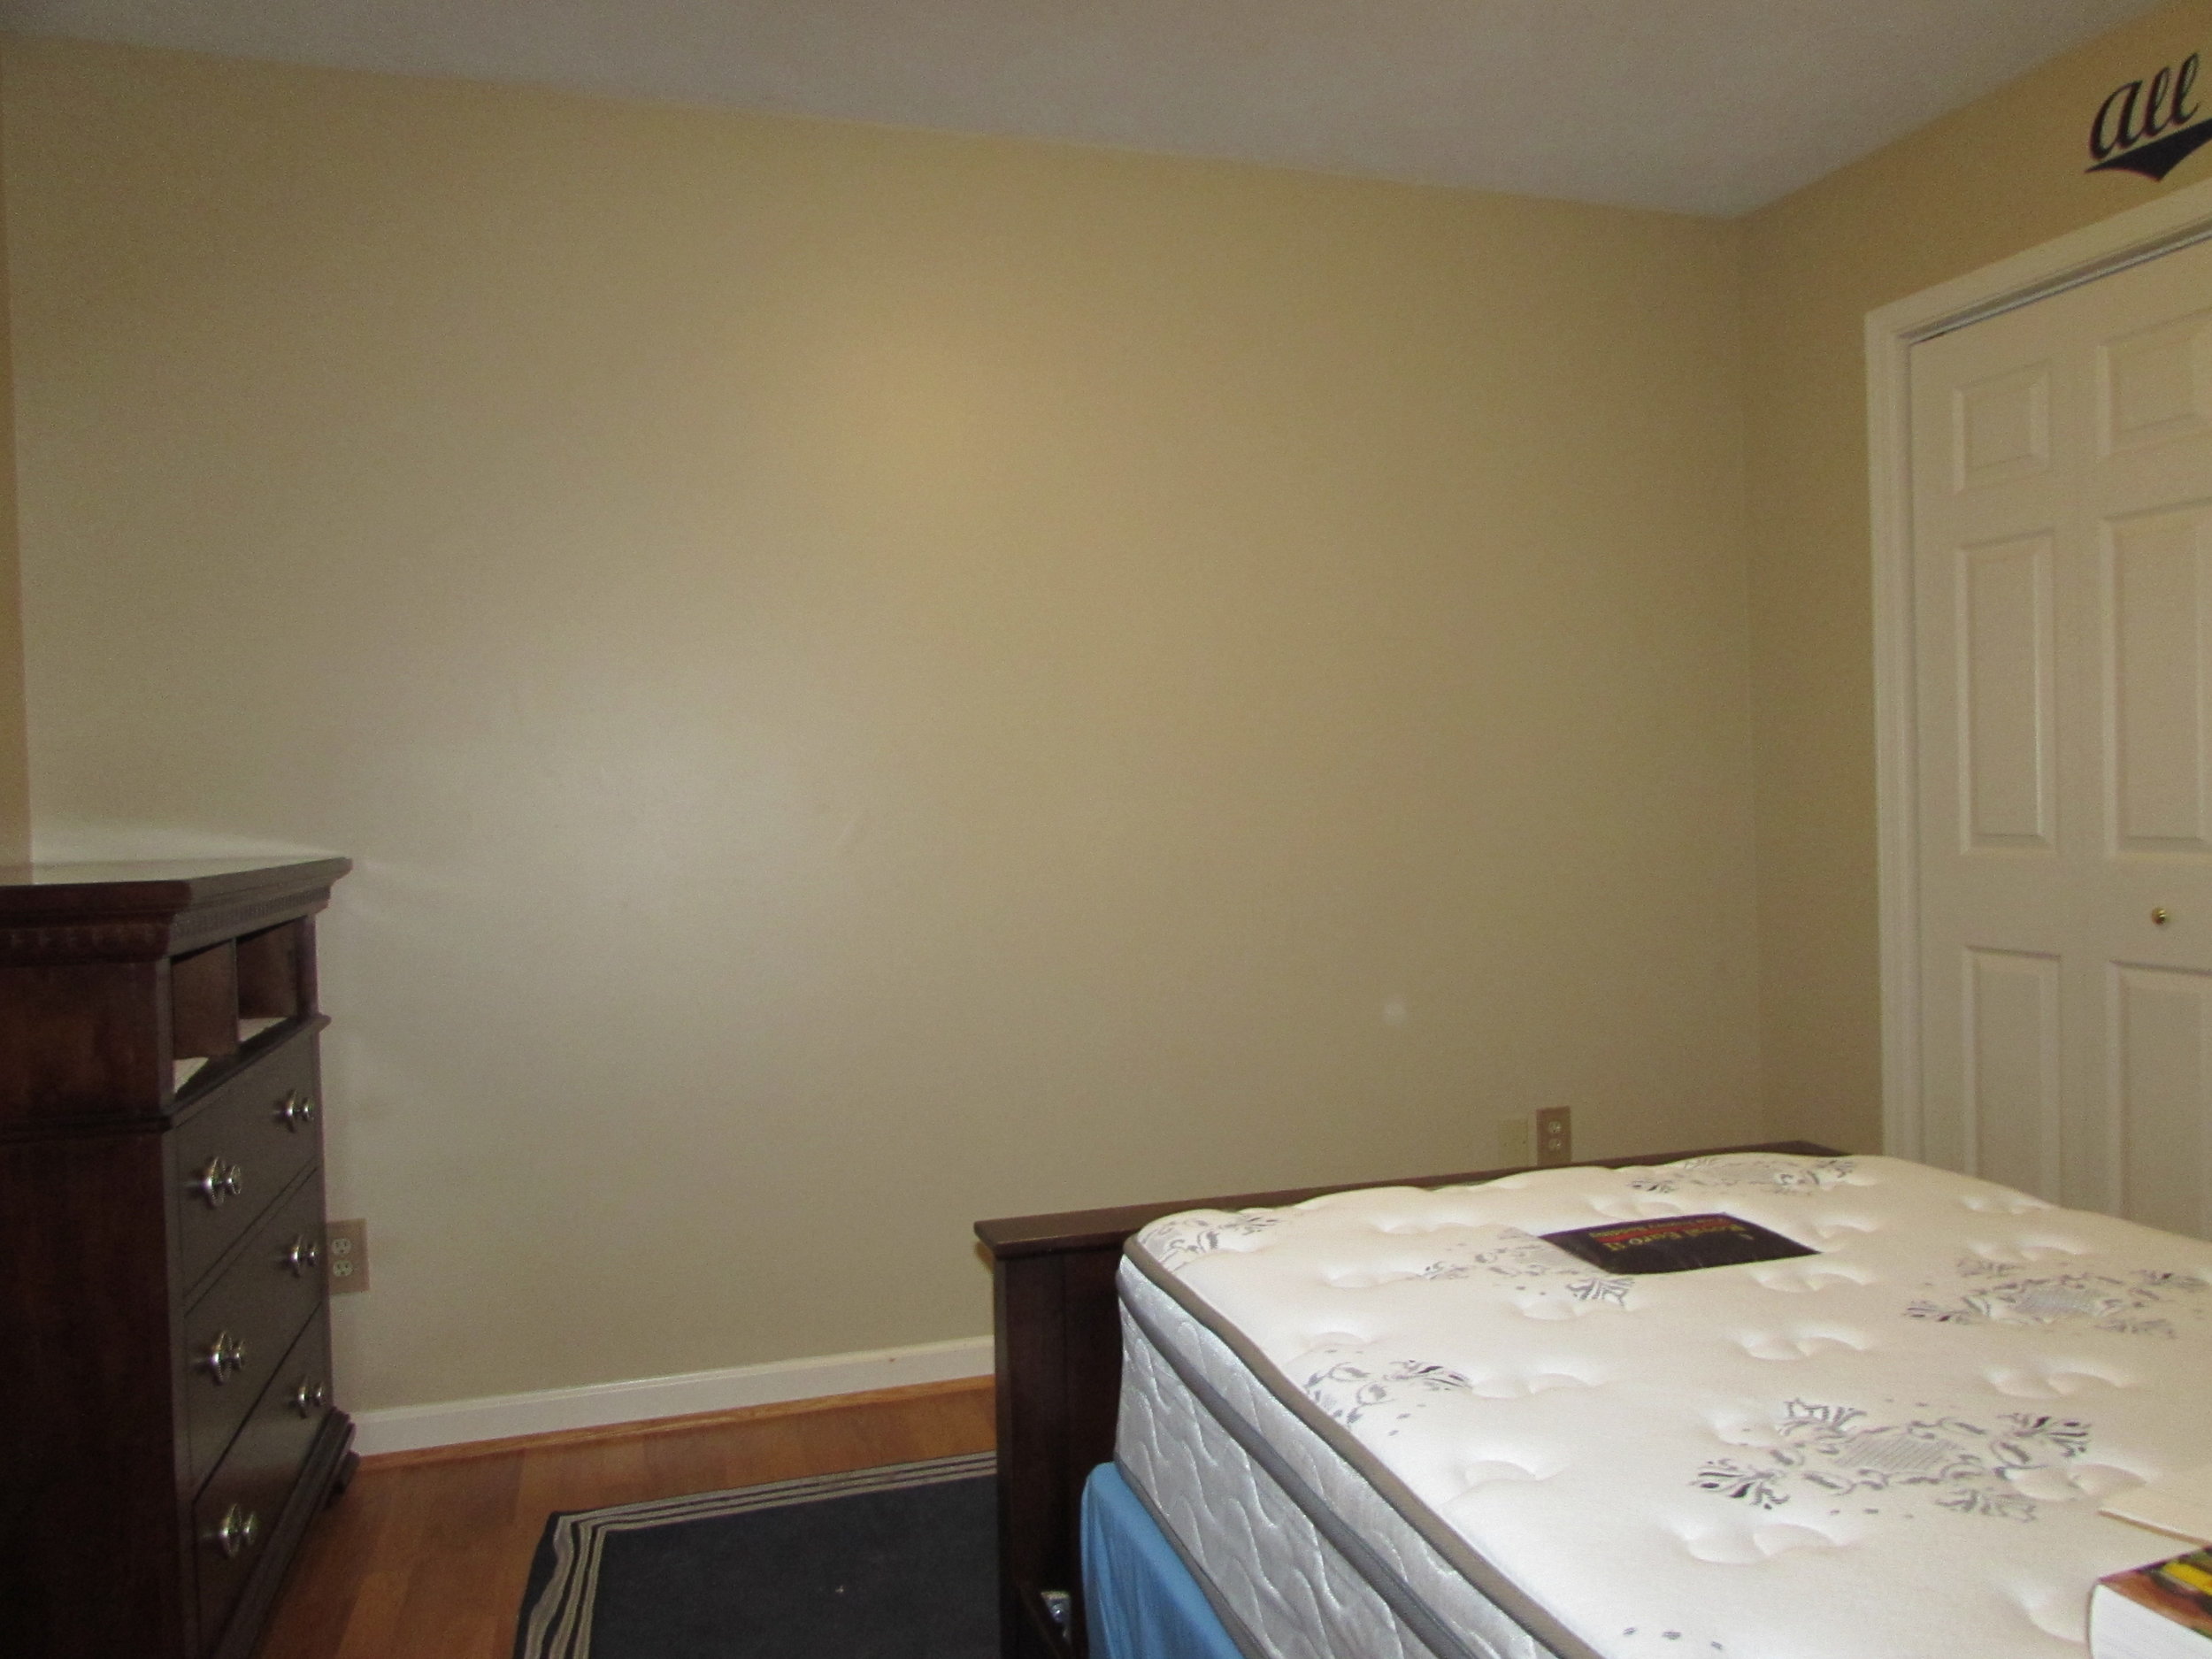
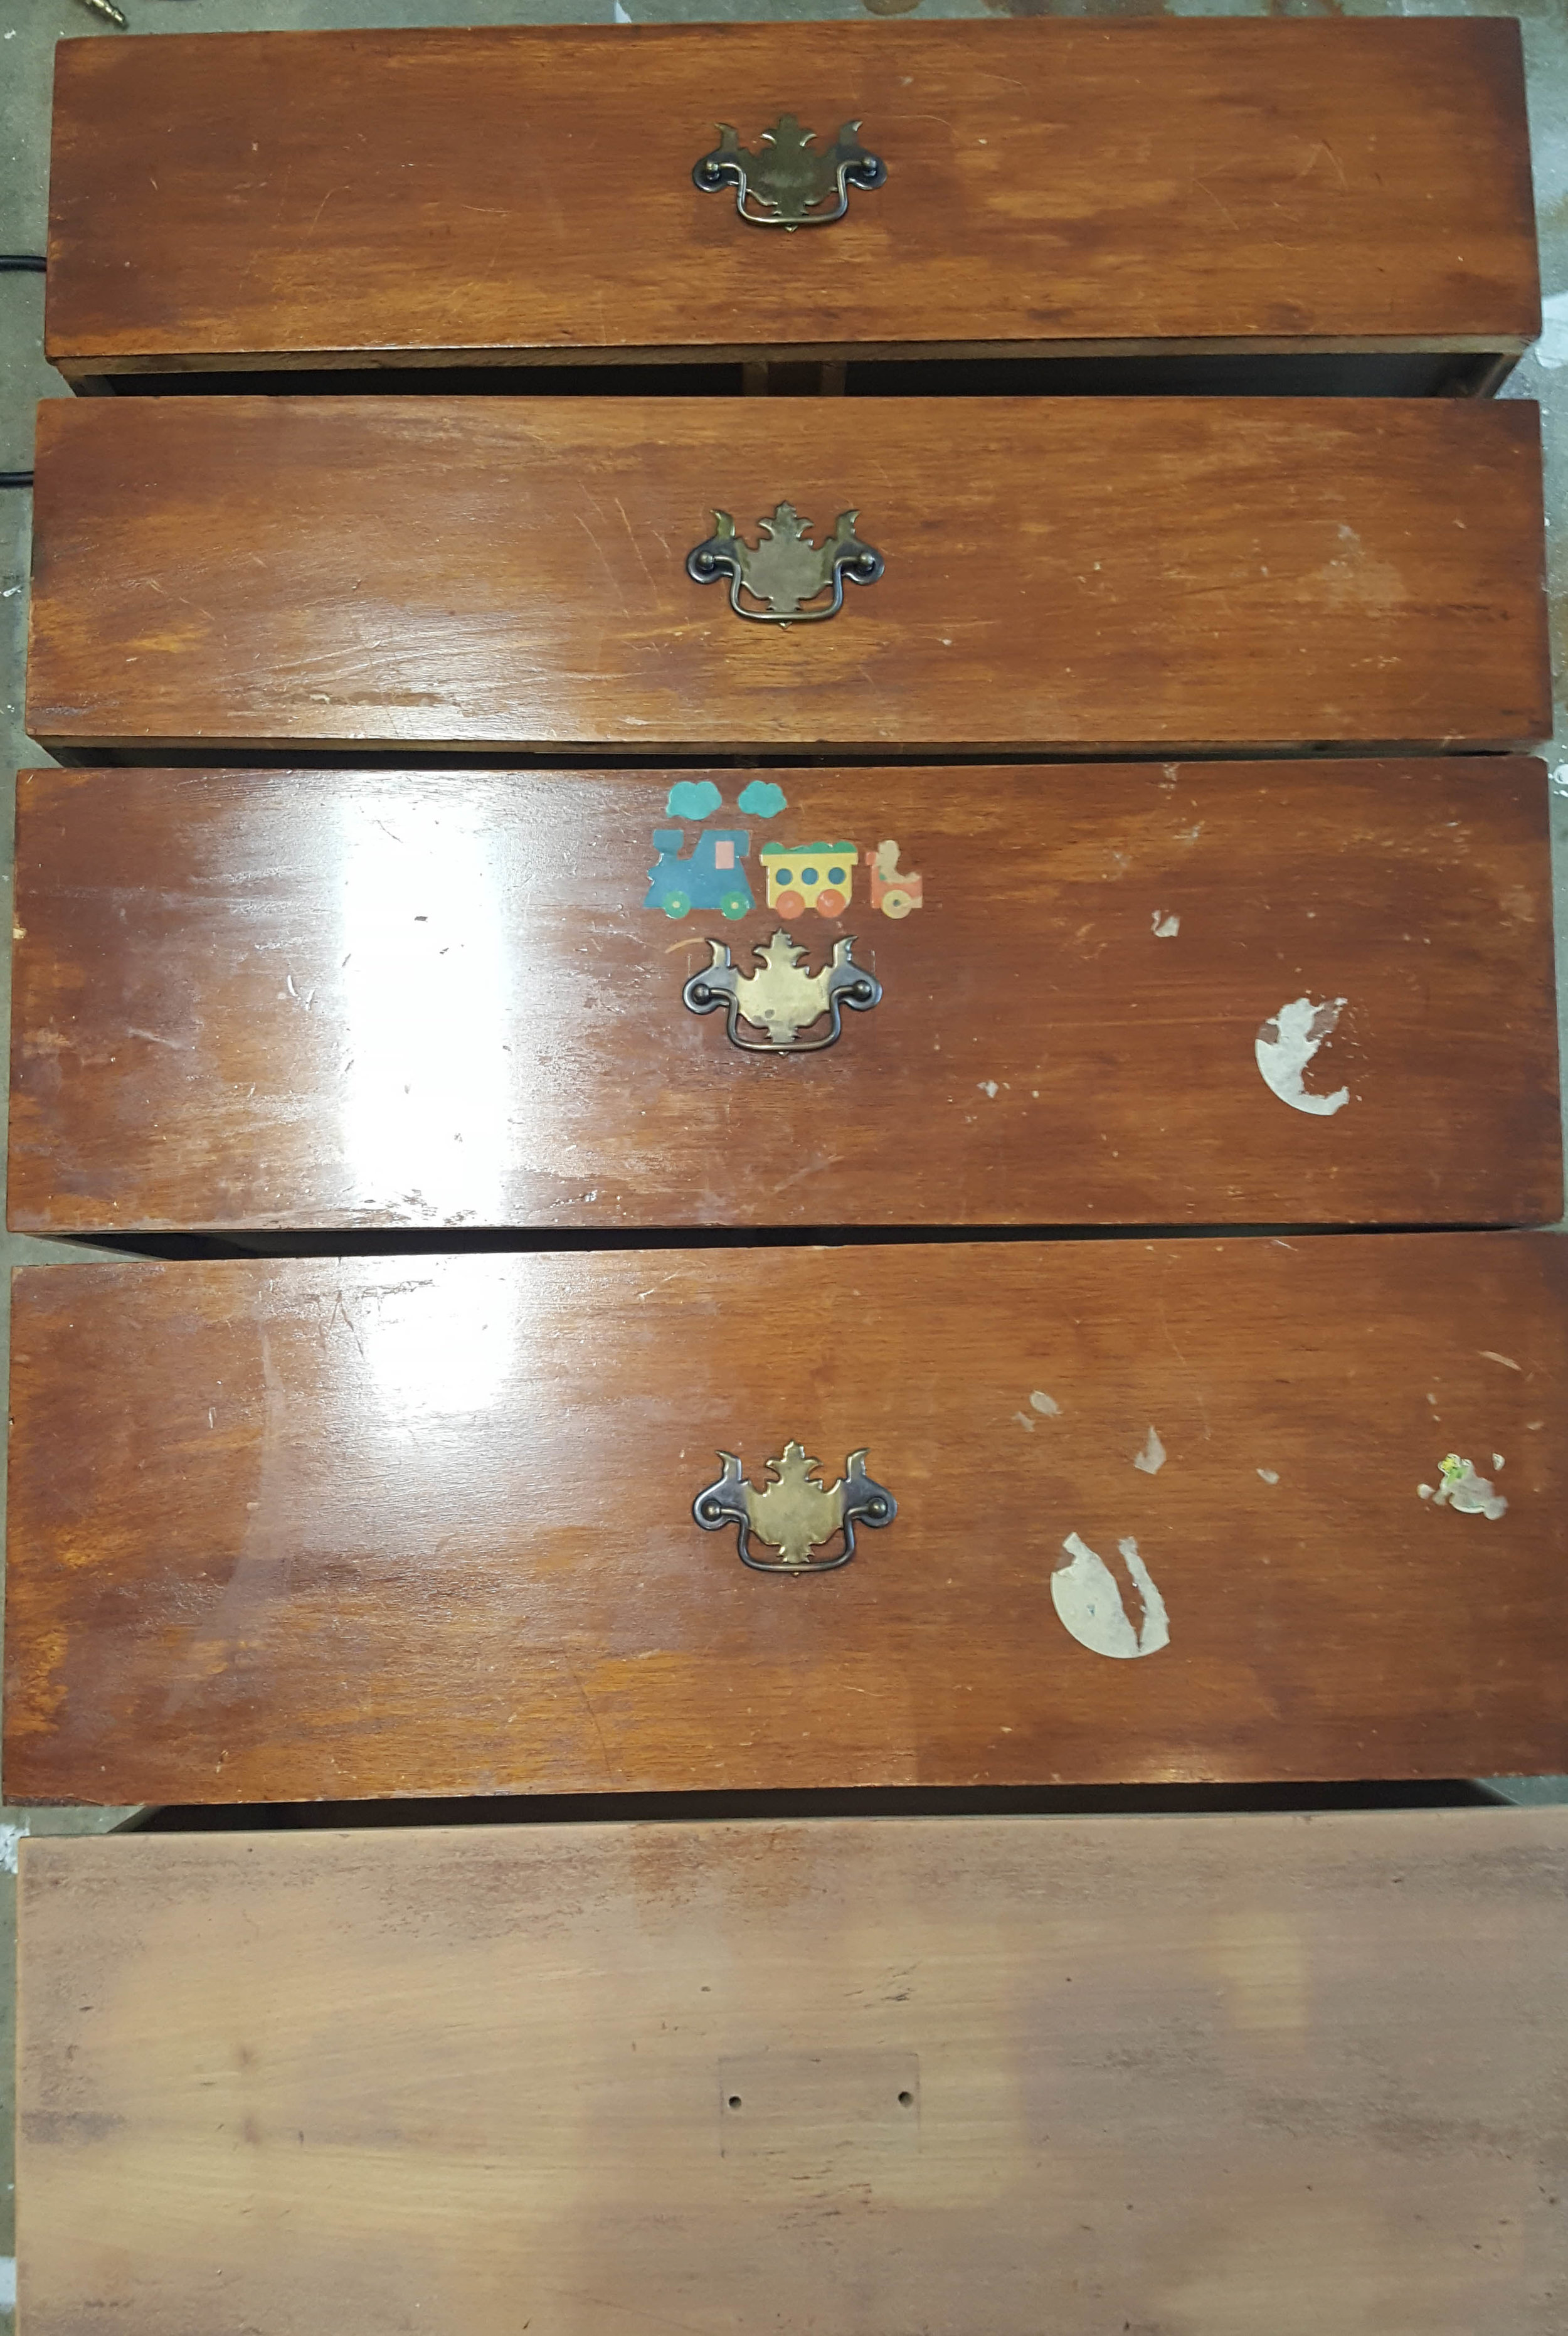
“Before” pictures of his room:

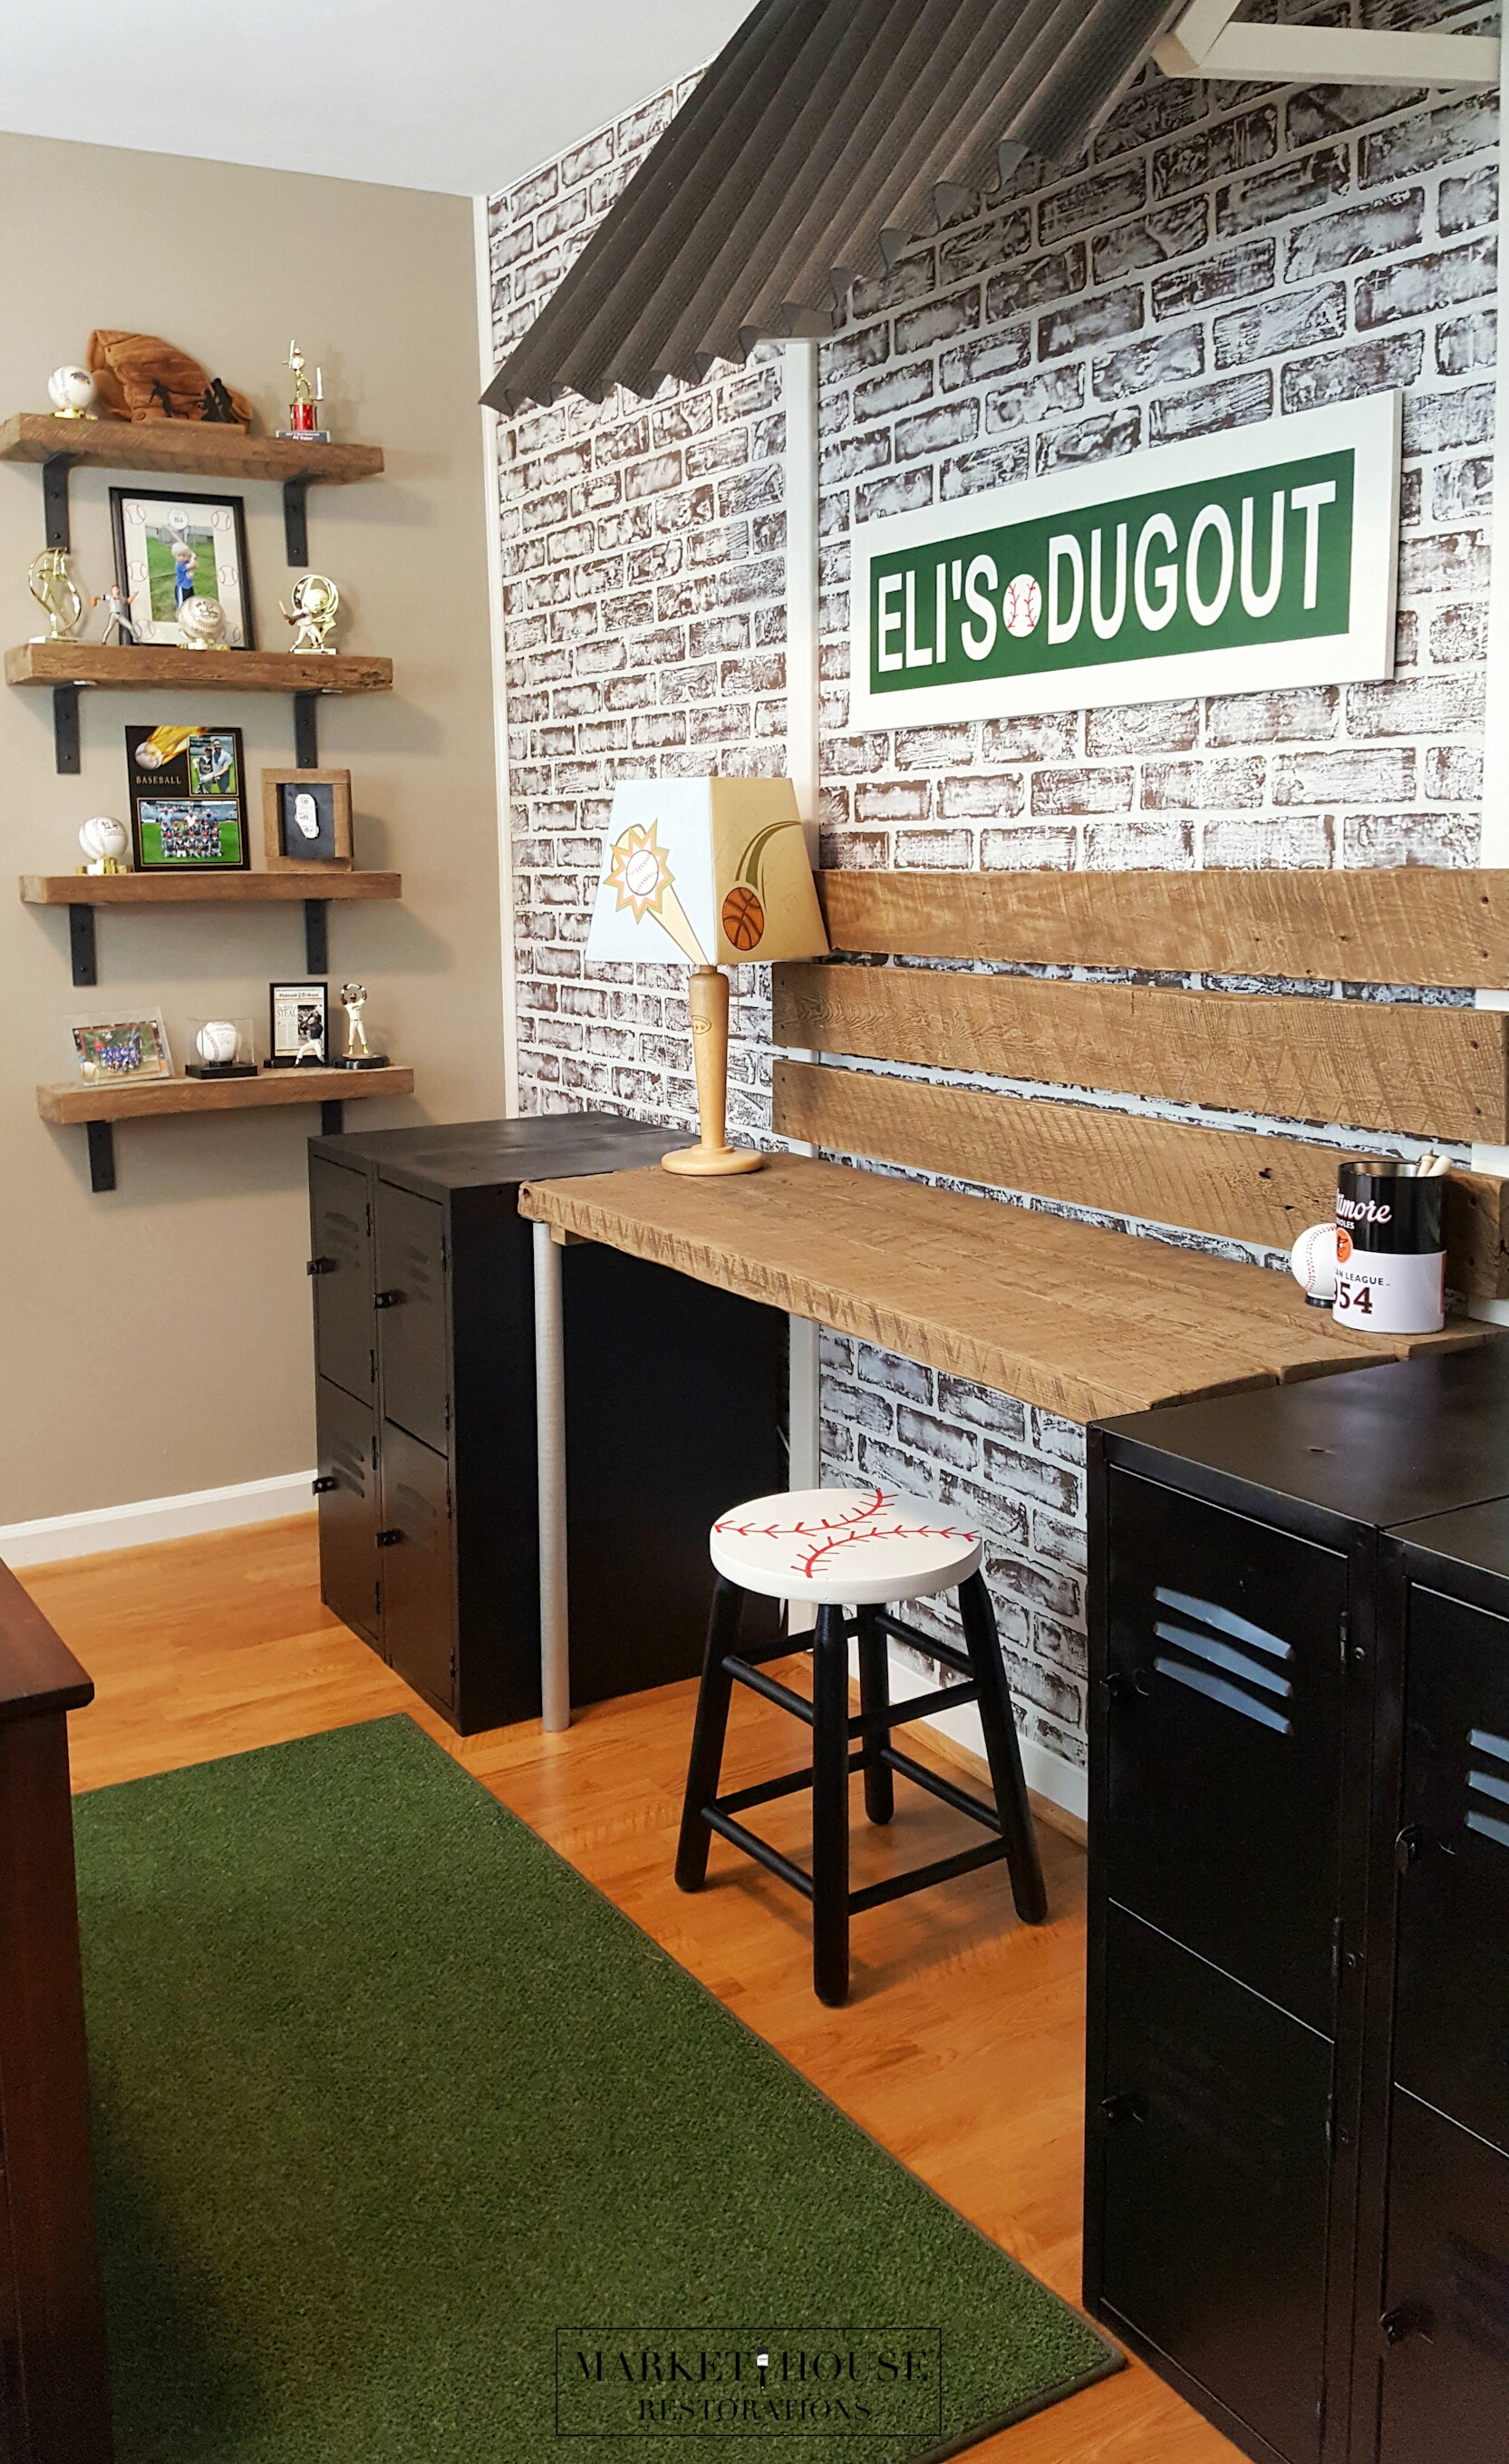
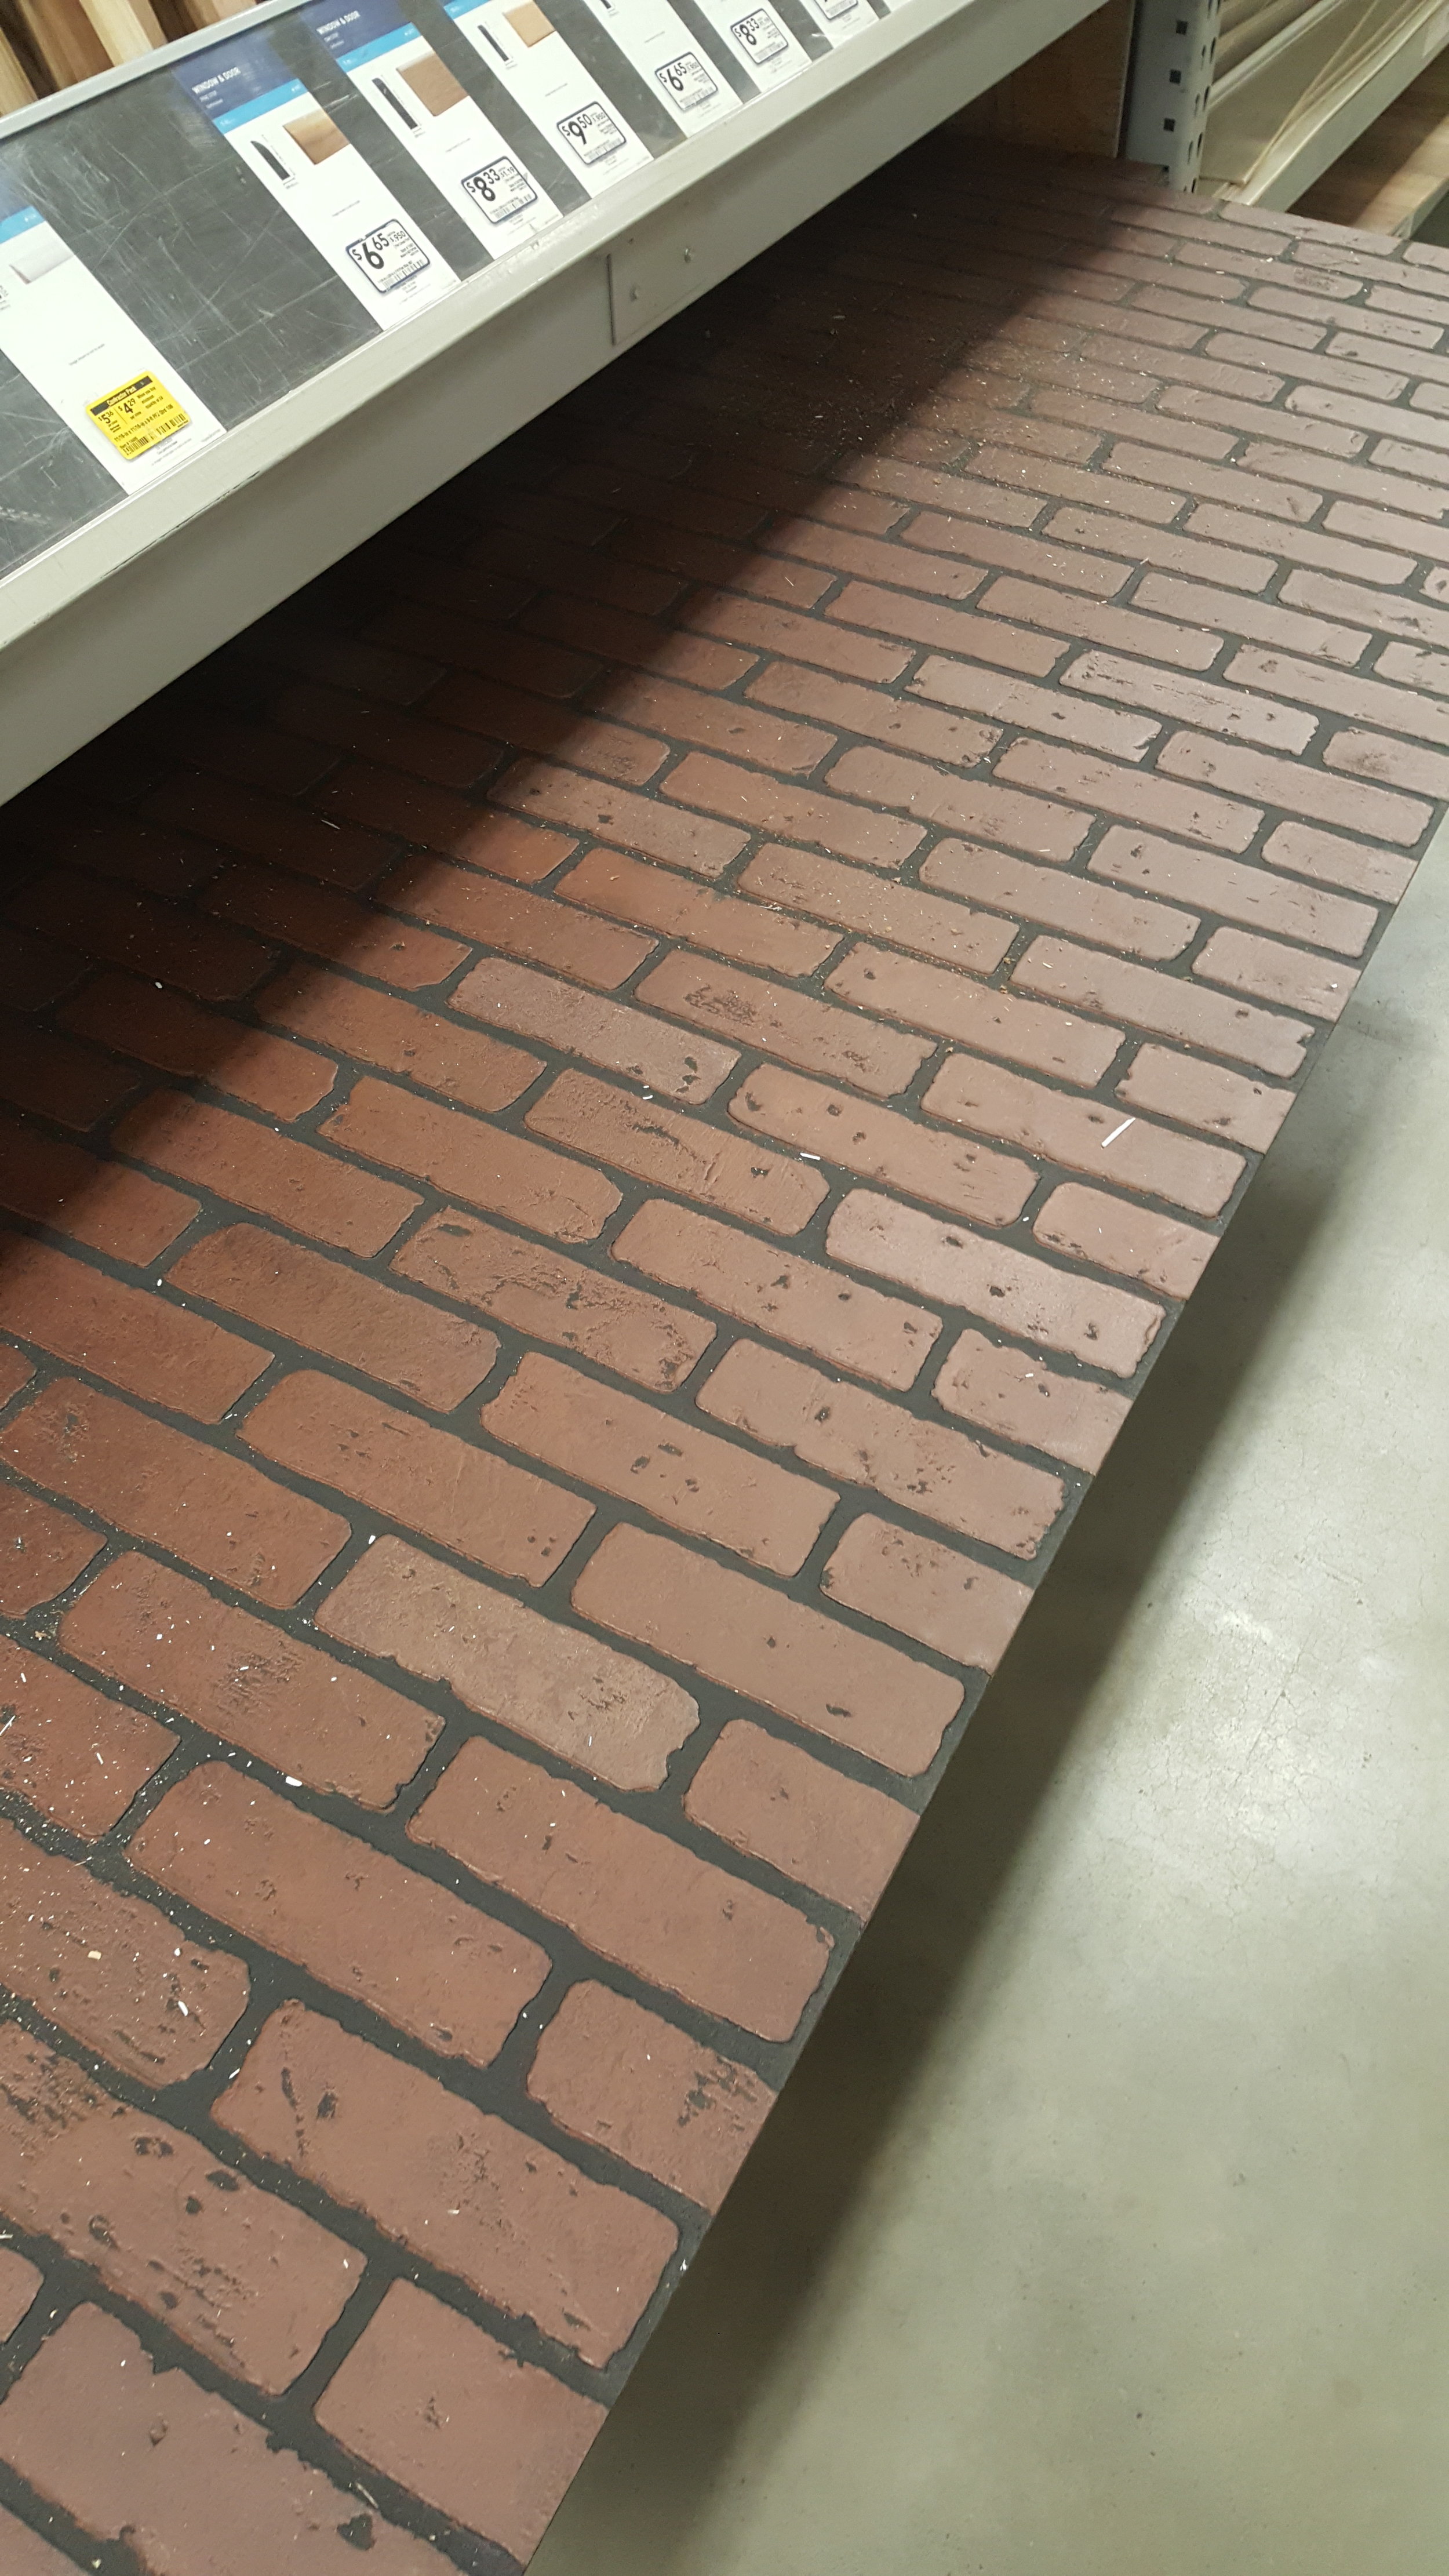
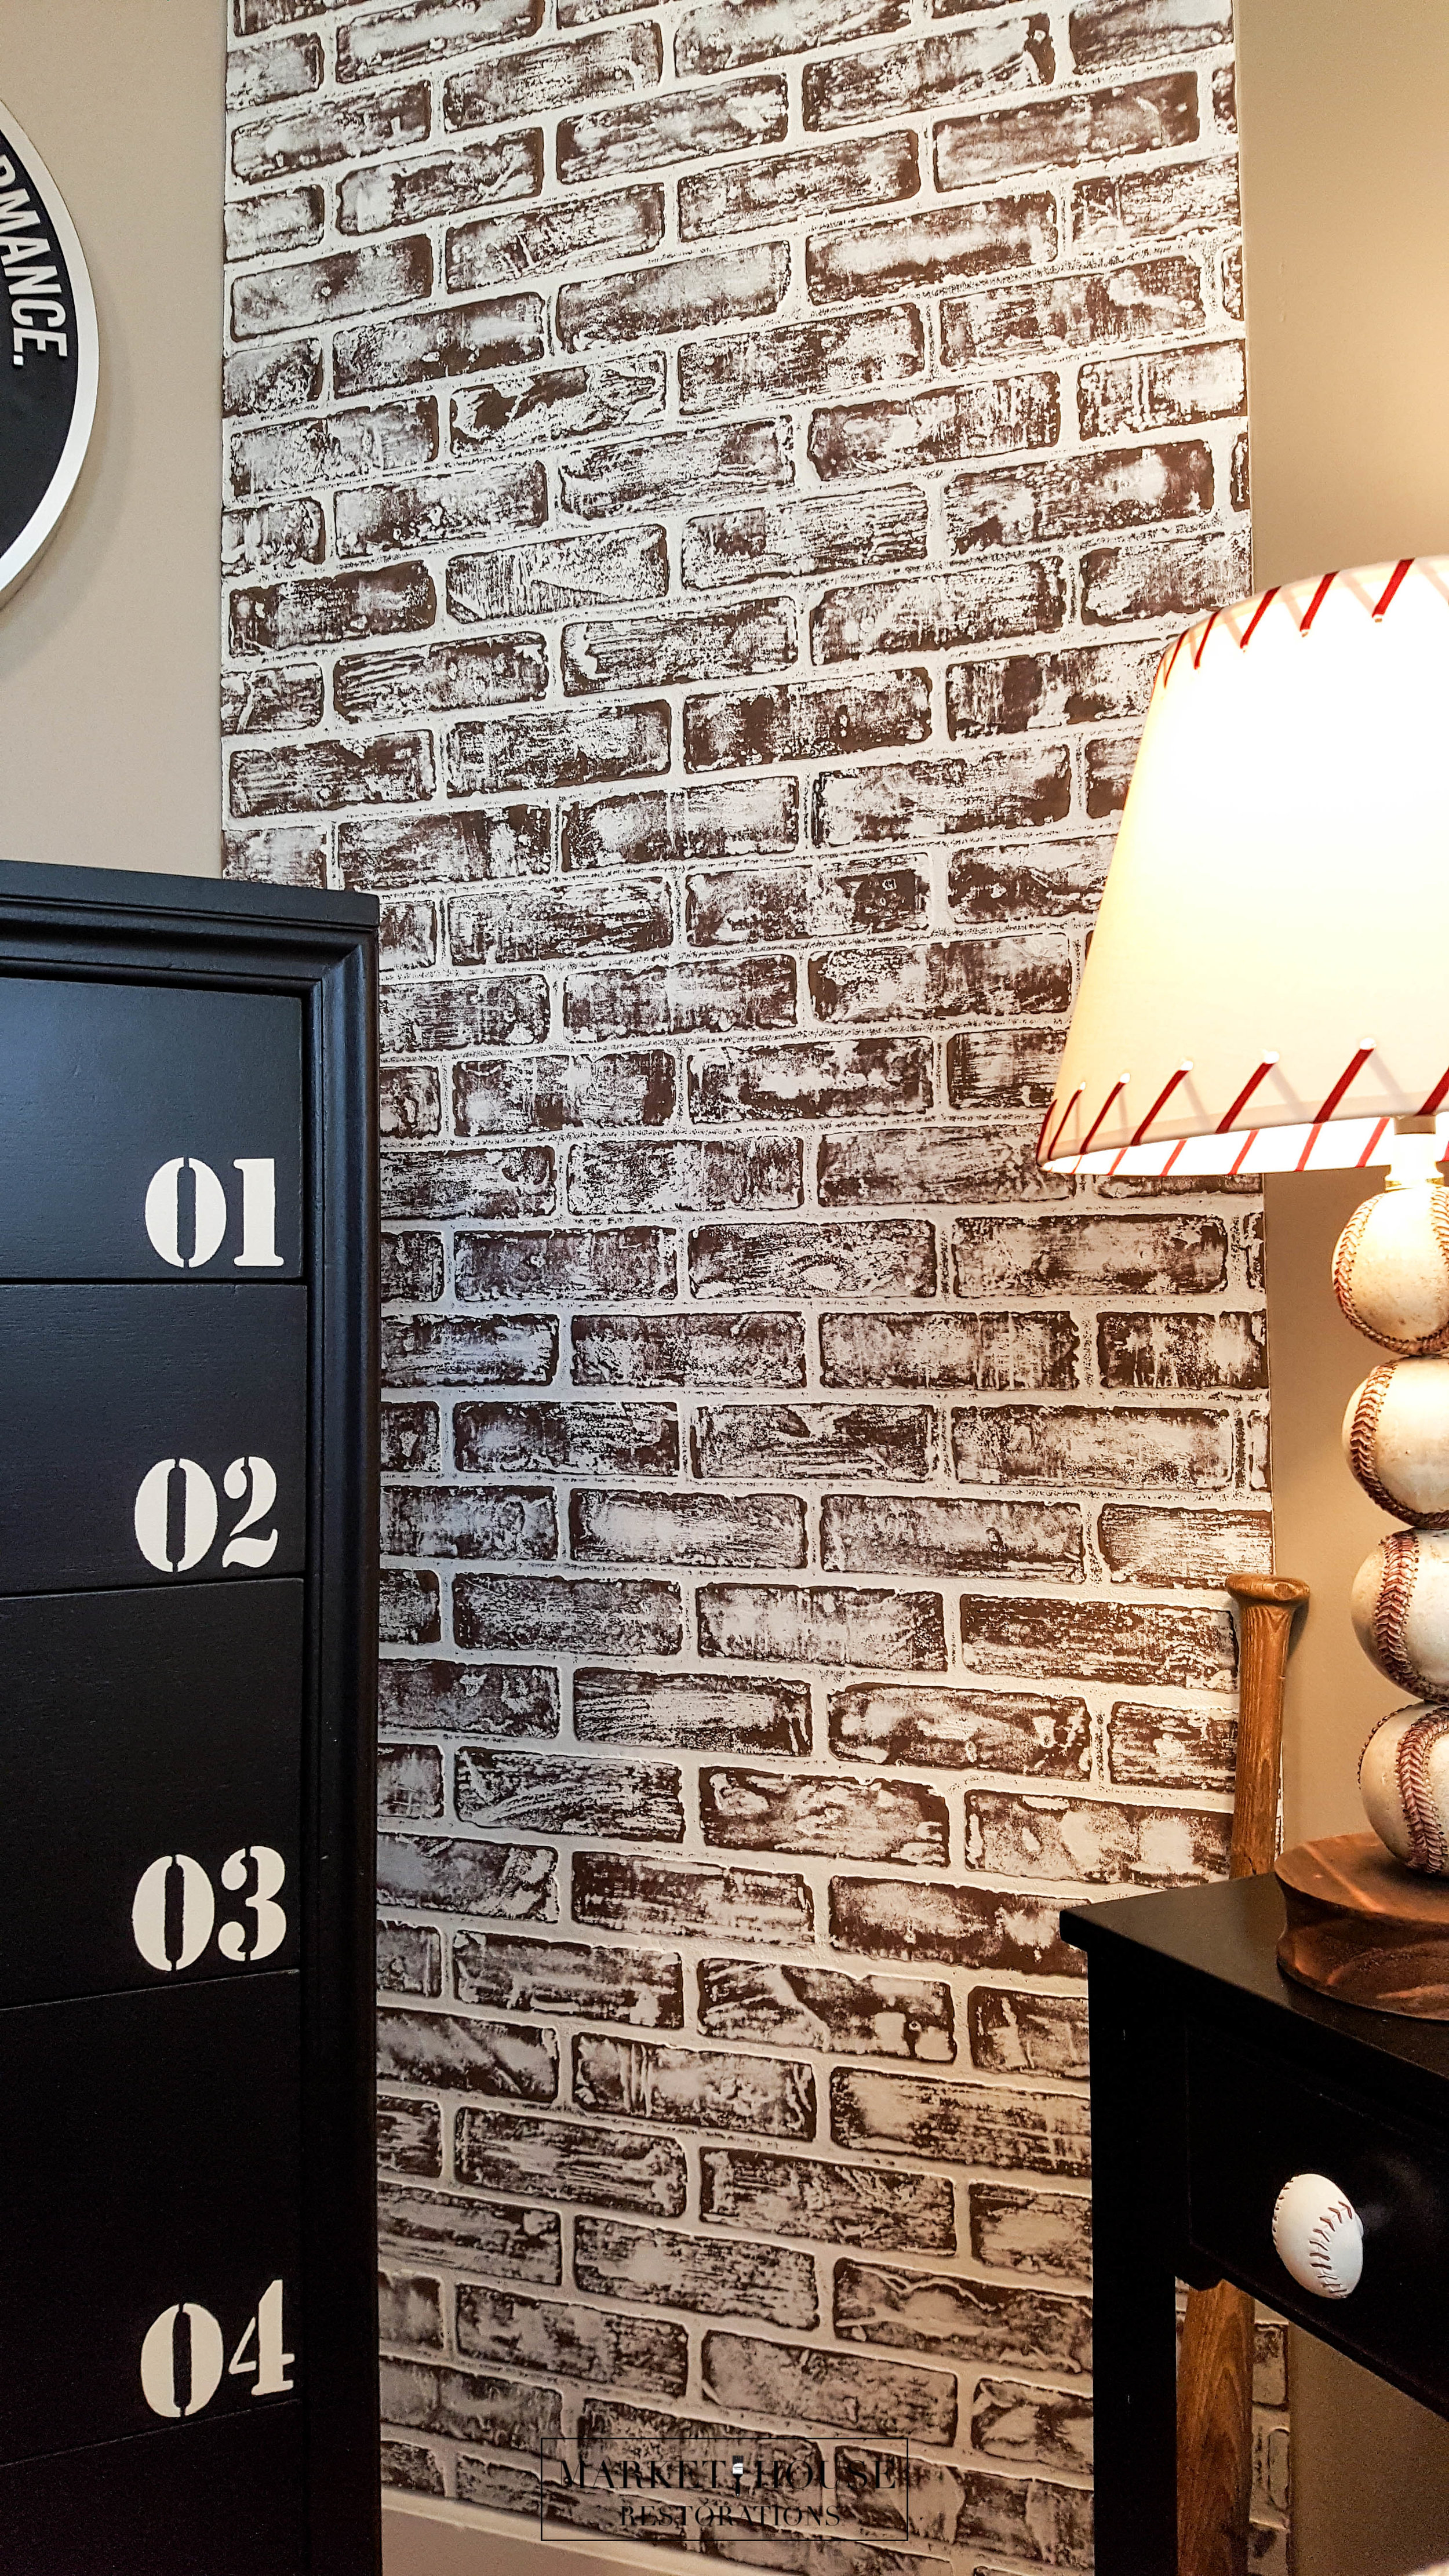
The Faux Brick Wall:
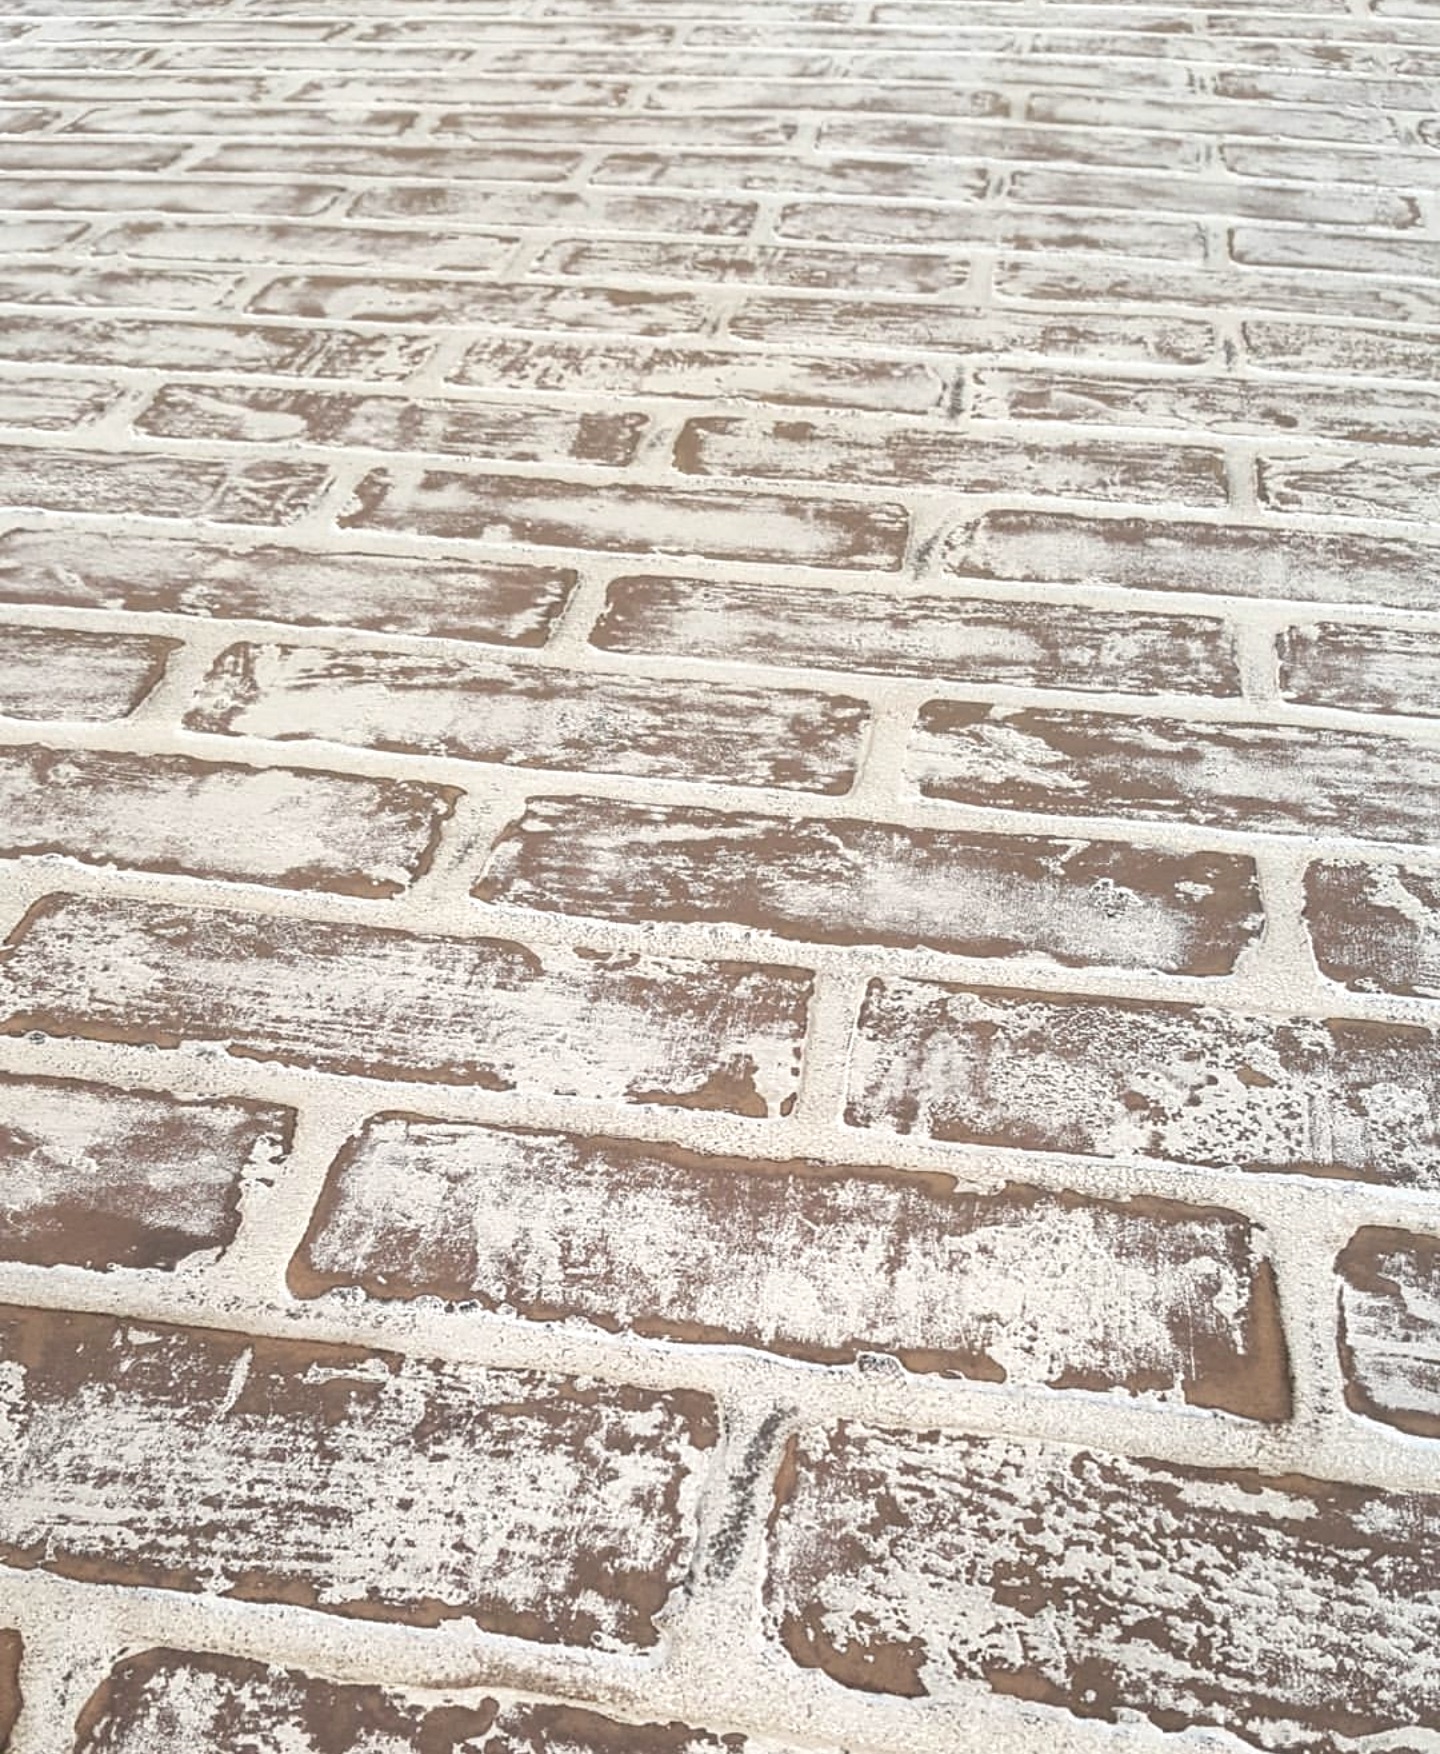
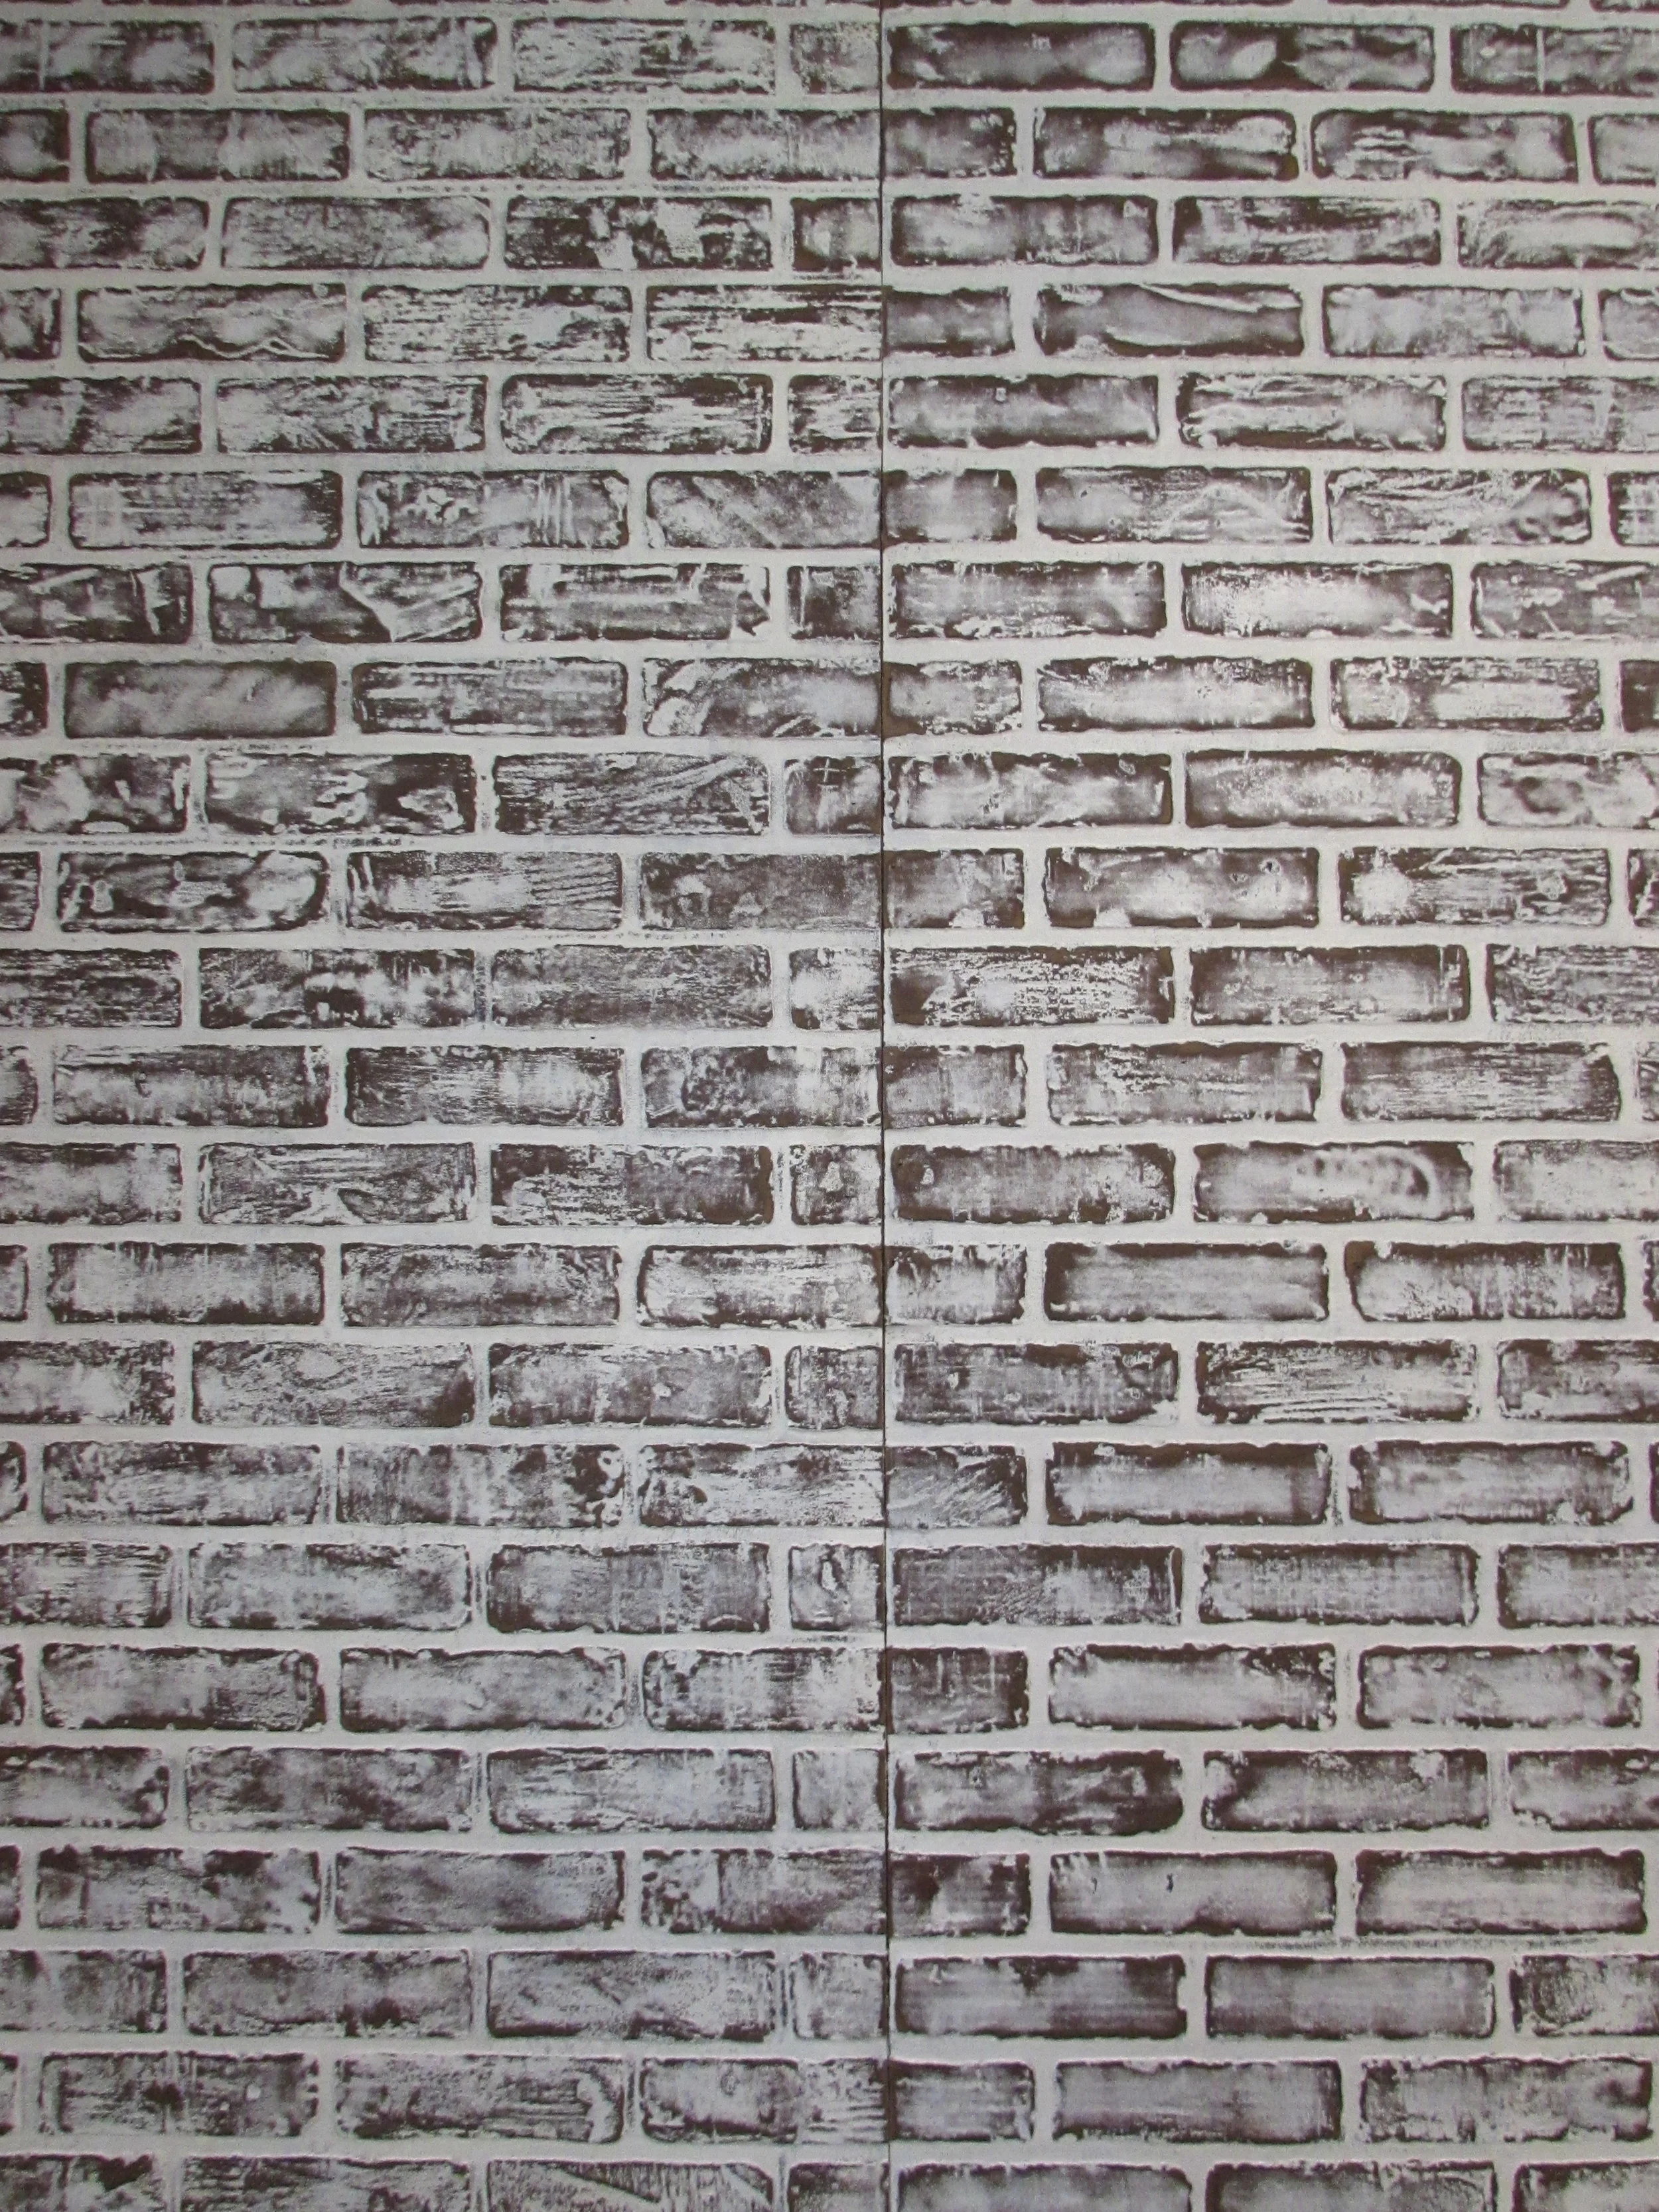
First, I painted the walls, ceiling and trim. The wall color is Pemetic Trail and the trim is Alabaster, both by Sherwin-Williams. Second, we purchased large faux brick panels from Lowe’s for the accent wall. I didn't particularly care for the red and black color that came on the panels, but I loved the look of the brick, so I decided to whitewash and sand them down to make the bricks look more realistic. I did this by painting a light coat of white paint (the same paint I used on the trim) and then I used 220 git on my orbital sander to take off some of the paint so the brick would have a worn look to it.
You can purchase these 4’ x 8’ panels in the wood department at Lowe’s, but keep in mind that Lowe’s does not cut particle board because it’s so messy and tends to rip if you’re not careful. So, you will need a table saw or circular saw on hand if you need to cut them to fit your needs.
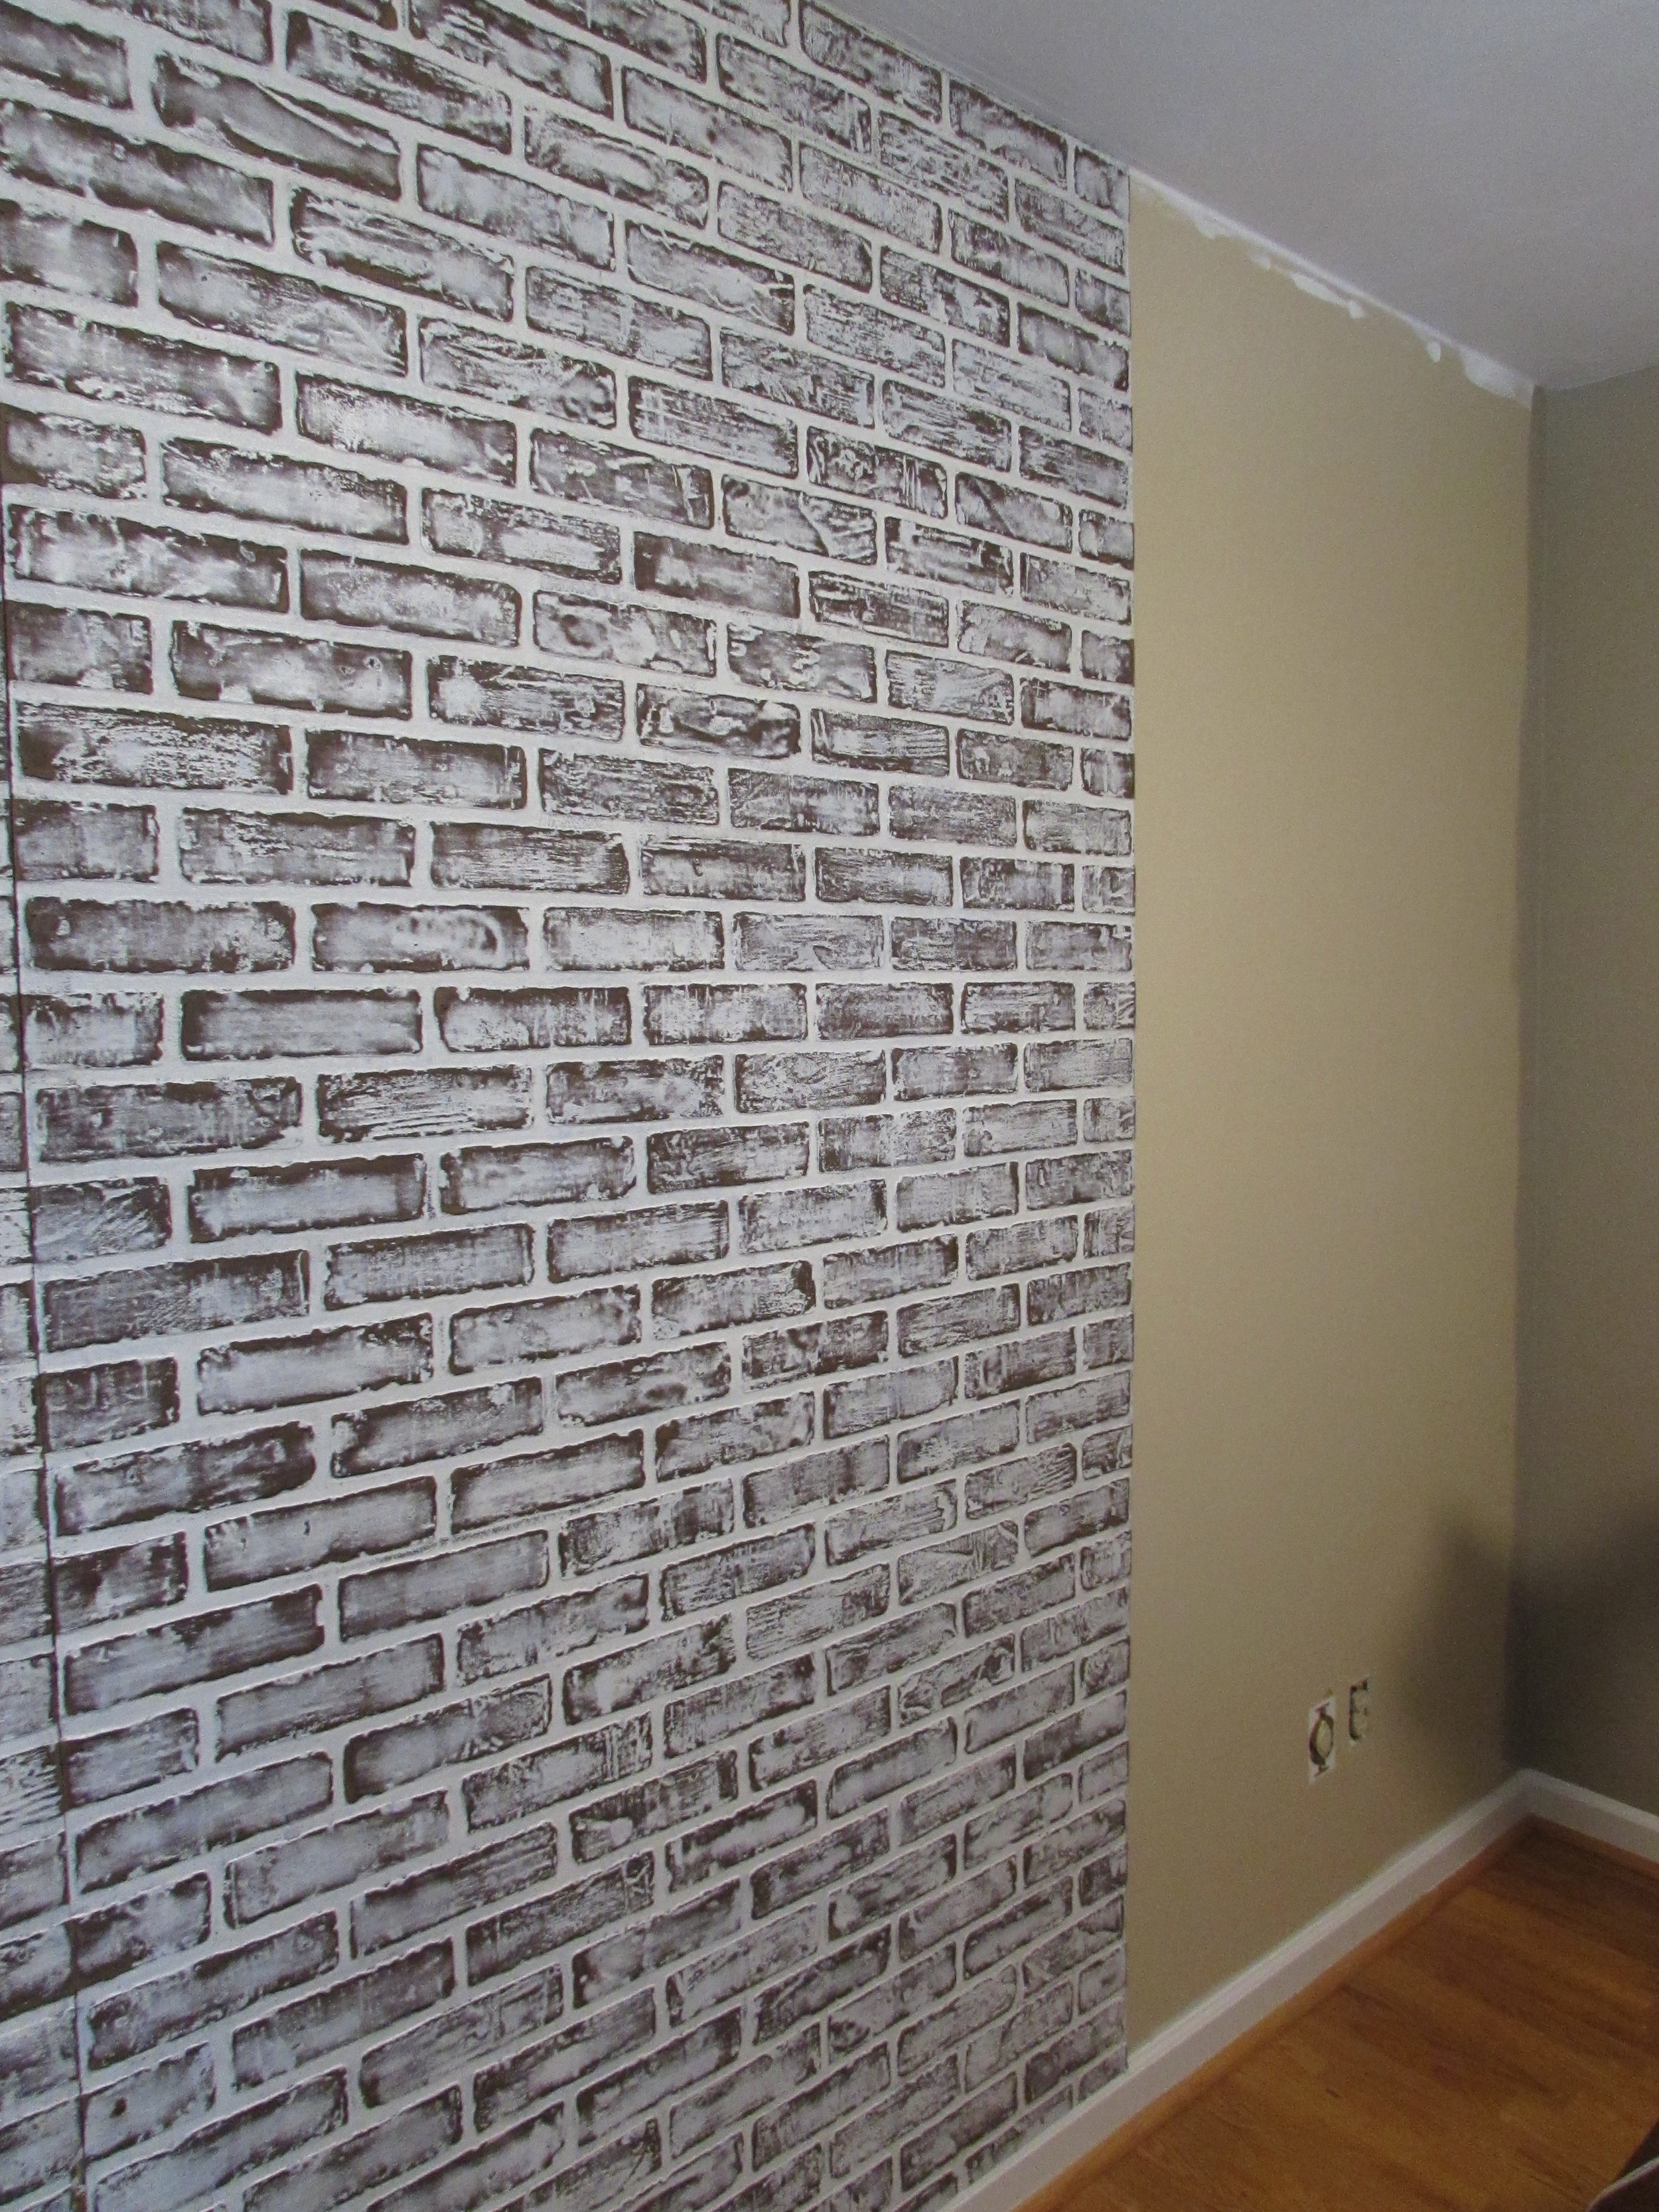
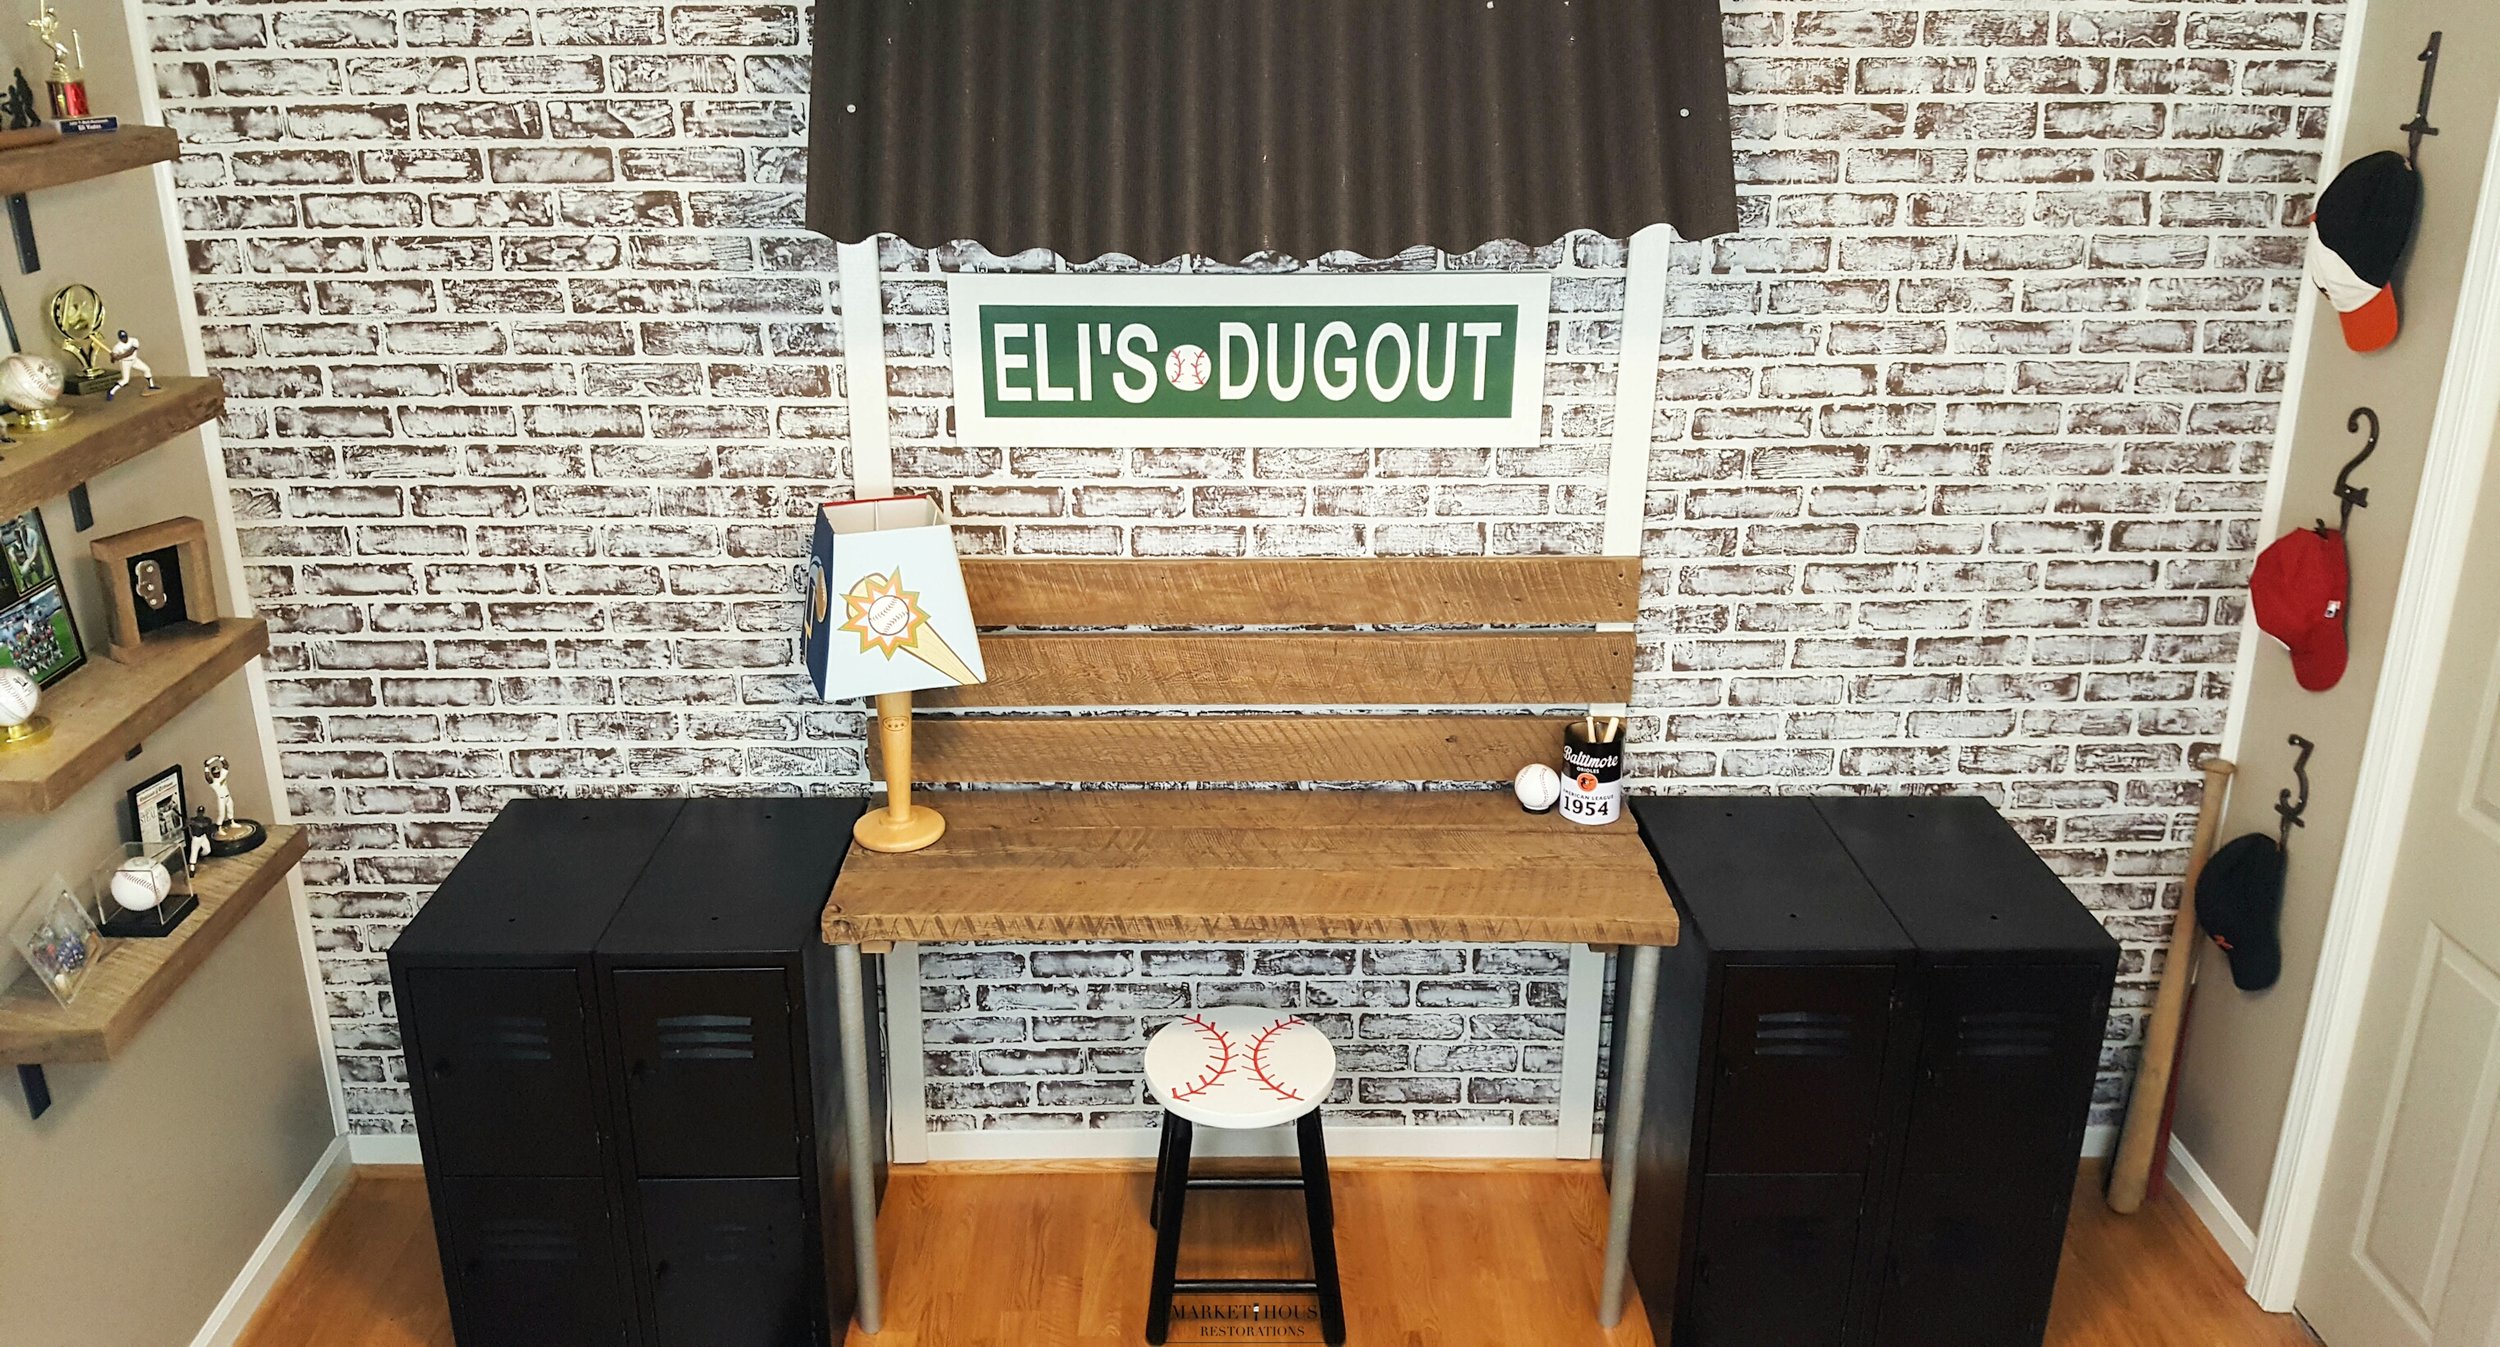
My husband and I hung the panels with liquid nails and a nail gun. As you can see, we used three different panels to cover the length of the wall. Because of this, there are two lines going down the wall where the panels meet. This is where the “dugout” comes into play. We added 1” x 2” stripes down the wall to blend the panels together and to also have an outline for the dugout. This allowed us to hid the lines, attach the wood pieces to form the bench and to also add the black roof at the top. We applied white trim along outside edges of the brick and drywall to give it a nice finished look.
On the opposite side of the room there is an awkward small angled wall, so we repeated the look of the brick wall to help tie everything together nicely.

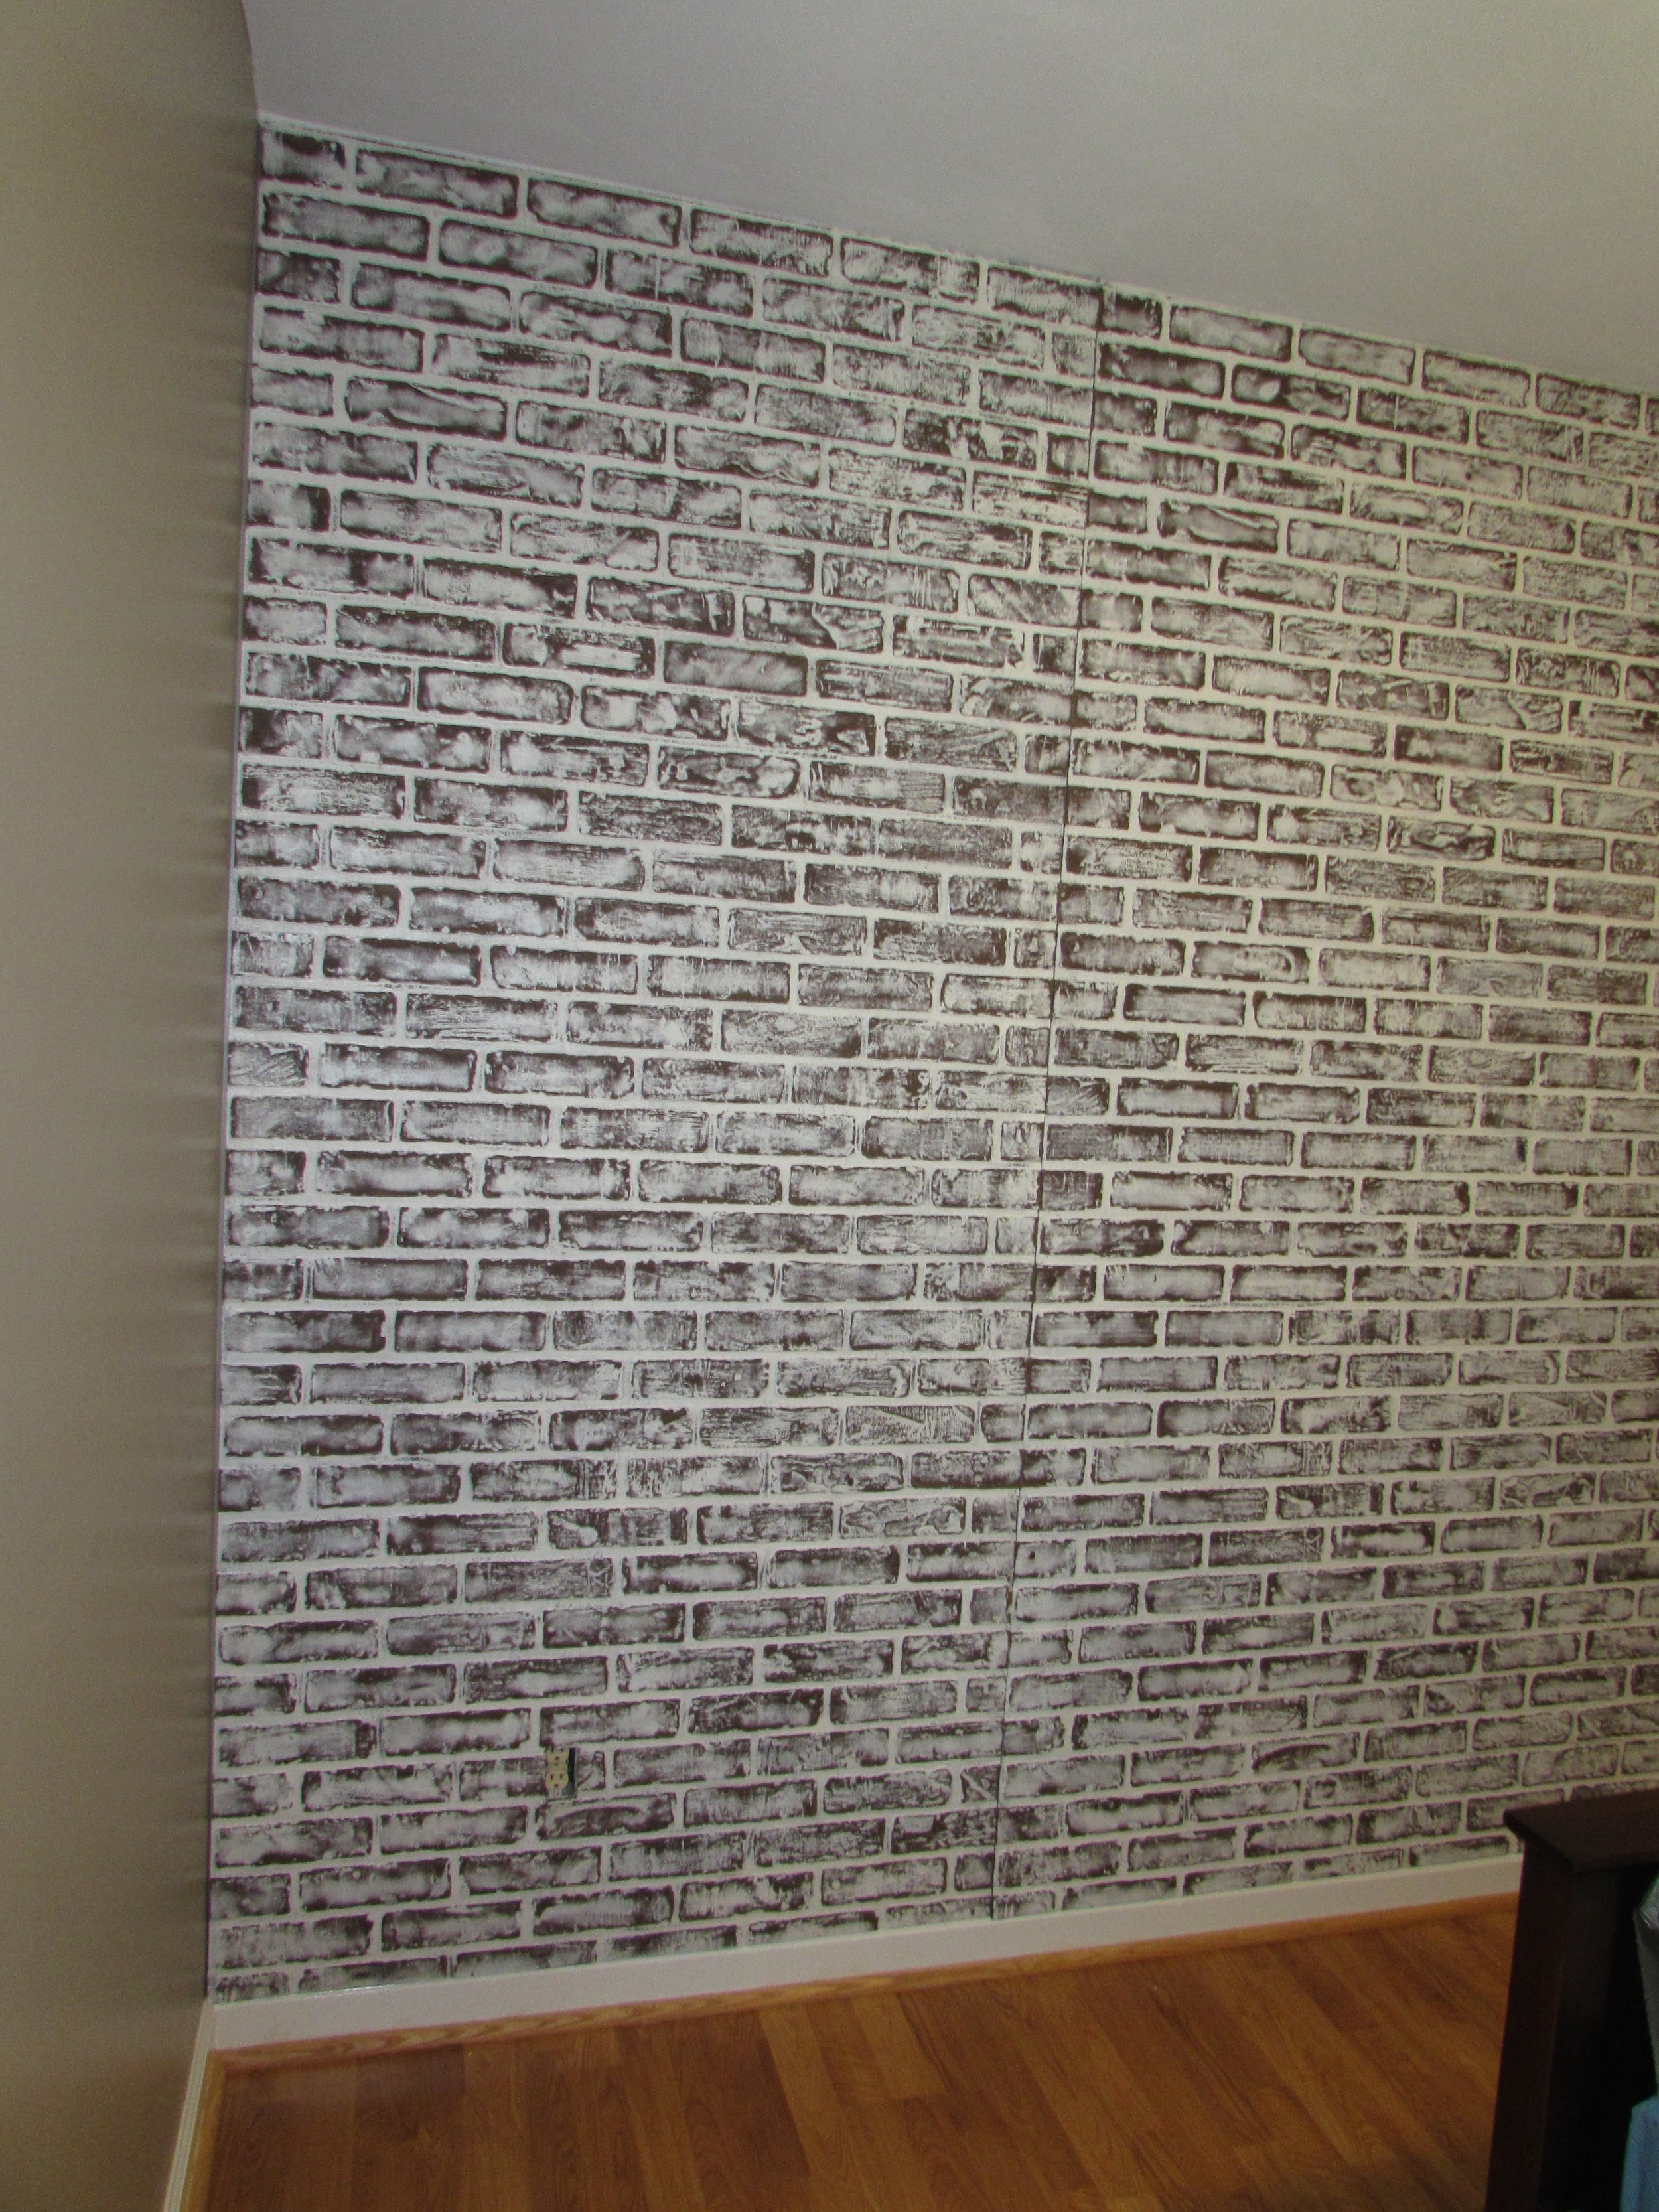
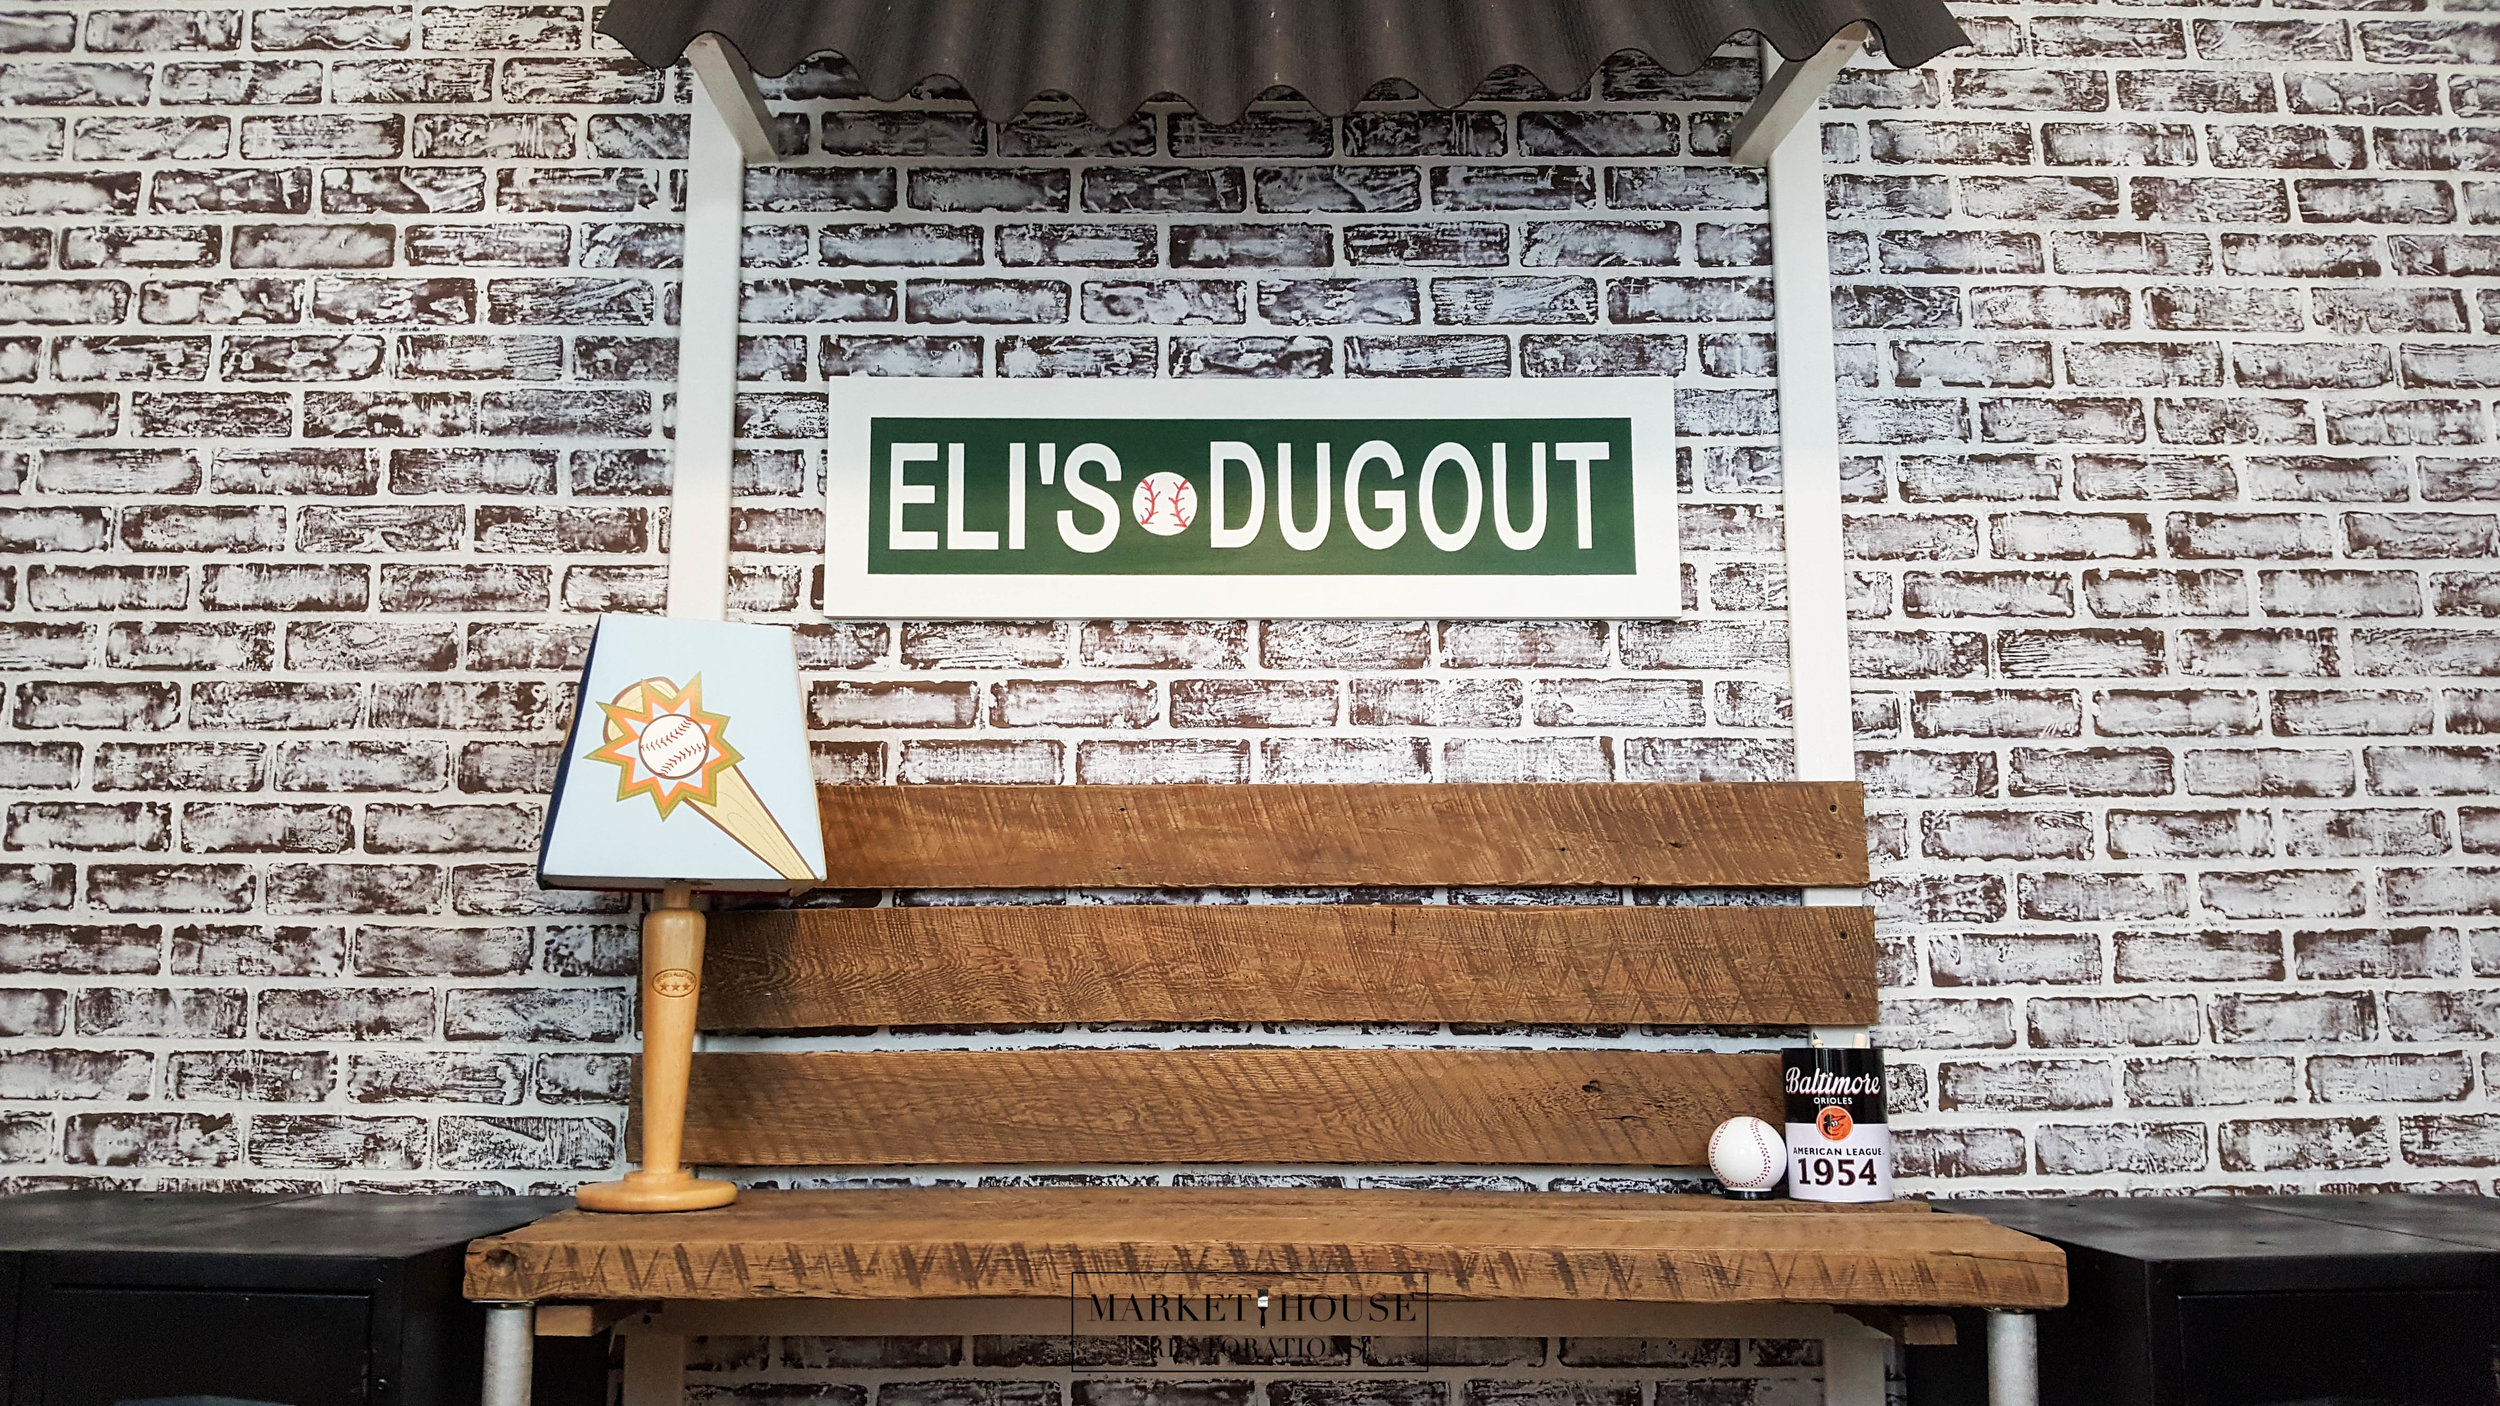
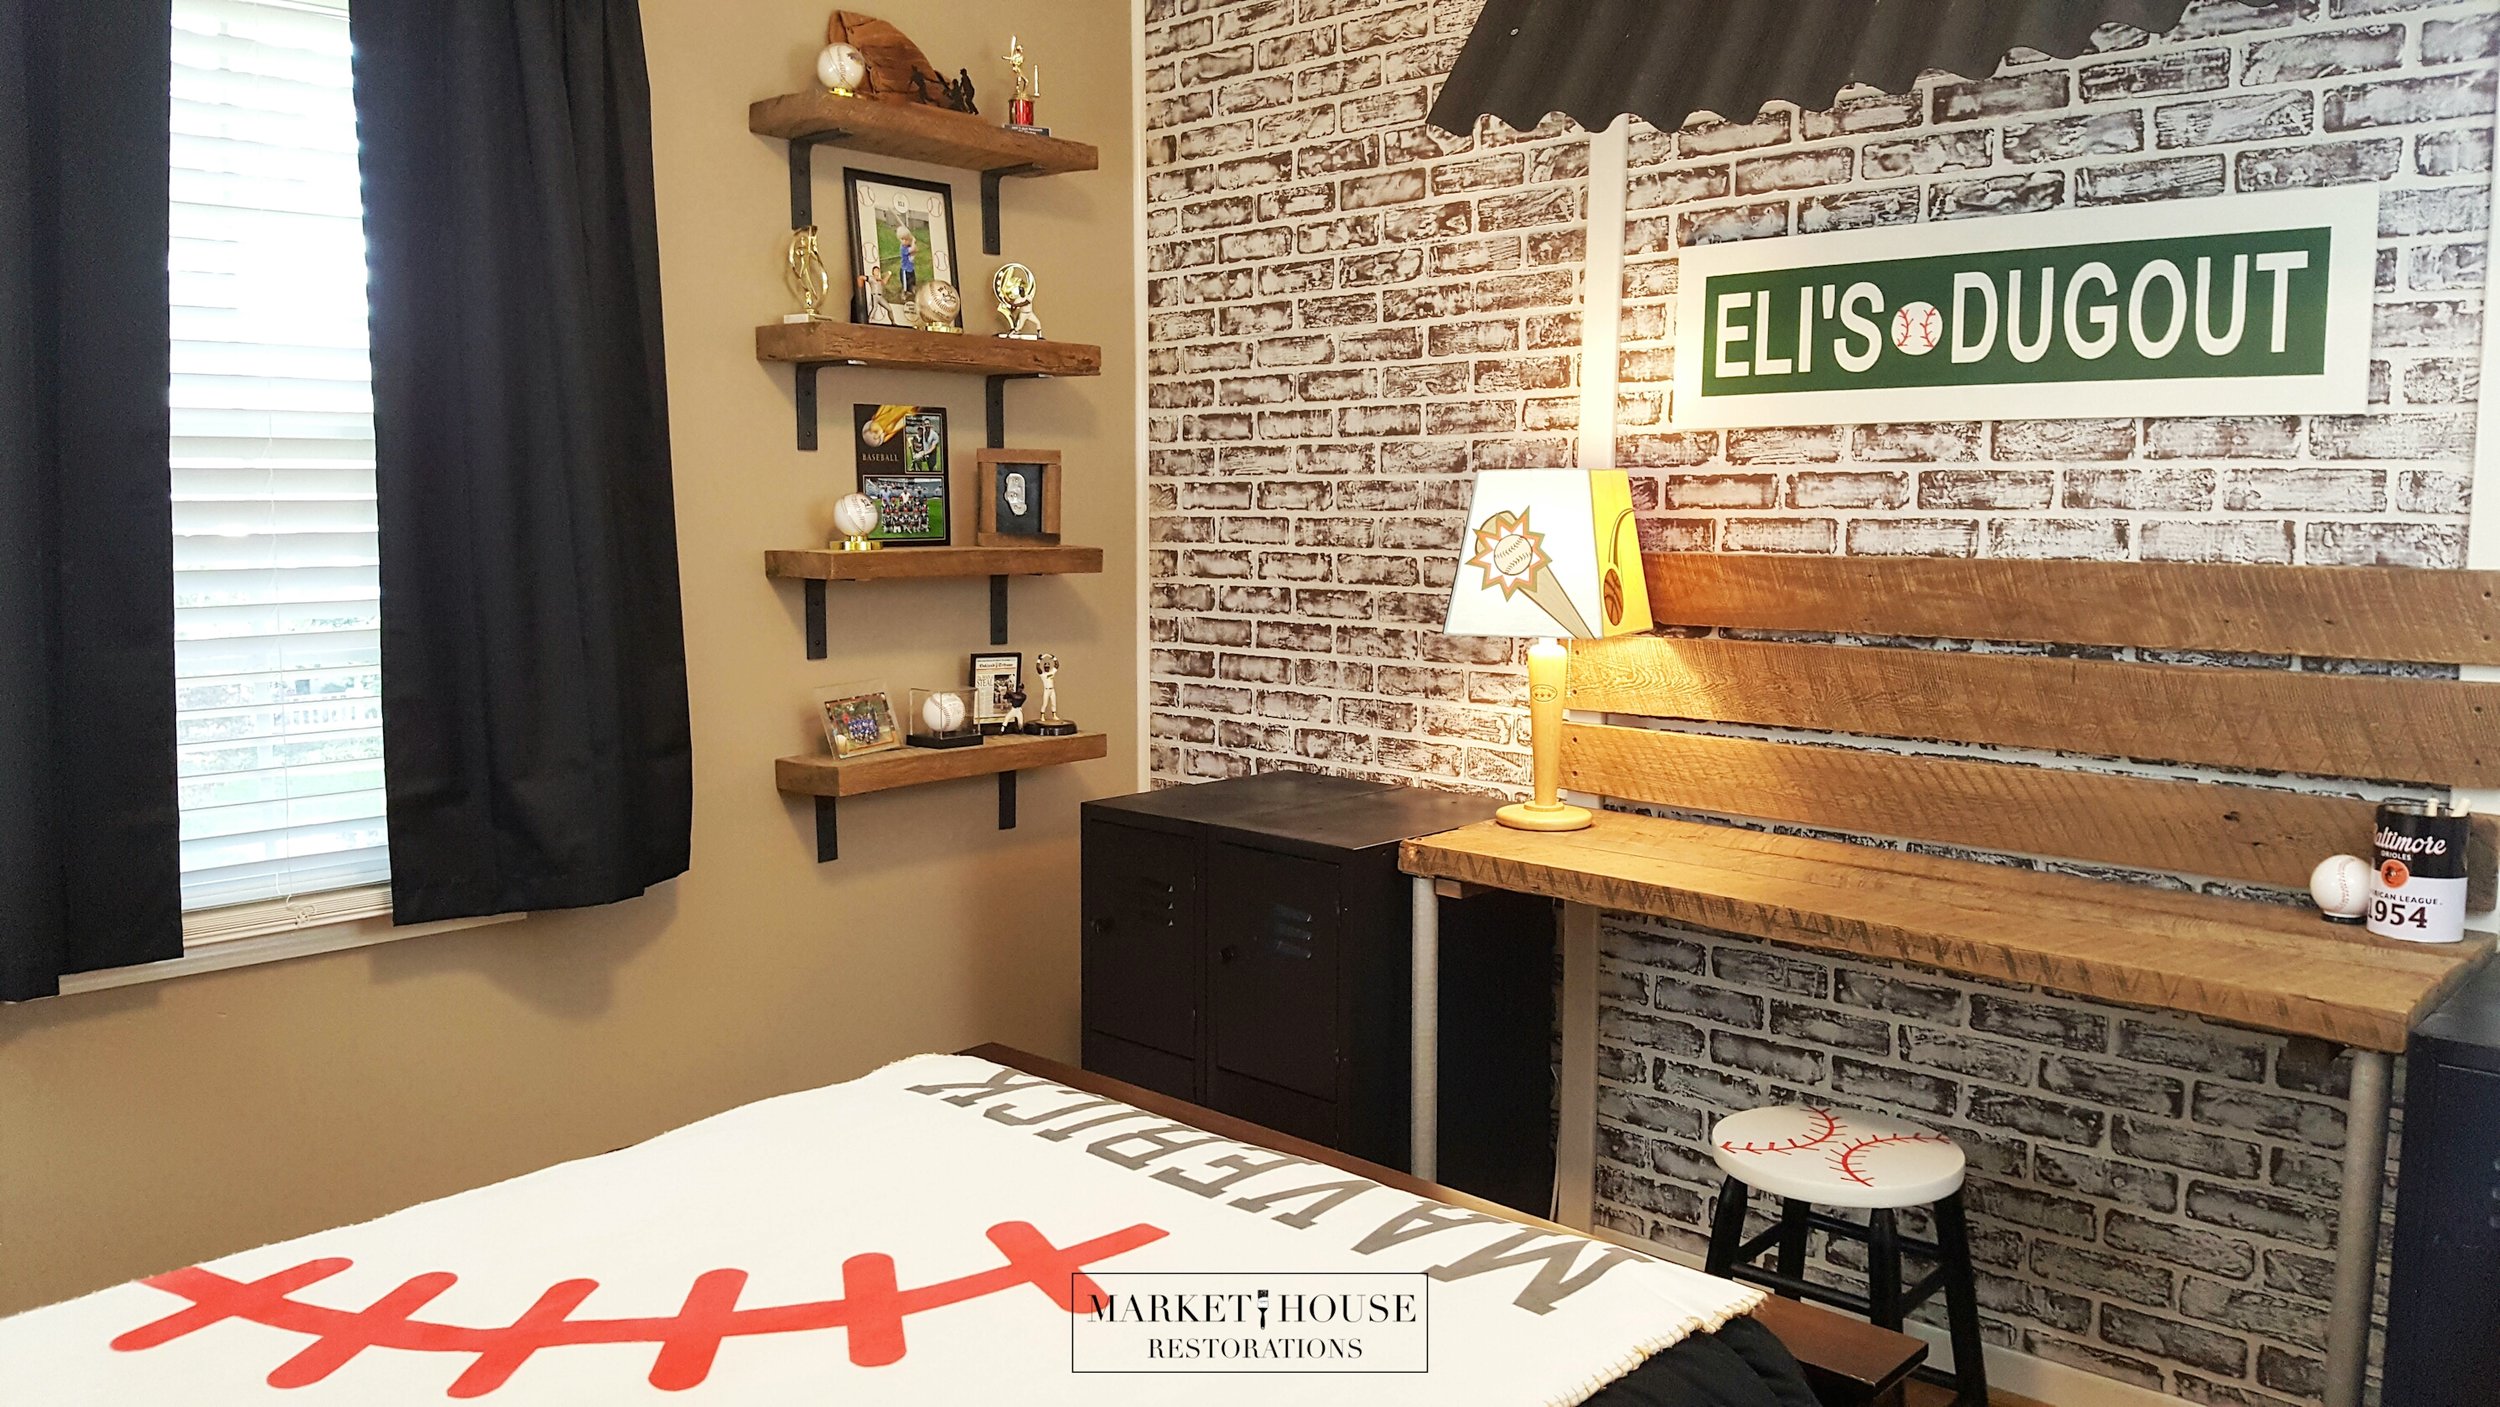
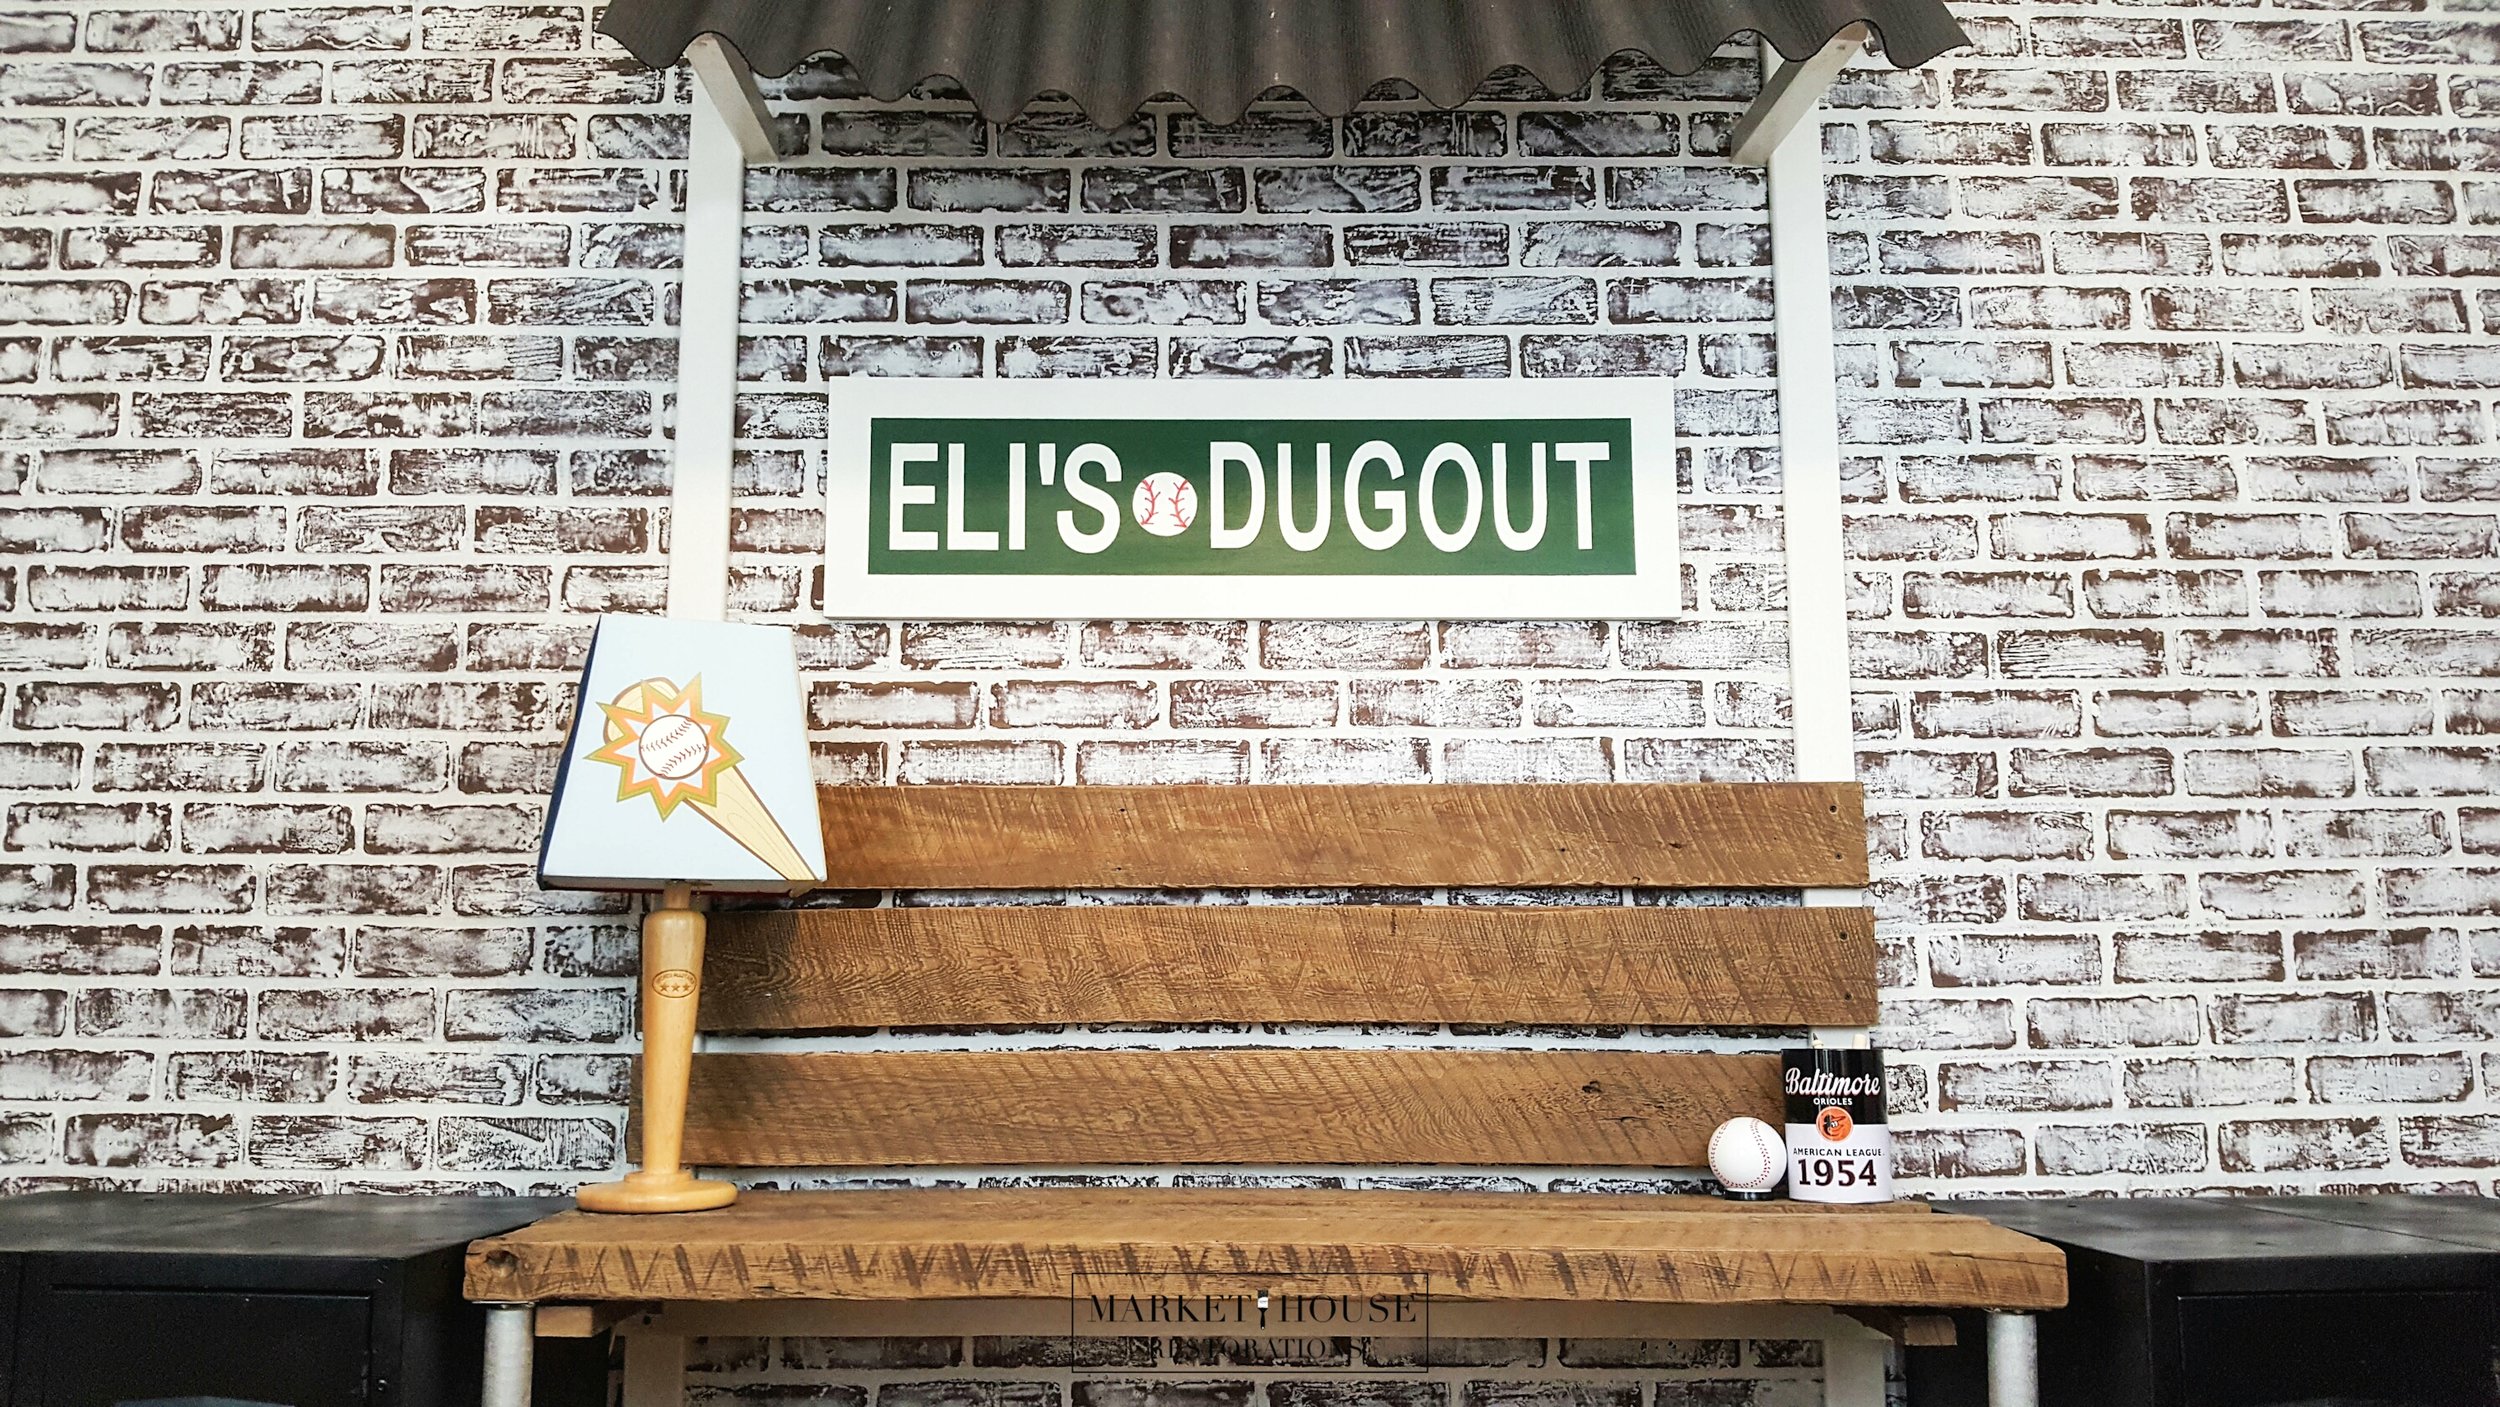
The Dugout:
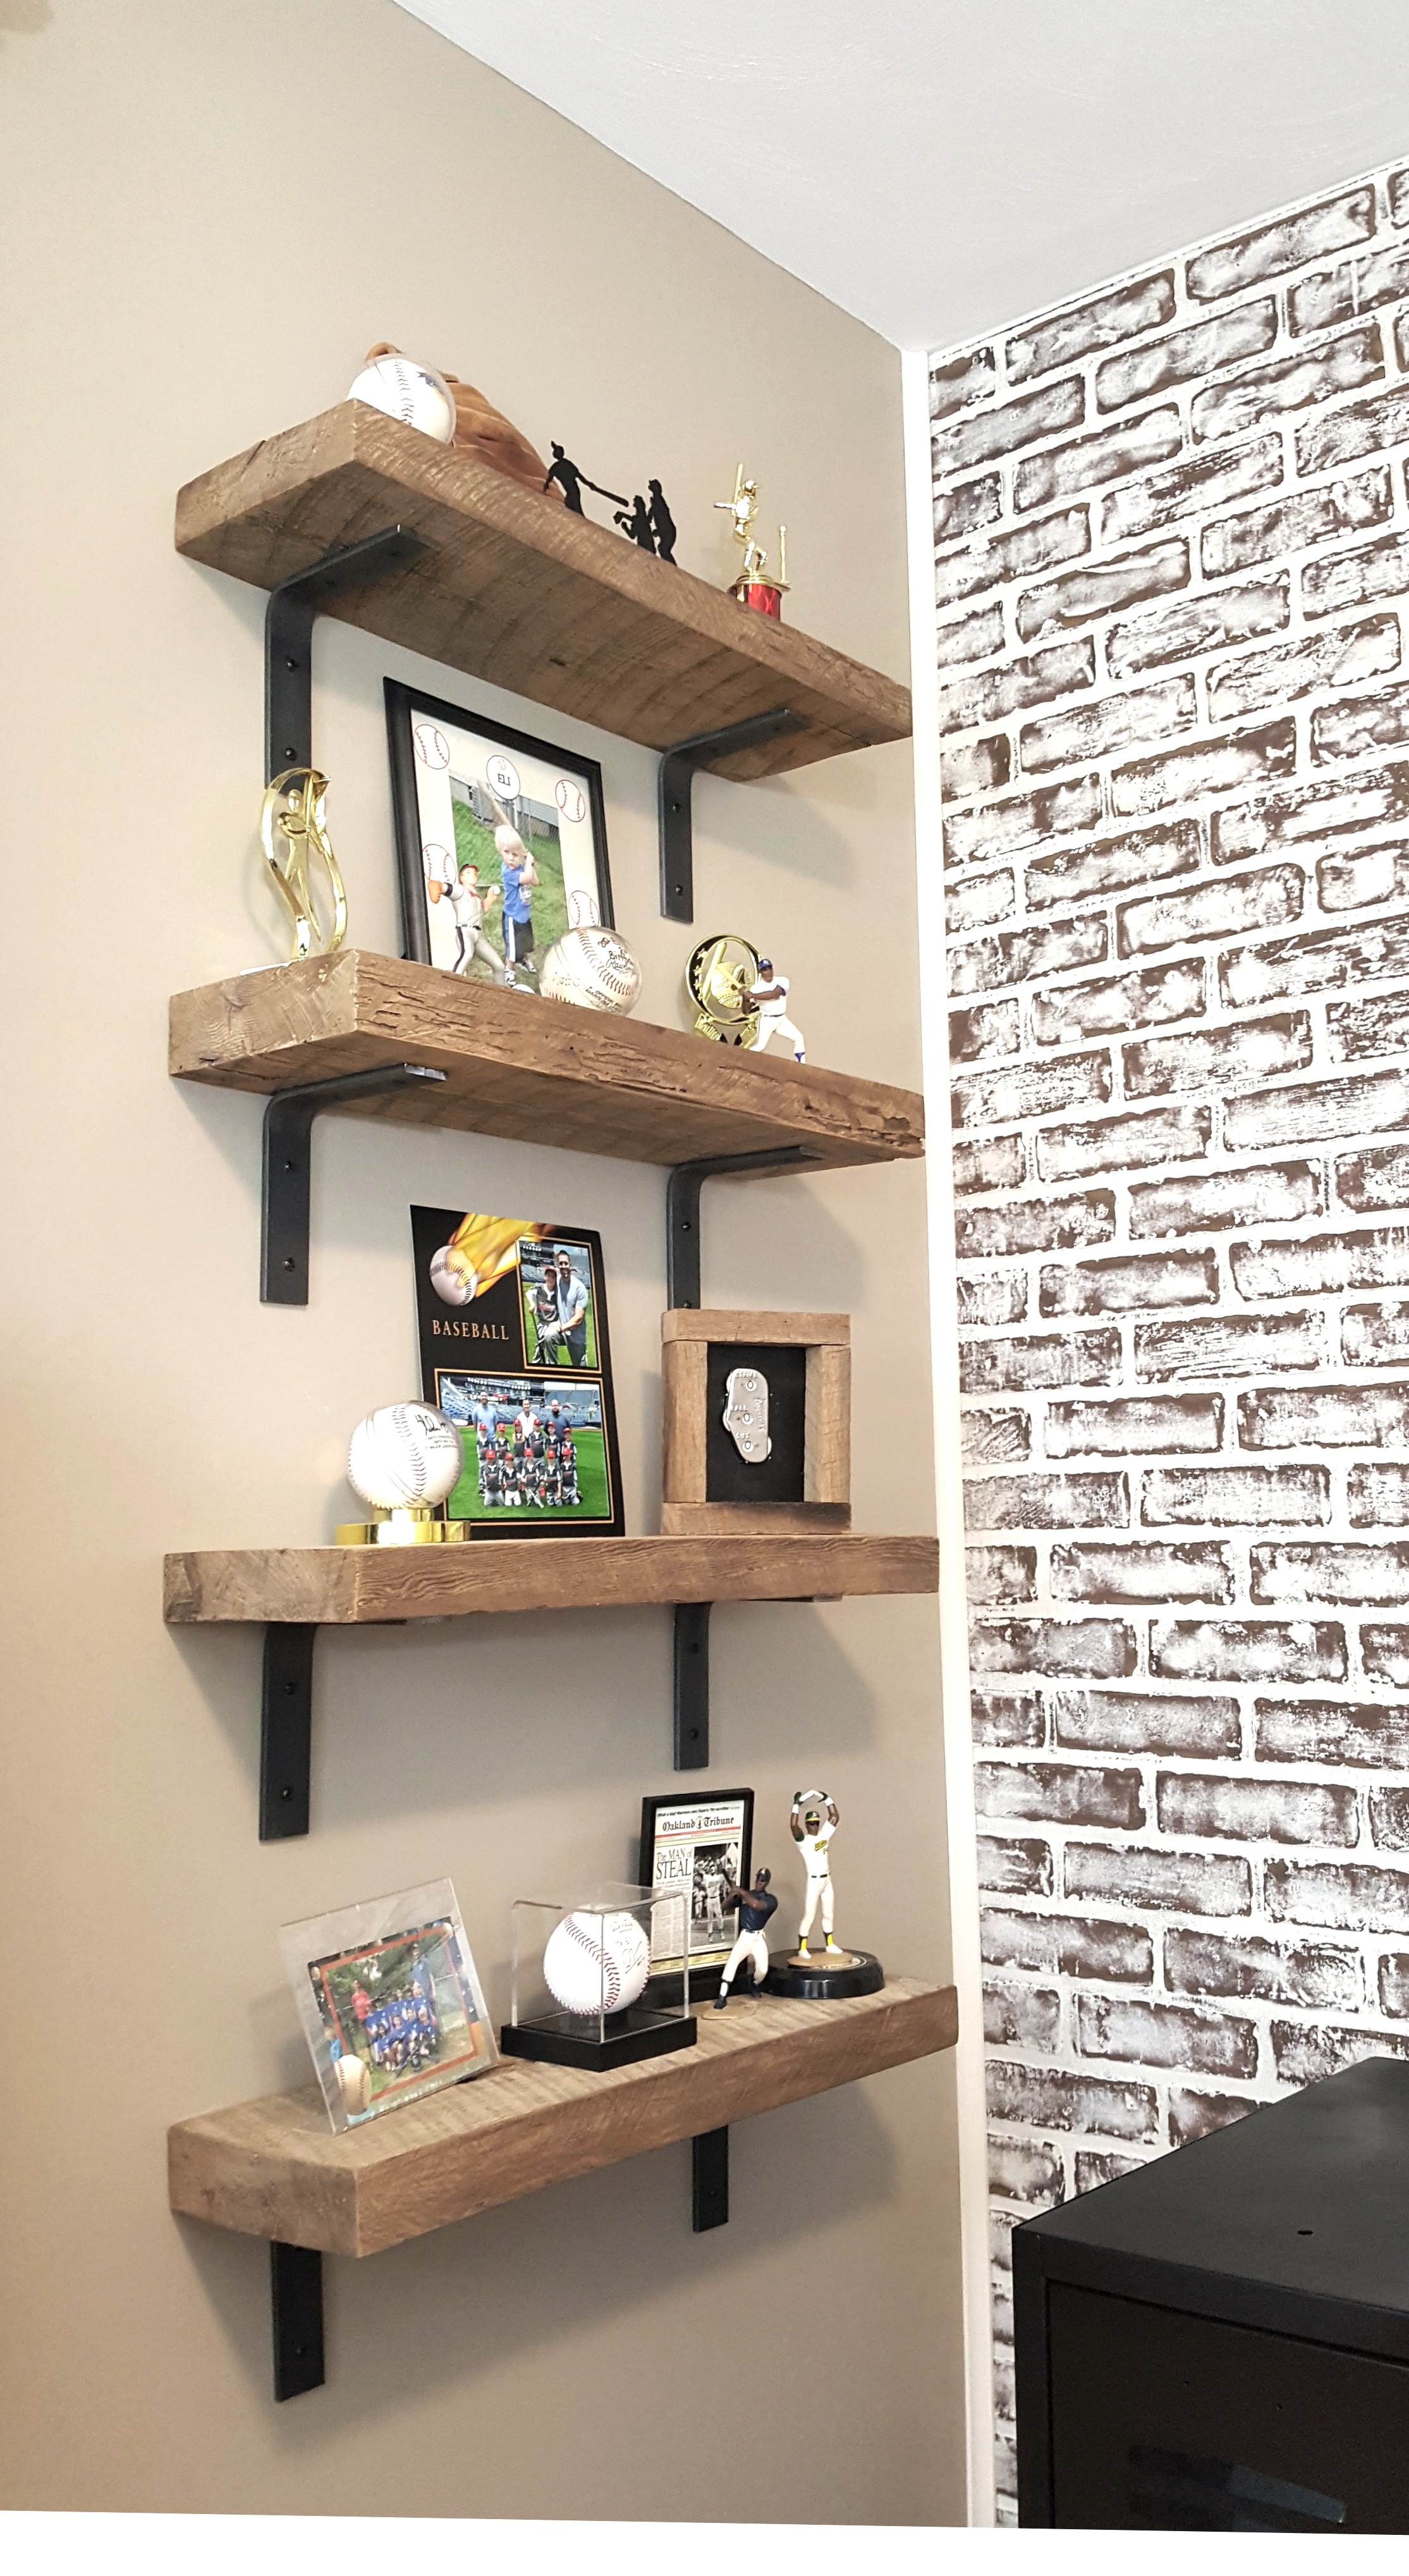
We added a "dugout" to serve as the focal point for the room. In the dugout I created a desk for my son that looks like an old-worn bench. I carried the same wood over to the left side of the room and used it as wall shelves to tie the areas together. The wood was reclaimed from my husband's grandparent's old barn, which makes it even more special!
The poles are round wooden spindles (purchased from Lowe’s) that I spray painted with silver Rustoleum Spray Paint, to mimic metal legs that are typically on a dugout bench.
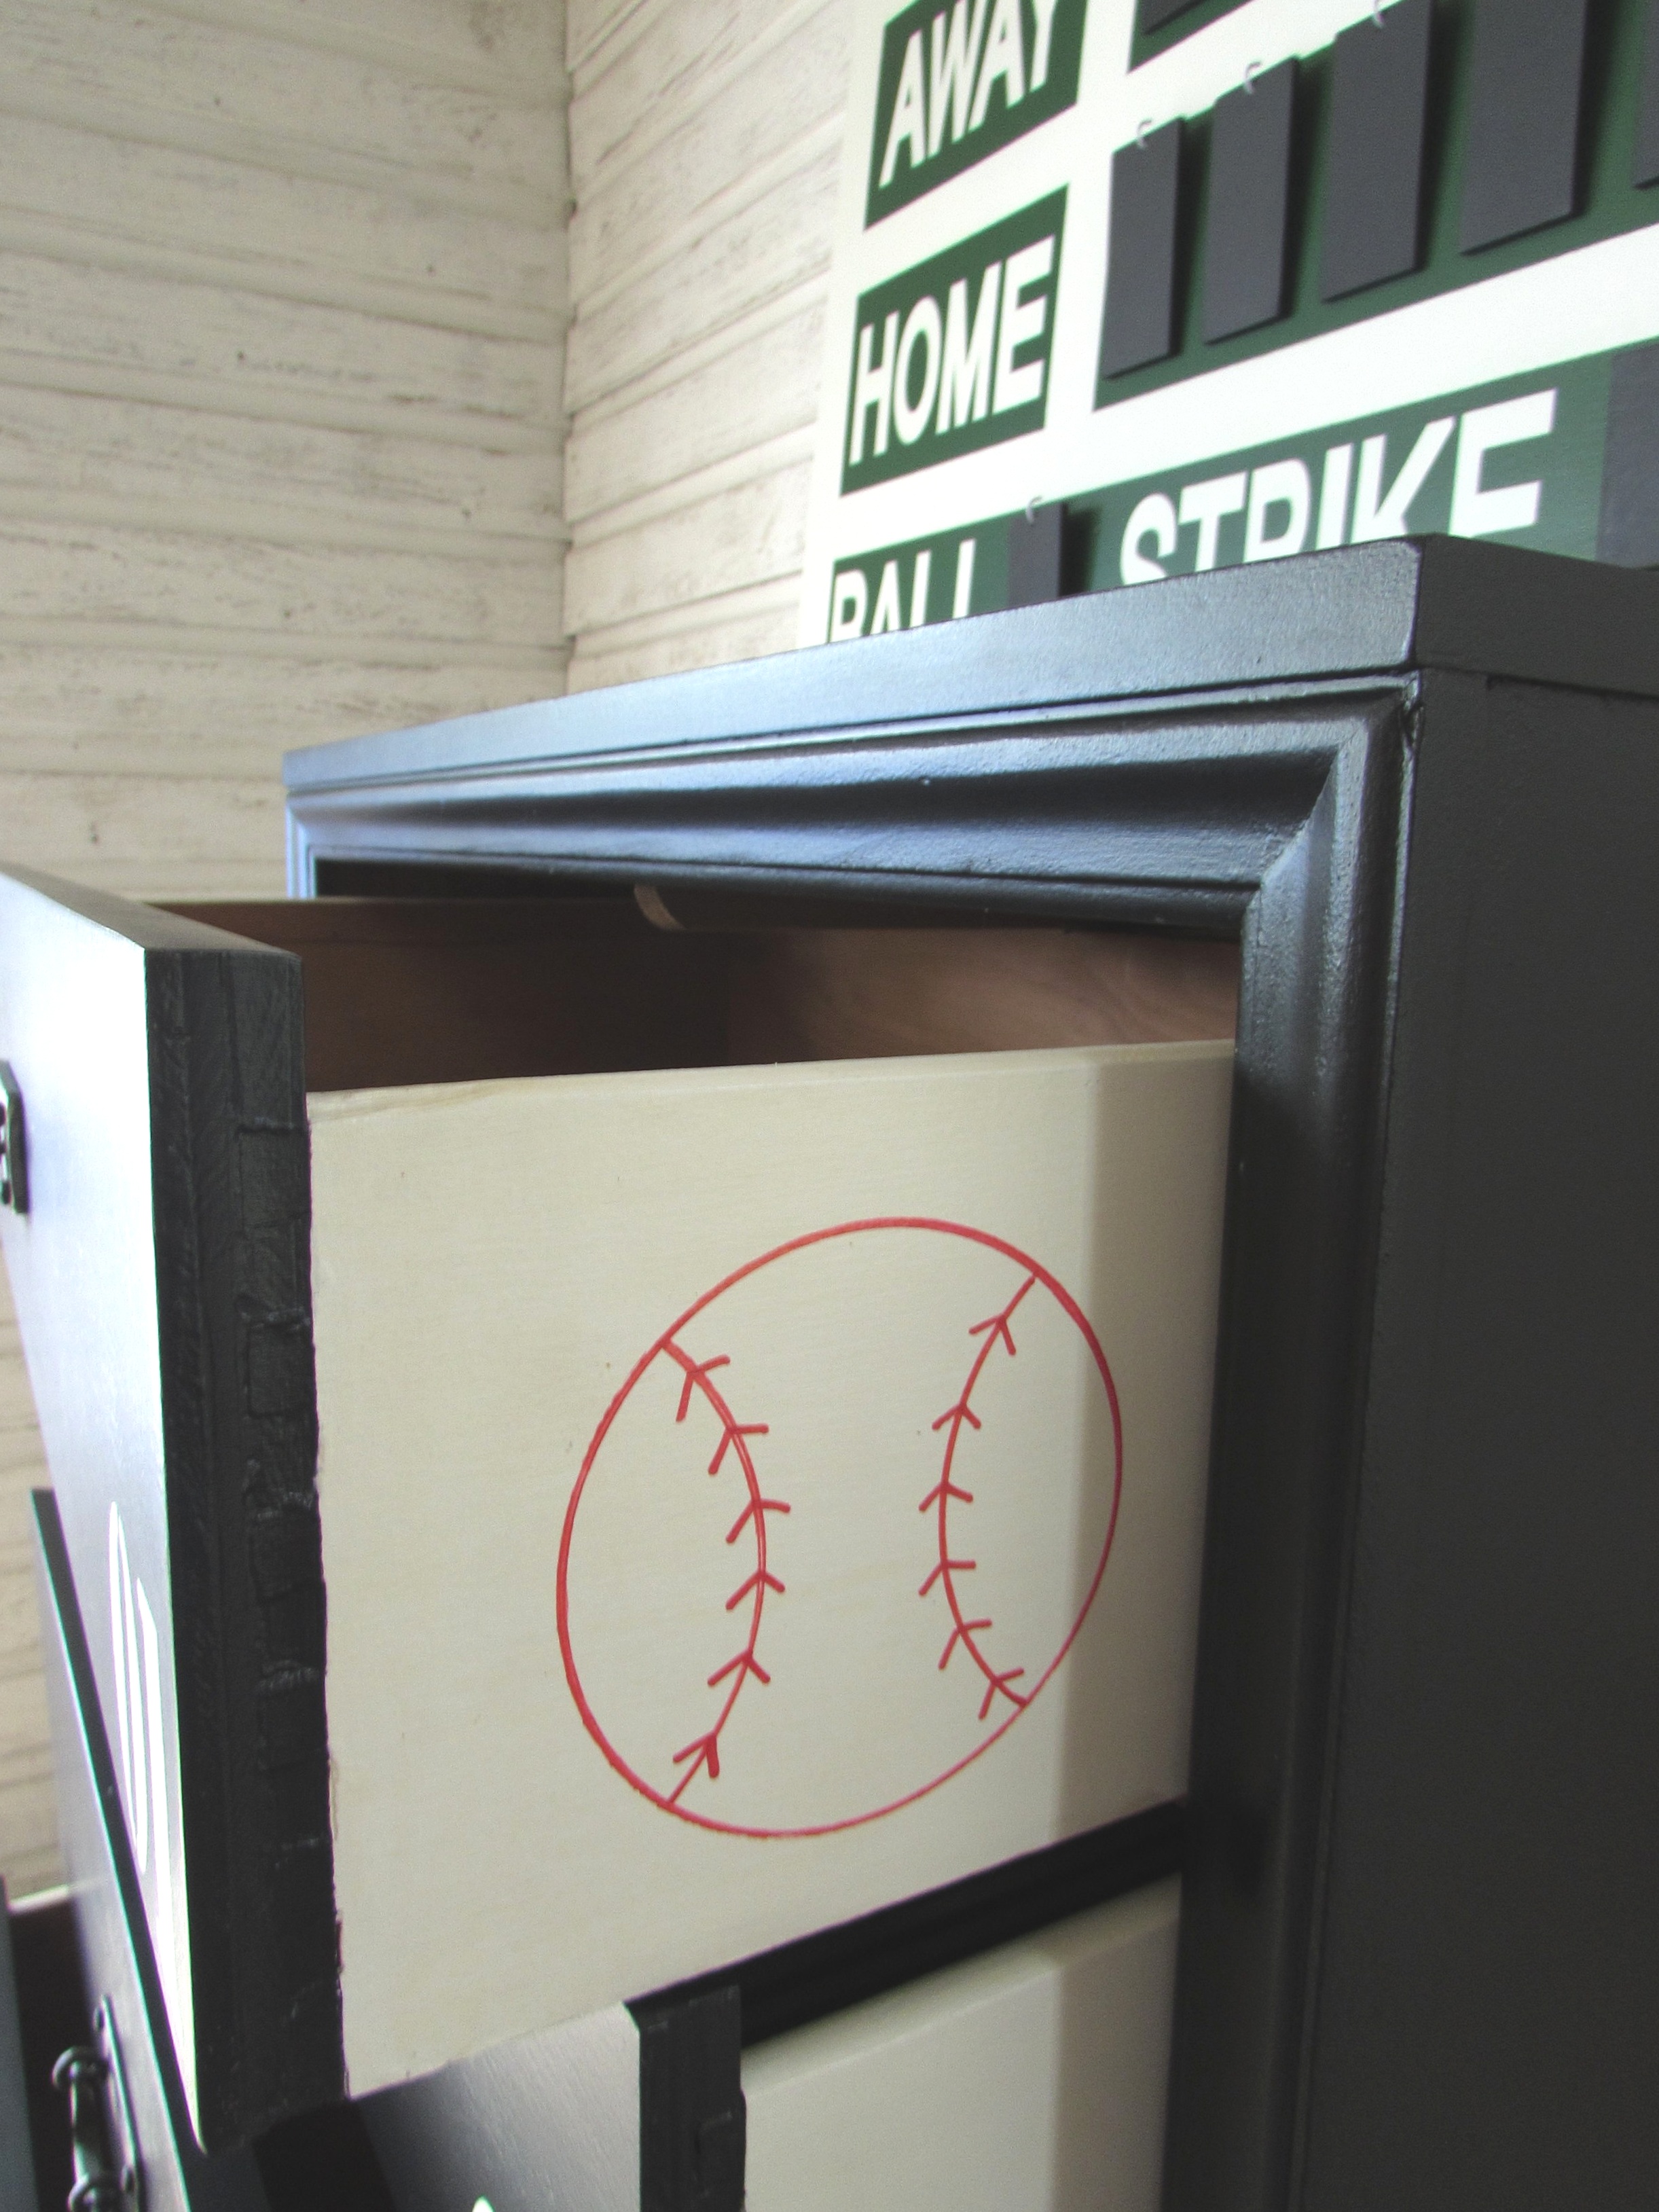
I painted a small stool that I found at a yard sale for $3! I painted the legs of the stool with General Finishes Lamp Black to match his dresser, and the top of the seat to look like a baseball. Thankfully, it was the perfect height! I used a bowl as an outline to mimic the edges of the baseball and I free-handed the stitches.
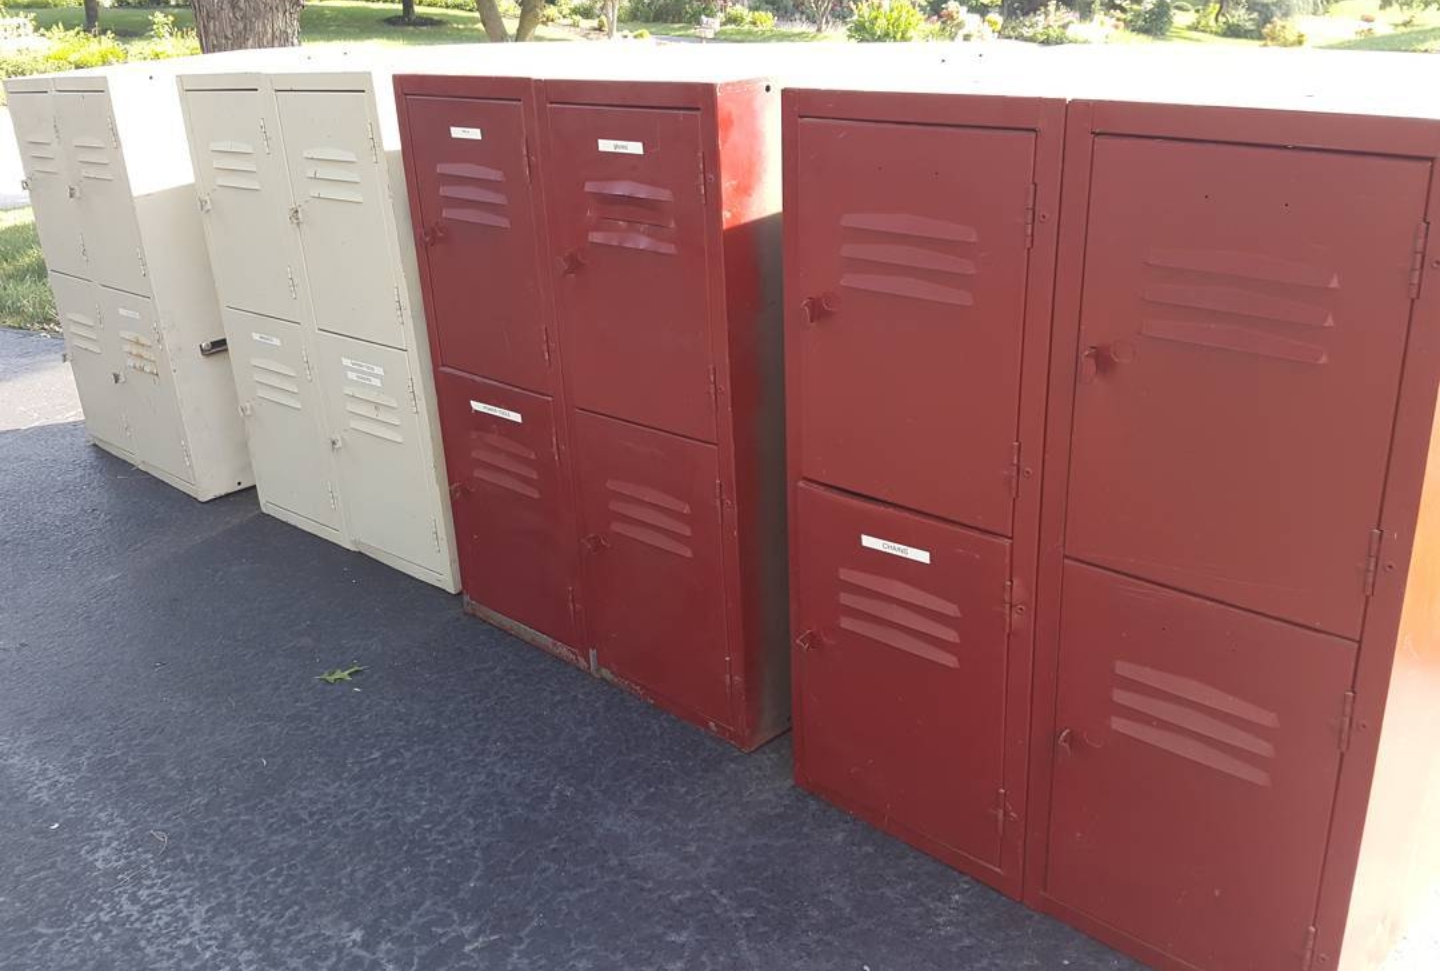
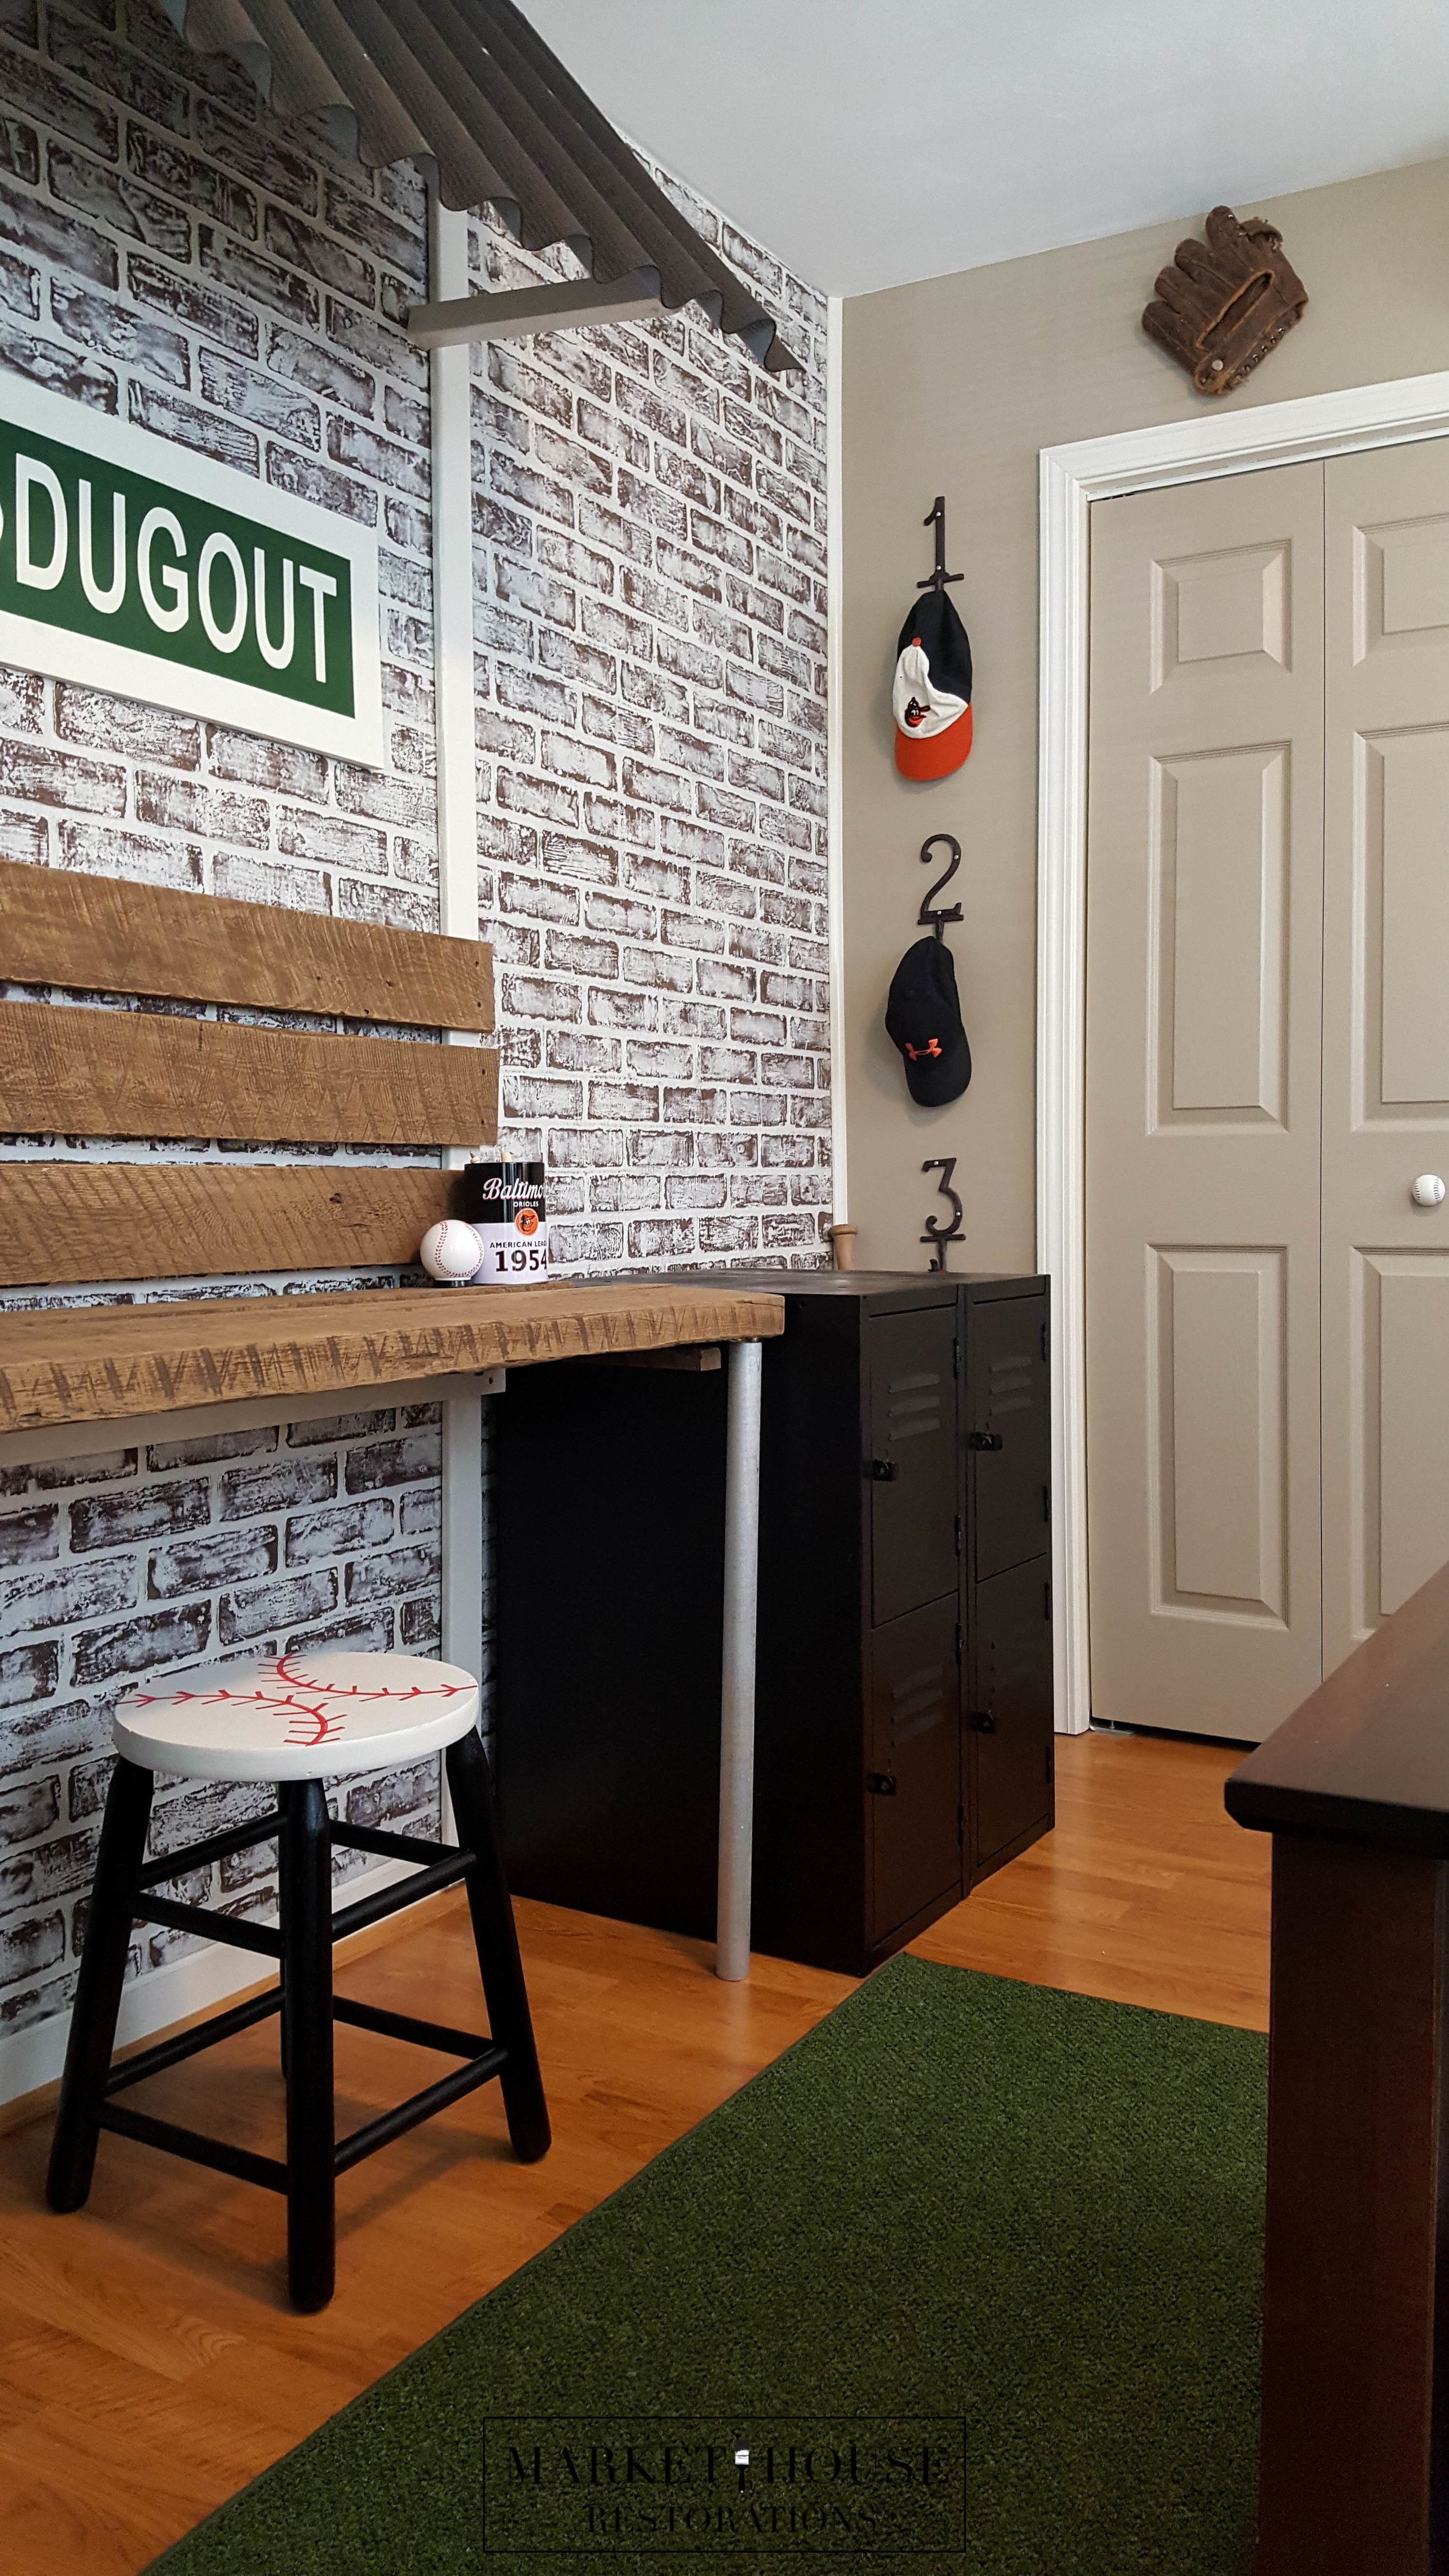
I found the lockers at another yard sale. I cleaned them up, spray painted them with Rustoleum Black Spray paint in Satin. Now, they serve as excellent place to store (and hide!!) his toys!


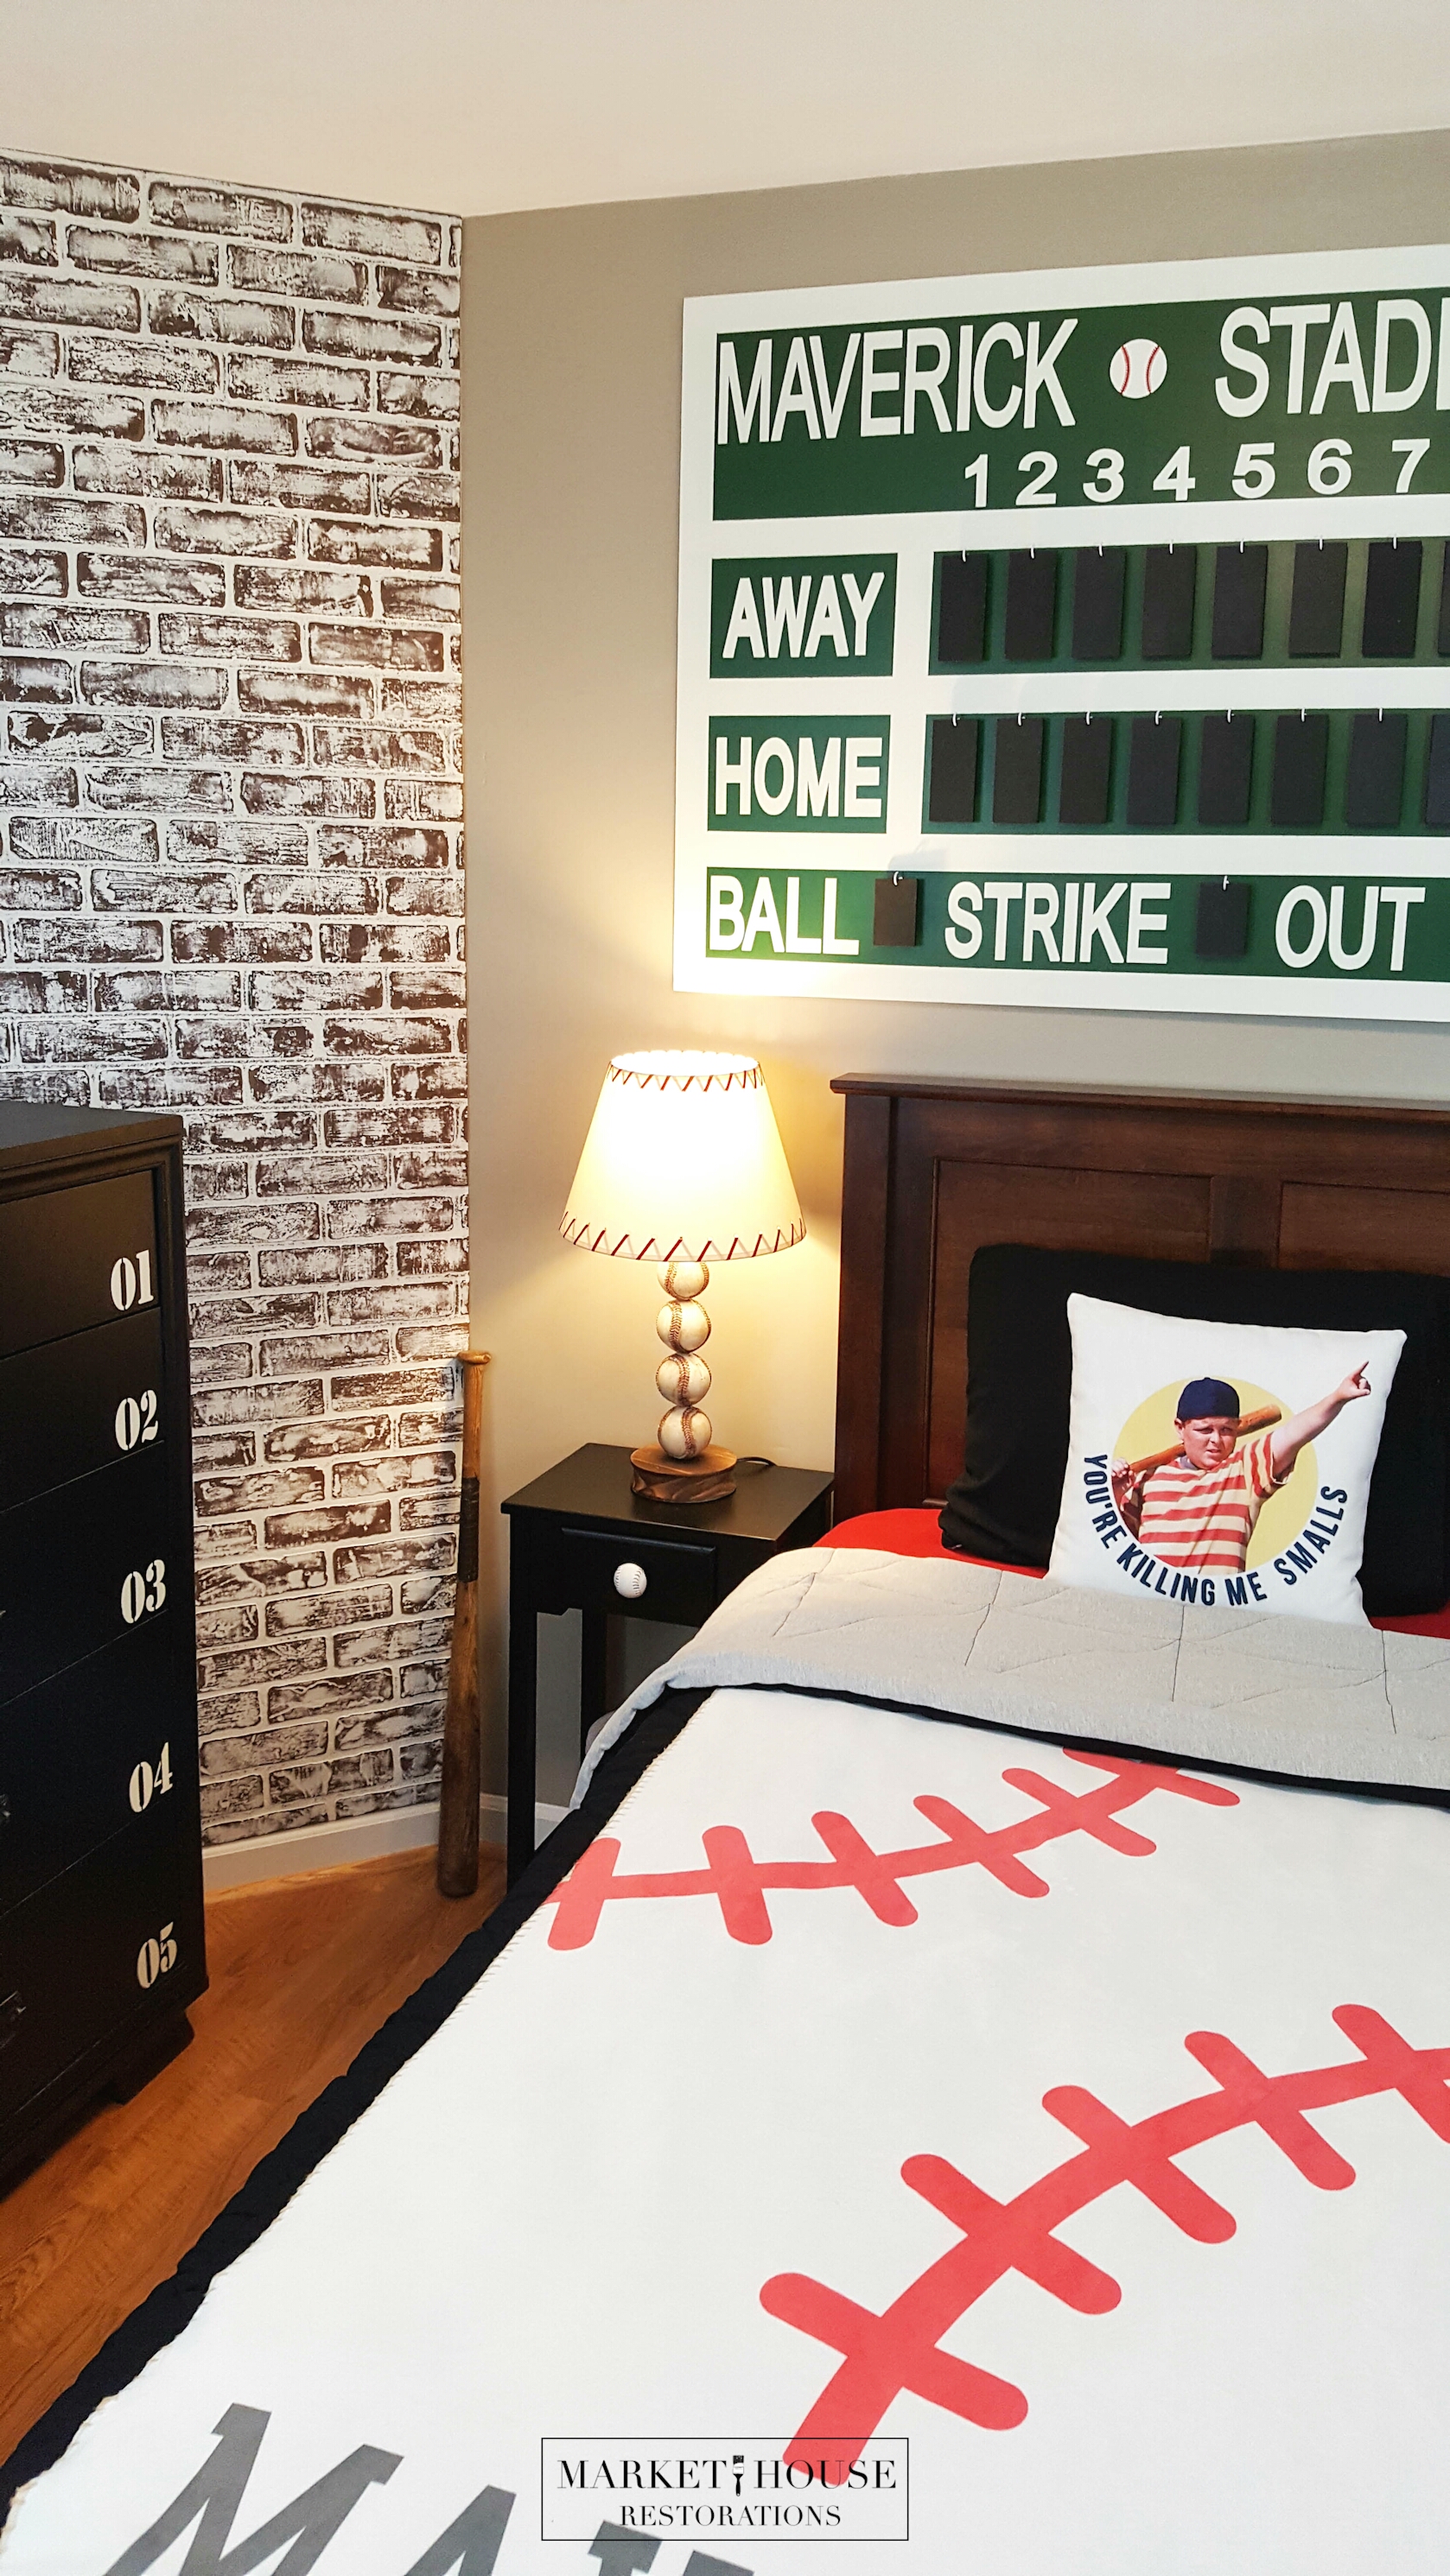
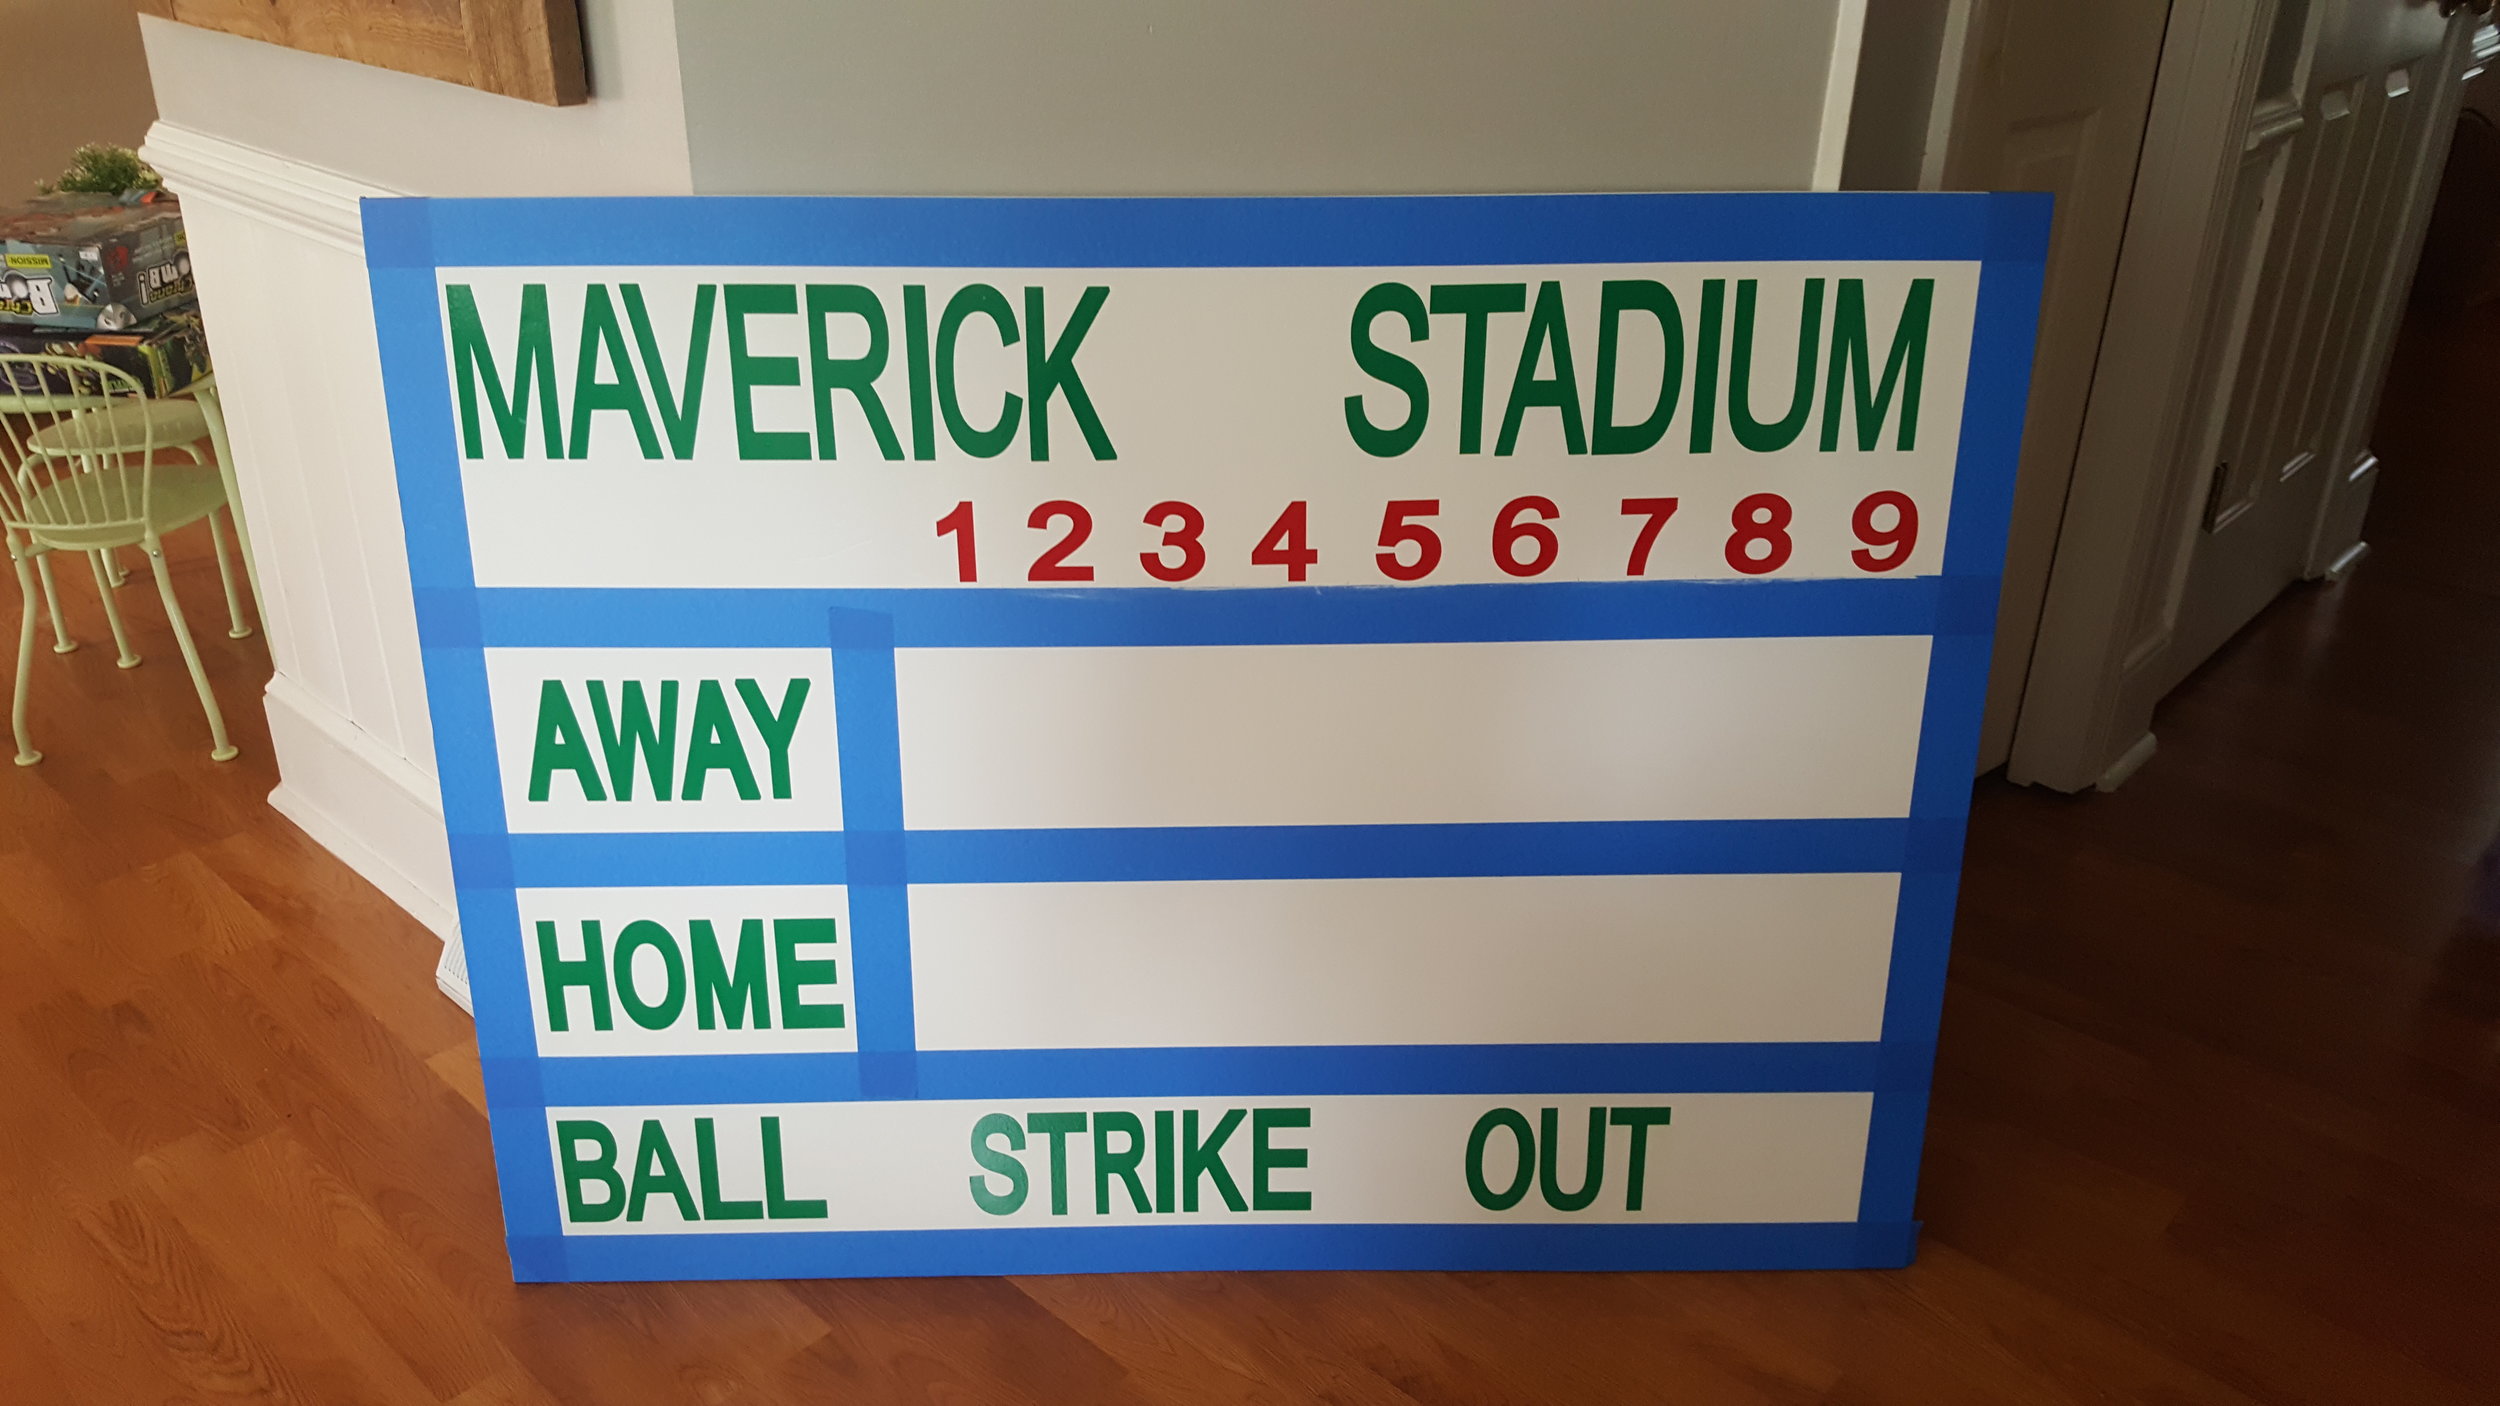
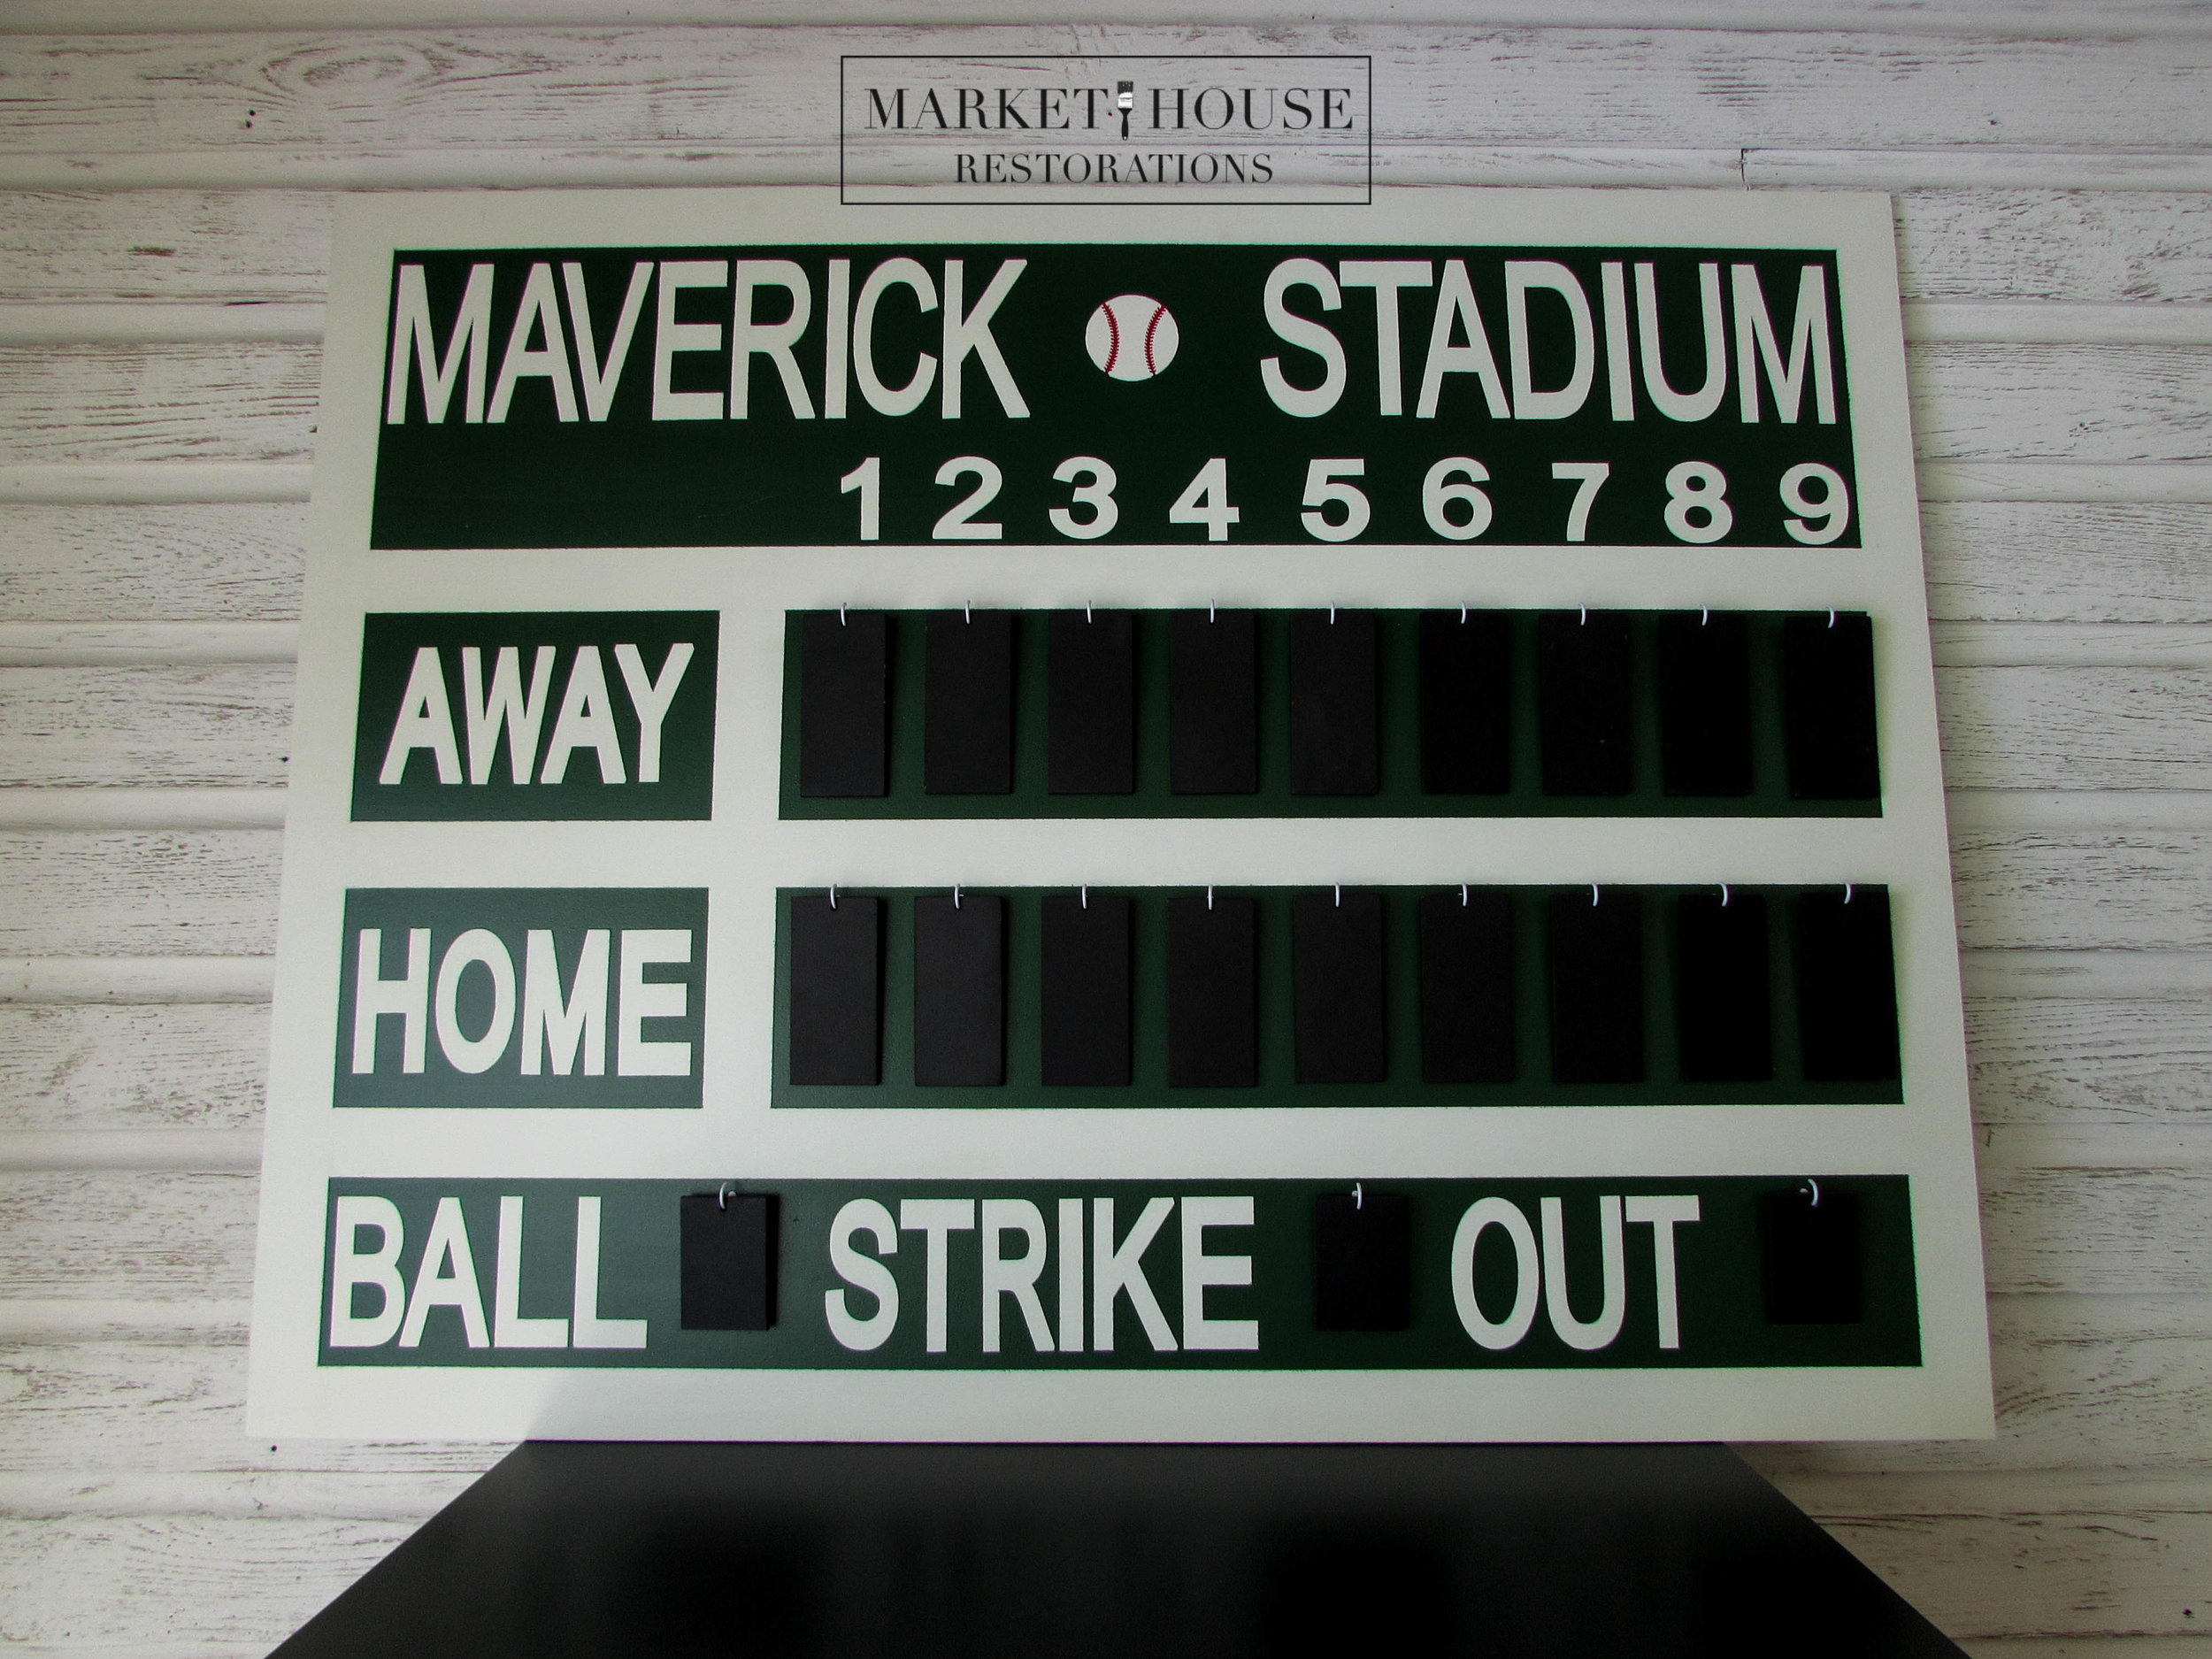
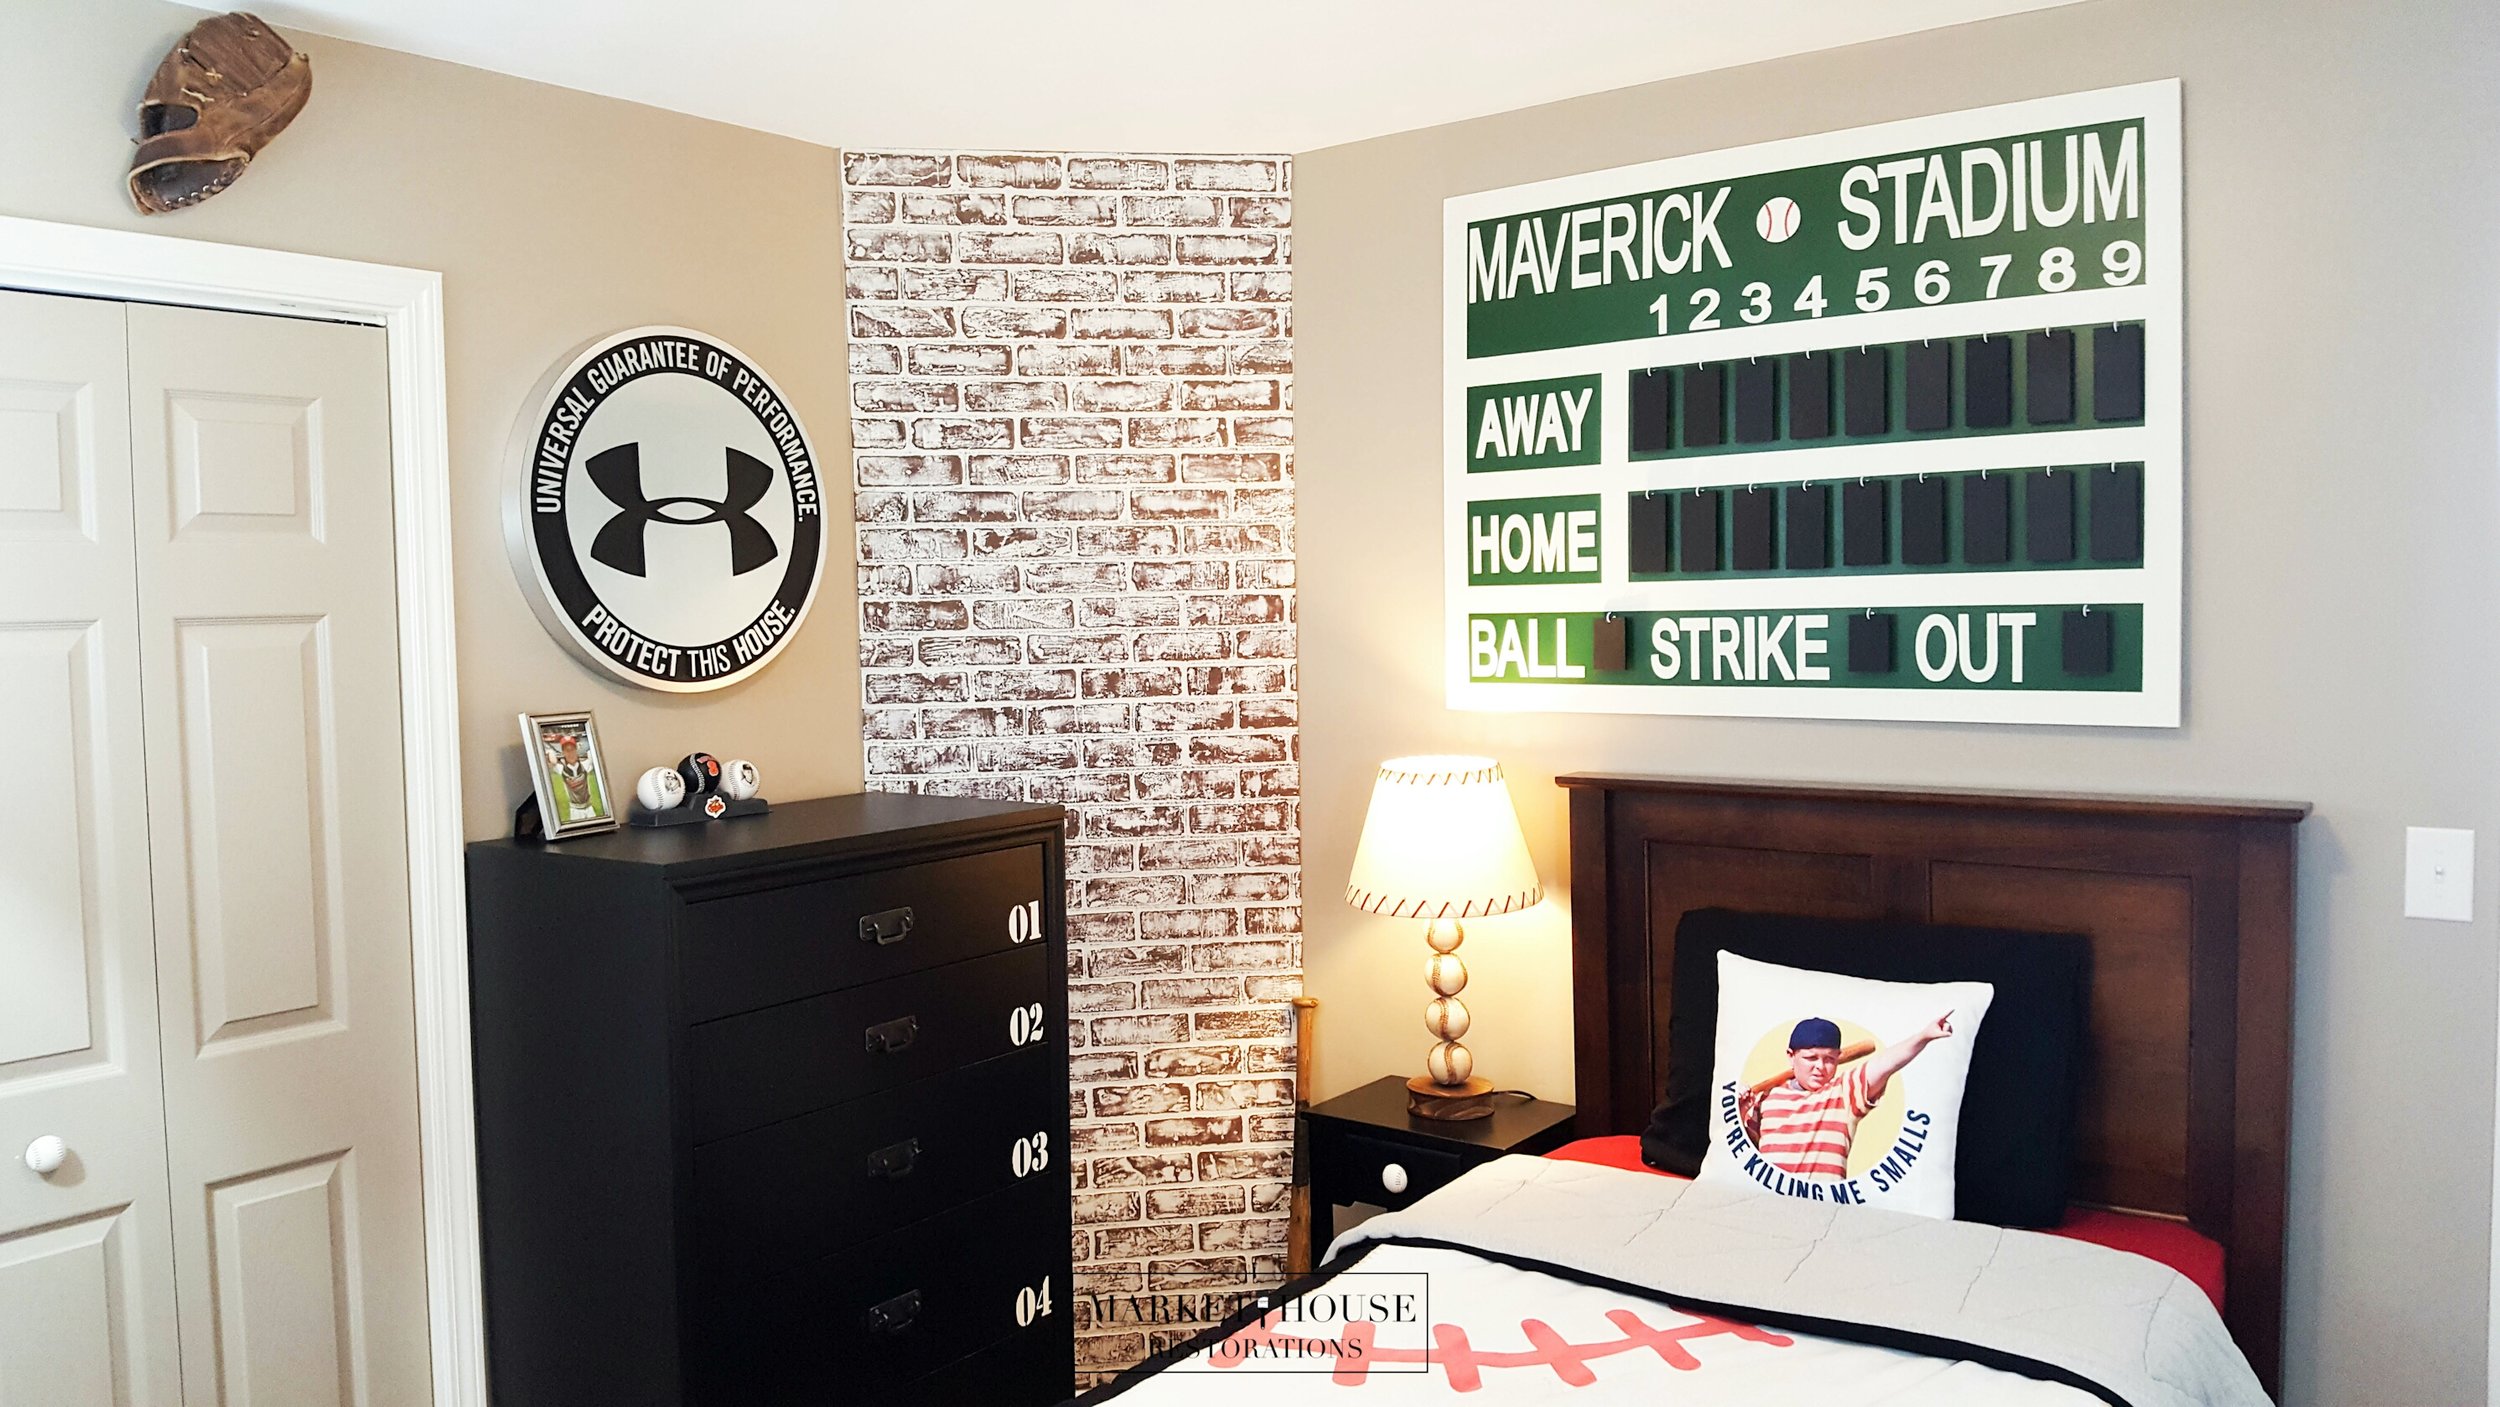
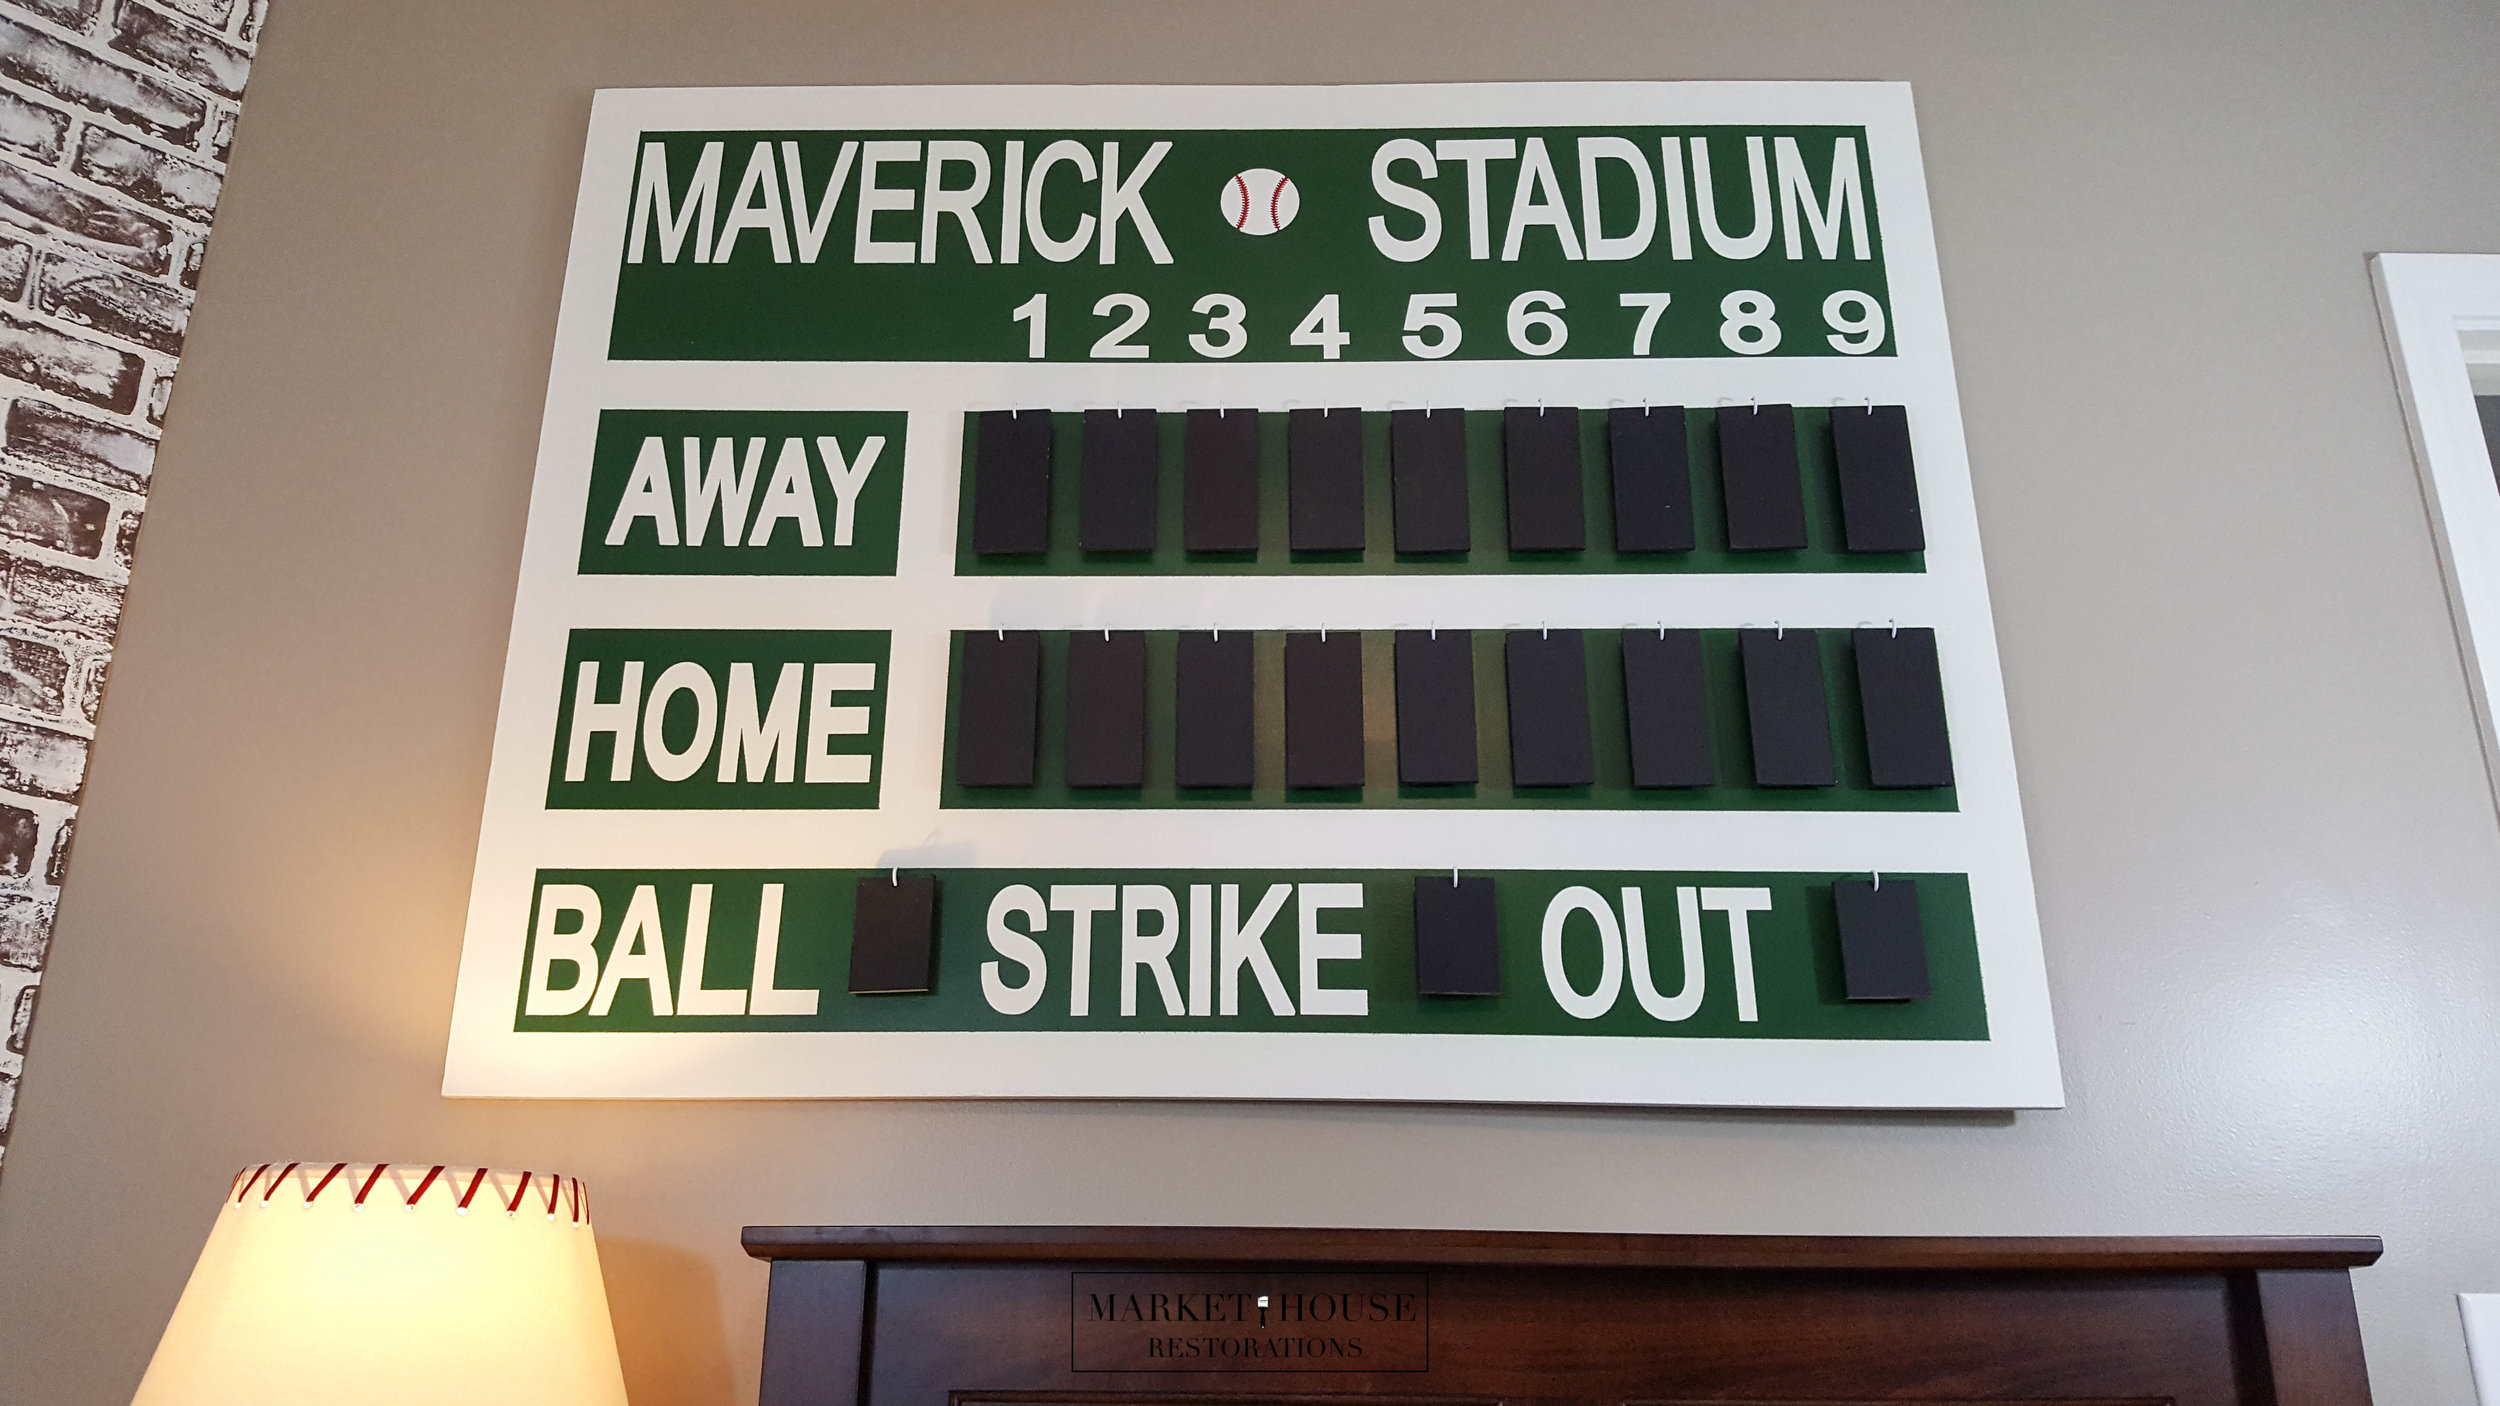
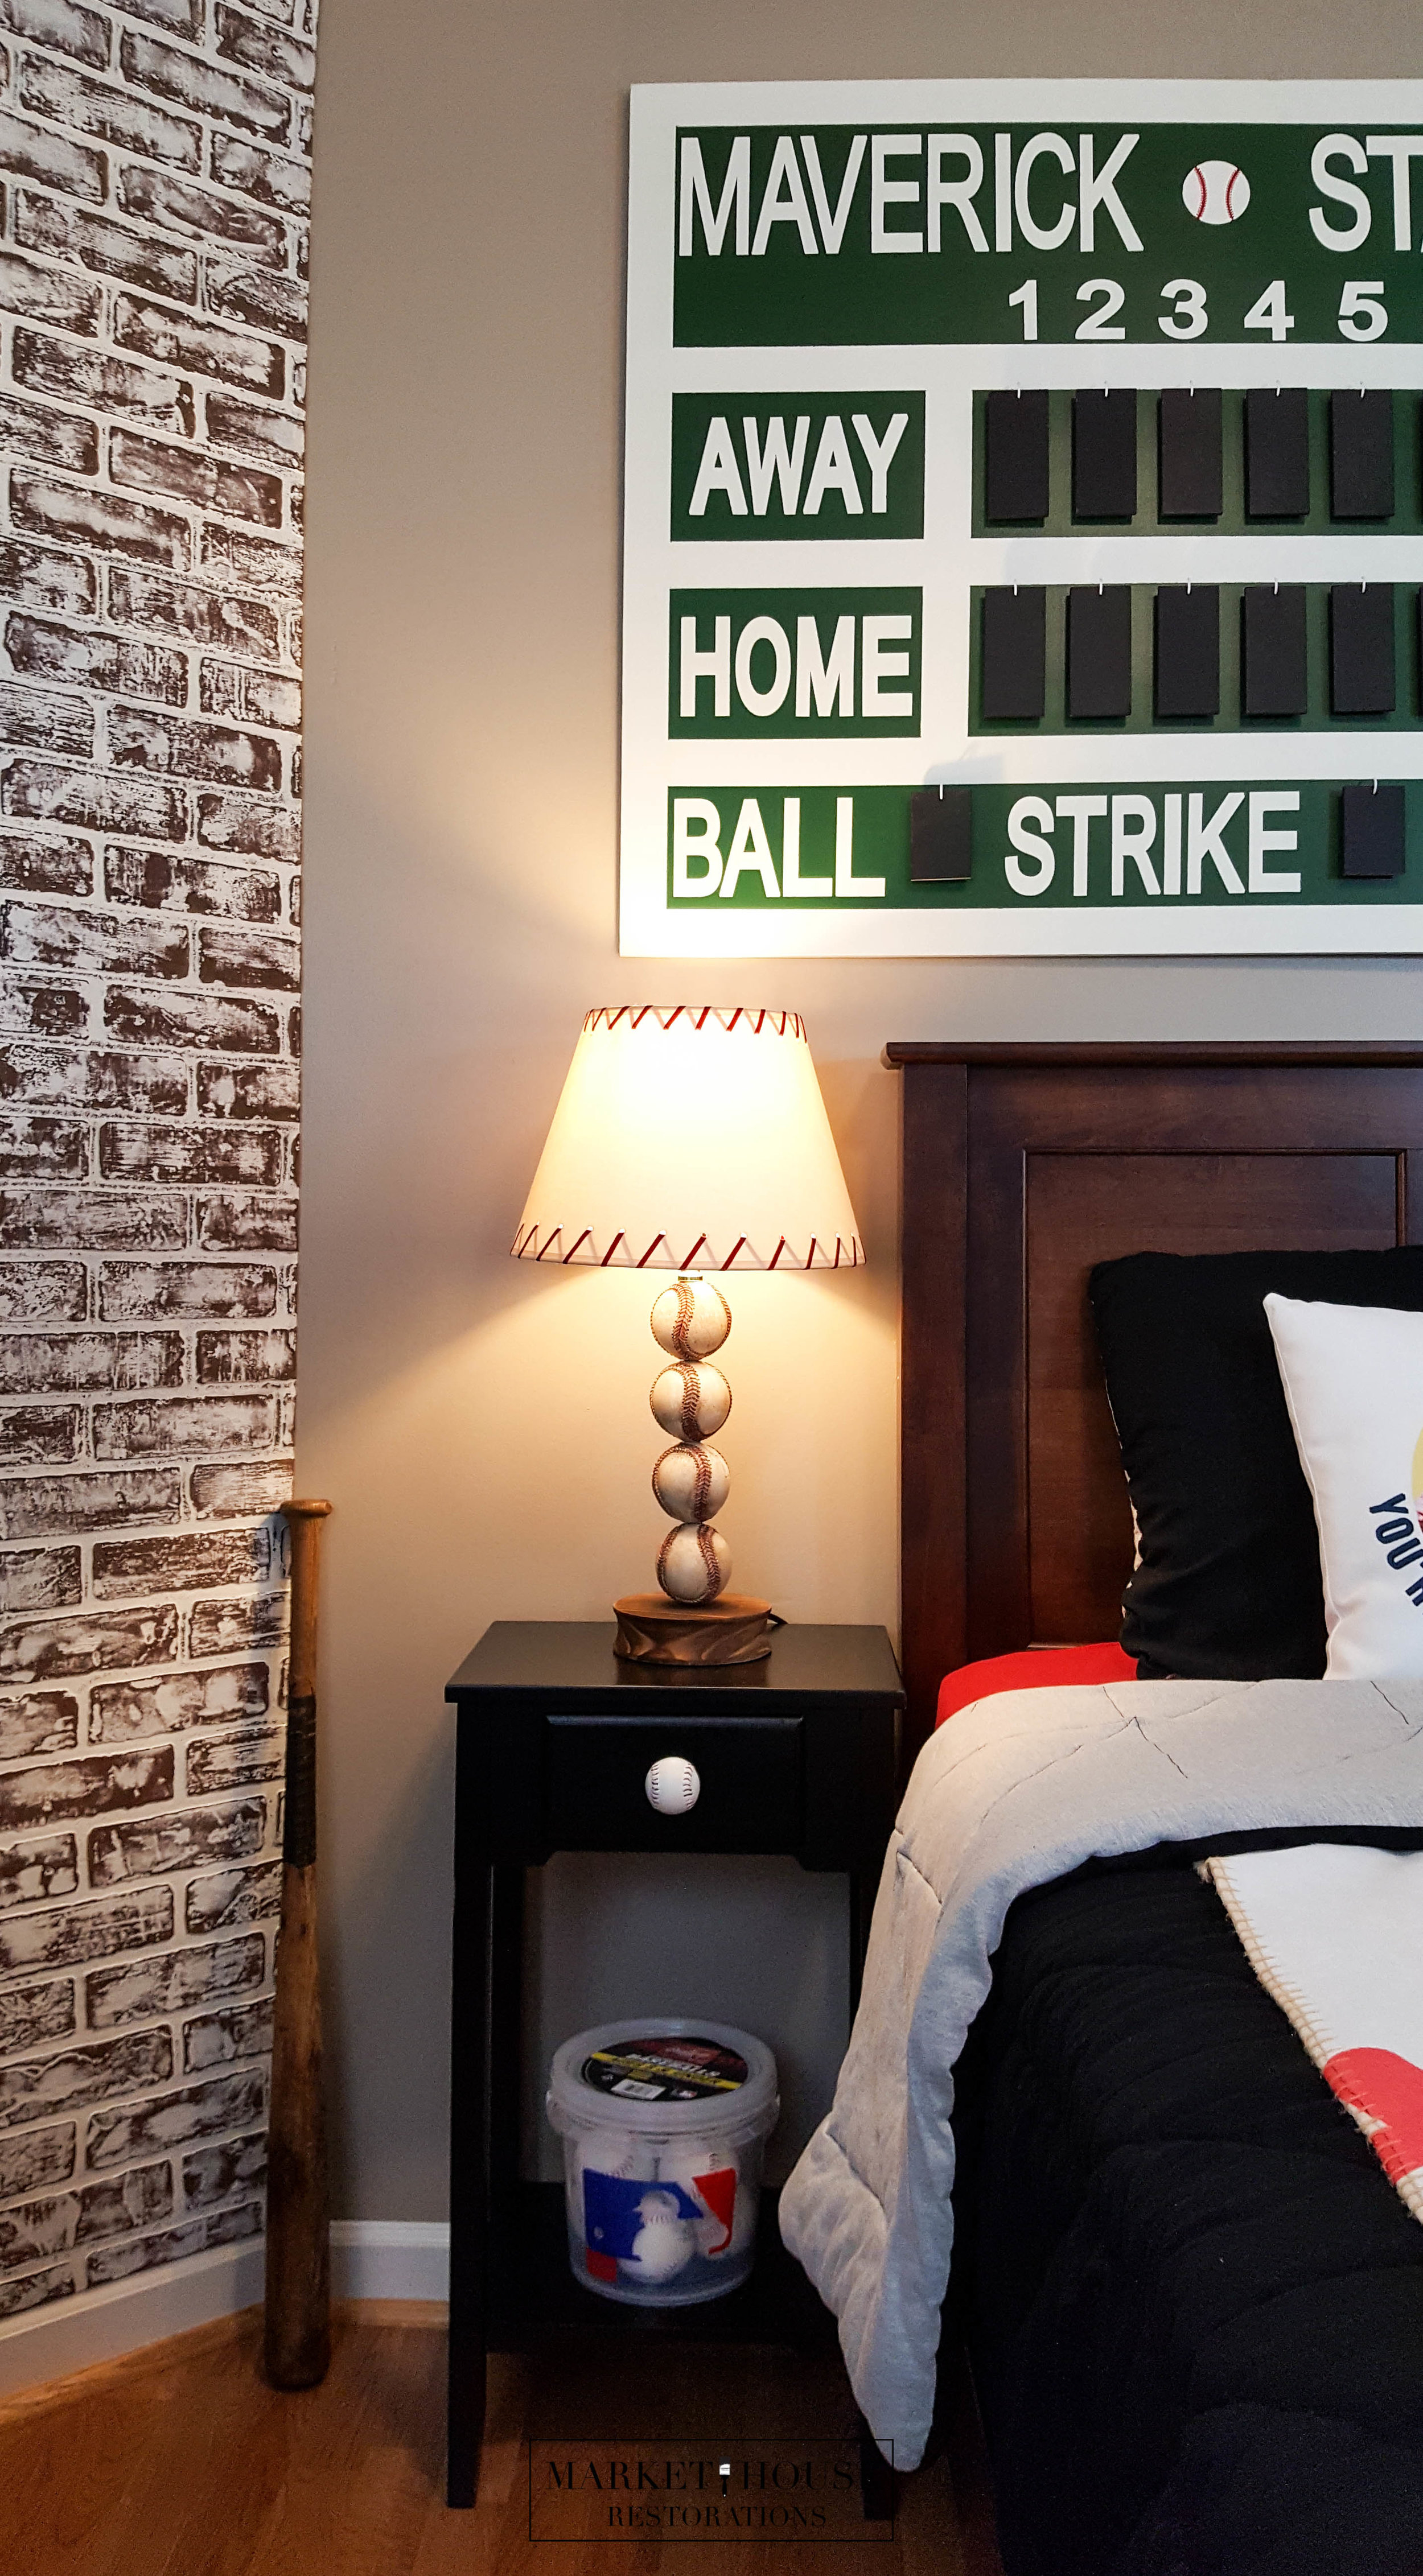
The Scoreboard:
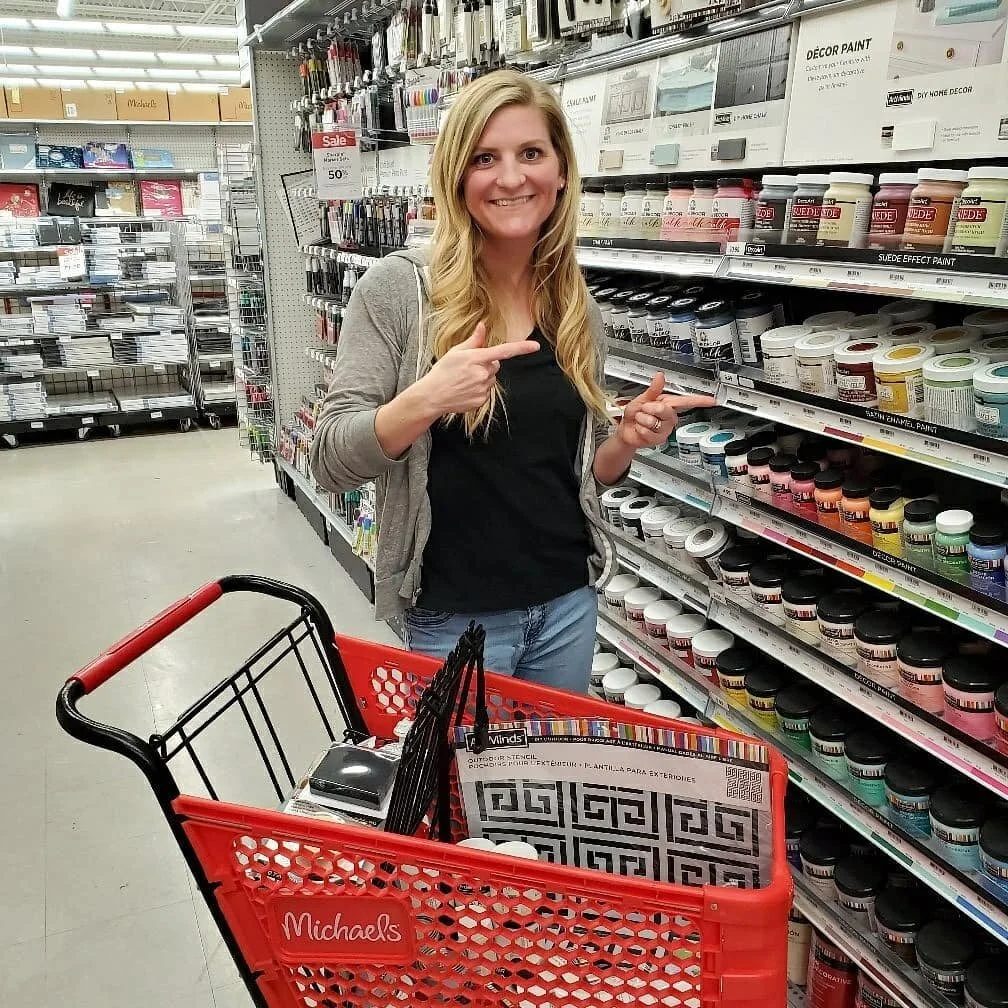
I made my son a large scoreboard, with his name(s) being the theme, to hang over his bed and carried the theme over to the sign that is also in his dugout. The scoreboard has chalkboard slats on it, so he can actually write on it if he wants! Both items make a huge impact and the scoreboard is functional! Win - win! For some reason though, when he write on the slats, the “home” team always wins. Hummm…haha. Anyway, I purchased the chalkboard slats from Michael’s, but I tried to make everything else. My sister has a Silhouette, so she graciously cut out all of the letters and numbers that I needed to customize the scoreboard.
I sketched out all of my measurements before I started applying the vinyl cut-outs and the paint. The size of his board is 3ft x 4ft so I wanted to make sure I didn’t make any mistakes. We purchased the pre-cut board from Lowe’s.
I started by painting the entire board with General Finishes Snow White.
Once the white paint was nice and dry, I laid out the vinyl cut-outs and painter’s tape.
I then painted the green color over the whole thing, including all of the painter’s tape and vinyl pieces. The green color I used on the scoreboard is called, Soccer Pitch. by Sherwin-Williams and I purchased it from Lowe’s.
I waited about an hour and then went back and pulled off all of the painter’s tape and vinyl stickers while the green paint was still a little tacky. I find it more difficult to pull these items off when the paint is completely dry.
I touched up the green and white areas.
I then sealed the whole board with a coat of General Finishes High Performance Top Coat in Flat to protect it.
I measured out and added “C” hooks and hung the black scoreboard slats, but you could also use nails if you wanted to.
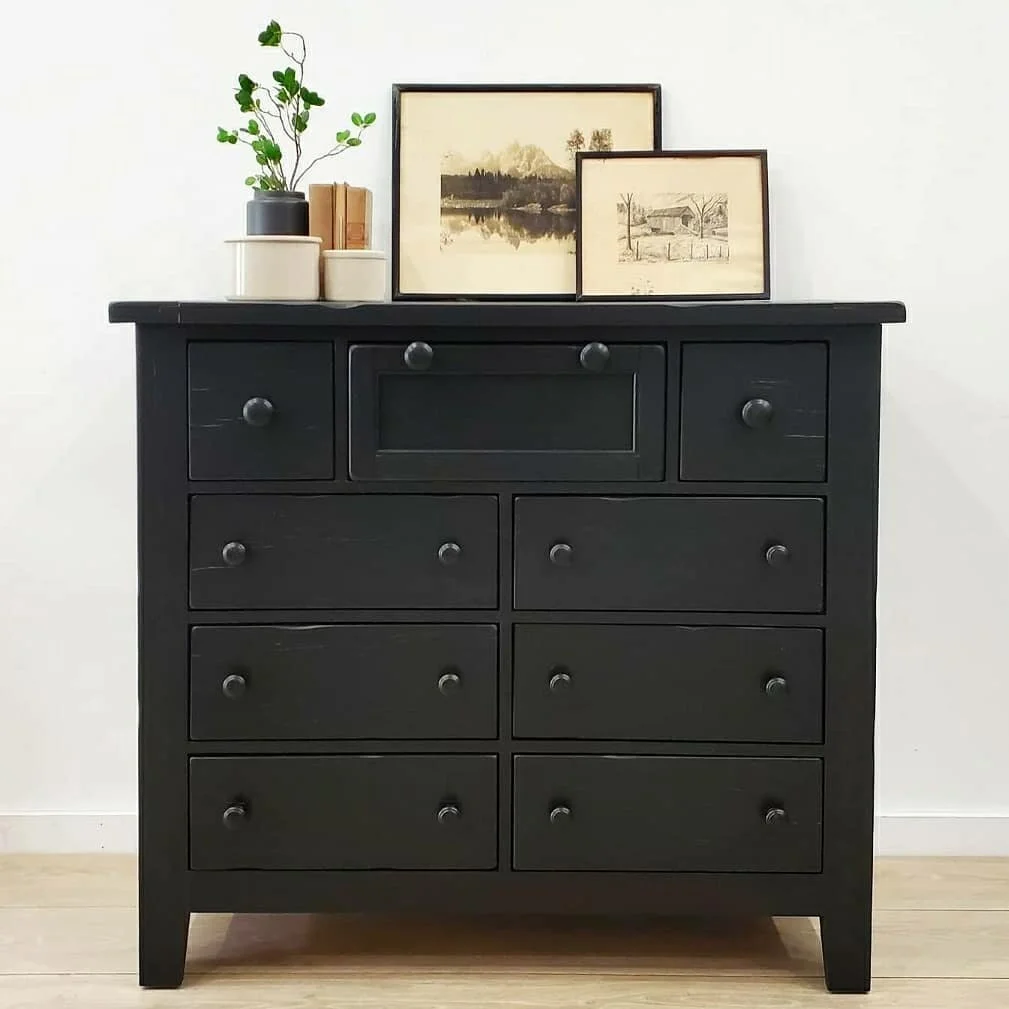
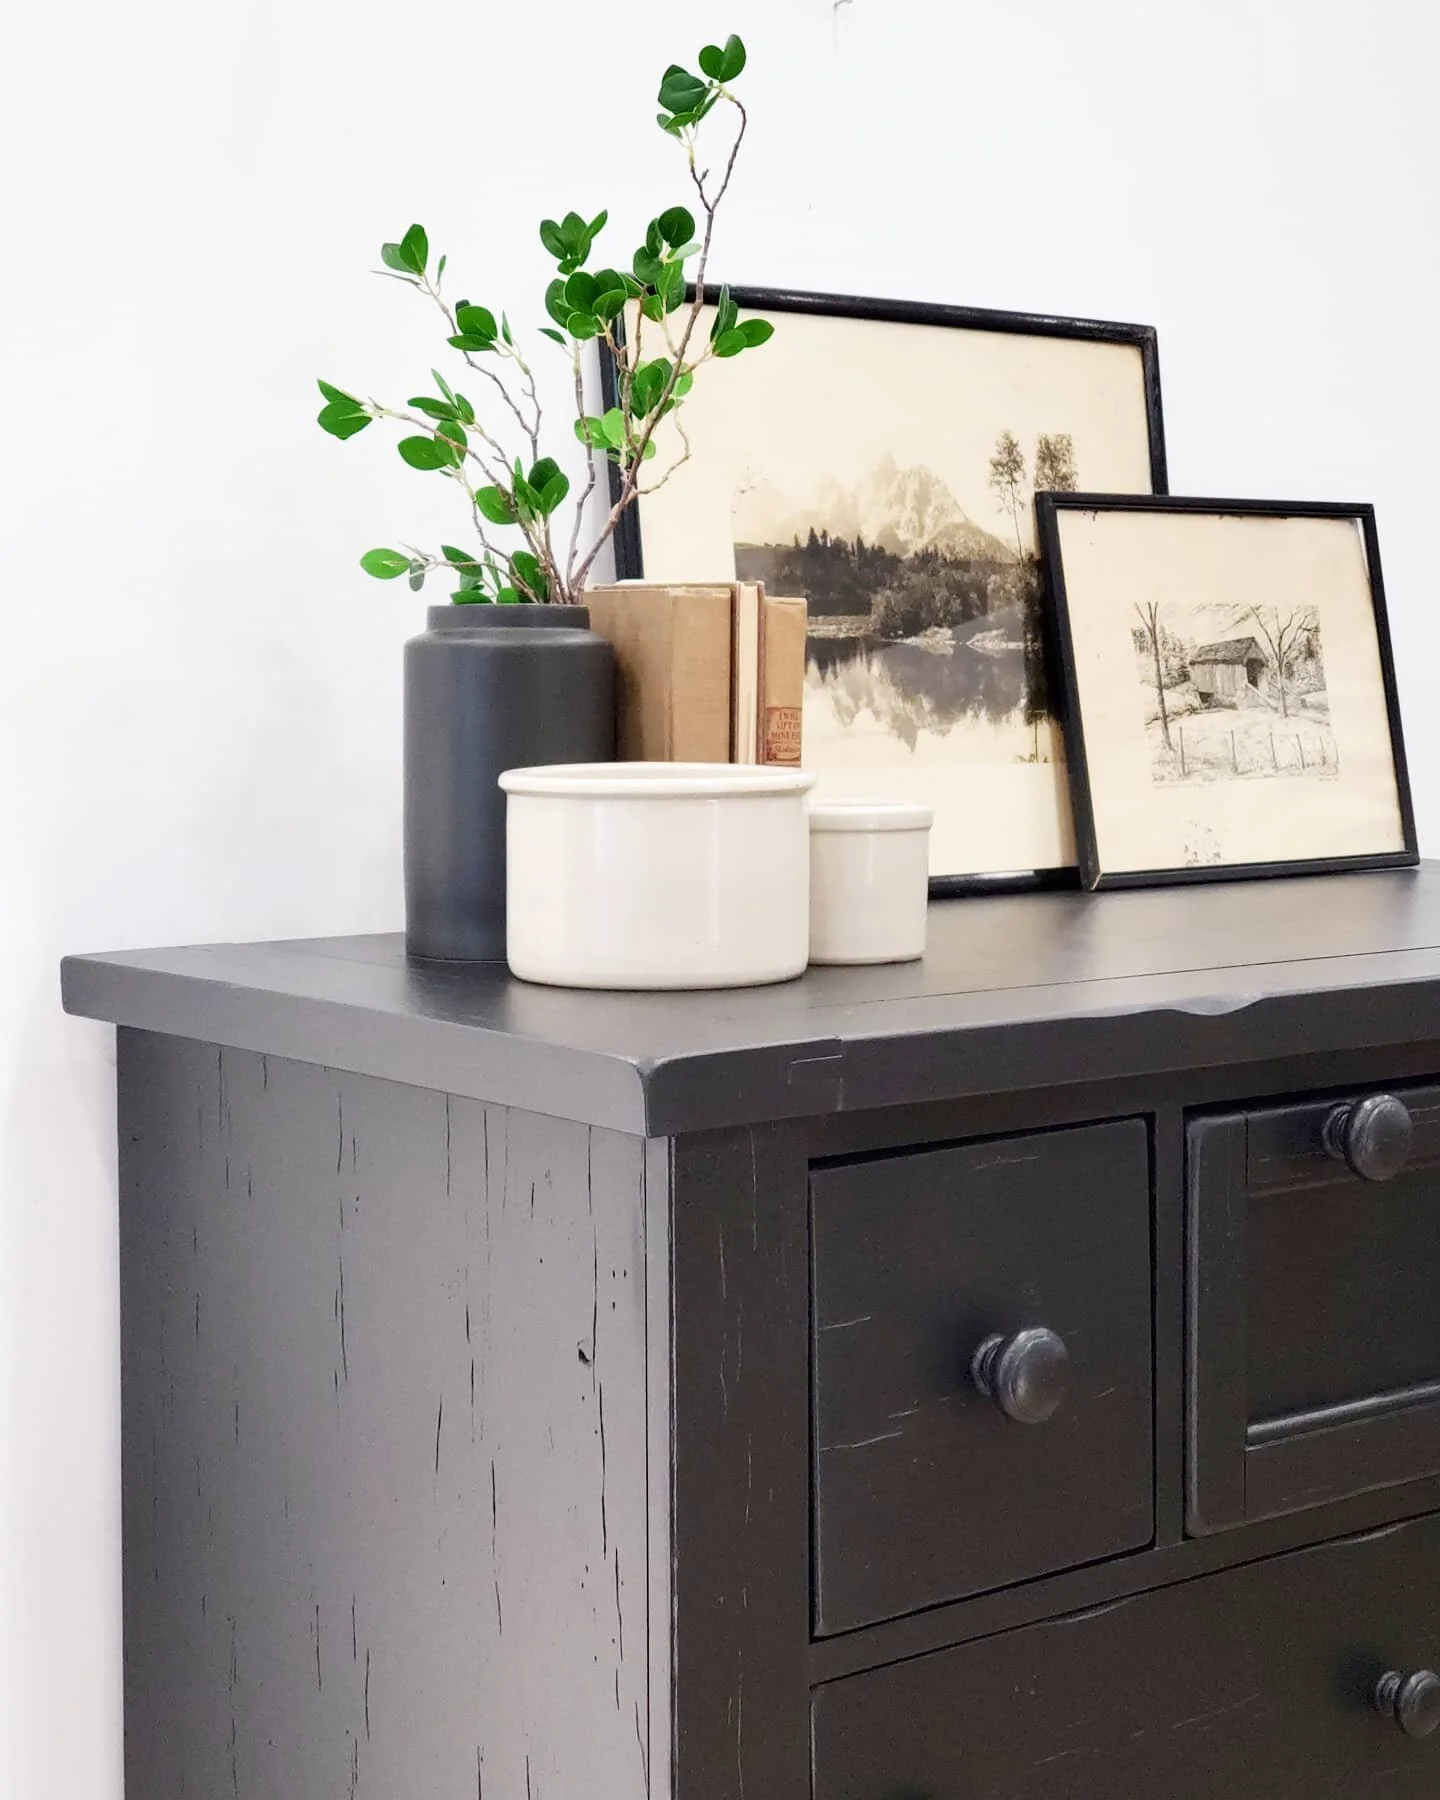
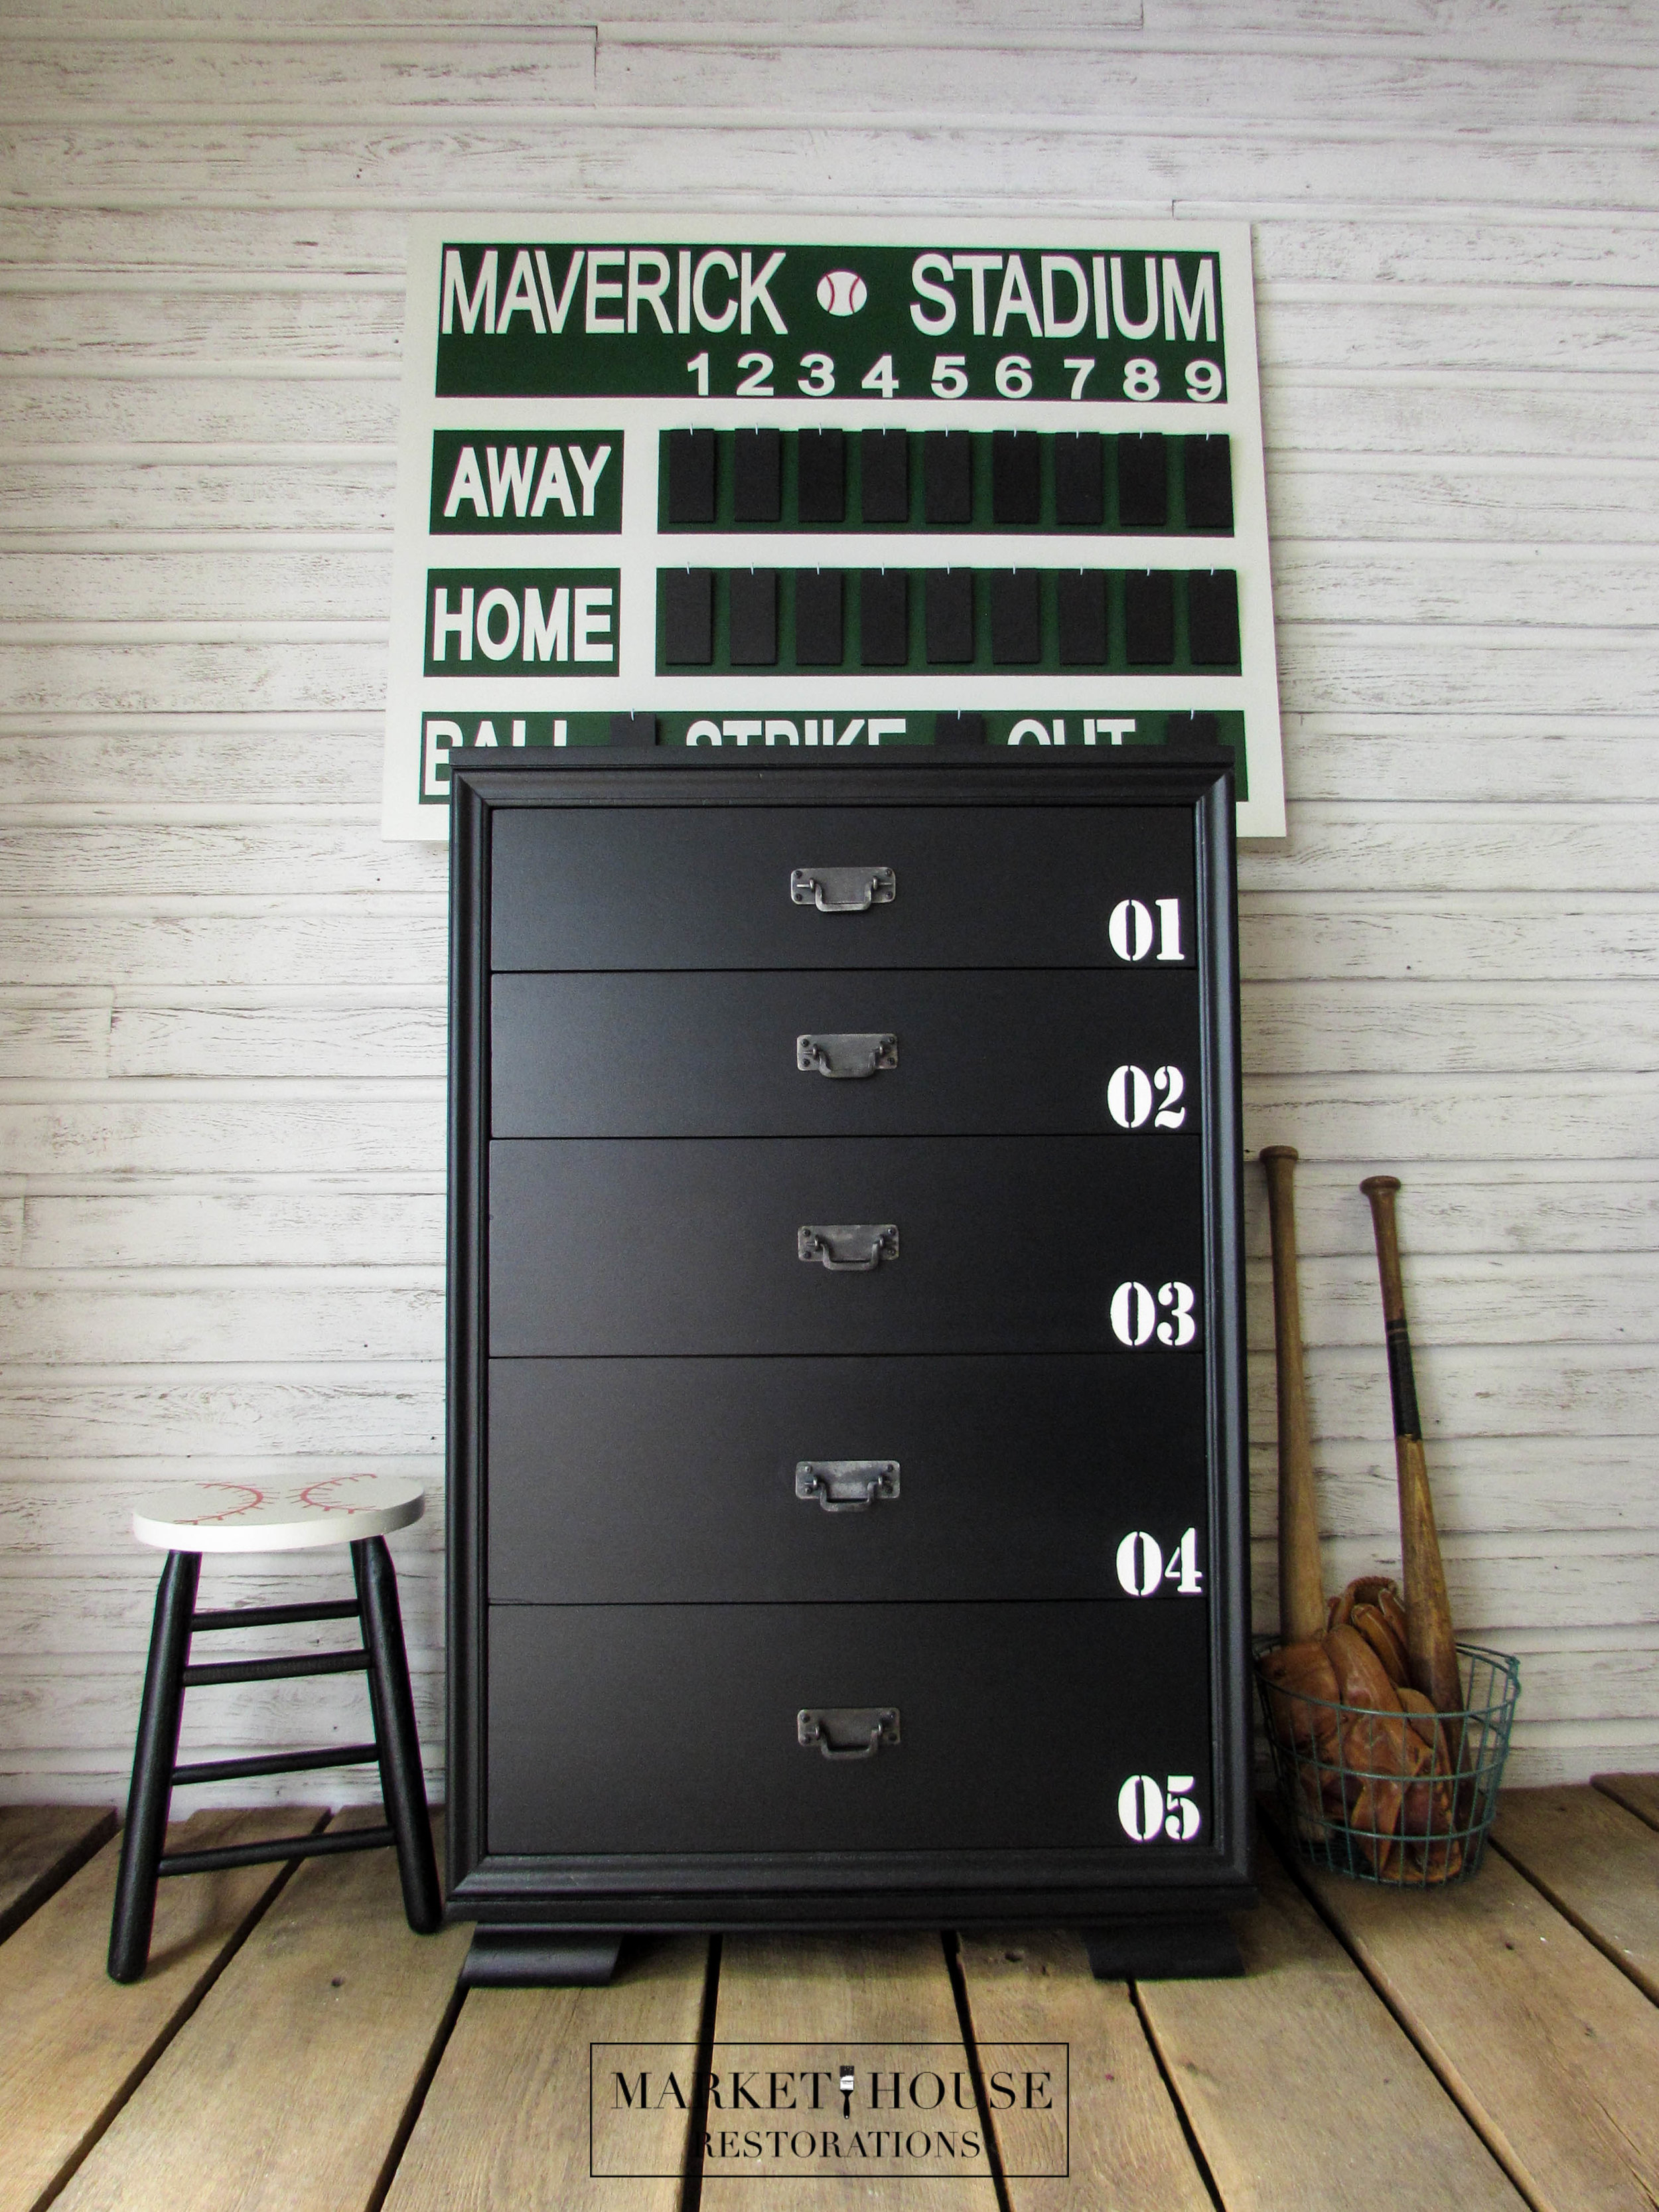
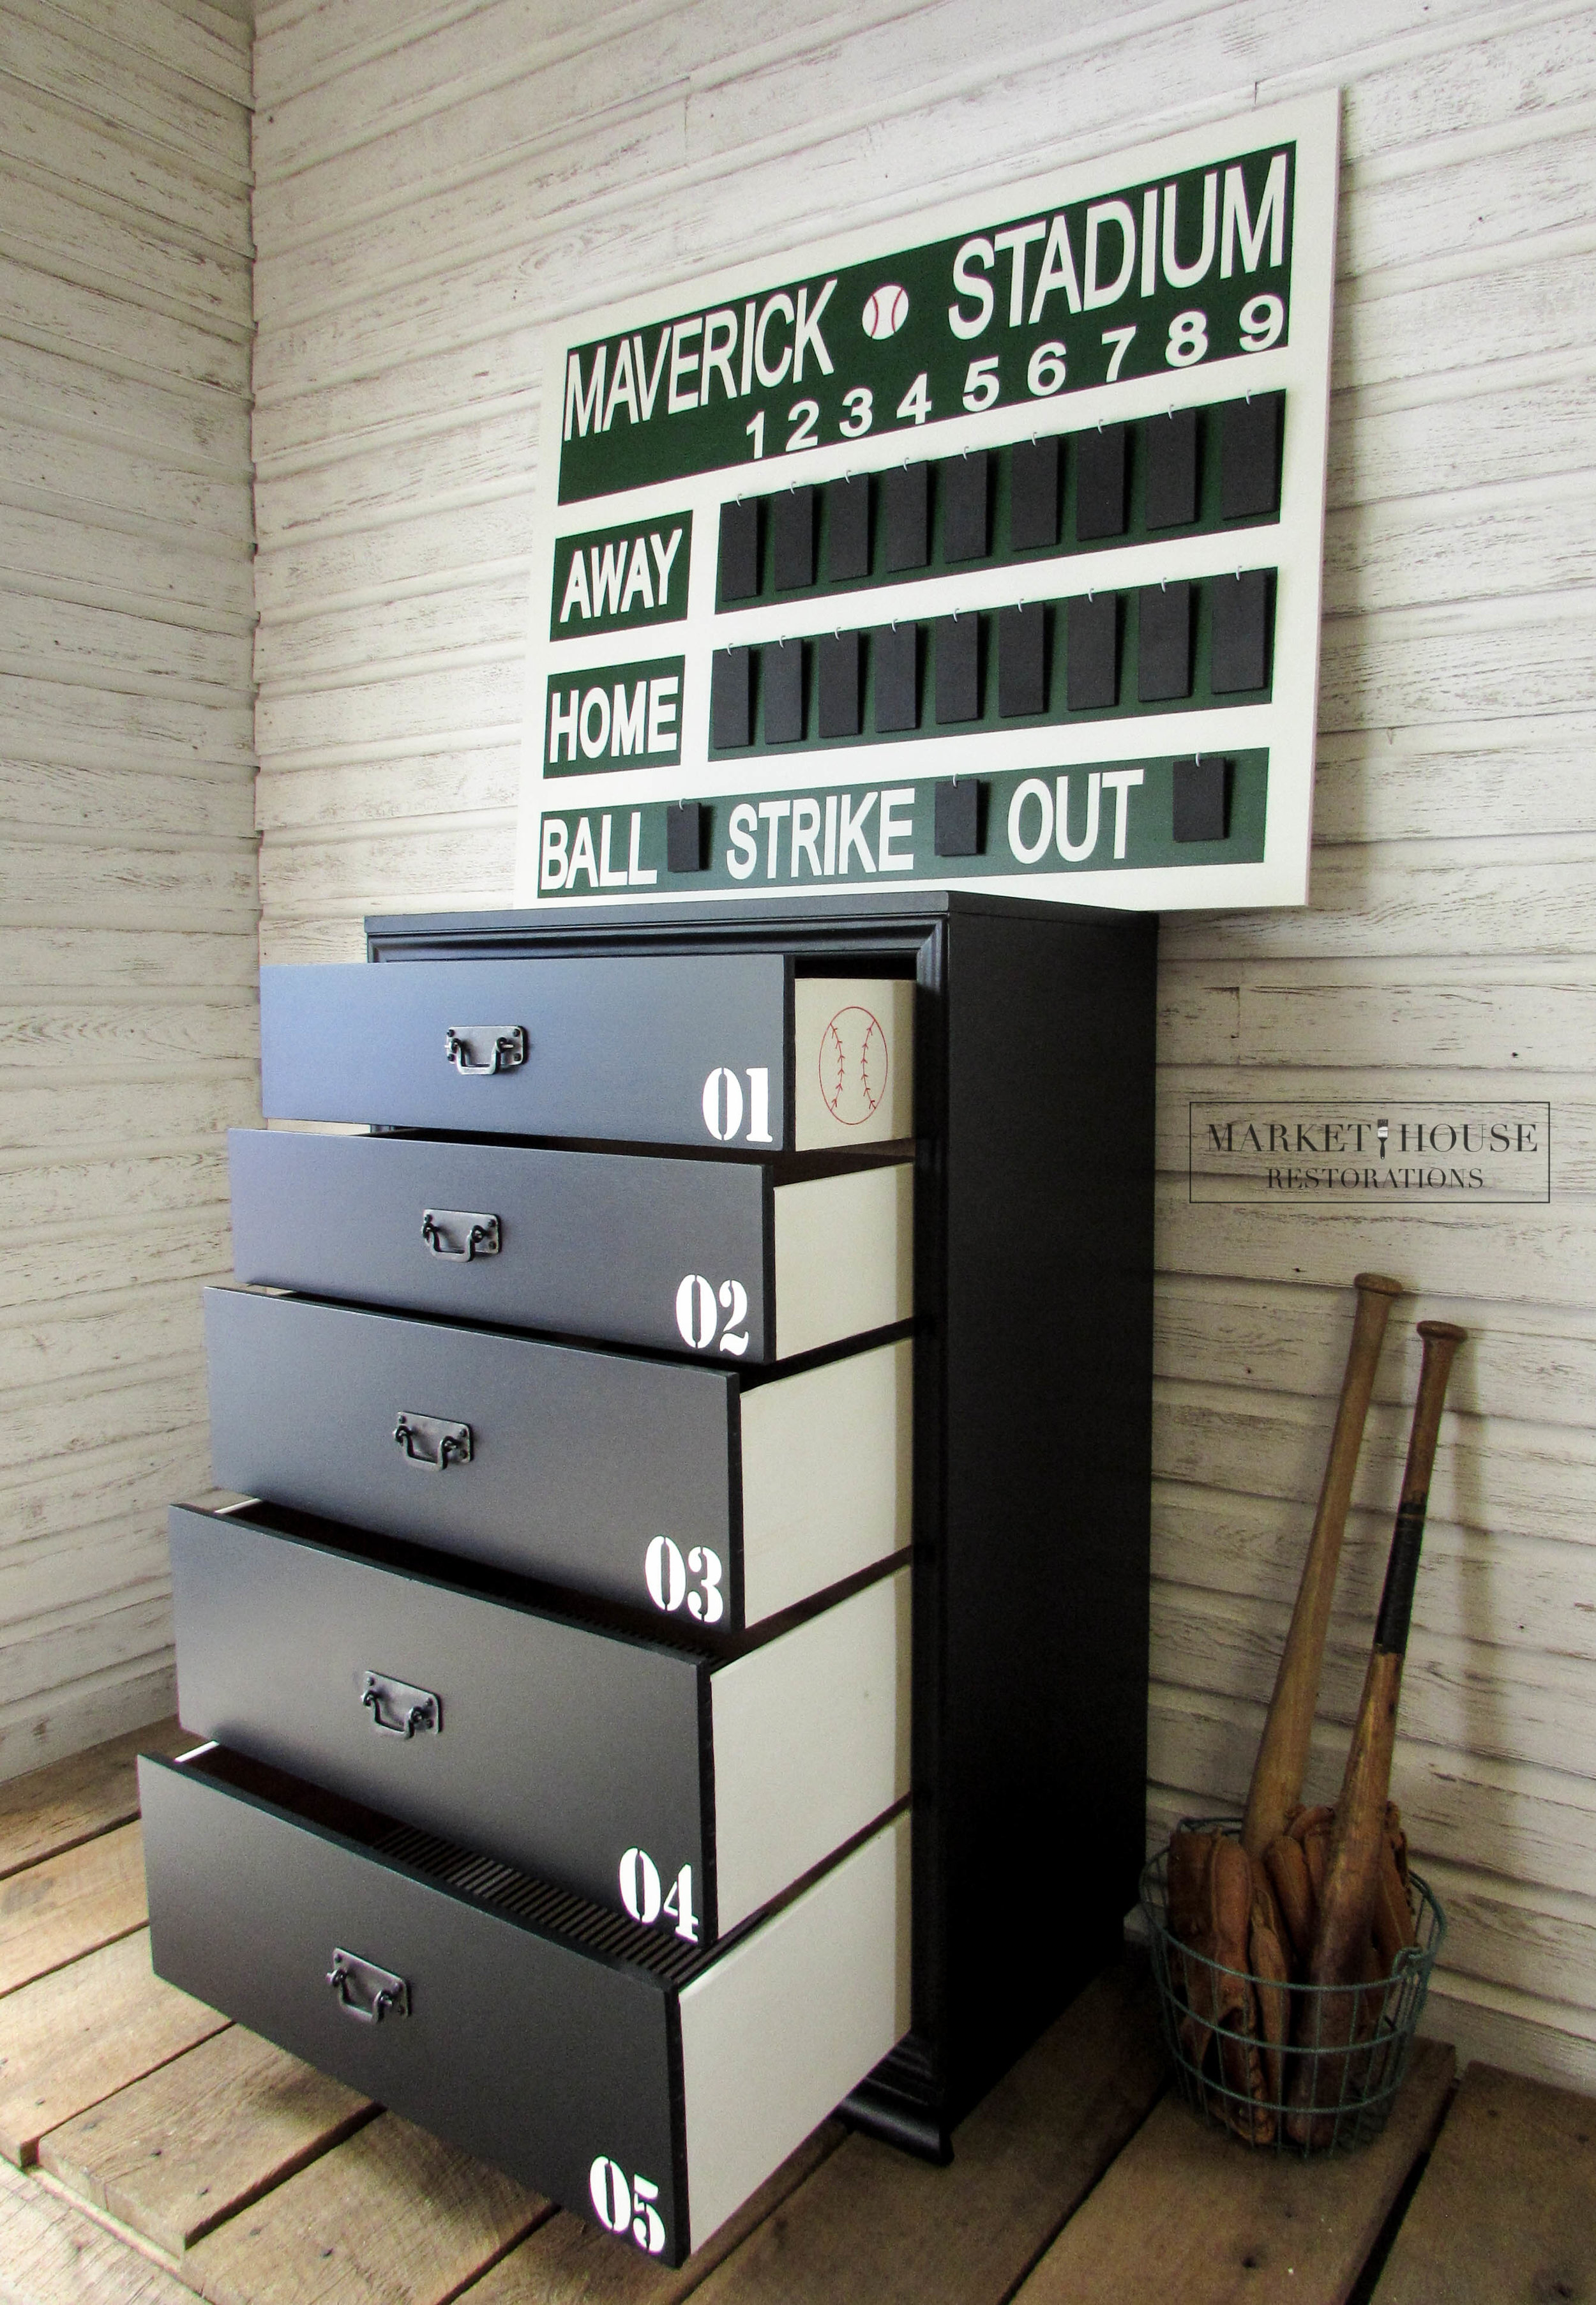
The Dresser Makeover:
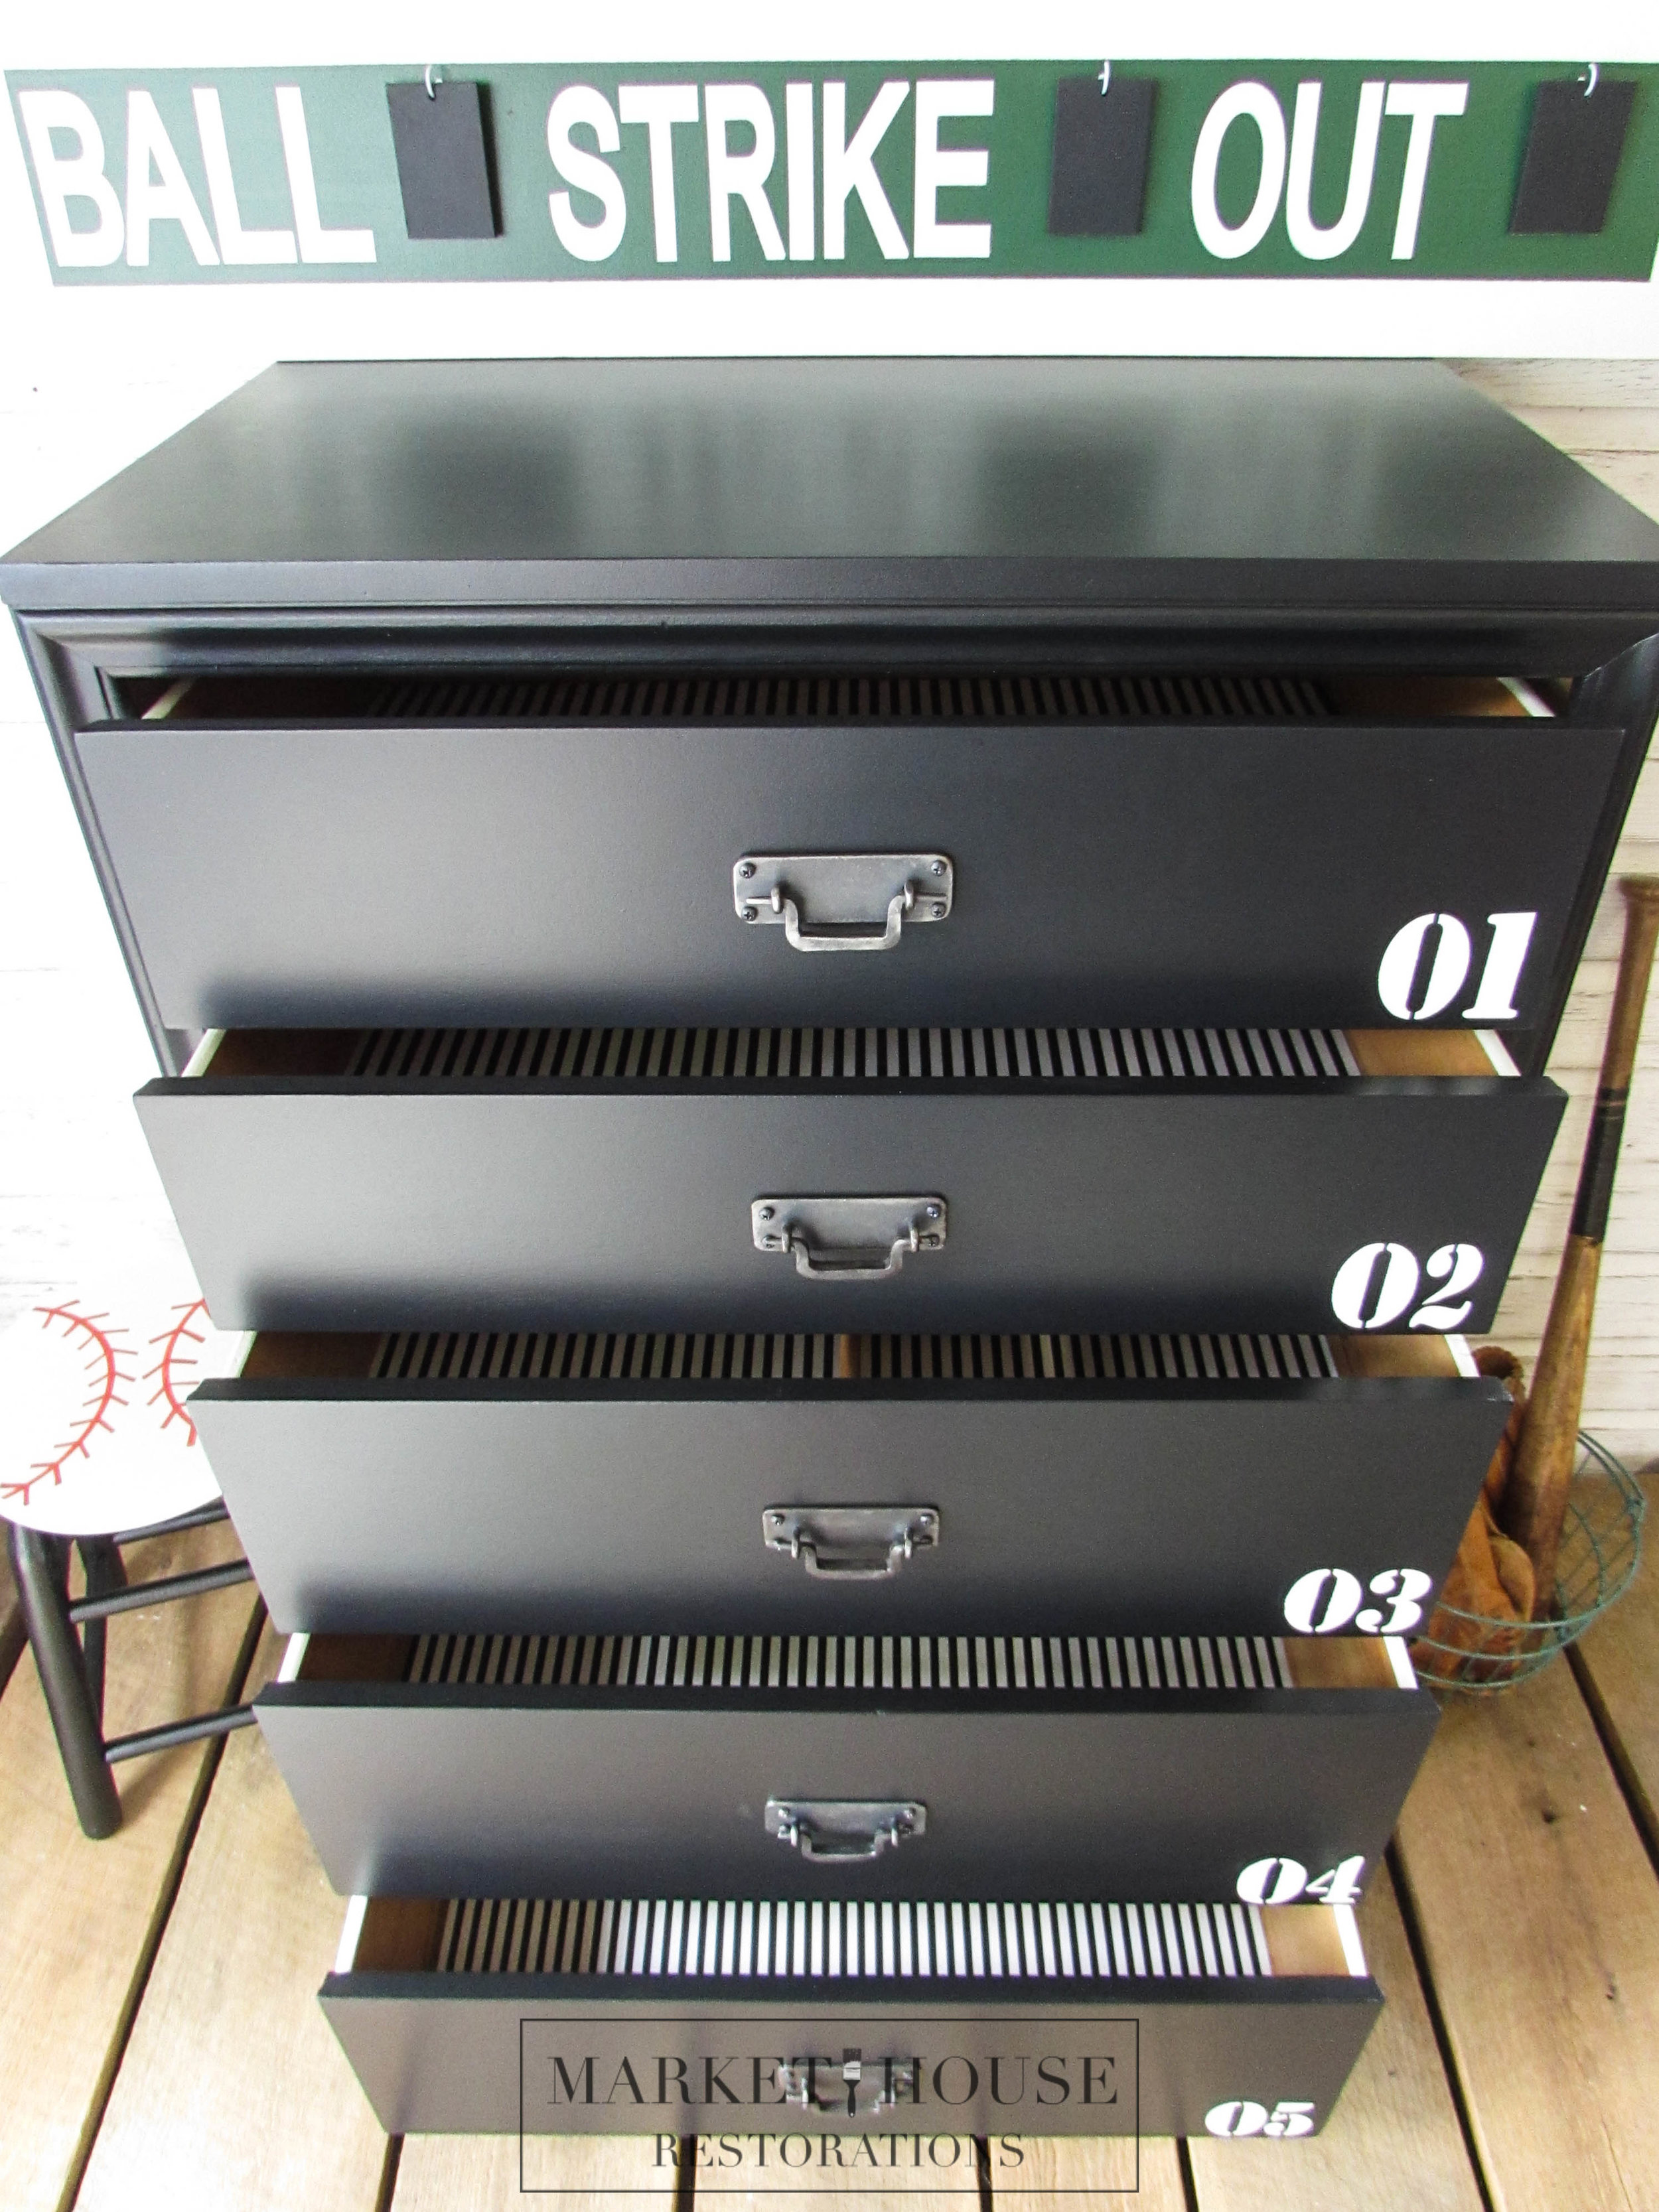
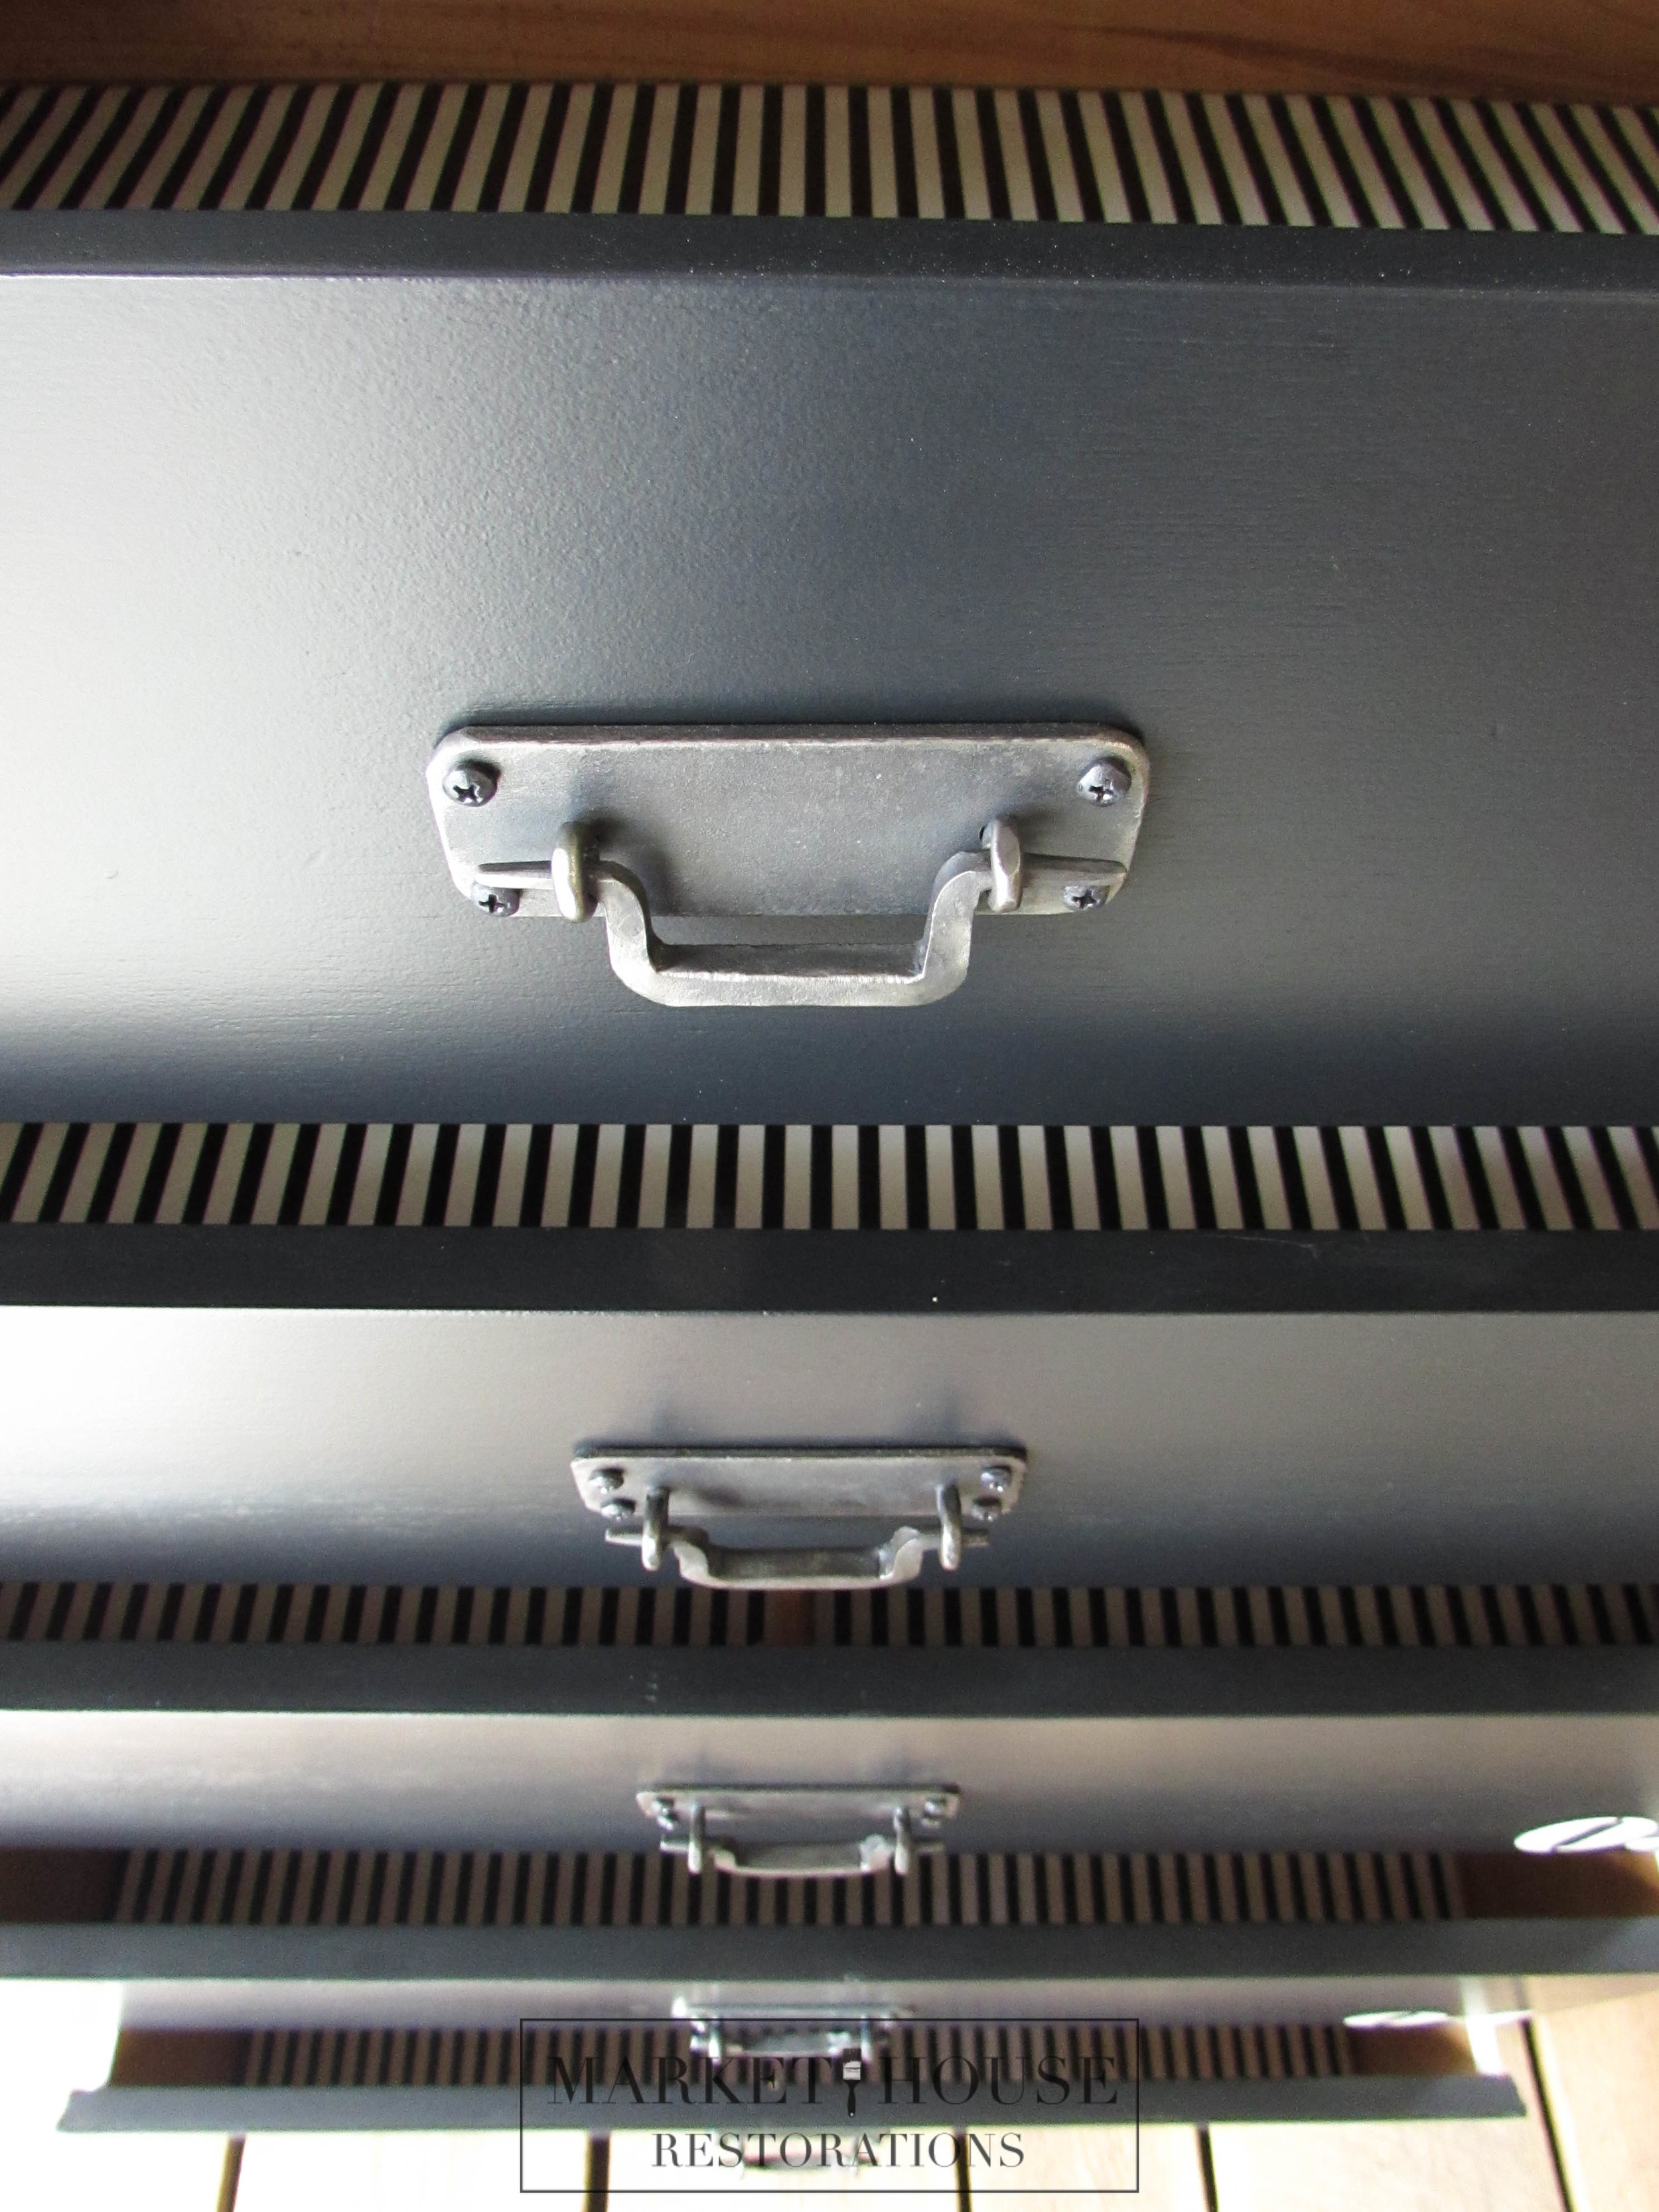
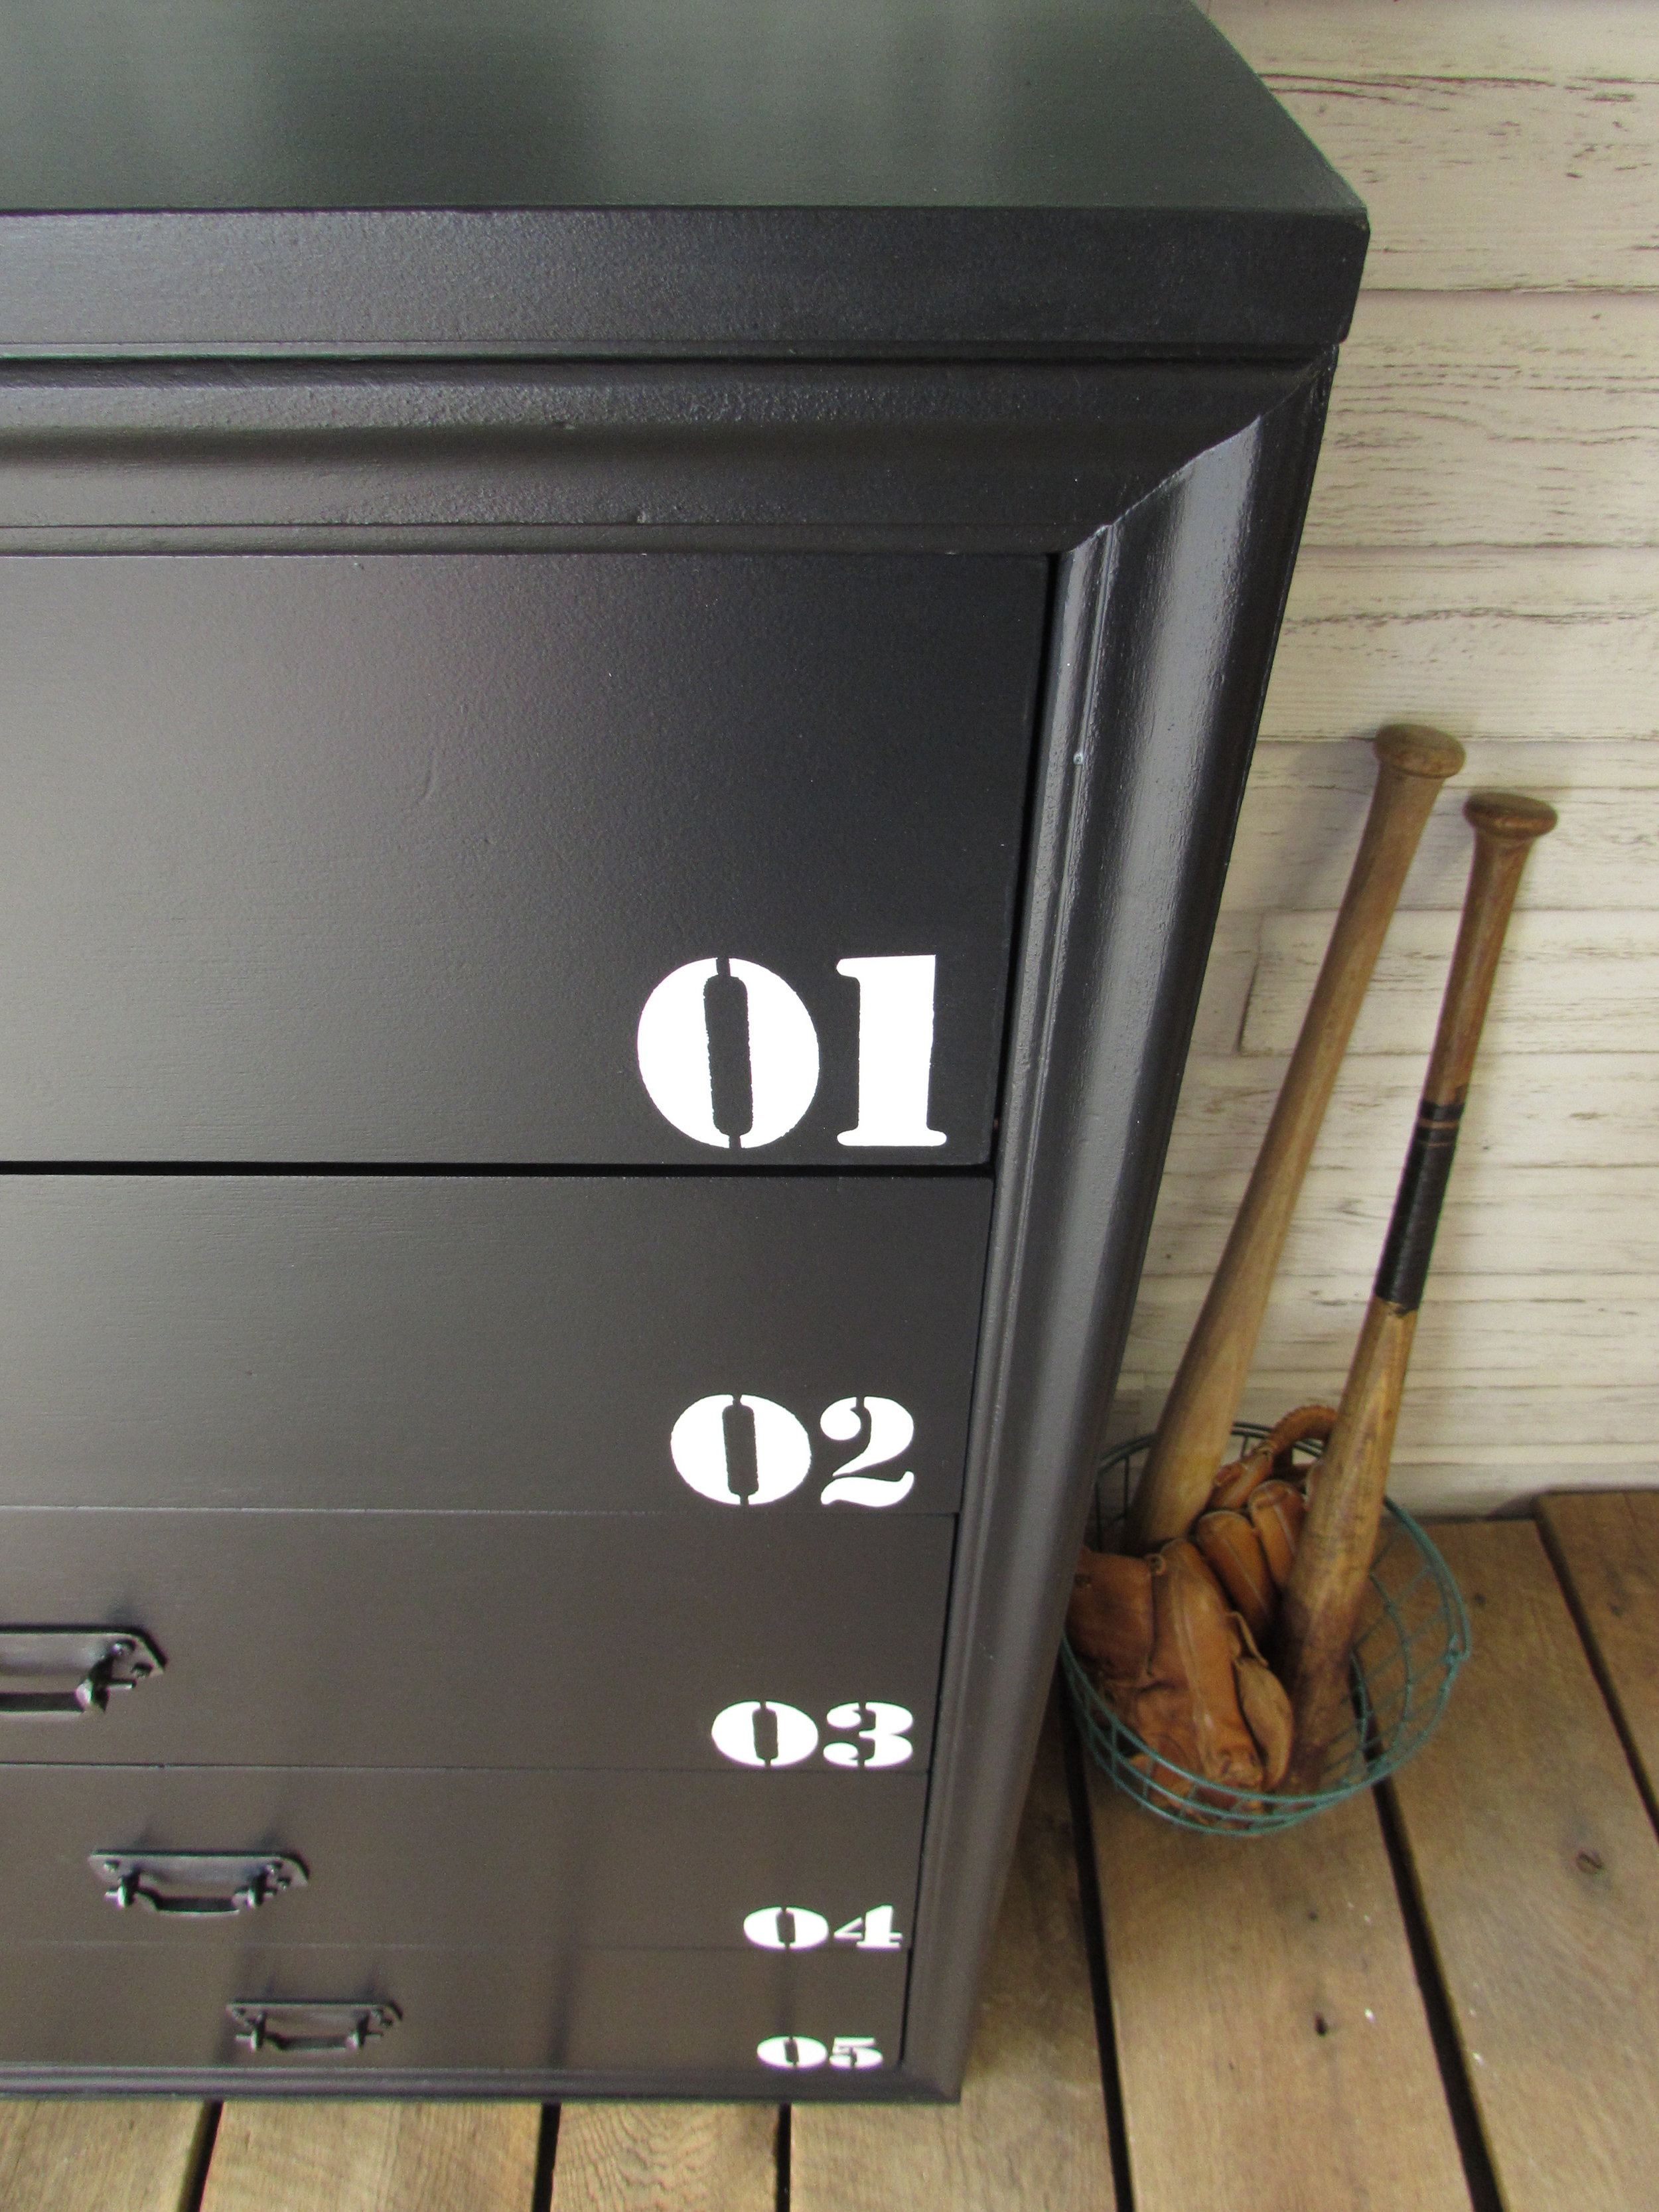
I re-did the chest-of-drawers, too. The previous owners of our house left it when they moved out, so thankfully it was free! I wanted it to go along with the locker theme, so I painted it black and added numbers to it. I also painted the outside of the drawers white and lined the drawers with black-and-white paper to mimic the attire of an umpire/ref.
THE PREP PROCESS:
I removed the drawers, took off the knobs (placed them in a Ziplock bag).
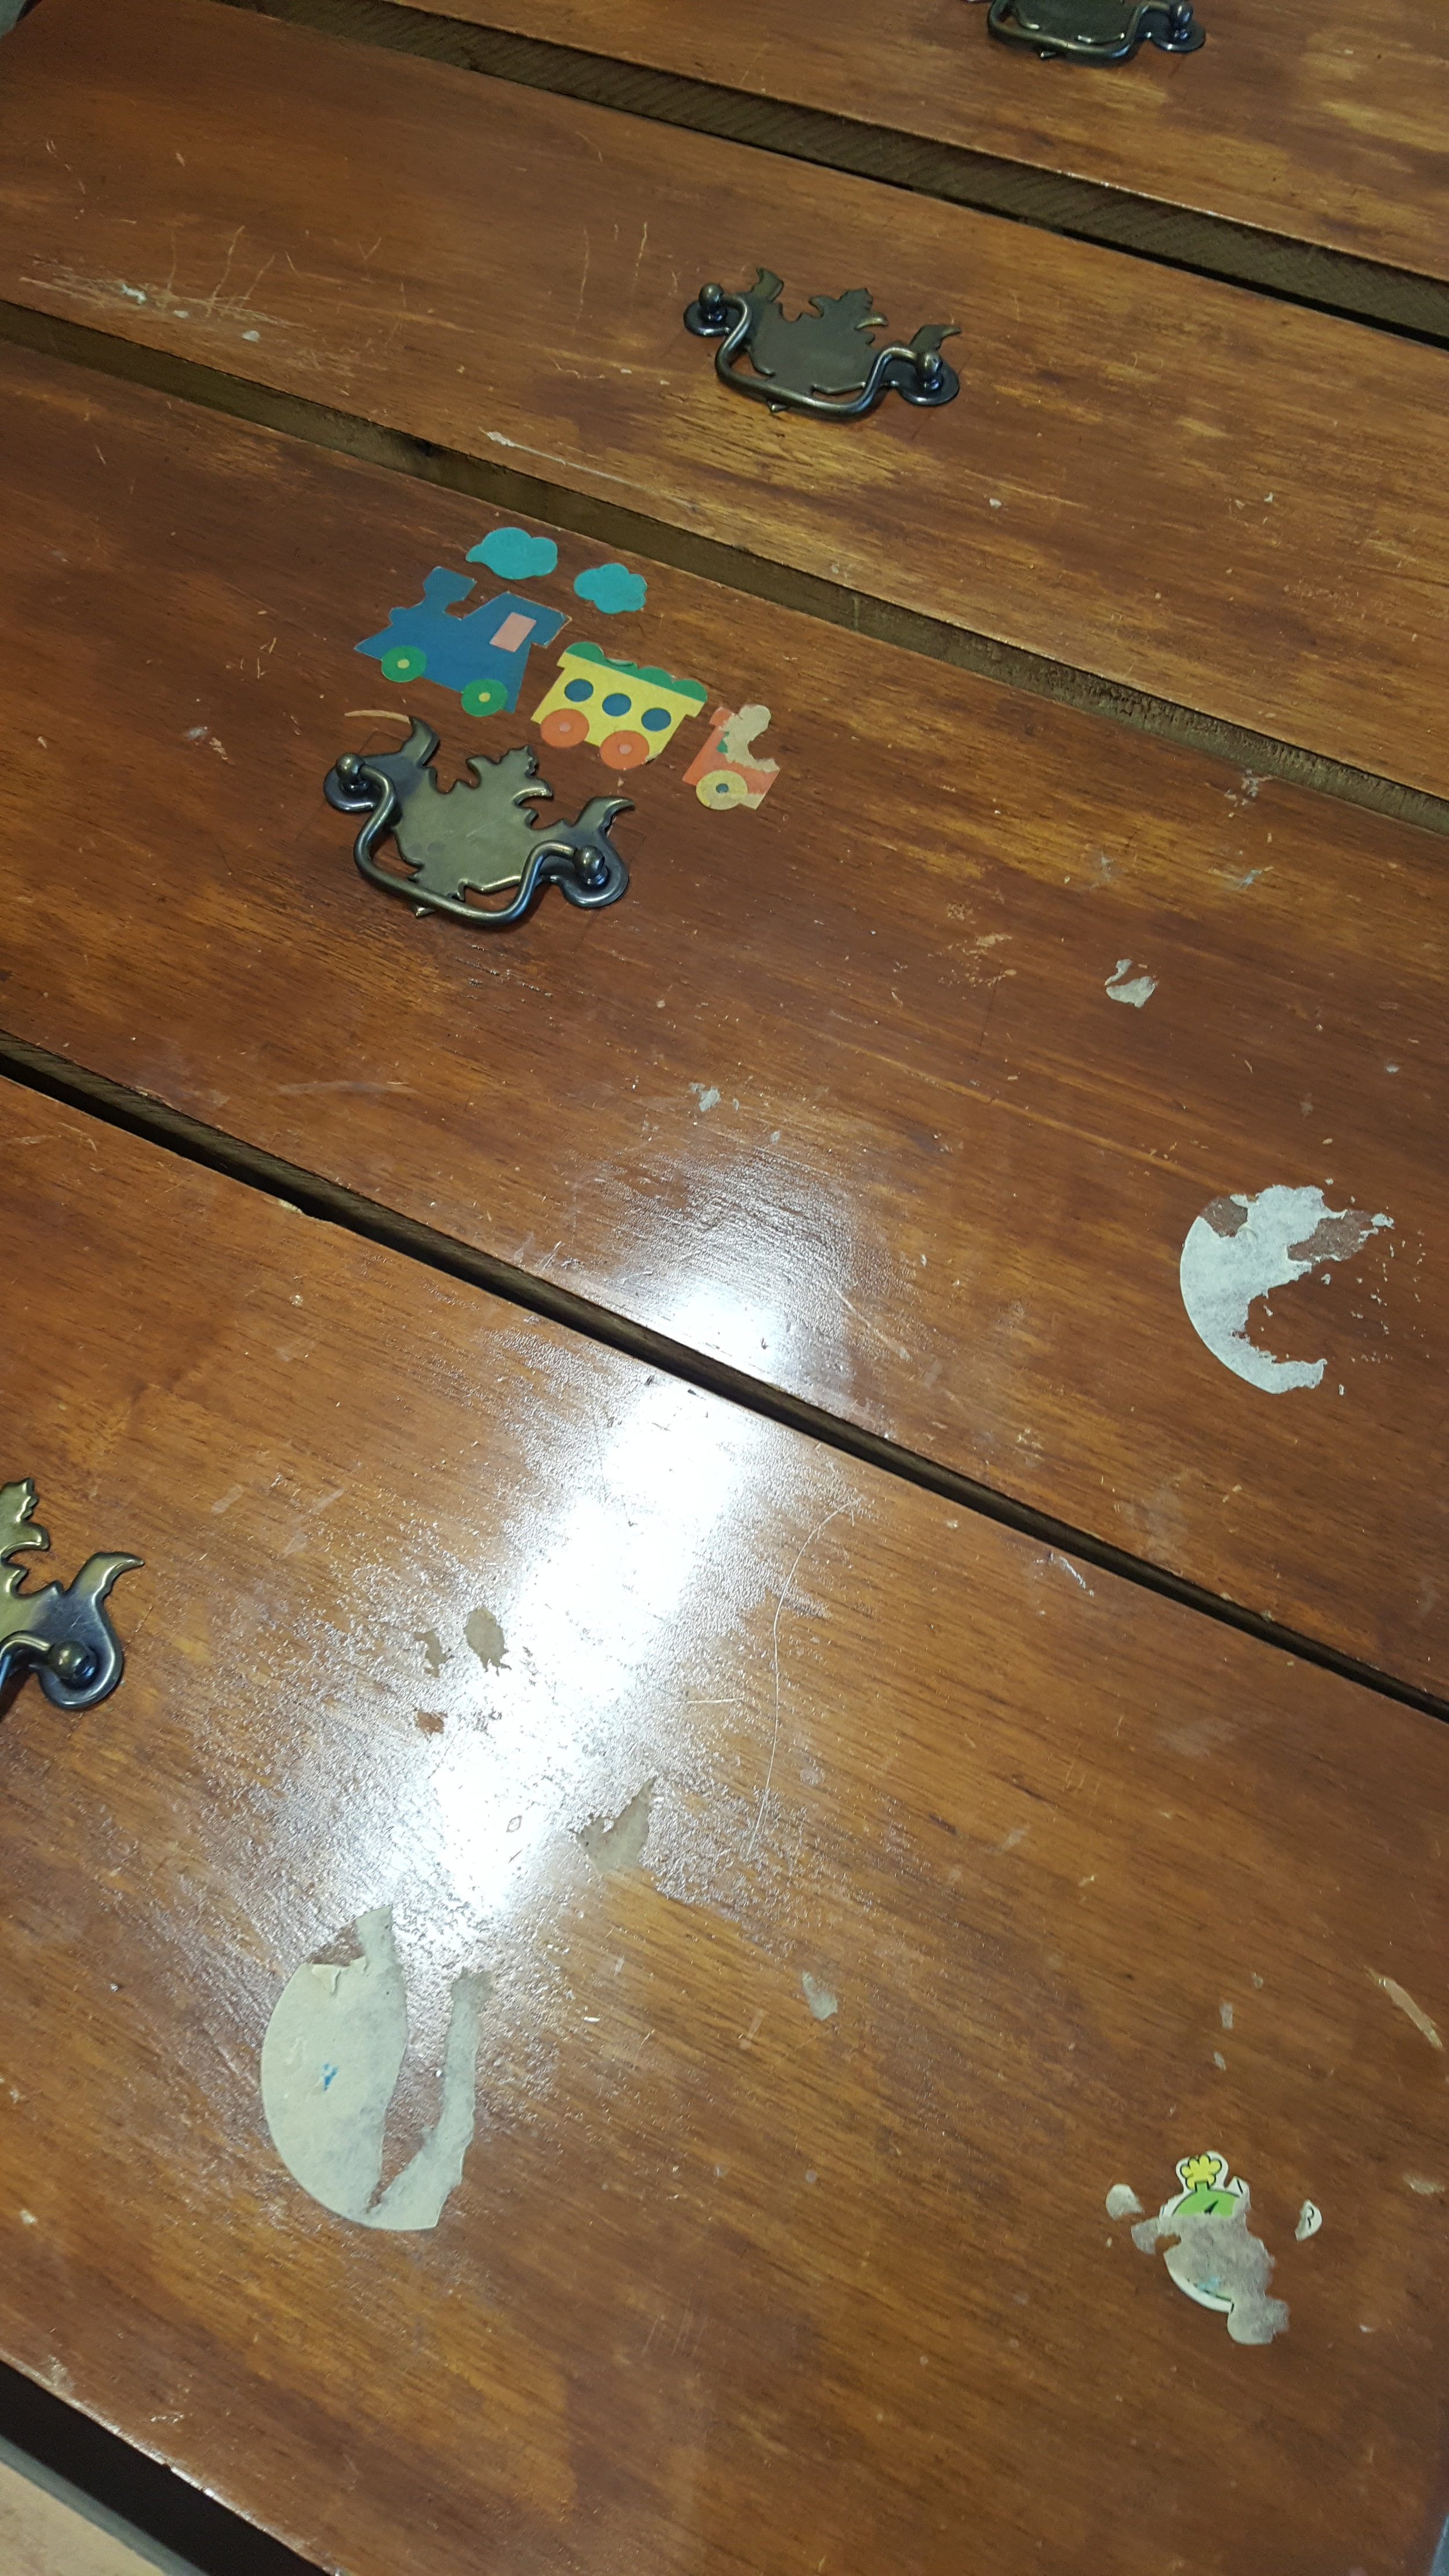
I cleaned the whole piece with Krud Kutter and shop towel and I removed the stickers with Guu Gone.
I put 220 grit sandpaper on my random orbital sander and sanded every inch of the dresser.
I then vacuumed off all of the sanding dust, the inside of the drawers and I also vacuumed the inside where each drawer sits
I cleaned the whole piece with Krud Kutter and shop towels again.
Once the prep process was complete, I waited 24 hours to make sure any of the chemical products I used had ample time to dry. Then I applied my paint.
THE PAINTING PROCESS:
I applied 3 coats of General Finishes Lamp Black using my Zibra 2” Palm Pro
I vacuumed the sanding dust
I added numbers to the right side of each drawer using cut-outs from the Silhouette Machine. I taped them on with painter’s tape and then lightly painted the numbers on with General Finishes Snow White.
I applied 3 coats of General Finishes High Performance Top Coat in Flat with my Zibra Chisled Wedge.
Once everything was nice and dry, I put everything back together and my husband added and re-positioned the new handles for me. The industrial handles are from Wayfair.
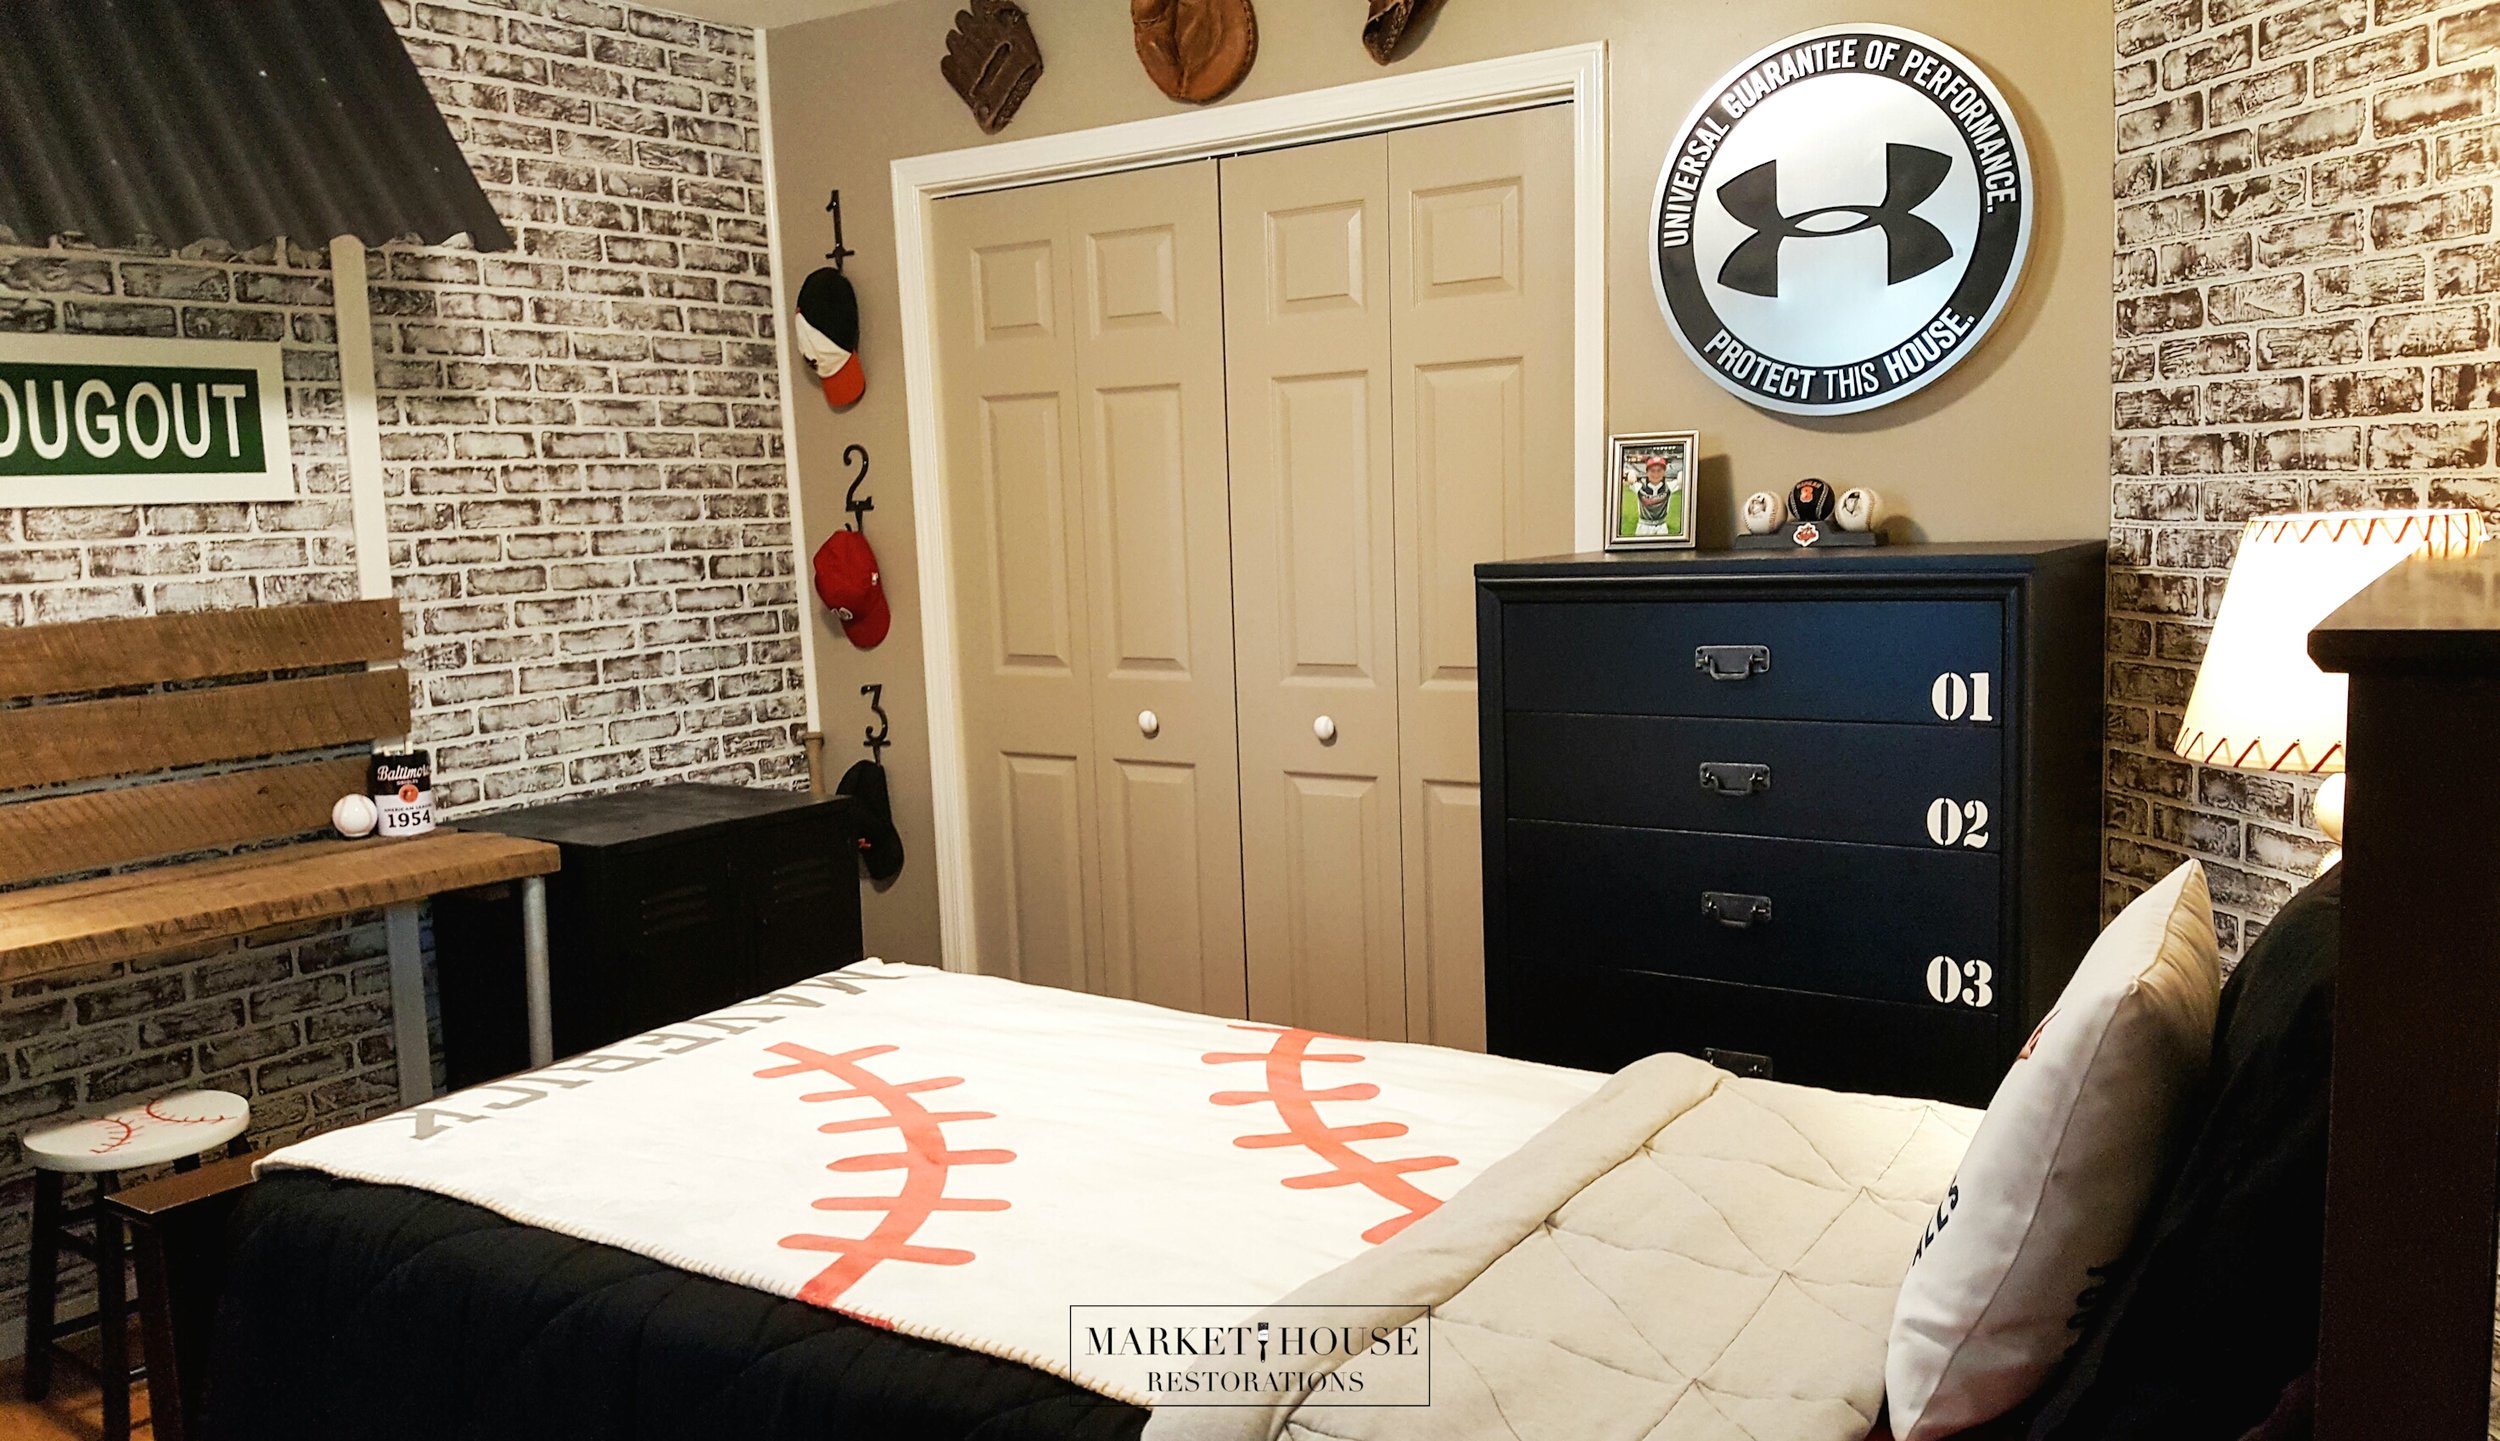
“After” picture’s of his room:
I "fluffed" the room with a few sentimental items that date back 4 generations in our families.
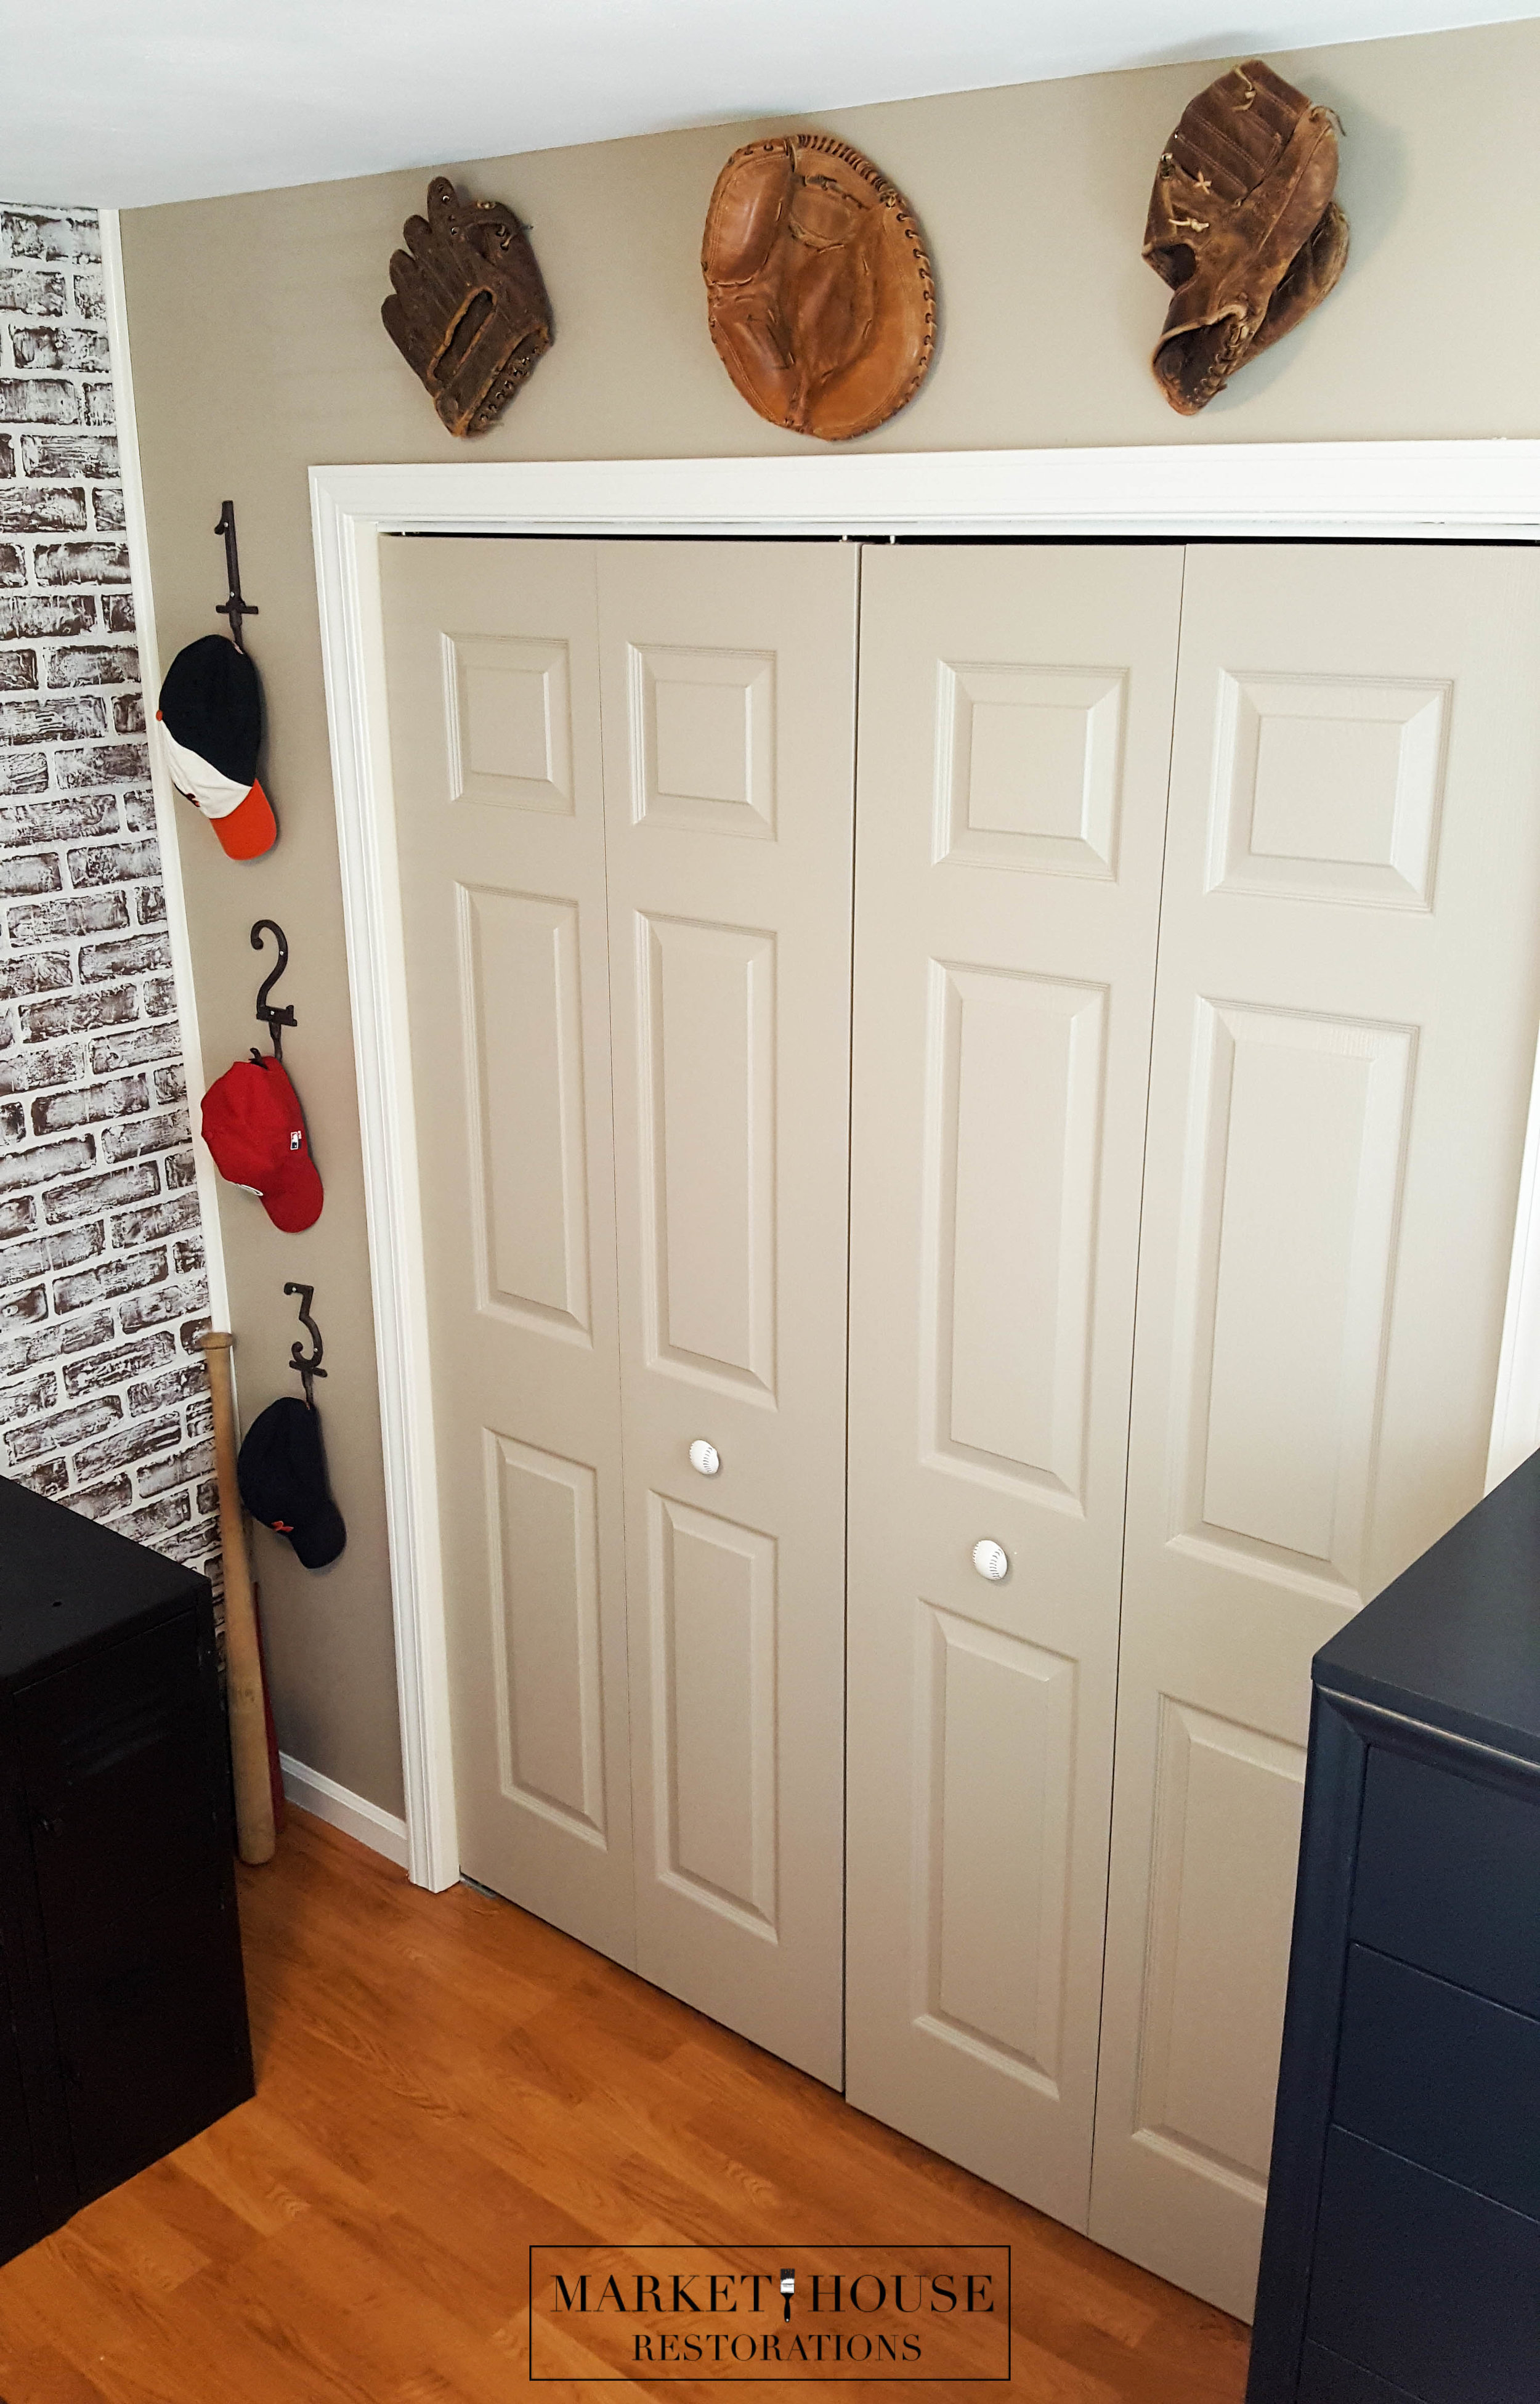
The ball gloves above his closet were used by his dad, granddad and great-granddad.
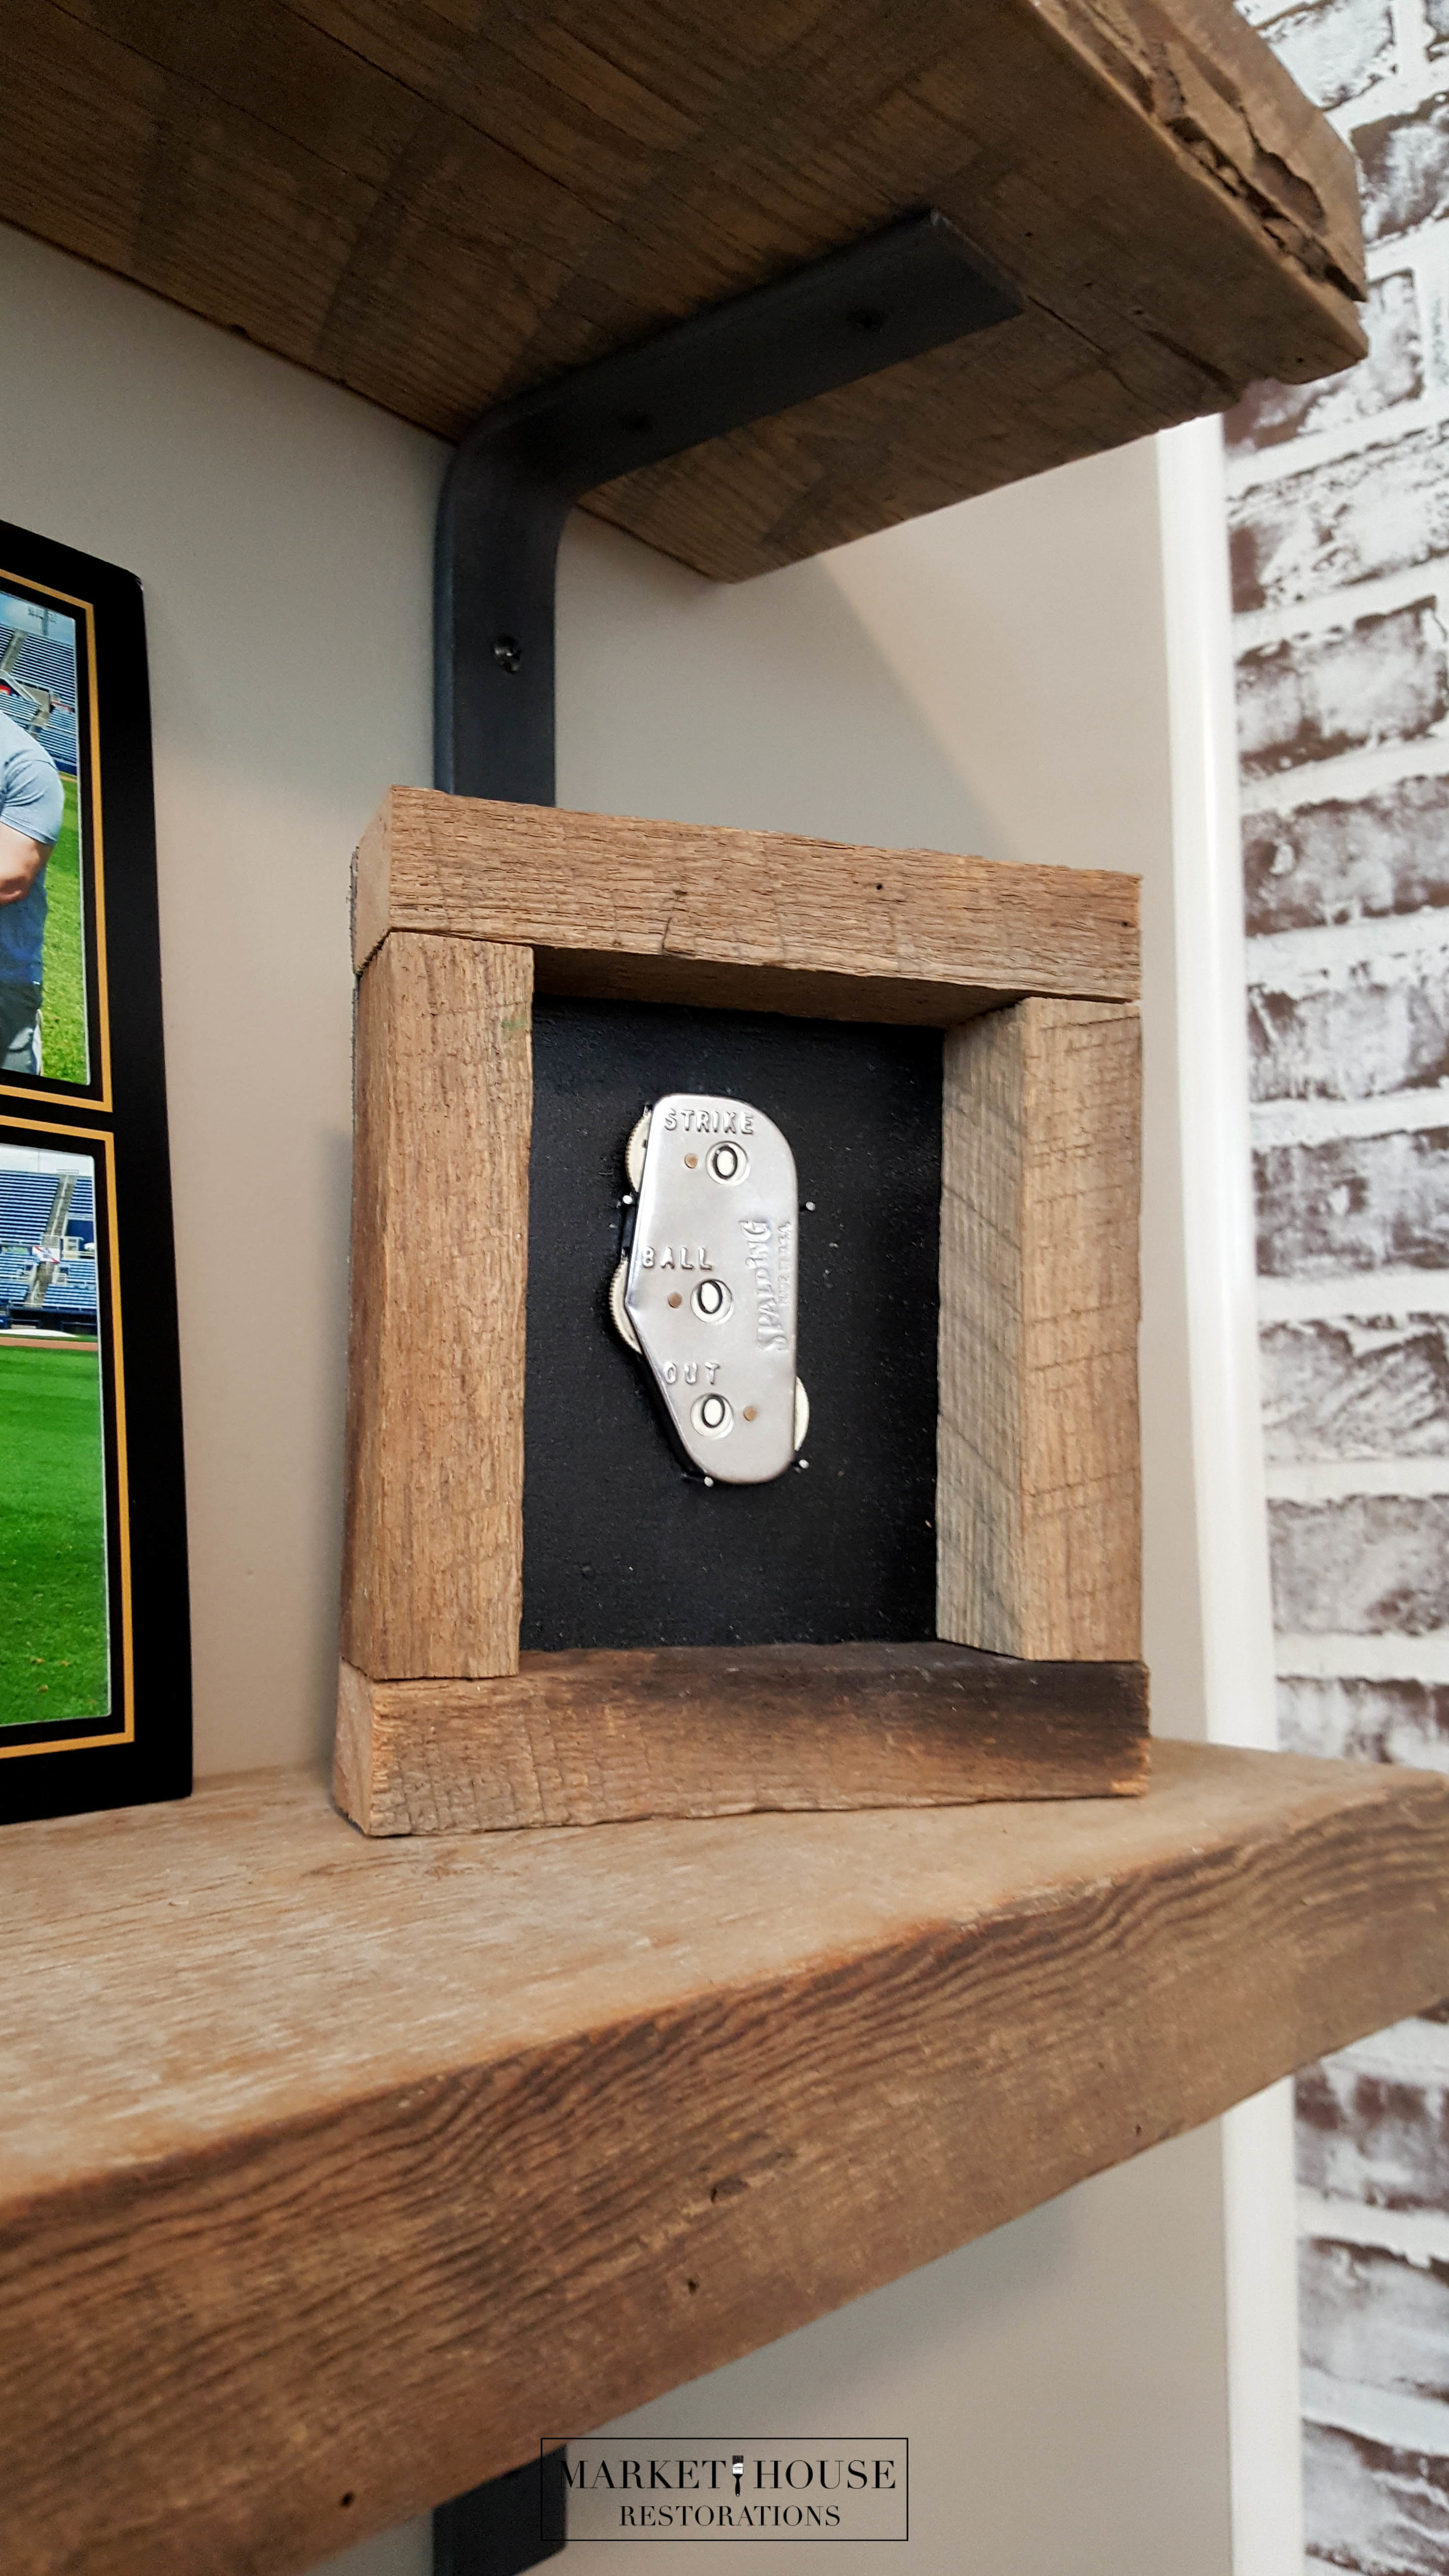
The umpire counter was used by his great-grandfather to ump games, so my husband made a little box from leftover barnwood to hang it up.
The baseballs, bats and starting lineup figures belong to his dad, who used to have them in his room when he was younger.
A few other special touches include: 1, 2, 3 (strikes you're out) baseball hat hangers (purchased from Michael’s a while back), baseball knobs on the closet doors (purchased from Hobby Lobby) and on his nightstand, baseball lamps (yard sale and zulilly.com), personalized baseball bedding (zulilly.com) and a couple of cute pictures of him and his teams. The cool Under Armour sign was given to me when I worked in the Sport Performance world, so I added it to his room to give it a nice athletic feel!

It was such a fun room to redo and it was pocket friendly since we did all of the work ourselves. Plus, most of the items were reclaimed or I purchased them from yard sales. We all love to hang out in the room now! I definitely think we hit it out of the park!
It was also a HUGE honor to have my son’s baseball room featured on Project Junior’s website and Instagram page! Here is the featured article .
As always, thank you so much for tuning in this week for #MondayMakeoversWithFallon. If you want to save this blog post so you can refer back to it, make sure you pin it to your Pinterest page and/or feel free to share it elsewhere. I look forward being with you next Monday and don’t forget to tune in tomorrow for my educating video tutorial/tip for #TuesdayTipsWithFallon!!
*Please note, this post does contain affiliate links.


Did you know I have an eBook plus three different staging and styling guides that help you stage your furniture!? Between all three guides you receive over 500 different ways to style and stage different pieces of furniture. Yes, 500!! They are not just for the furniture artist either. Maybe you are planning on selling your home and need help staging your furniture so it doesn’t look cluttered or maybe you just have no clue how to style the furniture that you currently have and you want it to look nice?! No worries! These are for you!! Between all three guides and my second edition eBook you get over 200 pages of information! You do not have to worry about staging and styling your furniture ever again!!Here is the link to my eBook, Your Virtual Storefront. The Complete Guide to Staging Painted Furniture. It jammed packed information that will help you take your staging to the next level! I also have three separate staging and styling guides that help you stage specific pieces of furniture.
Here is a breakdown of my eBook and Guides:
*Your Virtual Storefront. The Complete Guide to Staging Your Painted Furniture. 2nd EDITION: Everything you need to know to help you stage your furniture from, photography, the photo editing process, lighting, staging areas/locations, information about logo/watermarks…just to name a handful of the topics.
*The Bedroom Furniture Guide: Staging and Styling Chest of Drawers, Dressers, Nightstands, Wardrobes, Blanket Chests, Vanities, Beds and Bedroom Sets)
*The Dining Room Furniture Guide: Staging and Styling Buffets/Sideboards, China Hutches, Glass Front China Cabinets and Tables & Chairs
*The Everyday Living Furniture Guide: Staging and Styling Desks, Multi-Purpose Pieces, Sofa Tables, TV Stands, Side Tables, Coffee Tables, Benches and Bookshelves
I appreciate you stopping by!!
Make sure you check out my other #MondayMakeoversWithFallon blog posts with FREE step-by-step guides. Just click the pictures below!