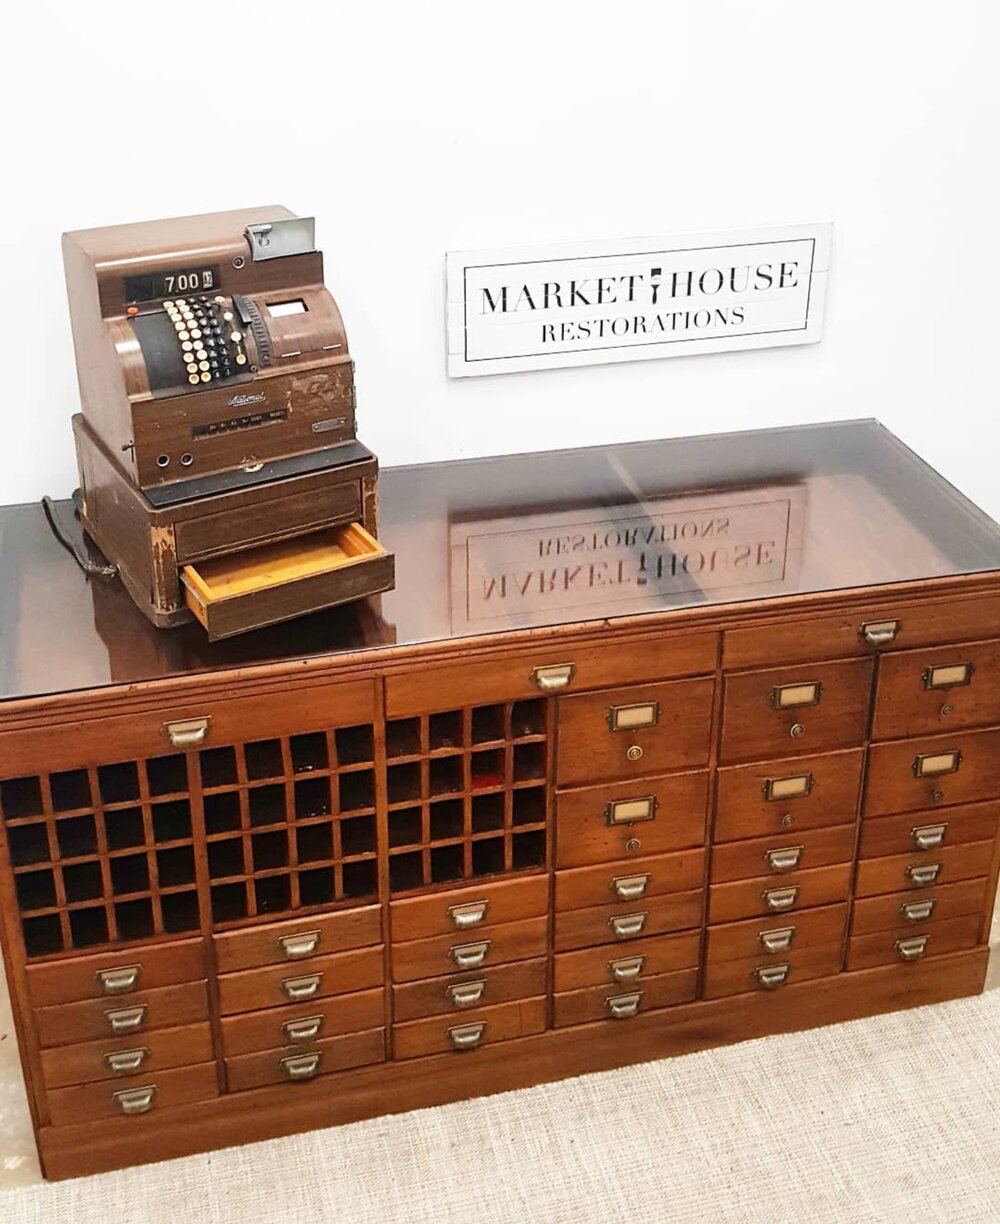
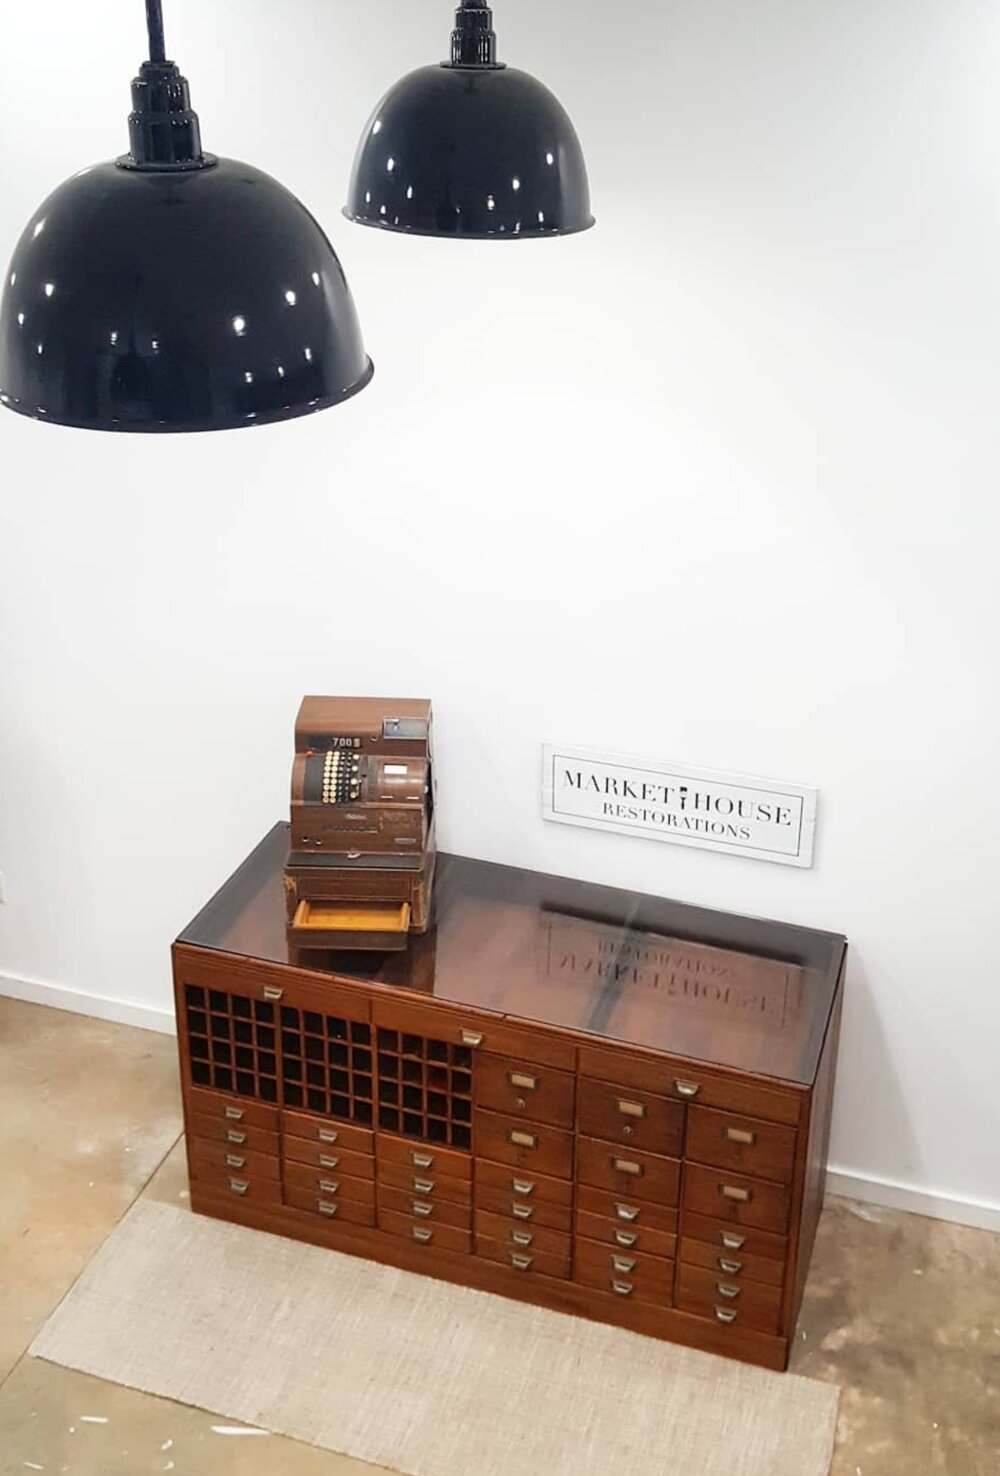
Antique General Store Apothecary Cabinet Makeover #MondayMakeoversWithFallon
/#MondayMakeoversWithFallon
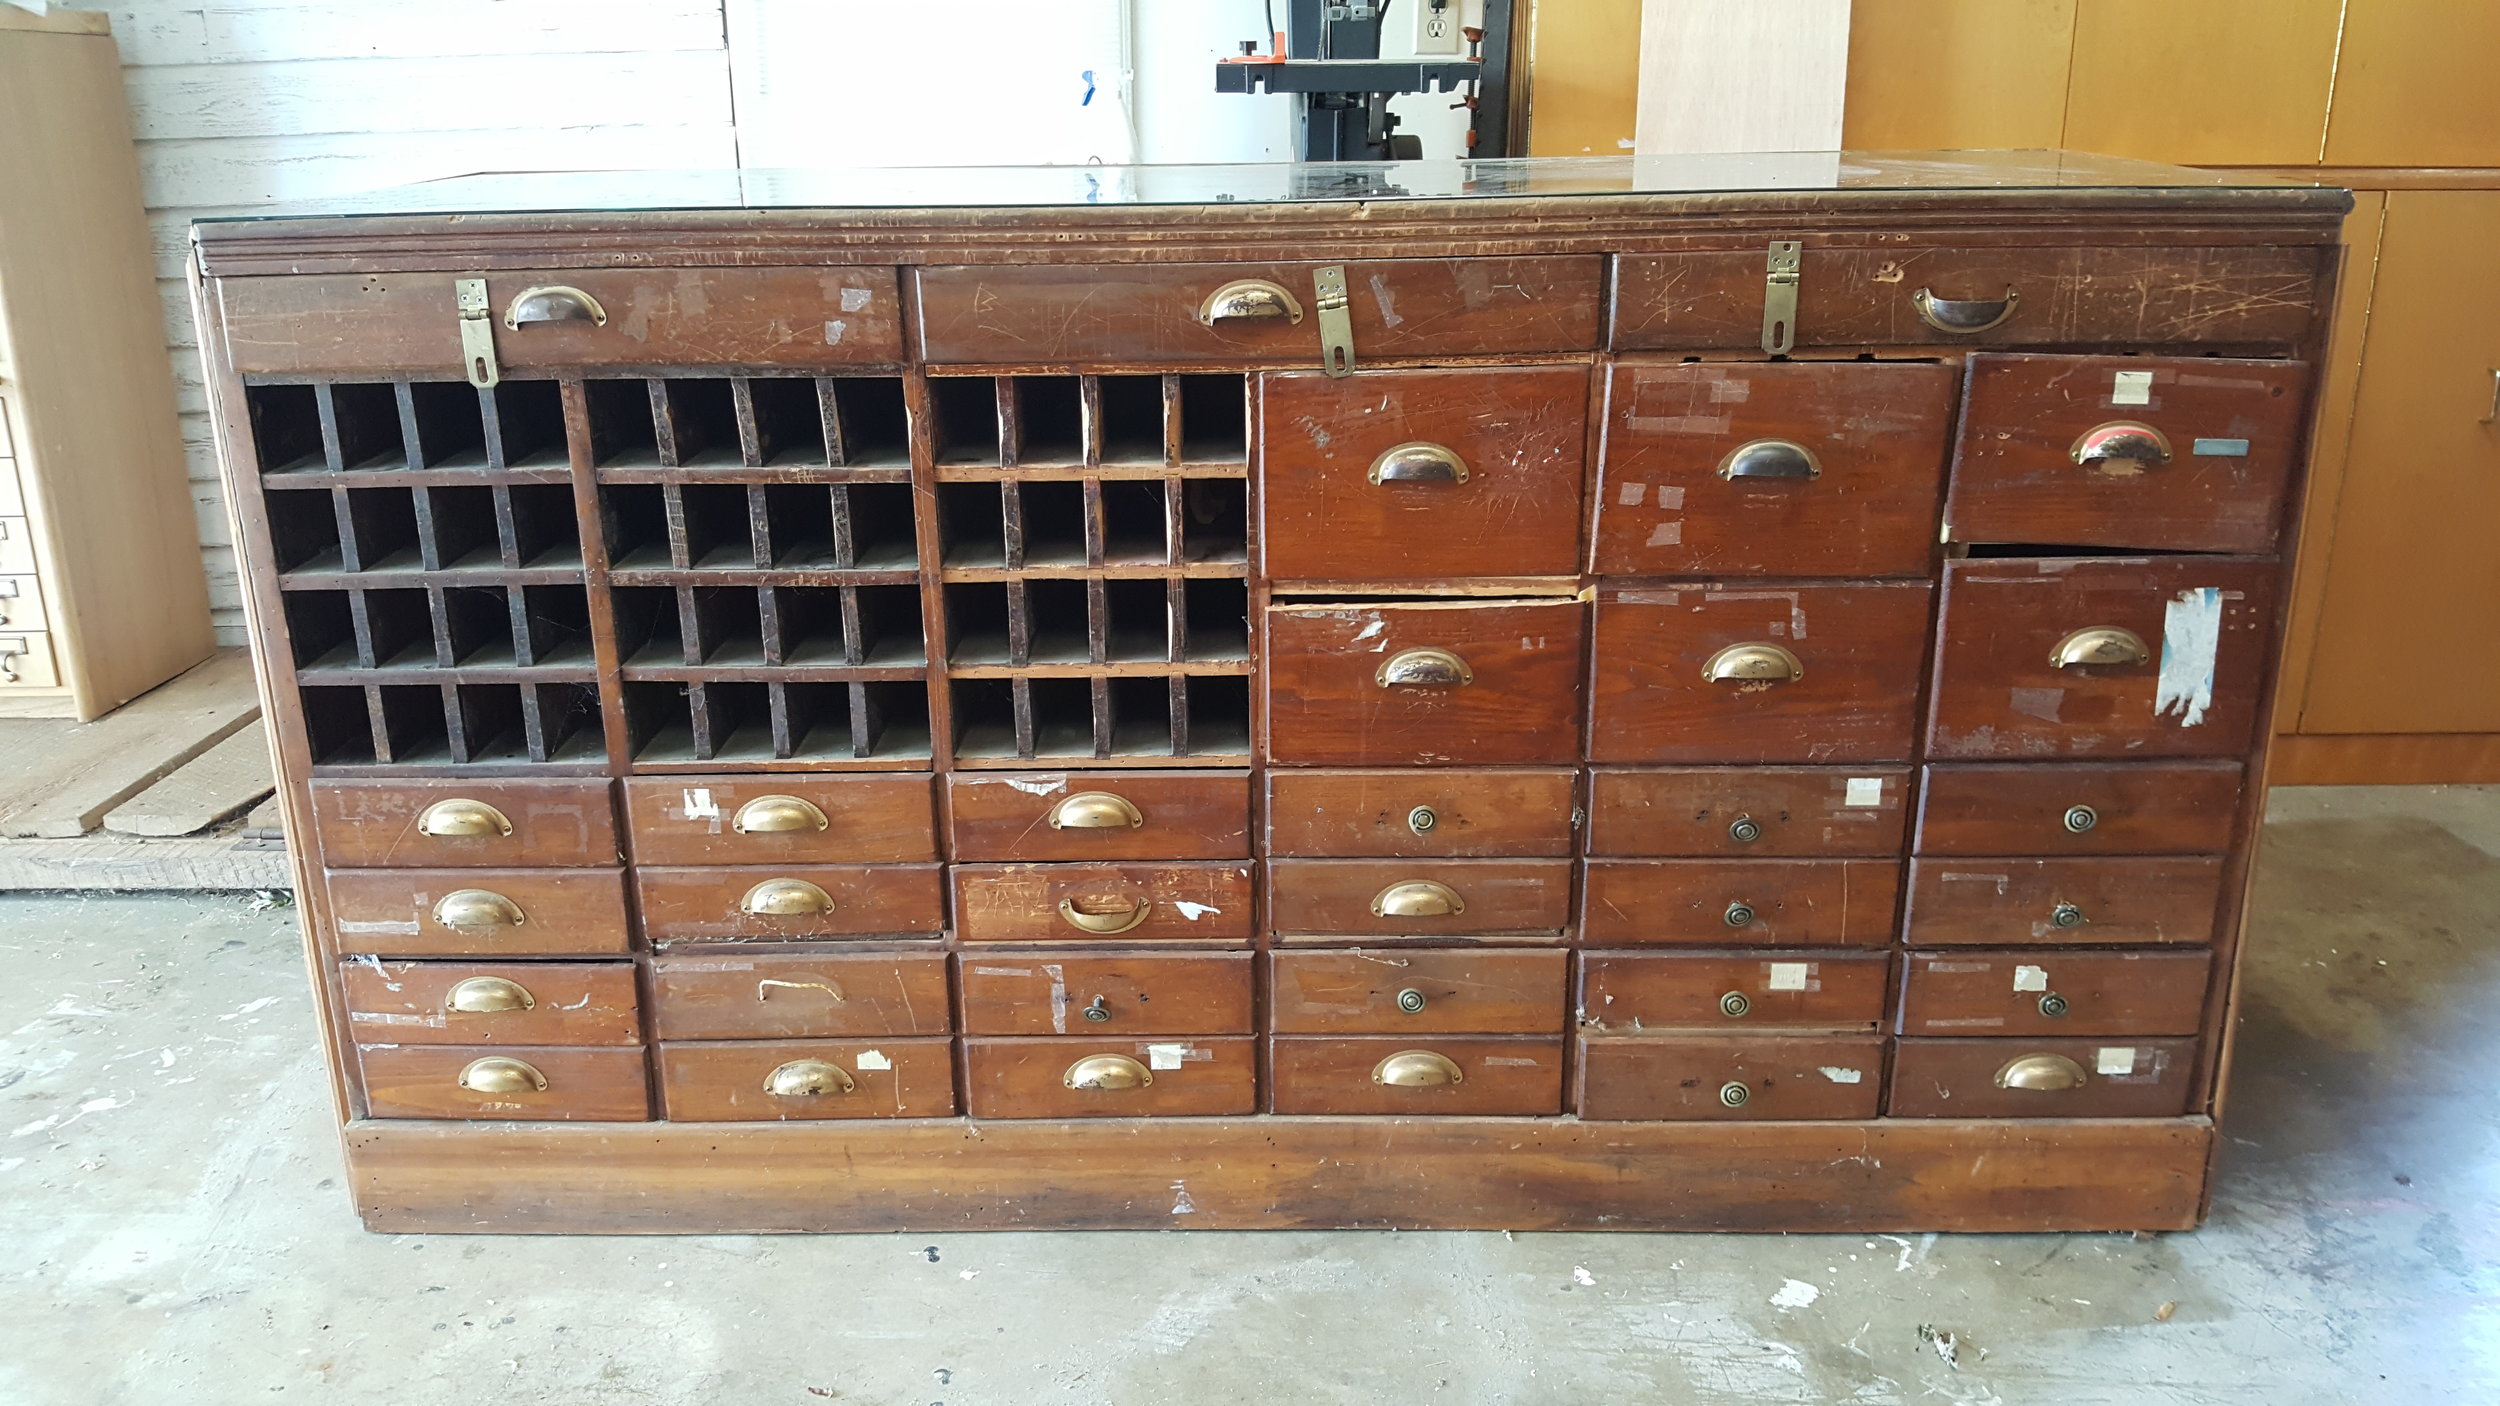
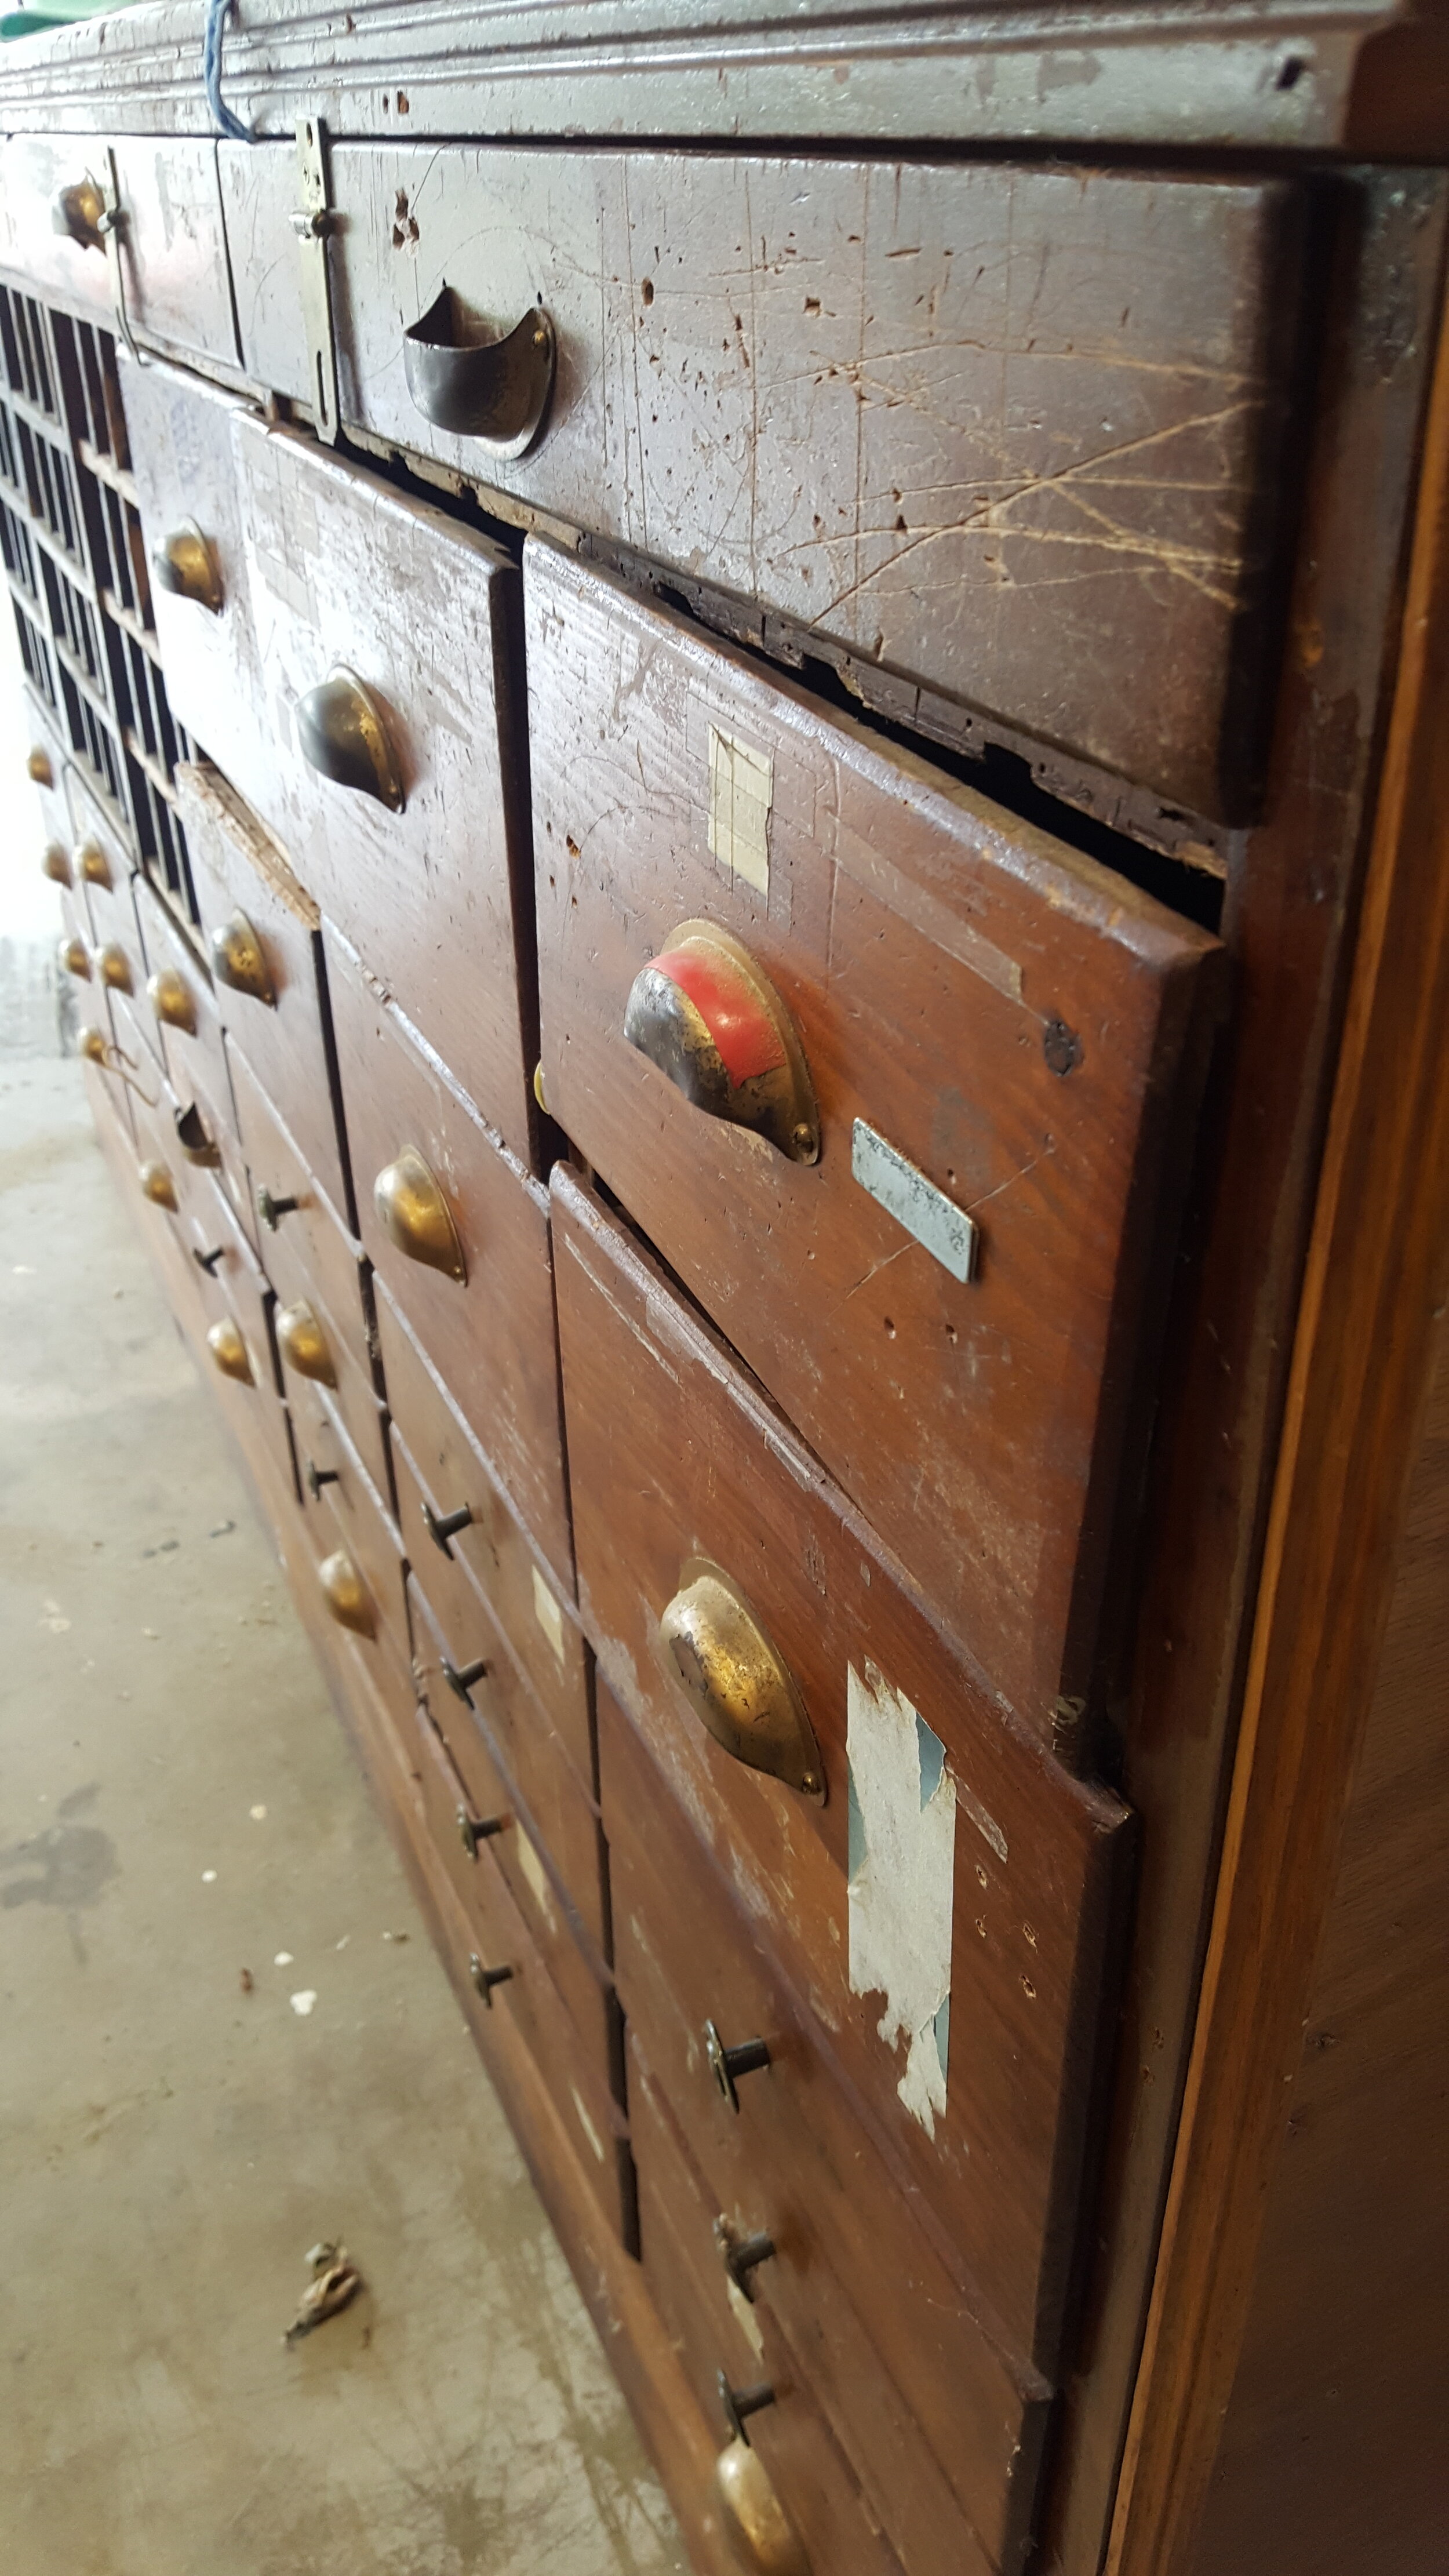
As SOON as I saw this piece I fell in love with it! Honestly, I didn’t realize how bad of shape it was in until I got it home and saw how broken and worn down it truly was, but it had a story and a history that most pieces of furniture don’t have the chance to tell so I was determined to make it beautiful again. I knew I didn’t want to paint this piece, in fact, I wanted to make it look as original as possible, but not perfect because I loved the scrapes and marks that the piece had collected on it over the years.
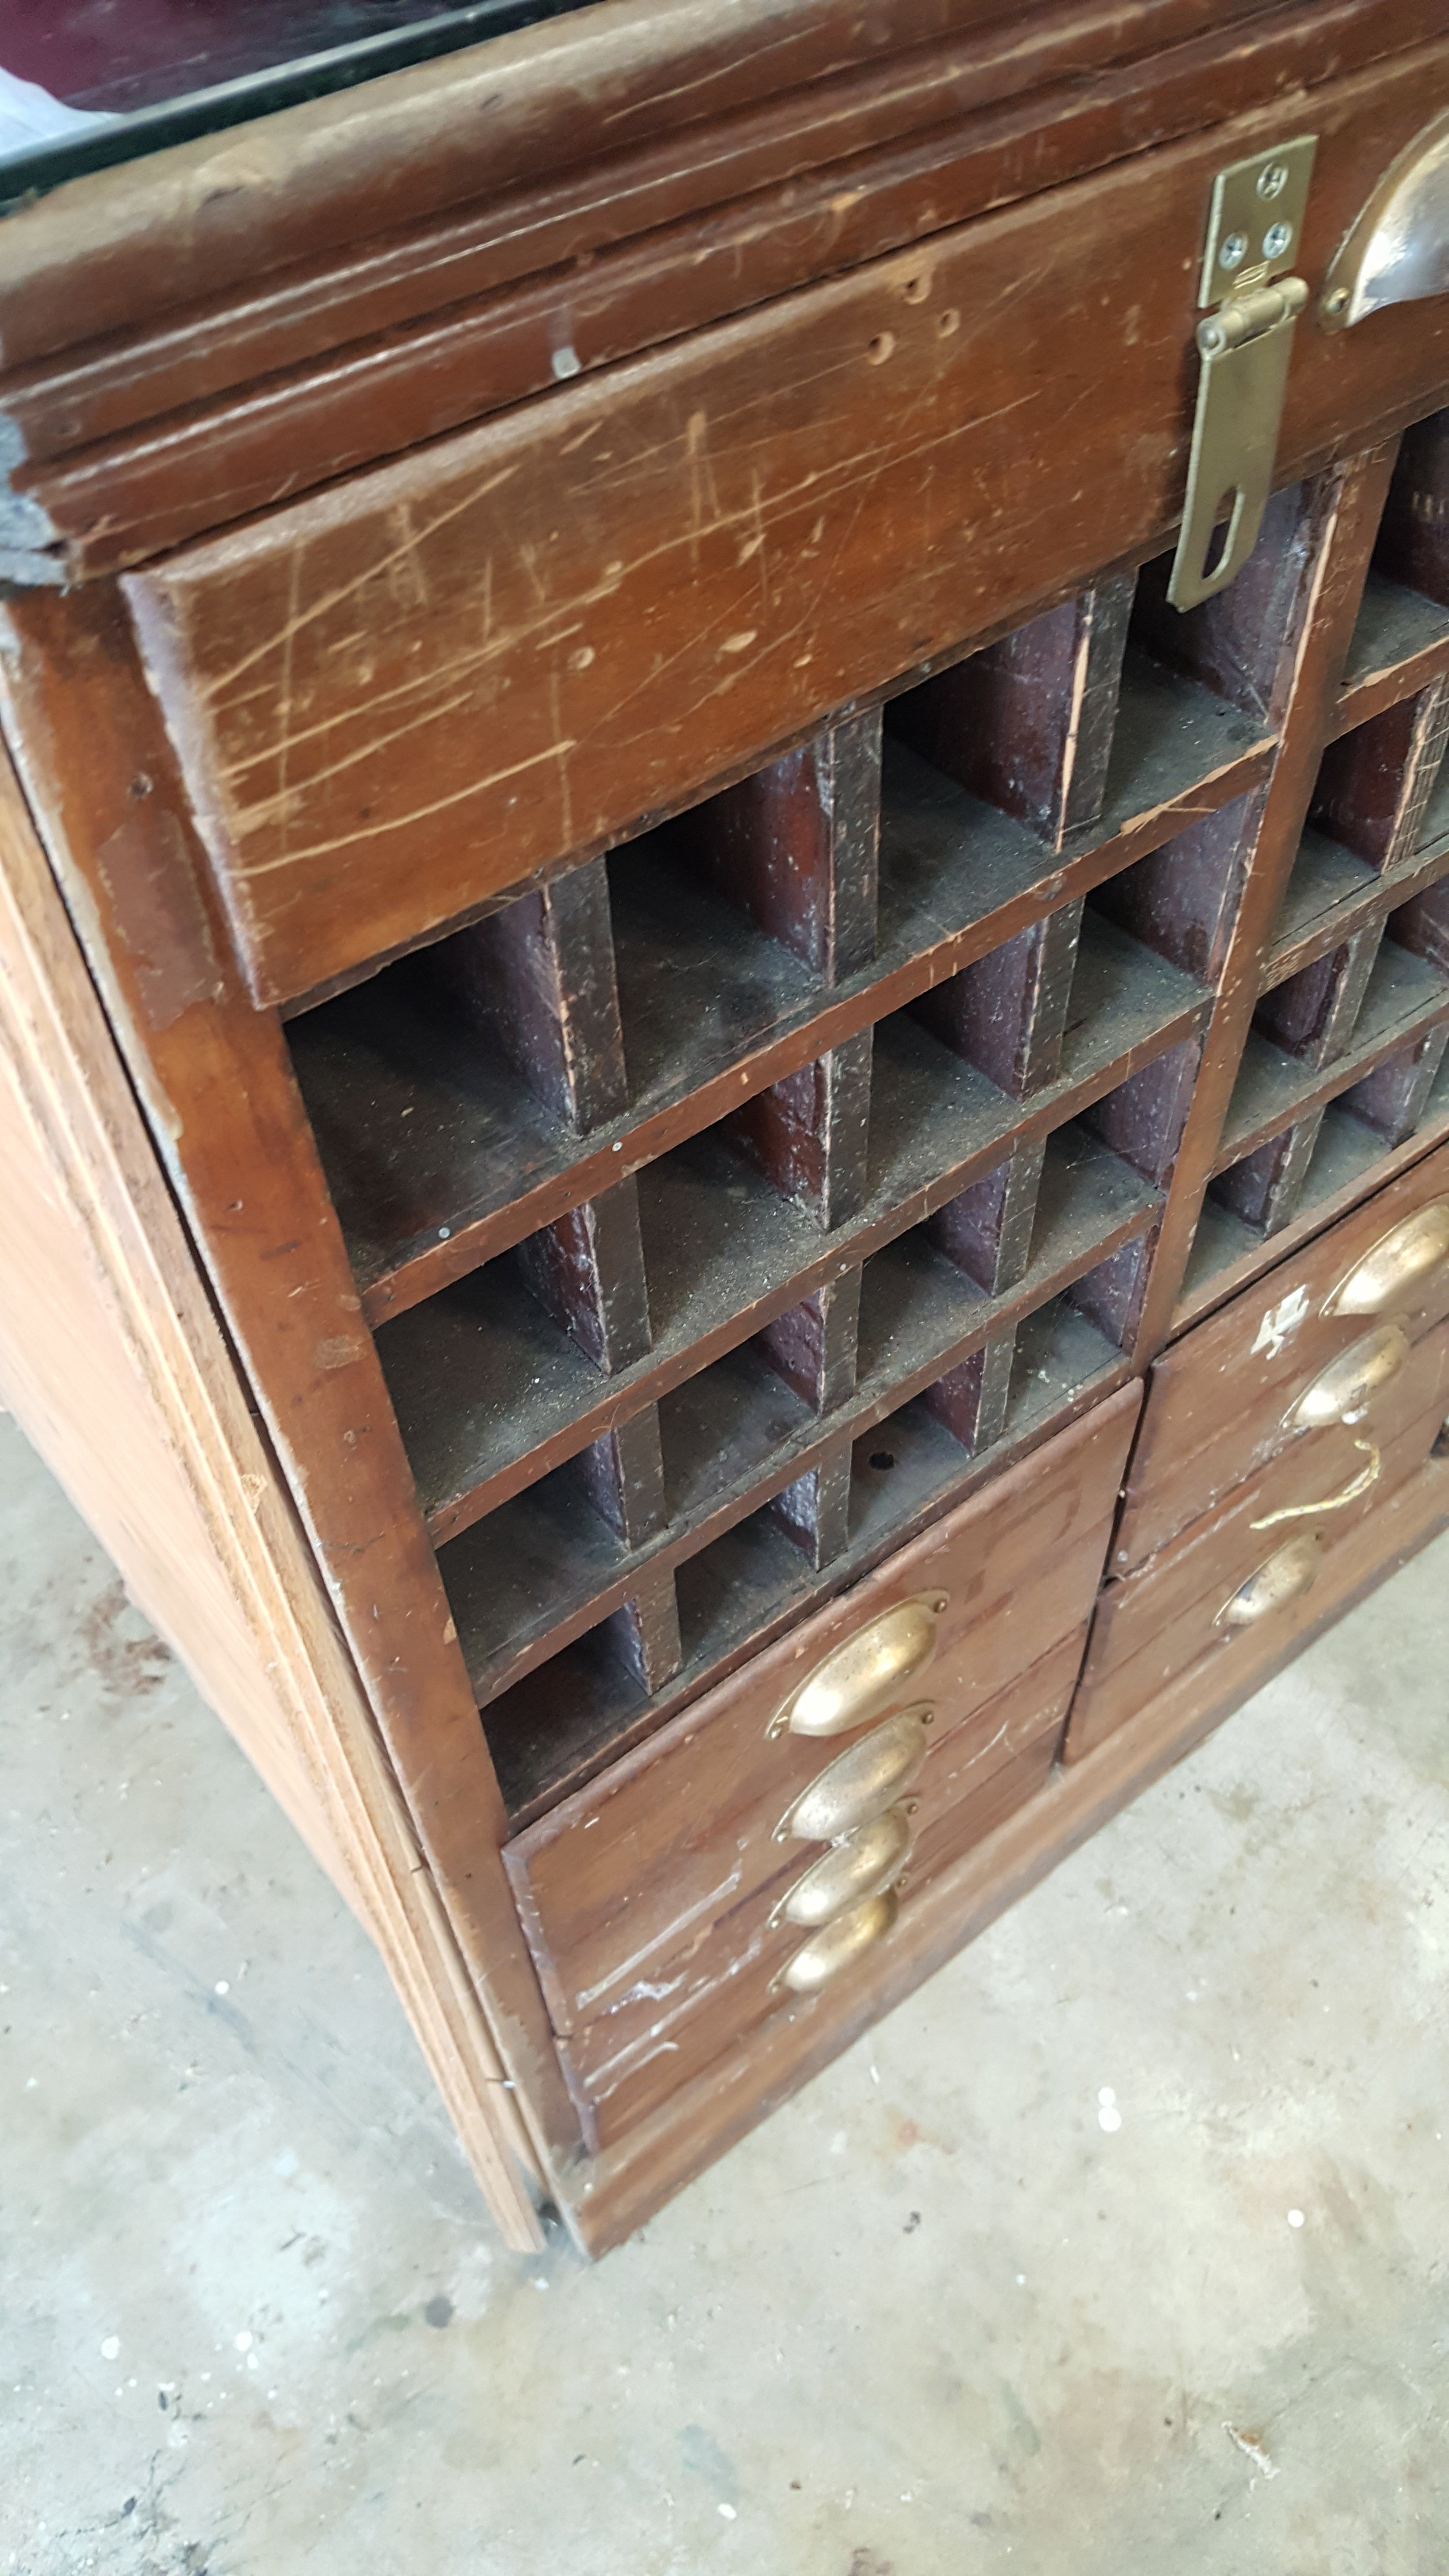
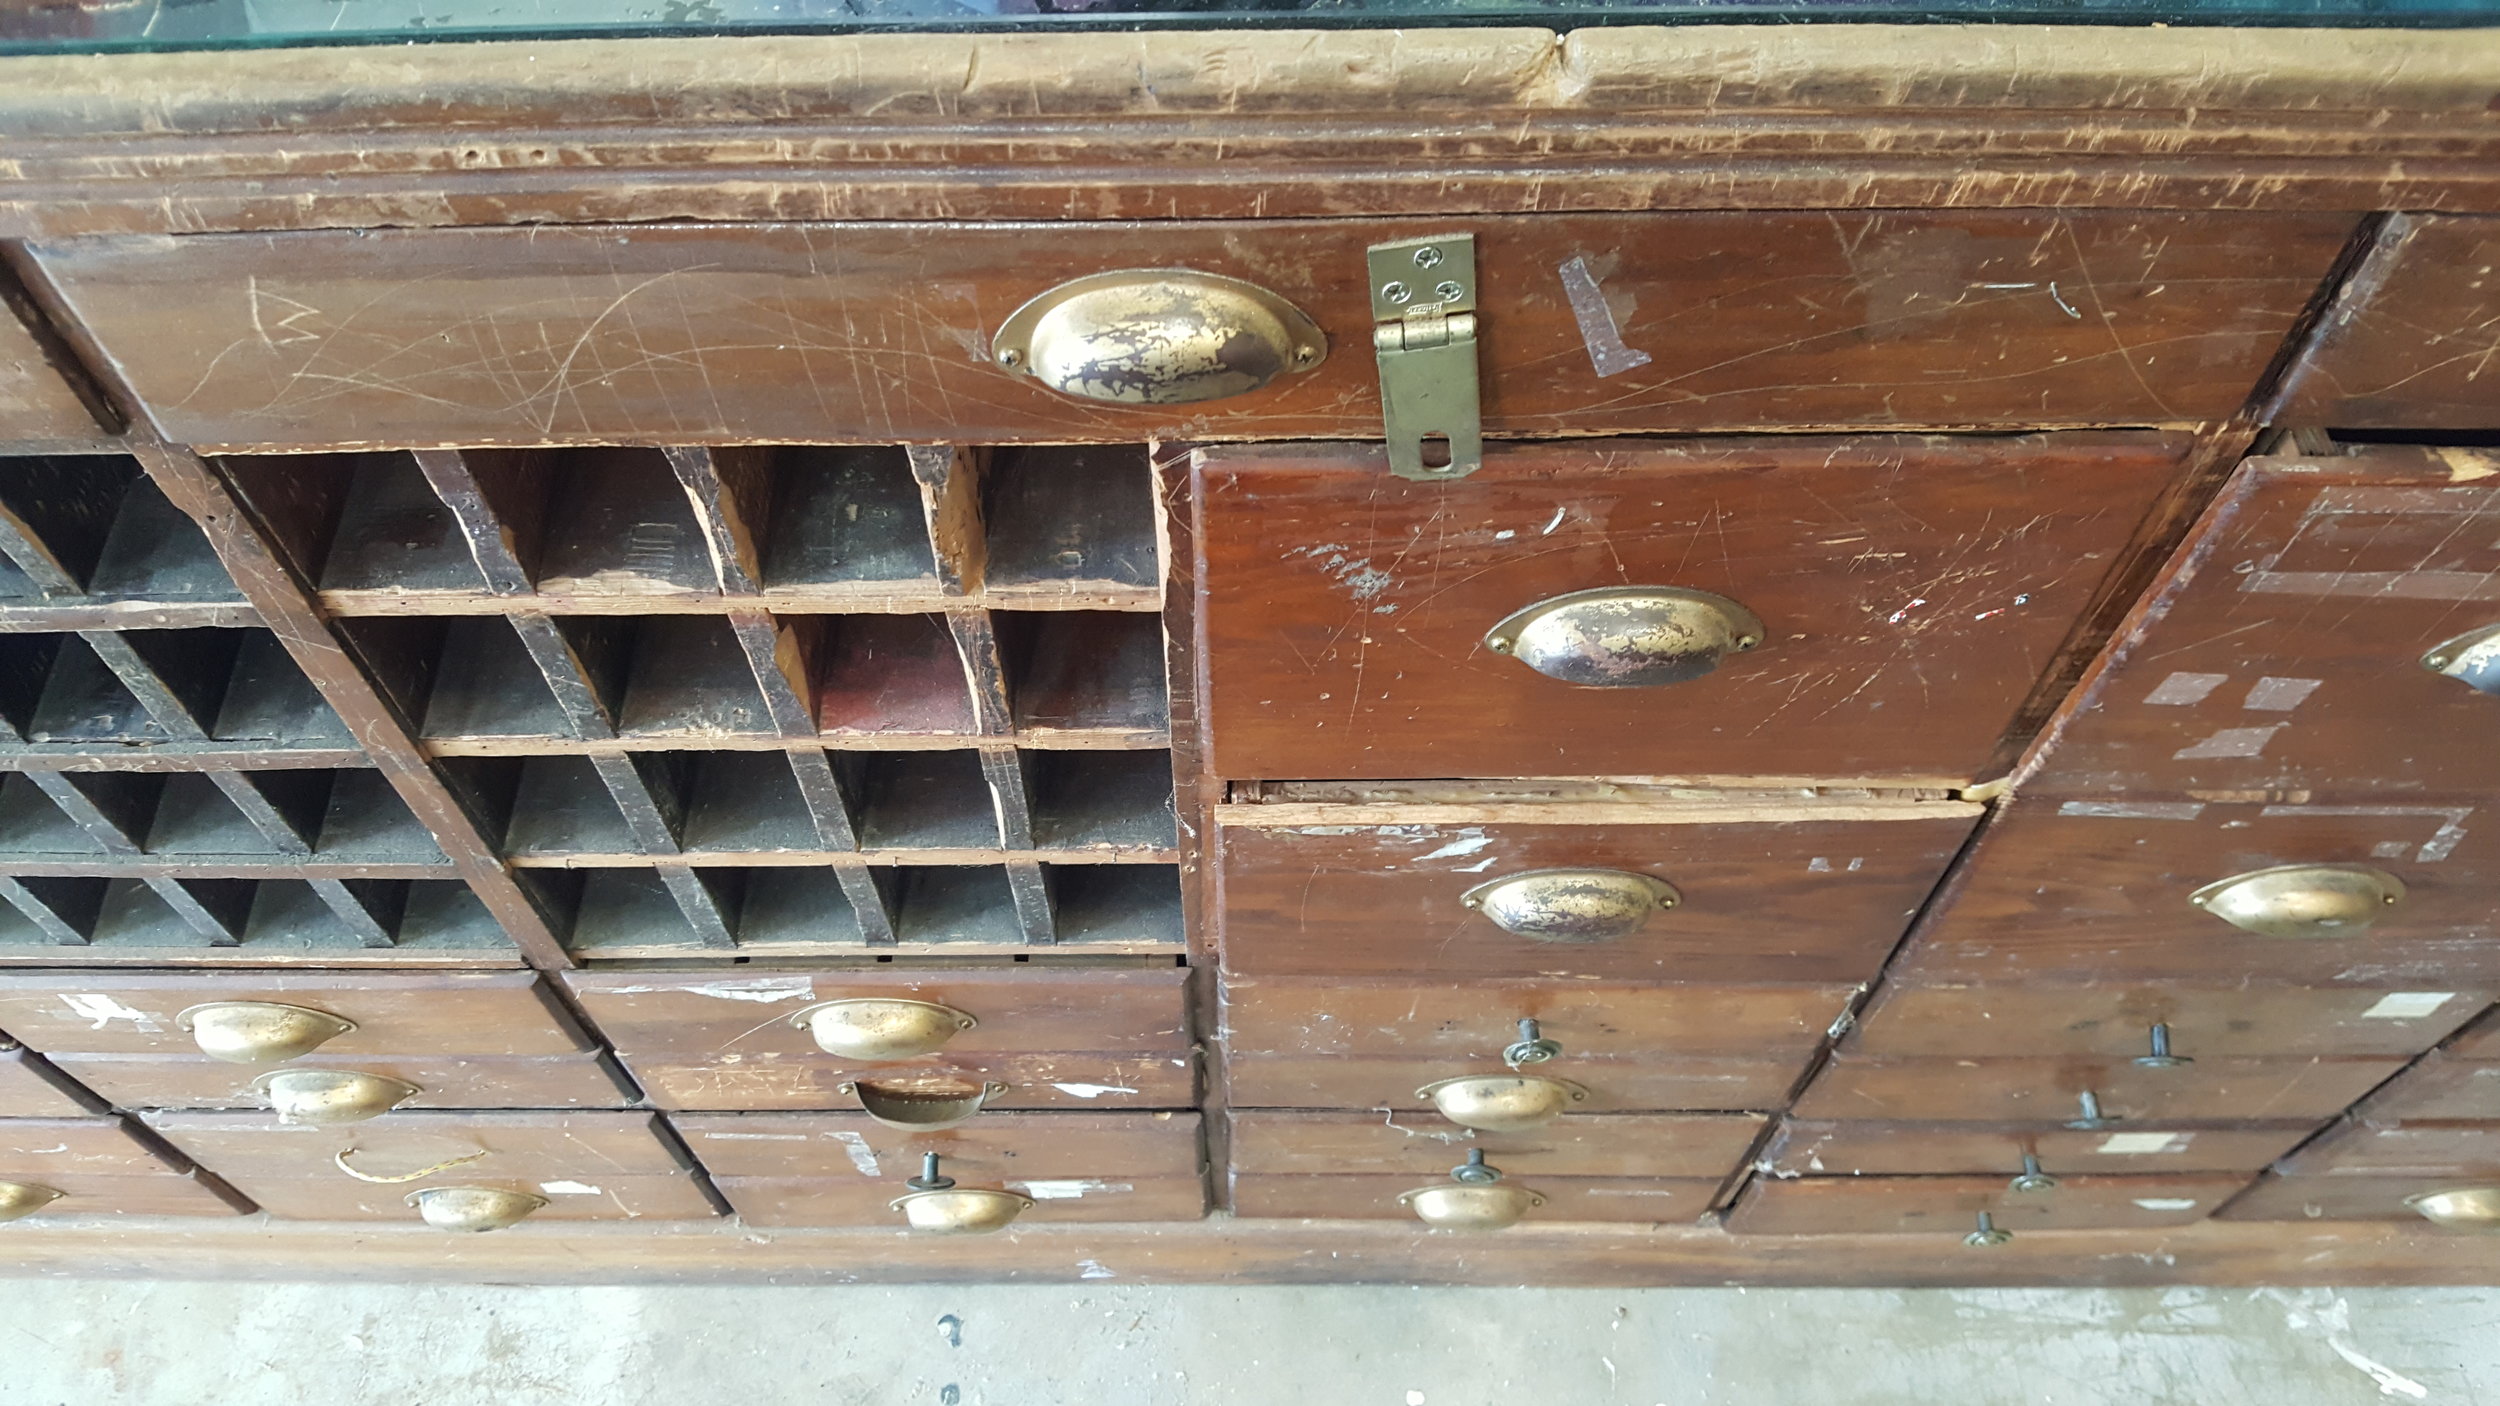
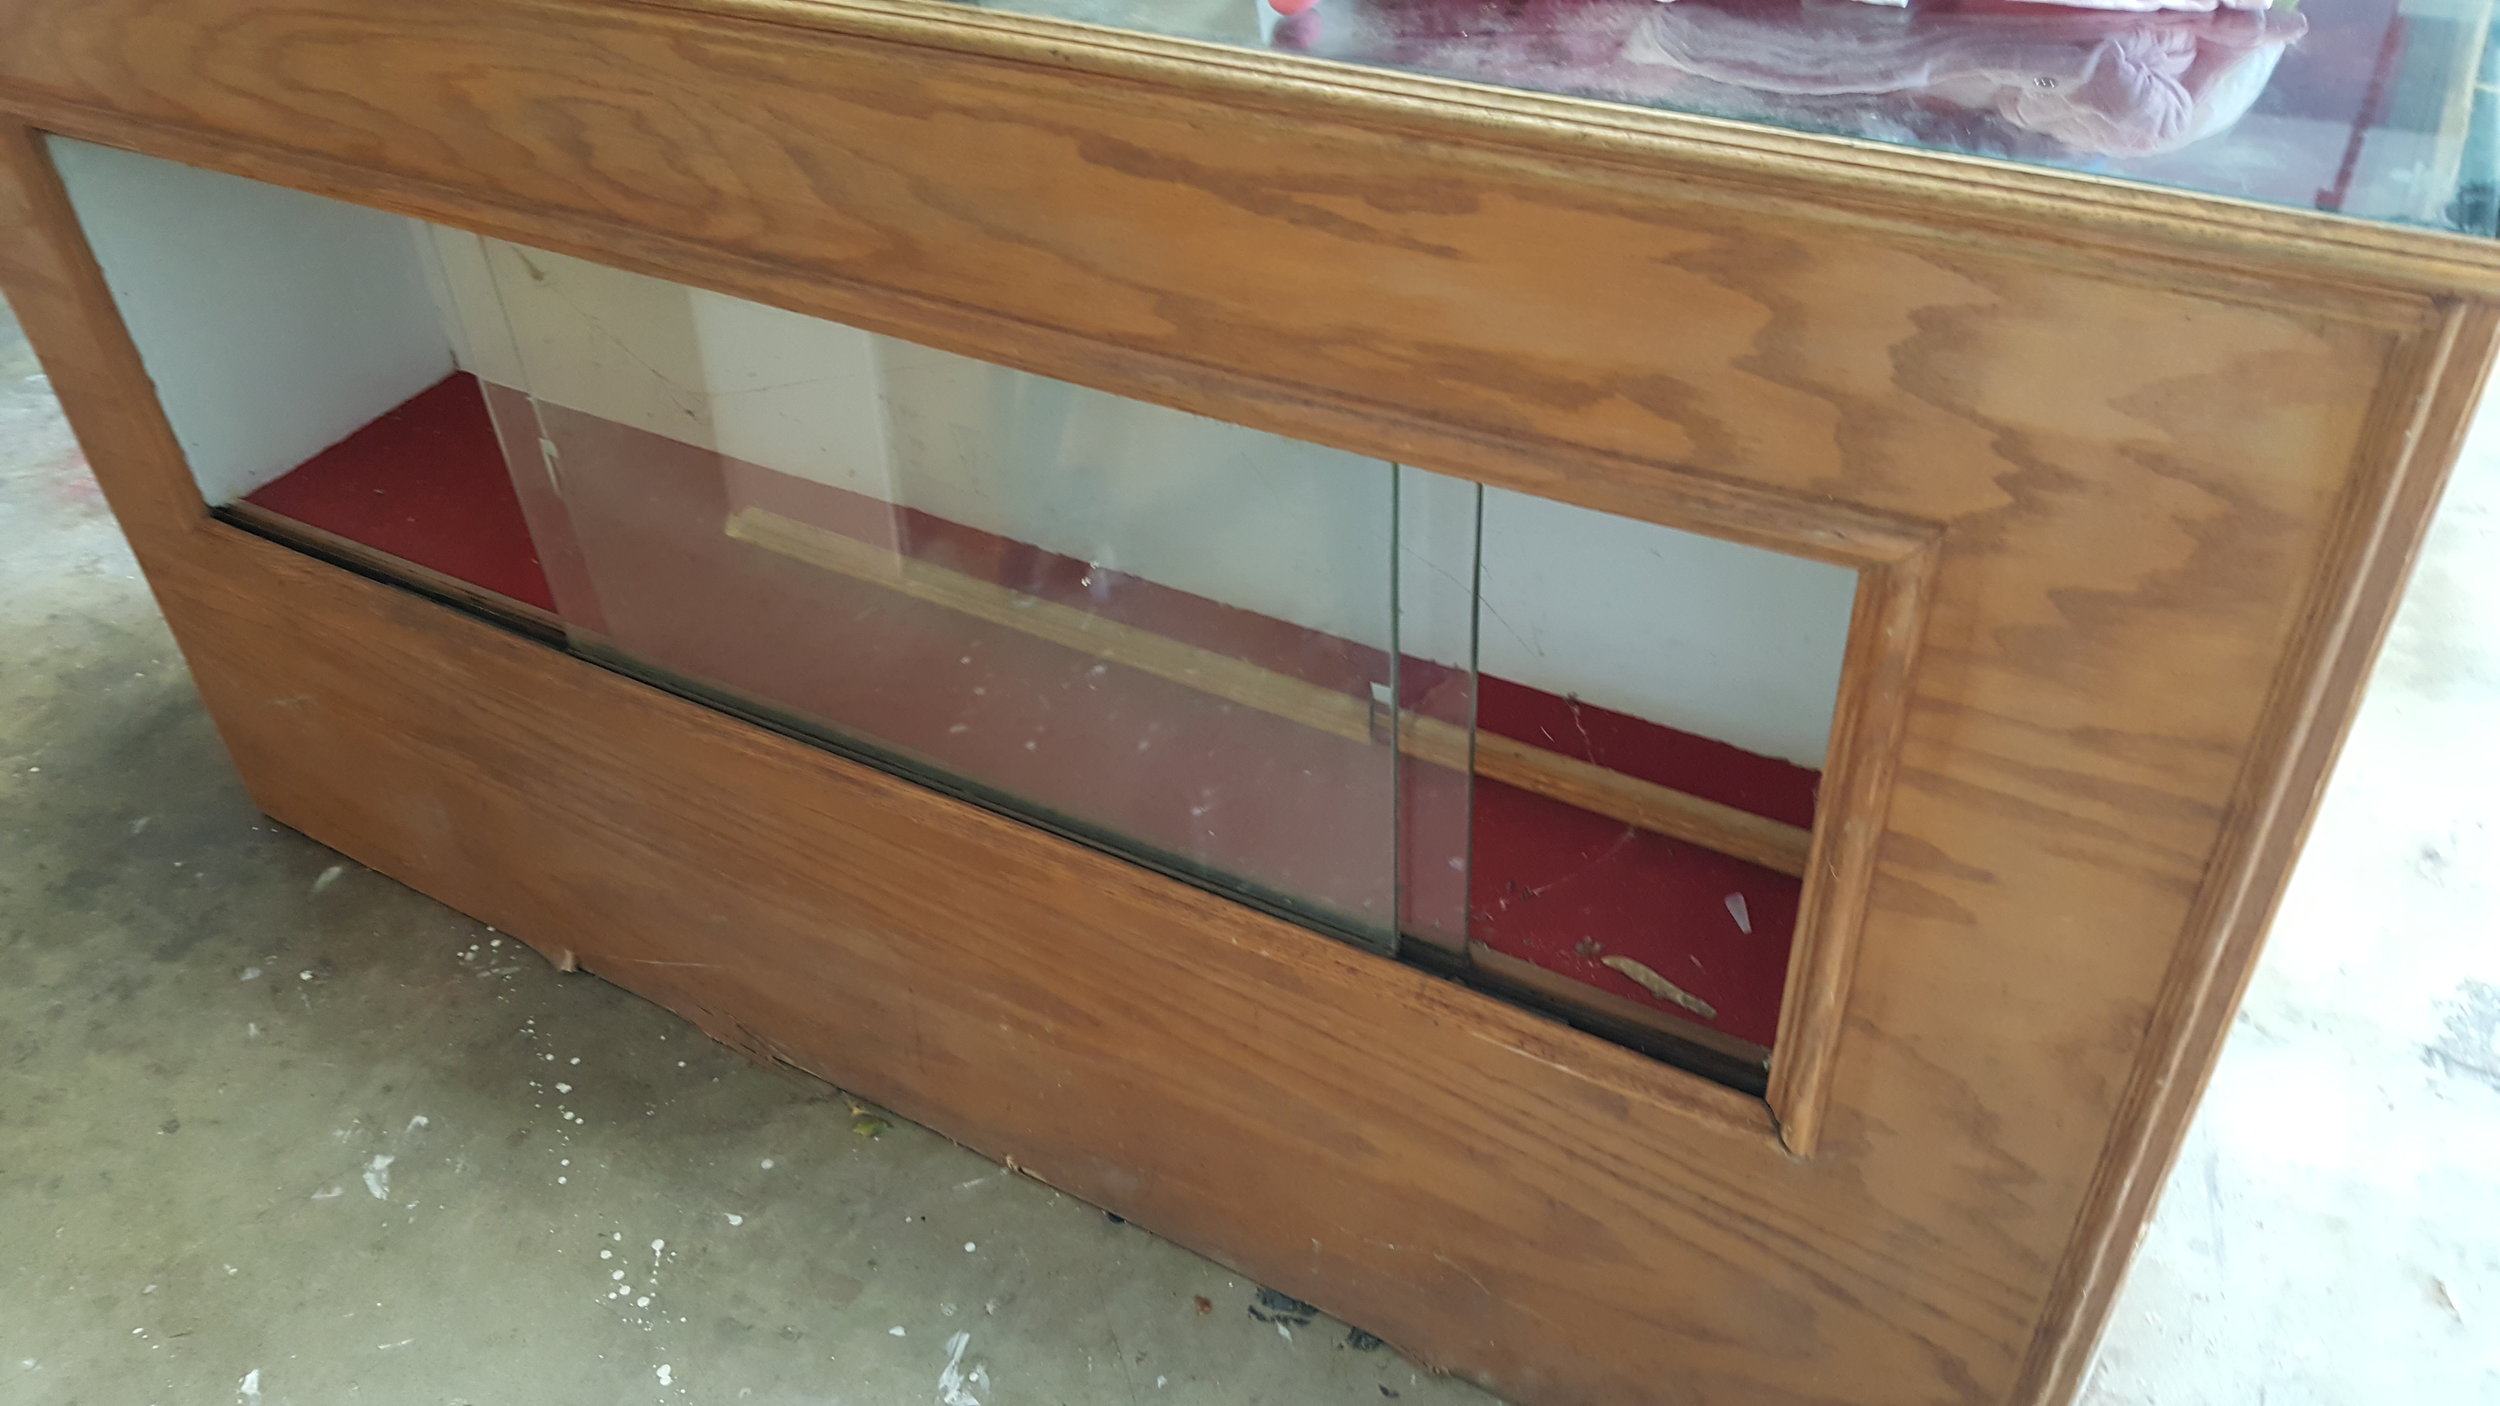
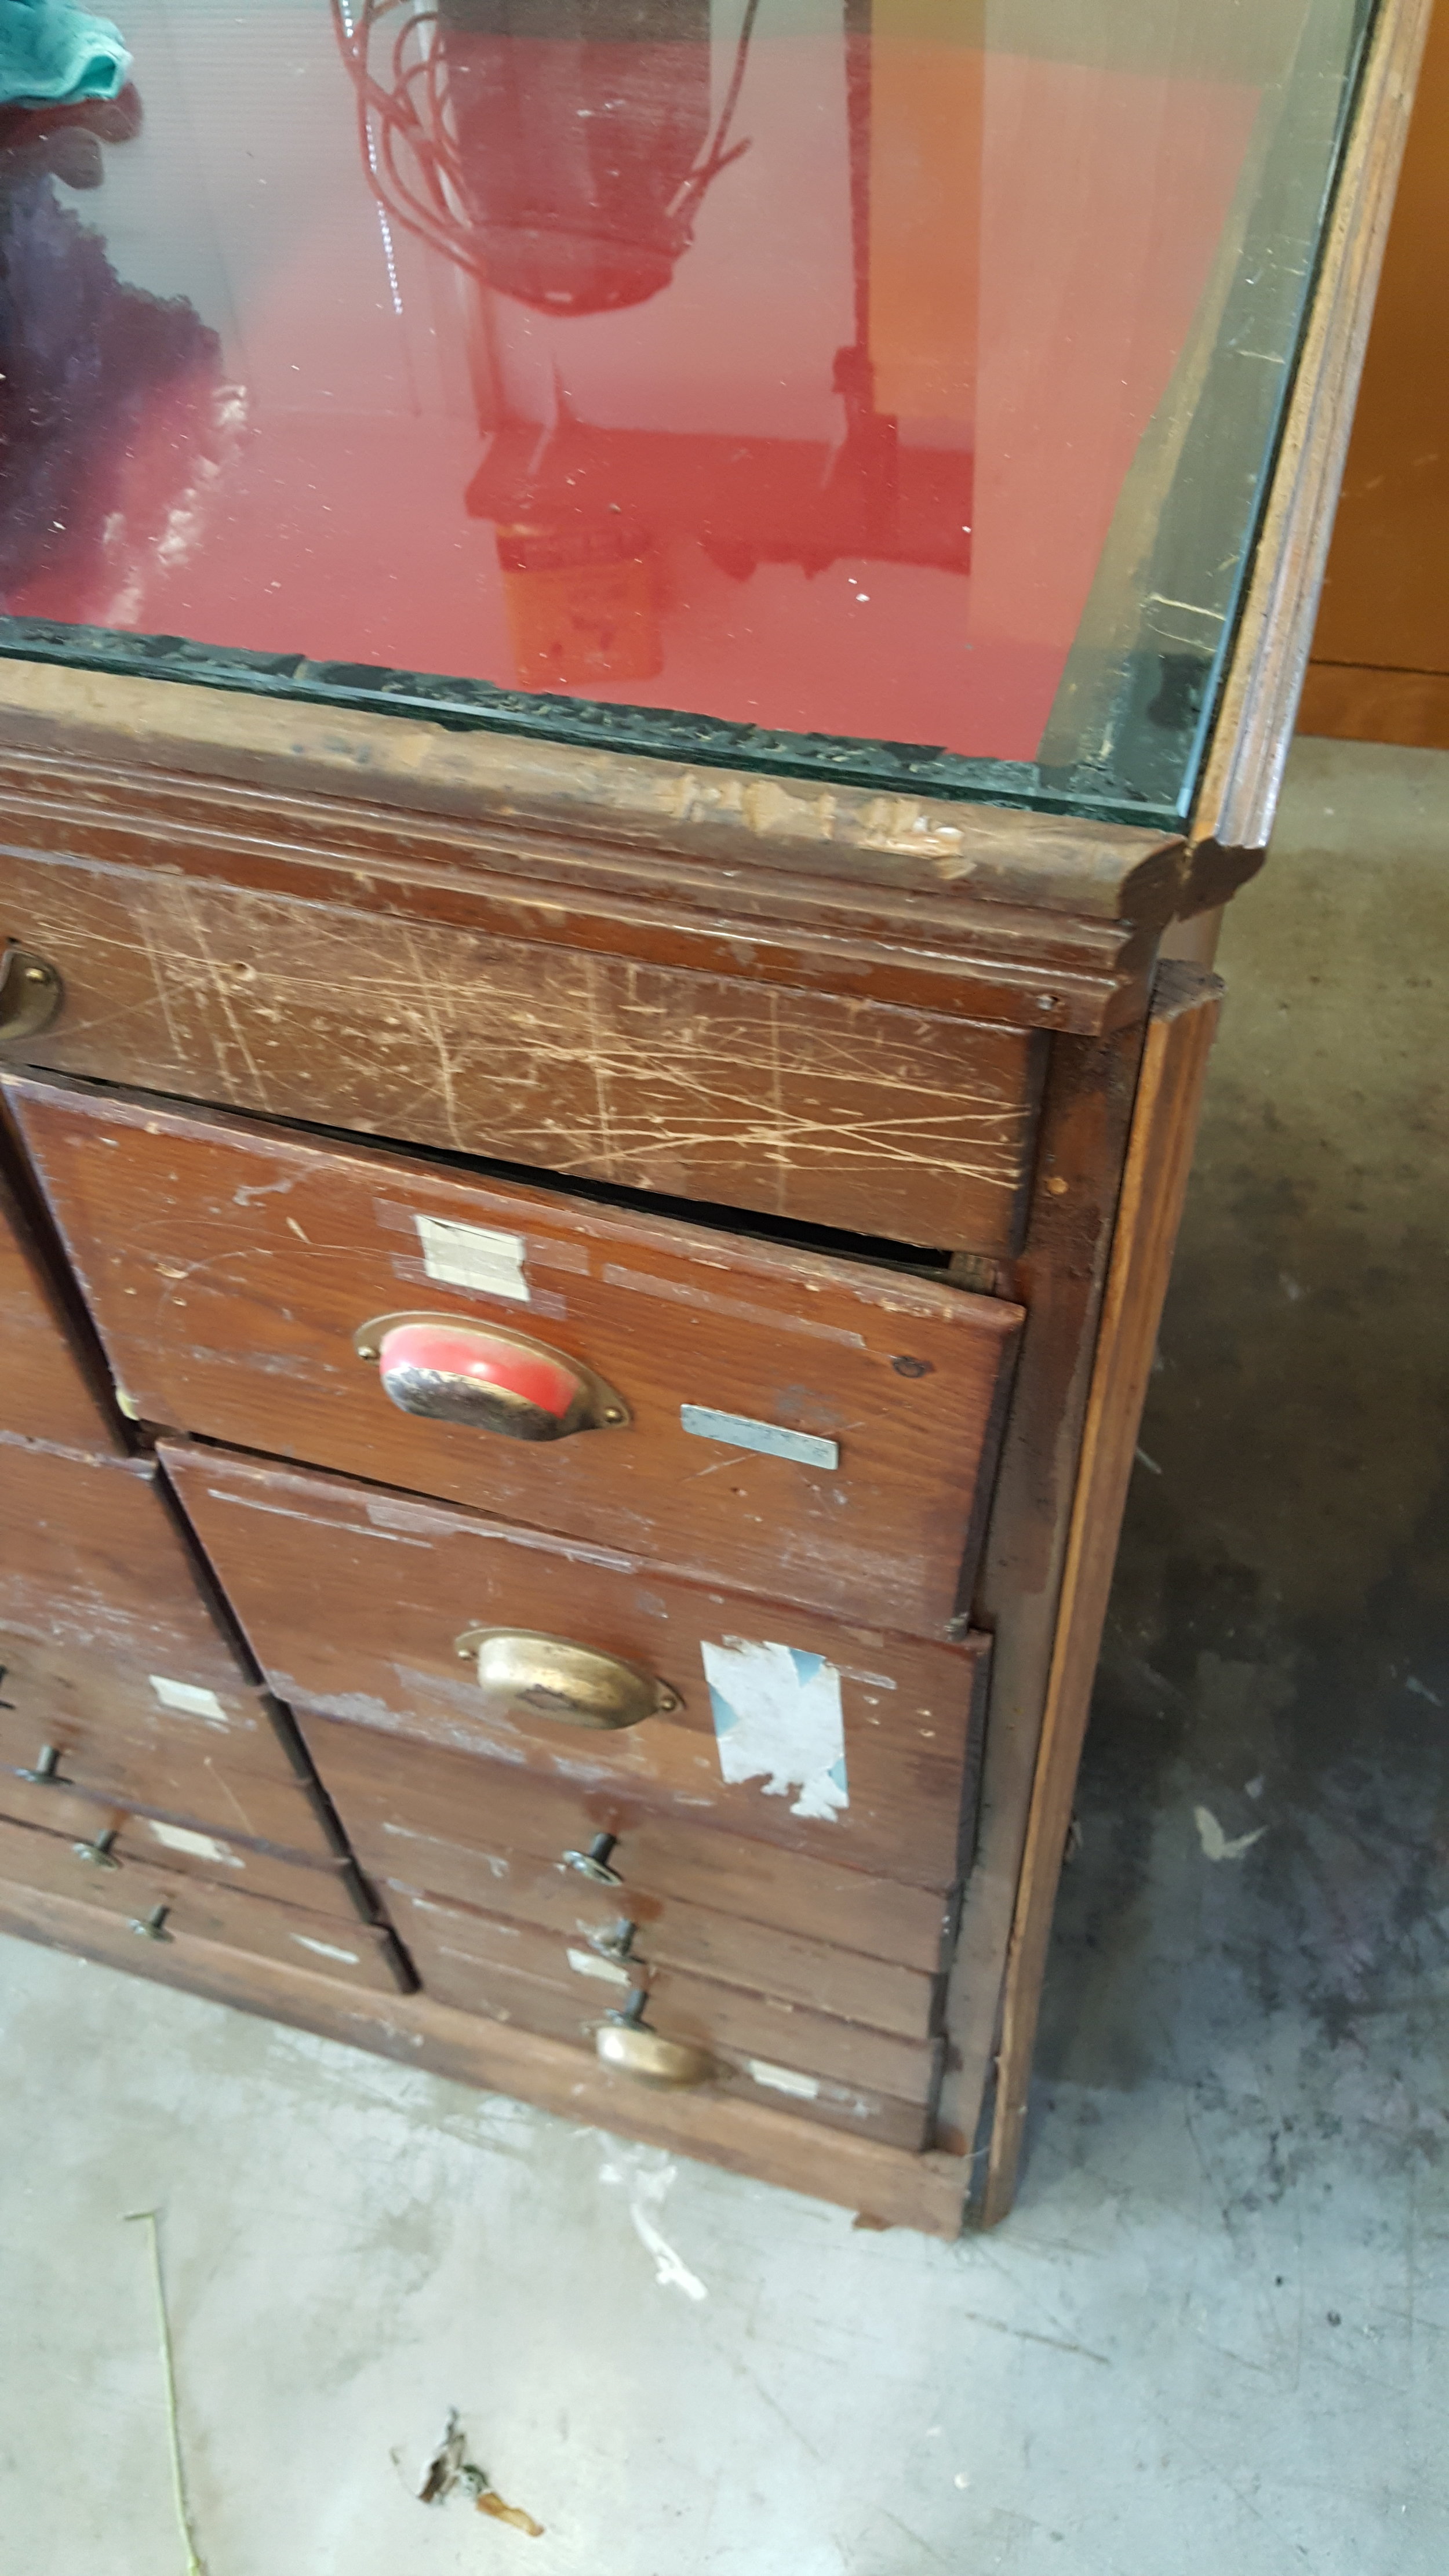
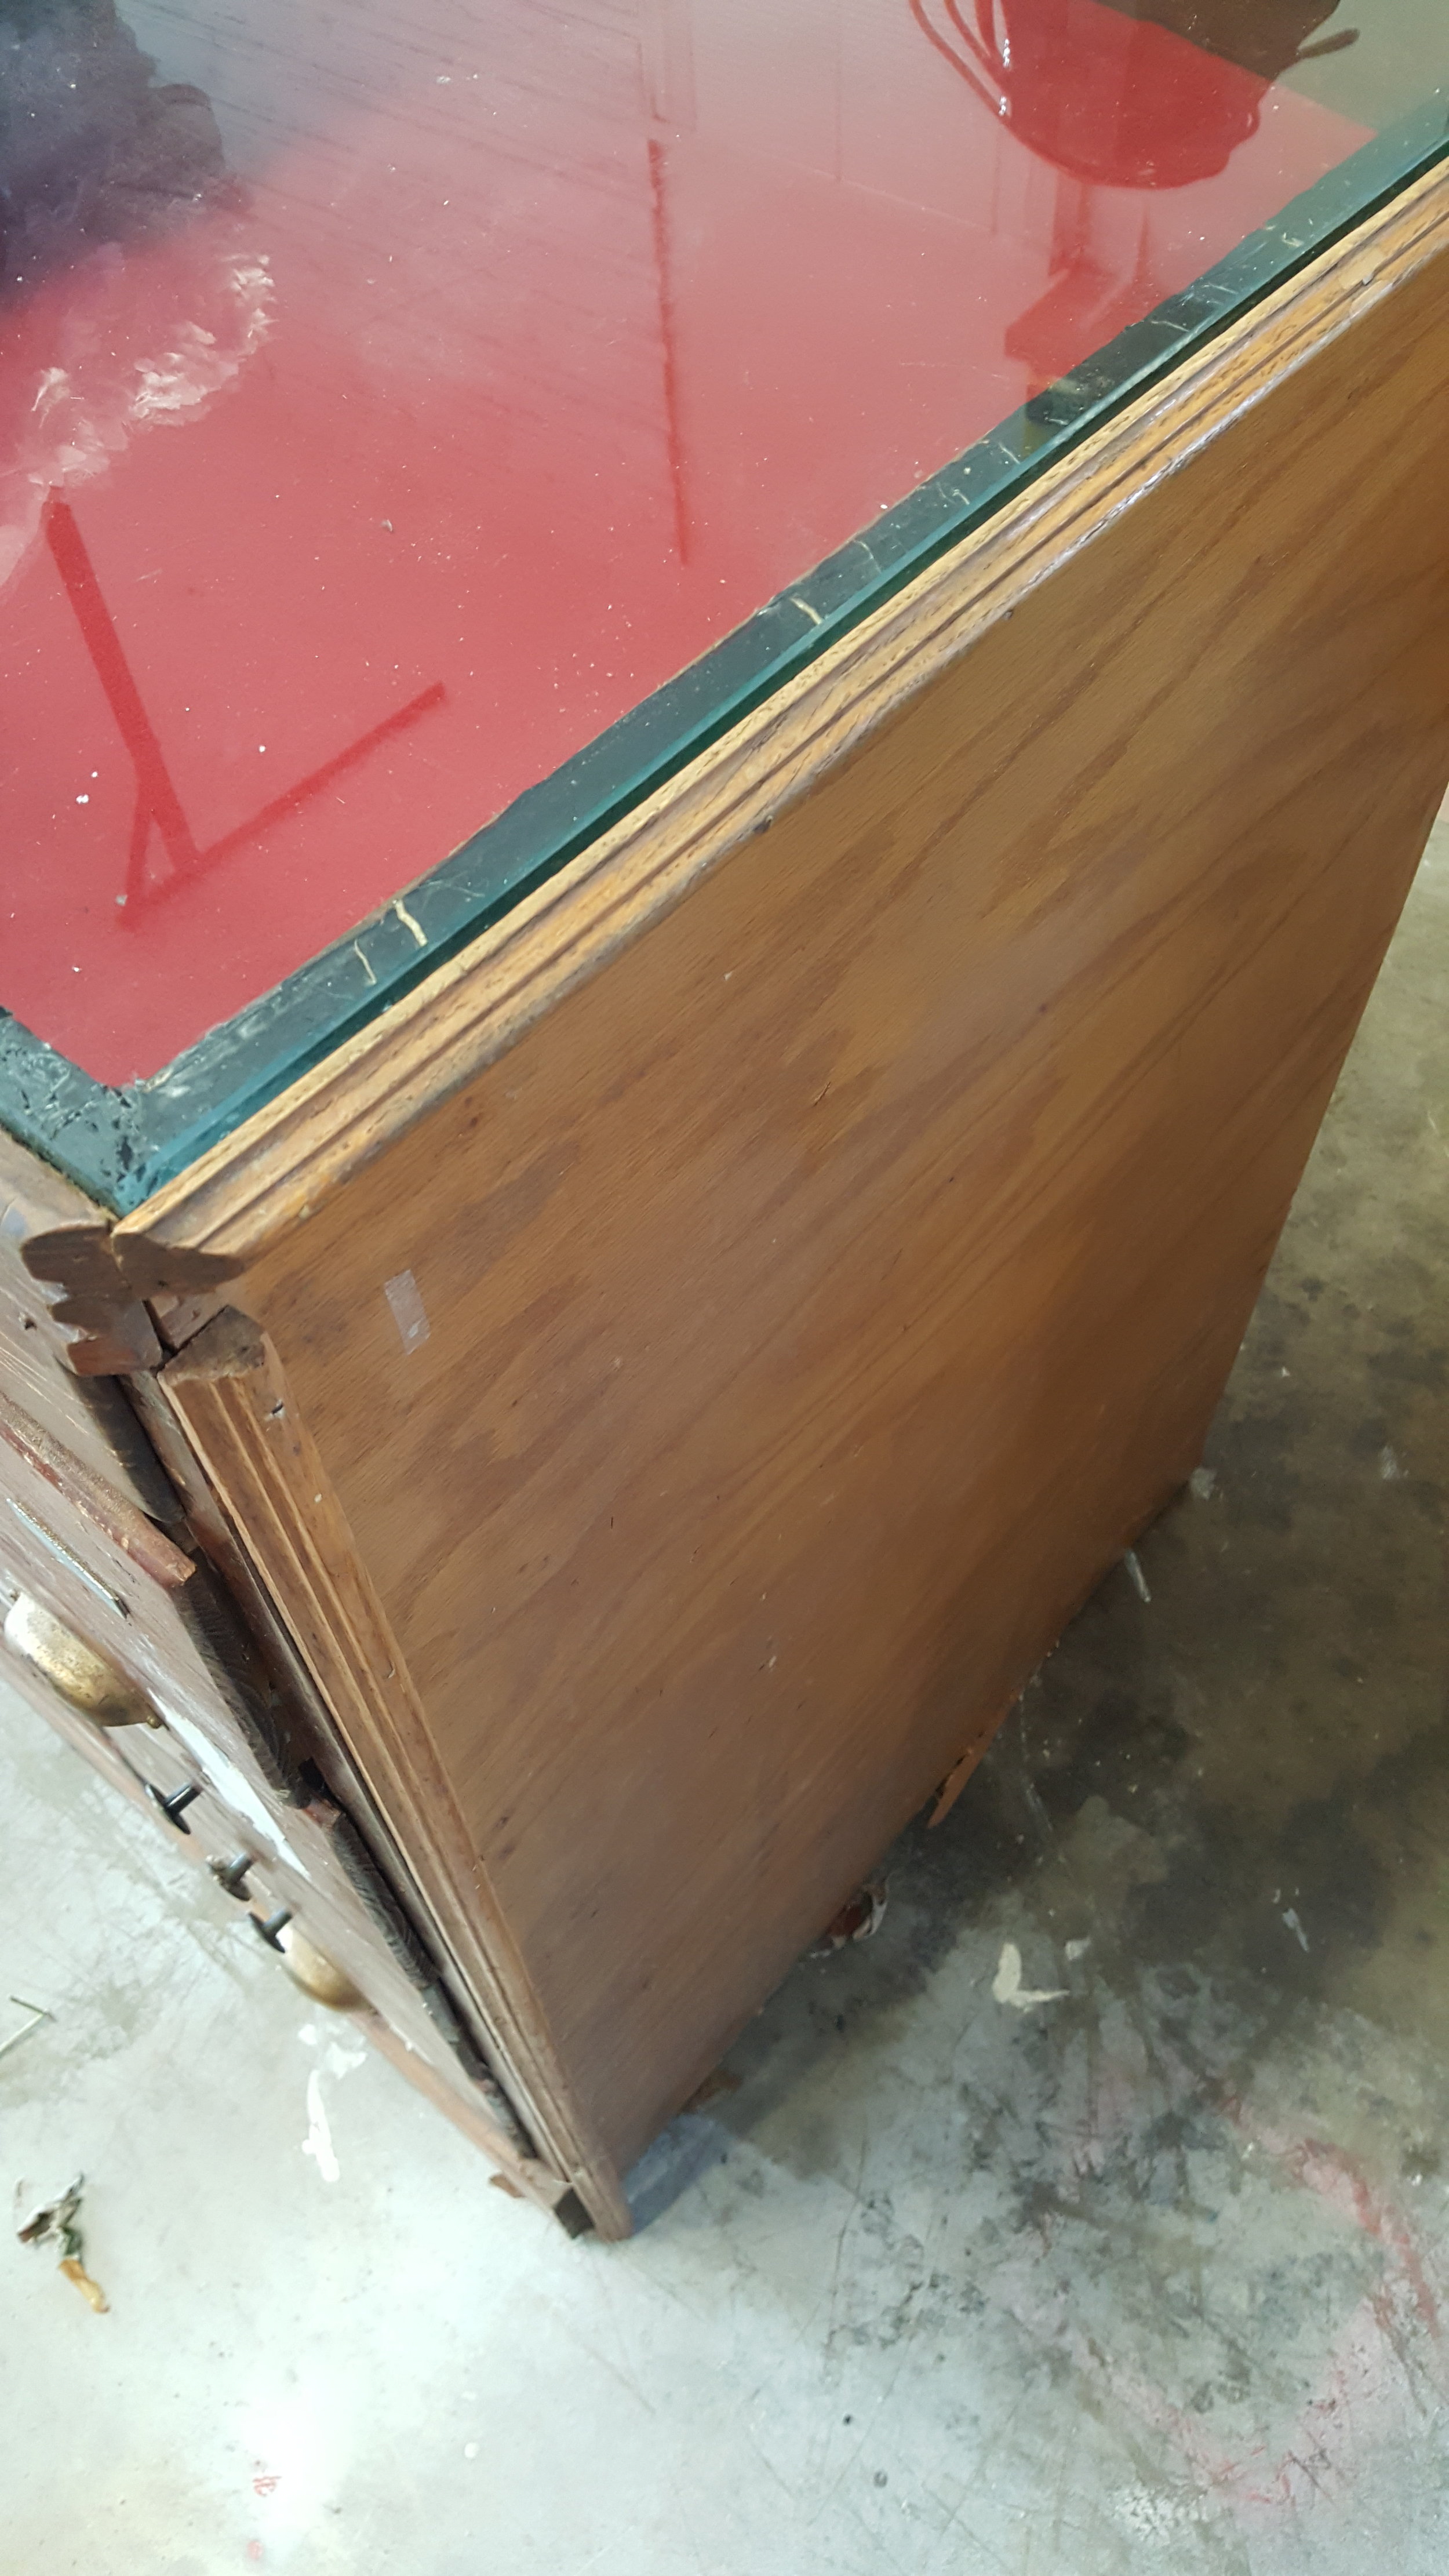
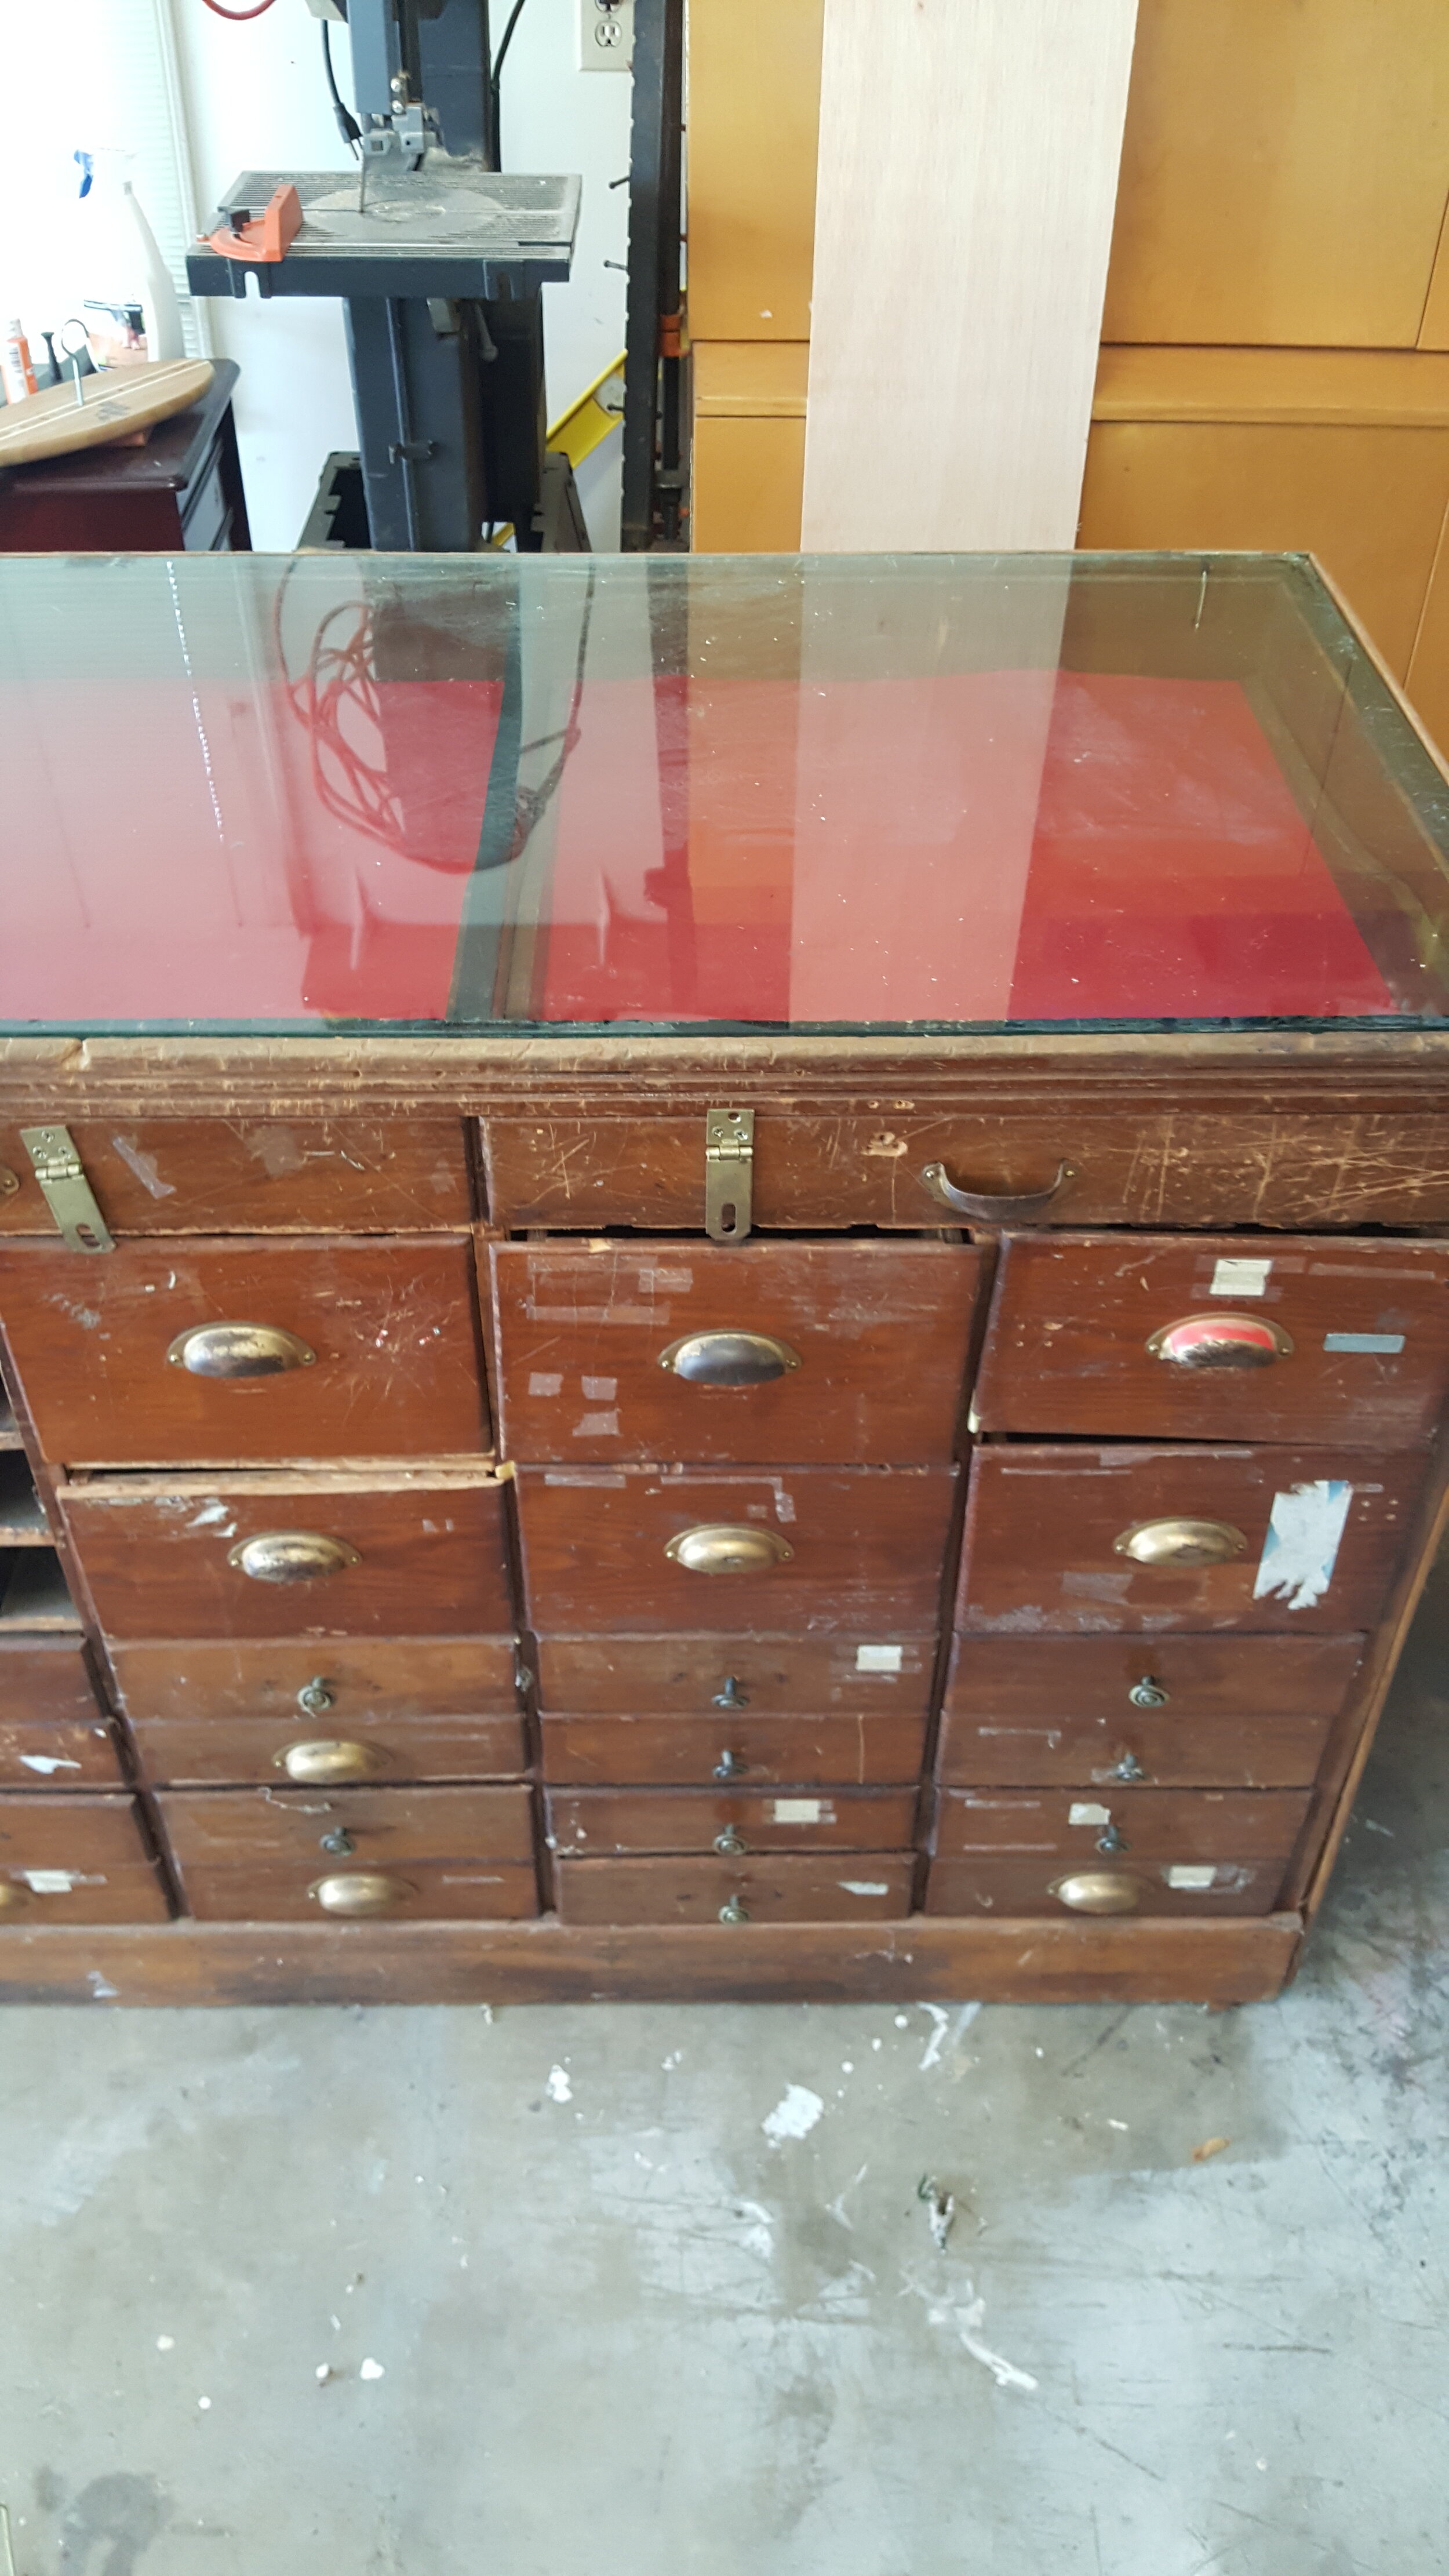
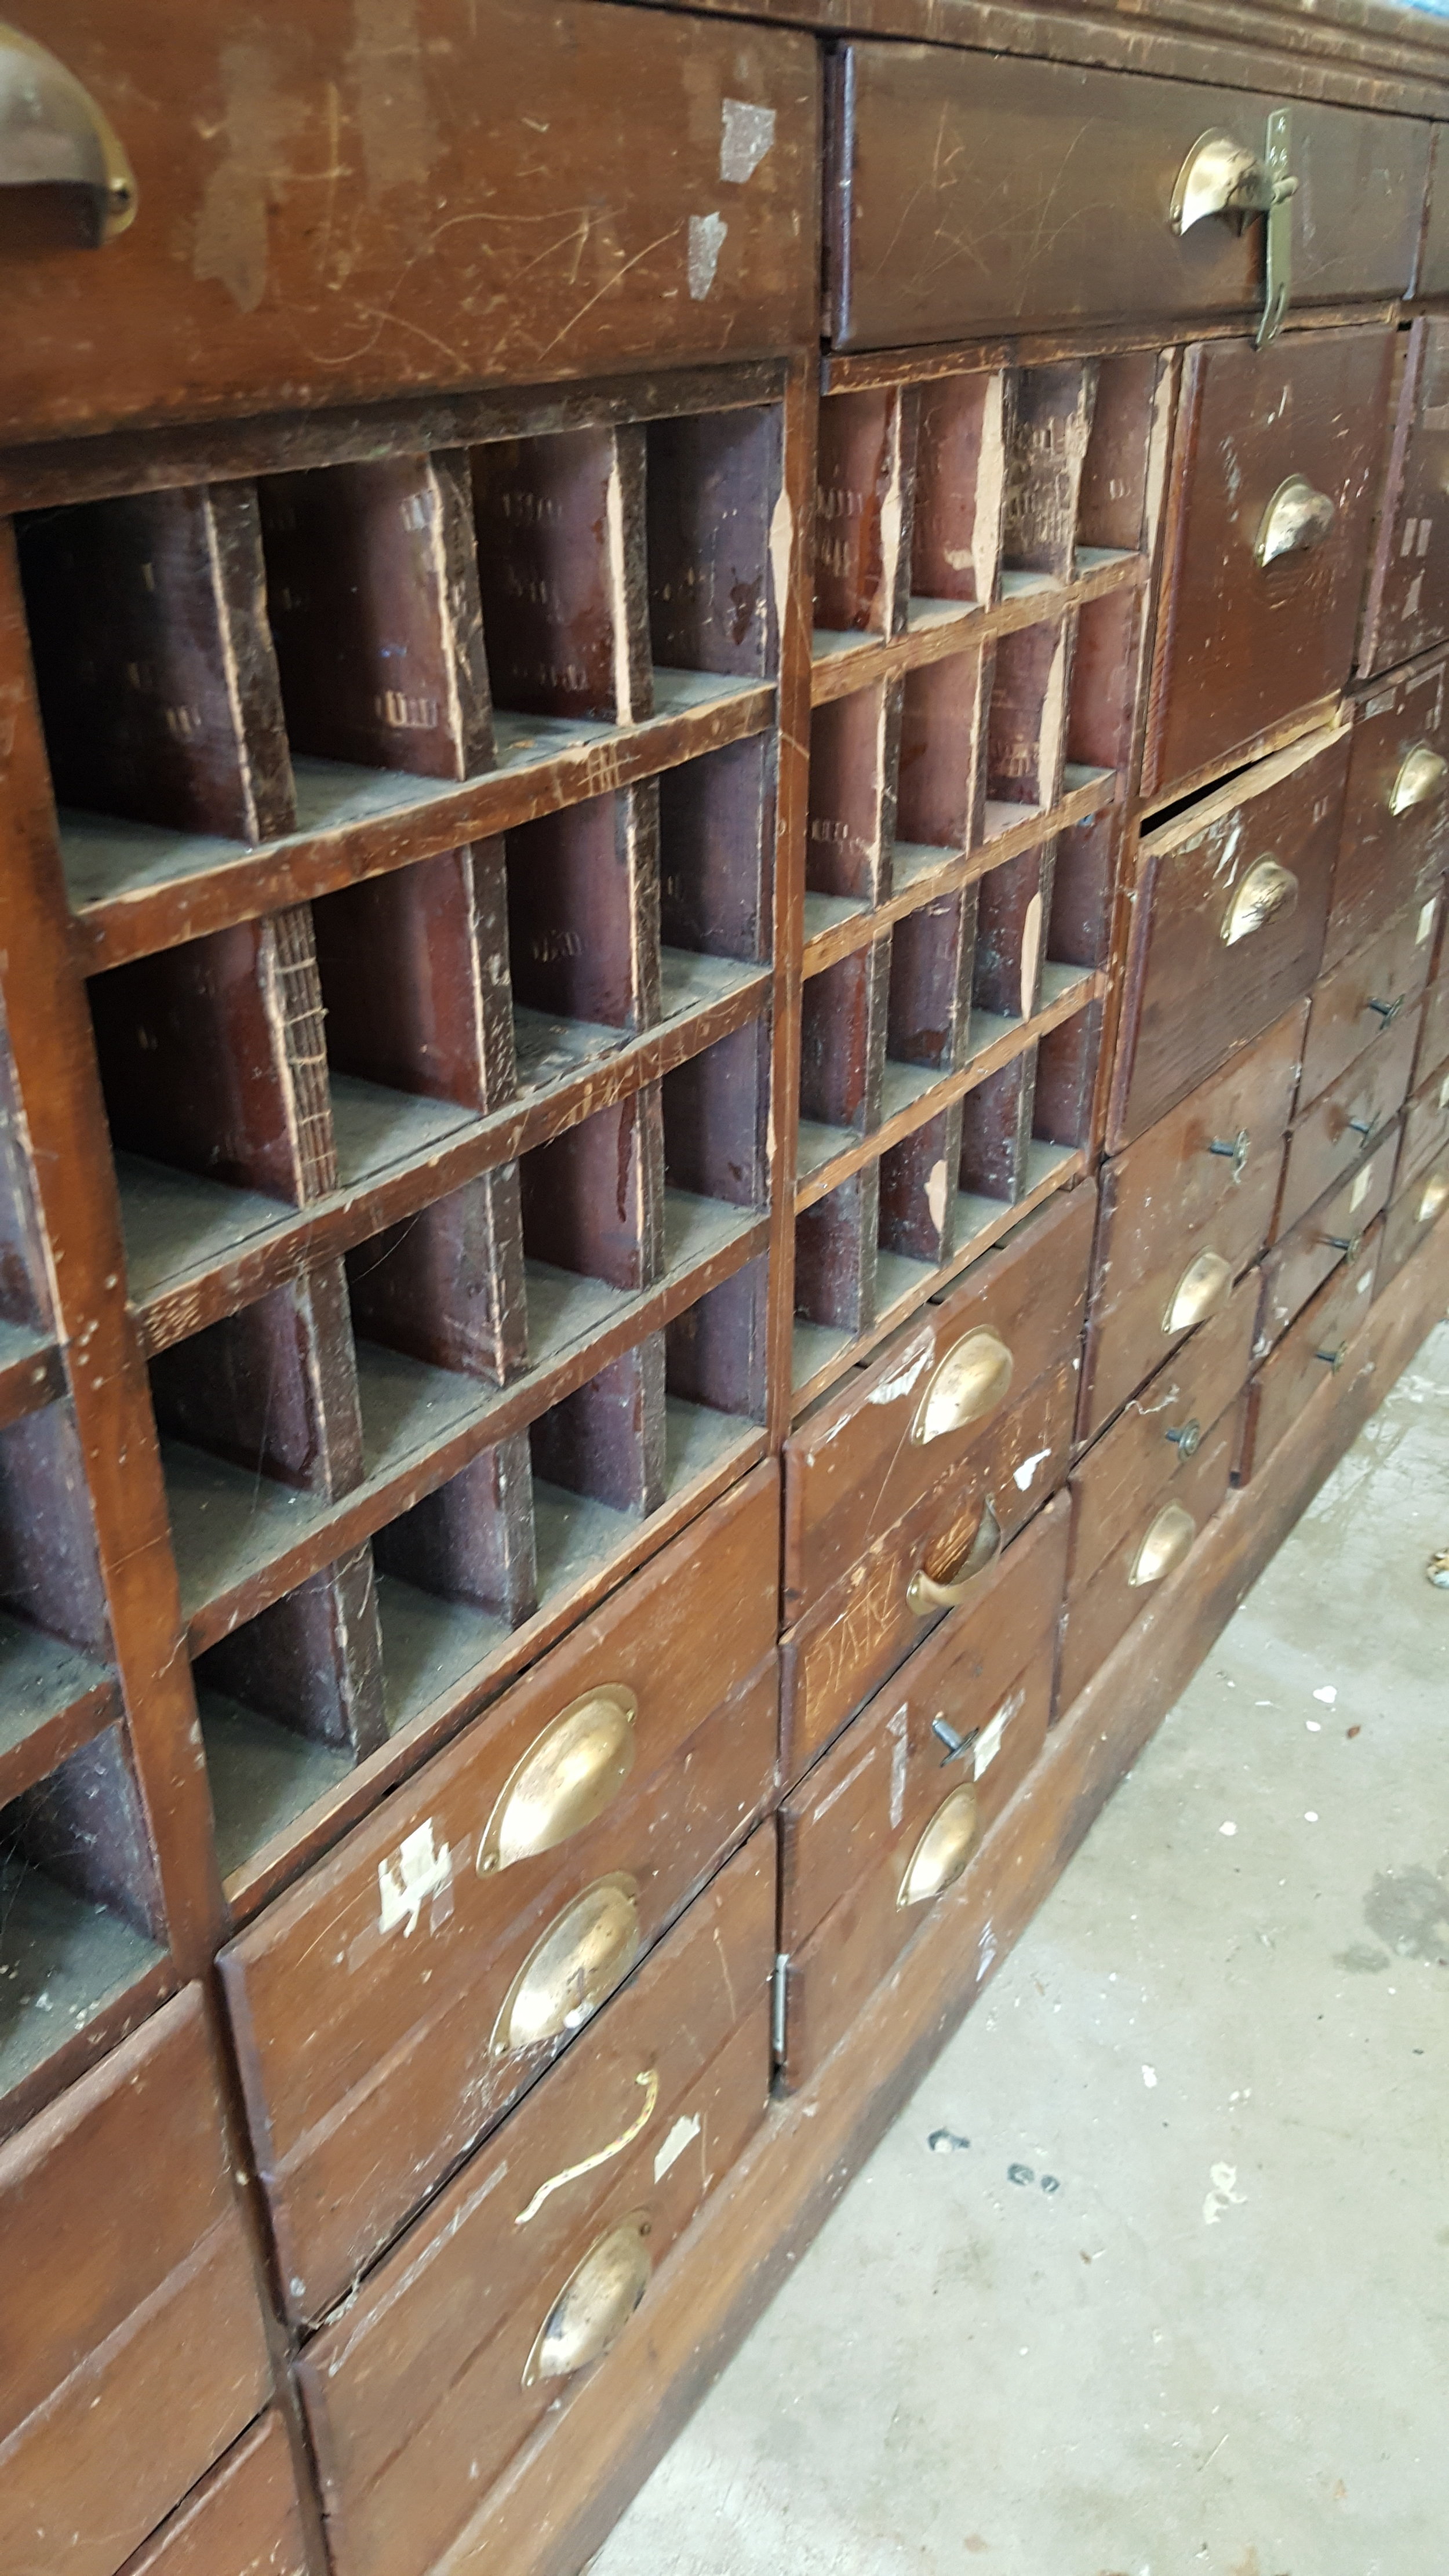
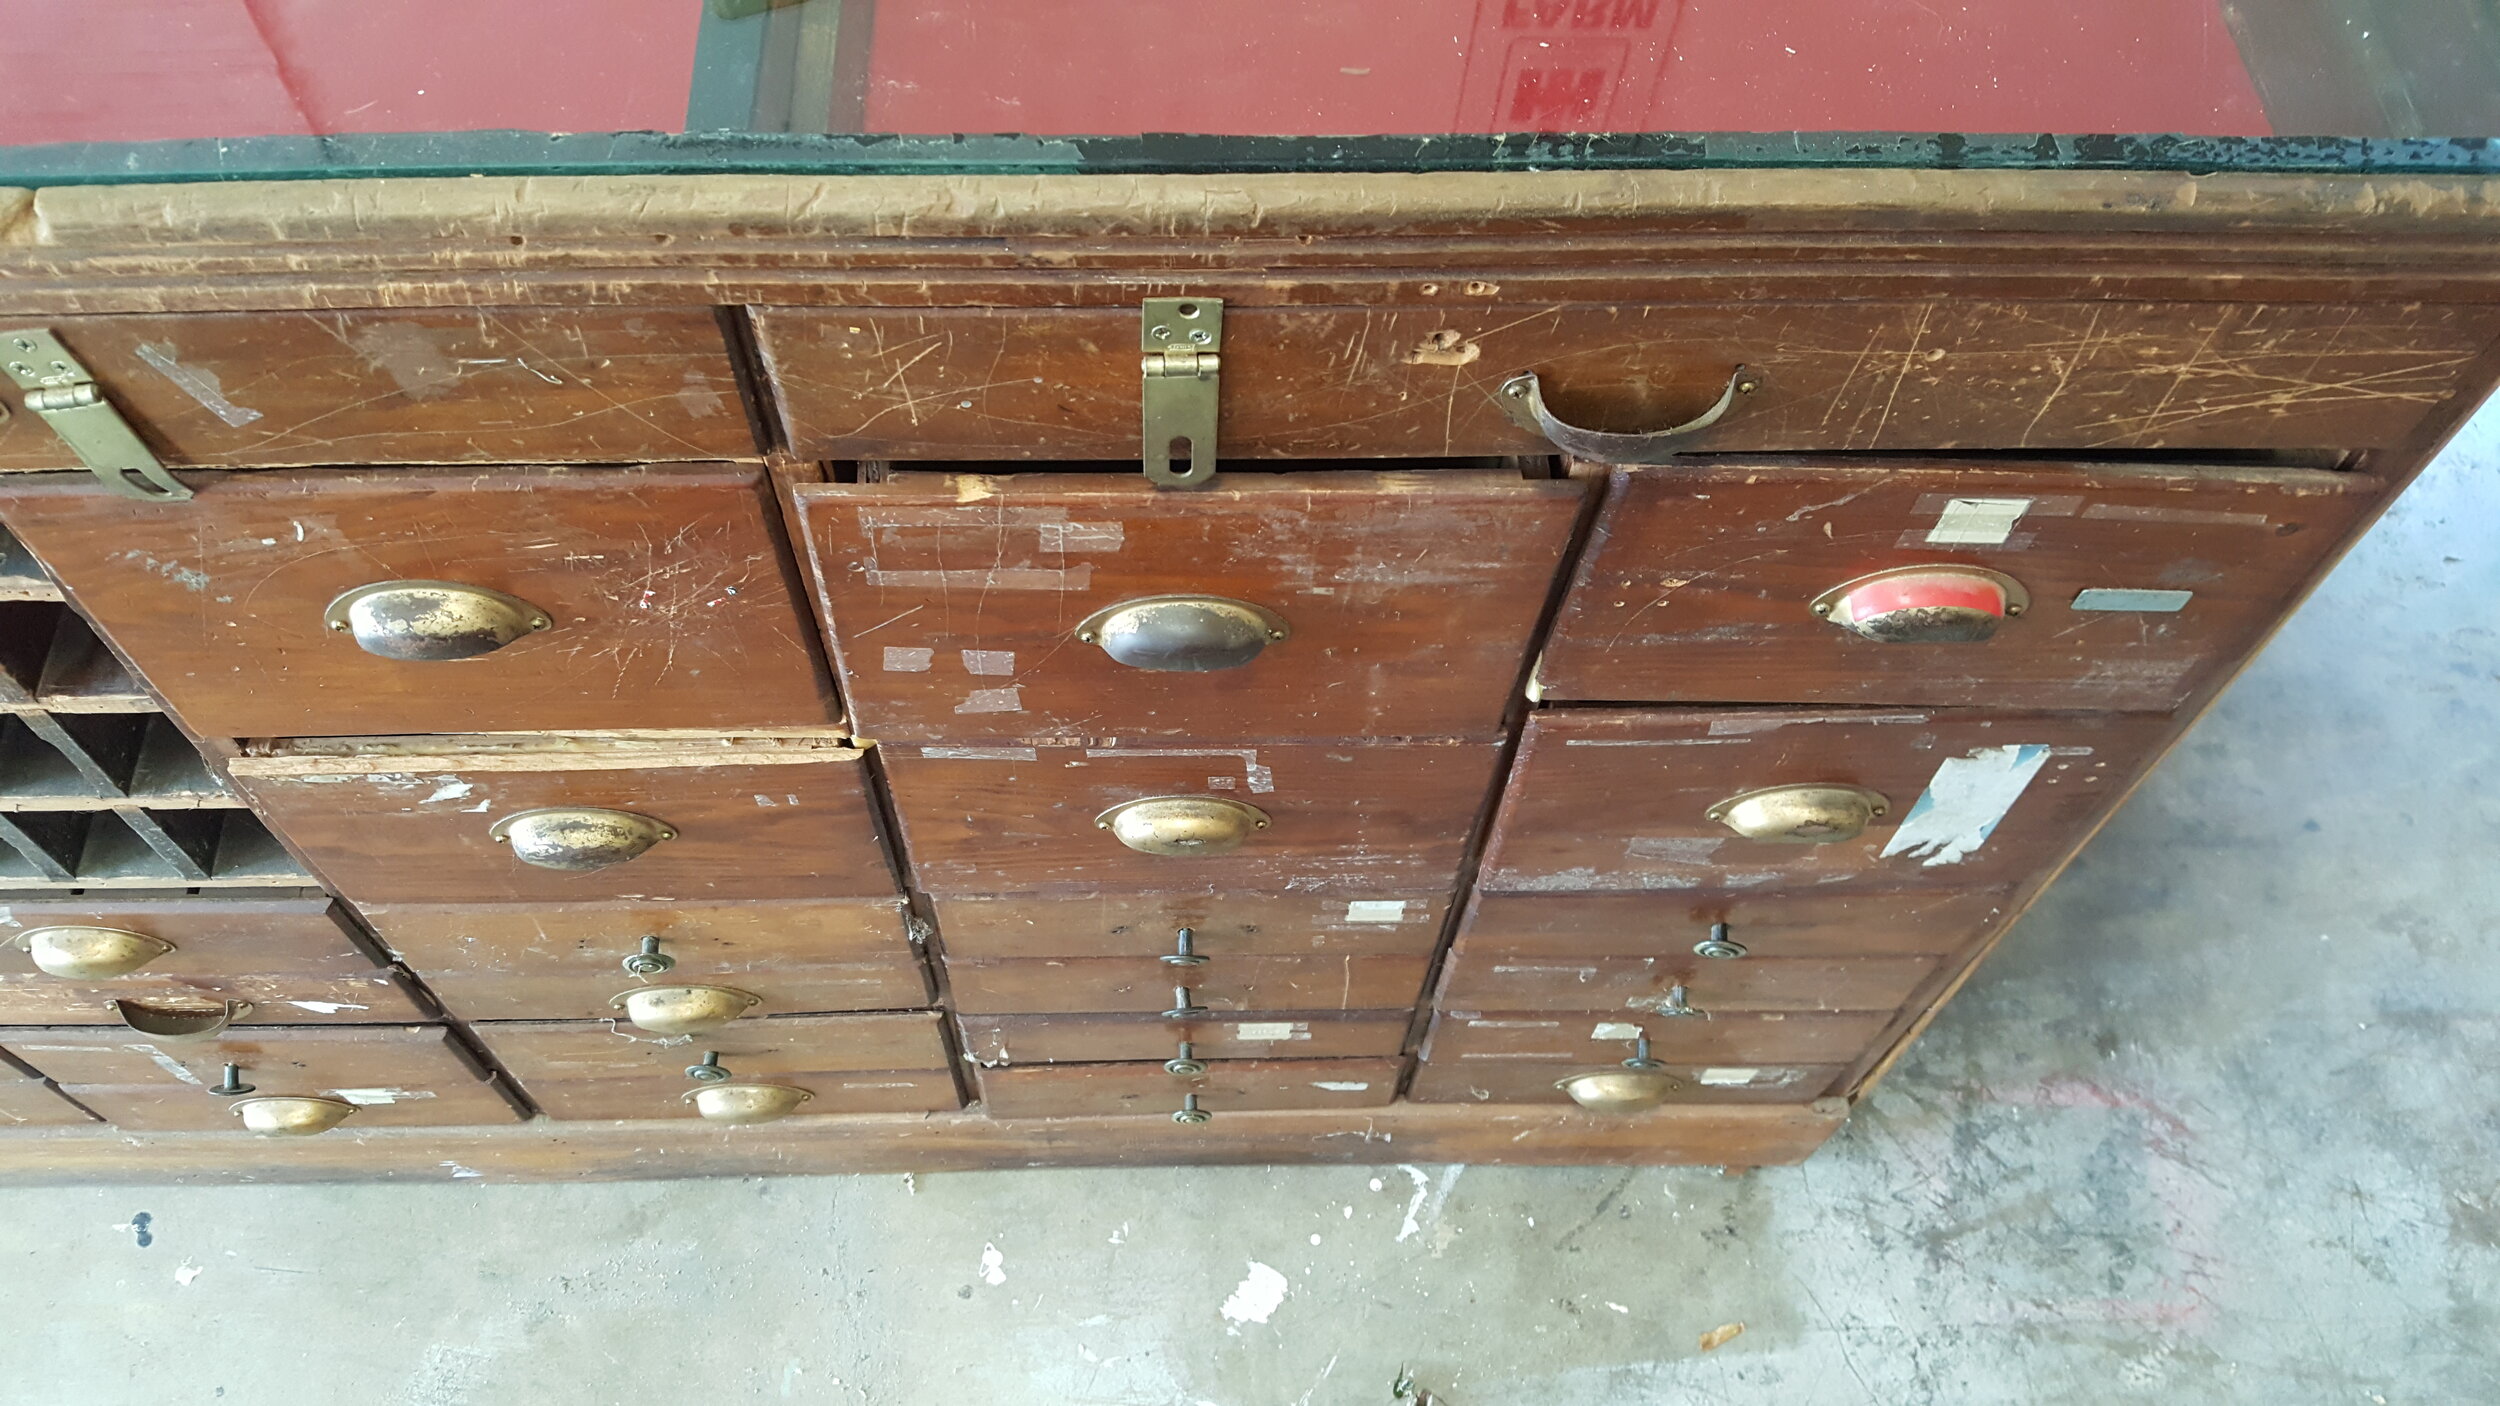
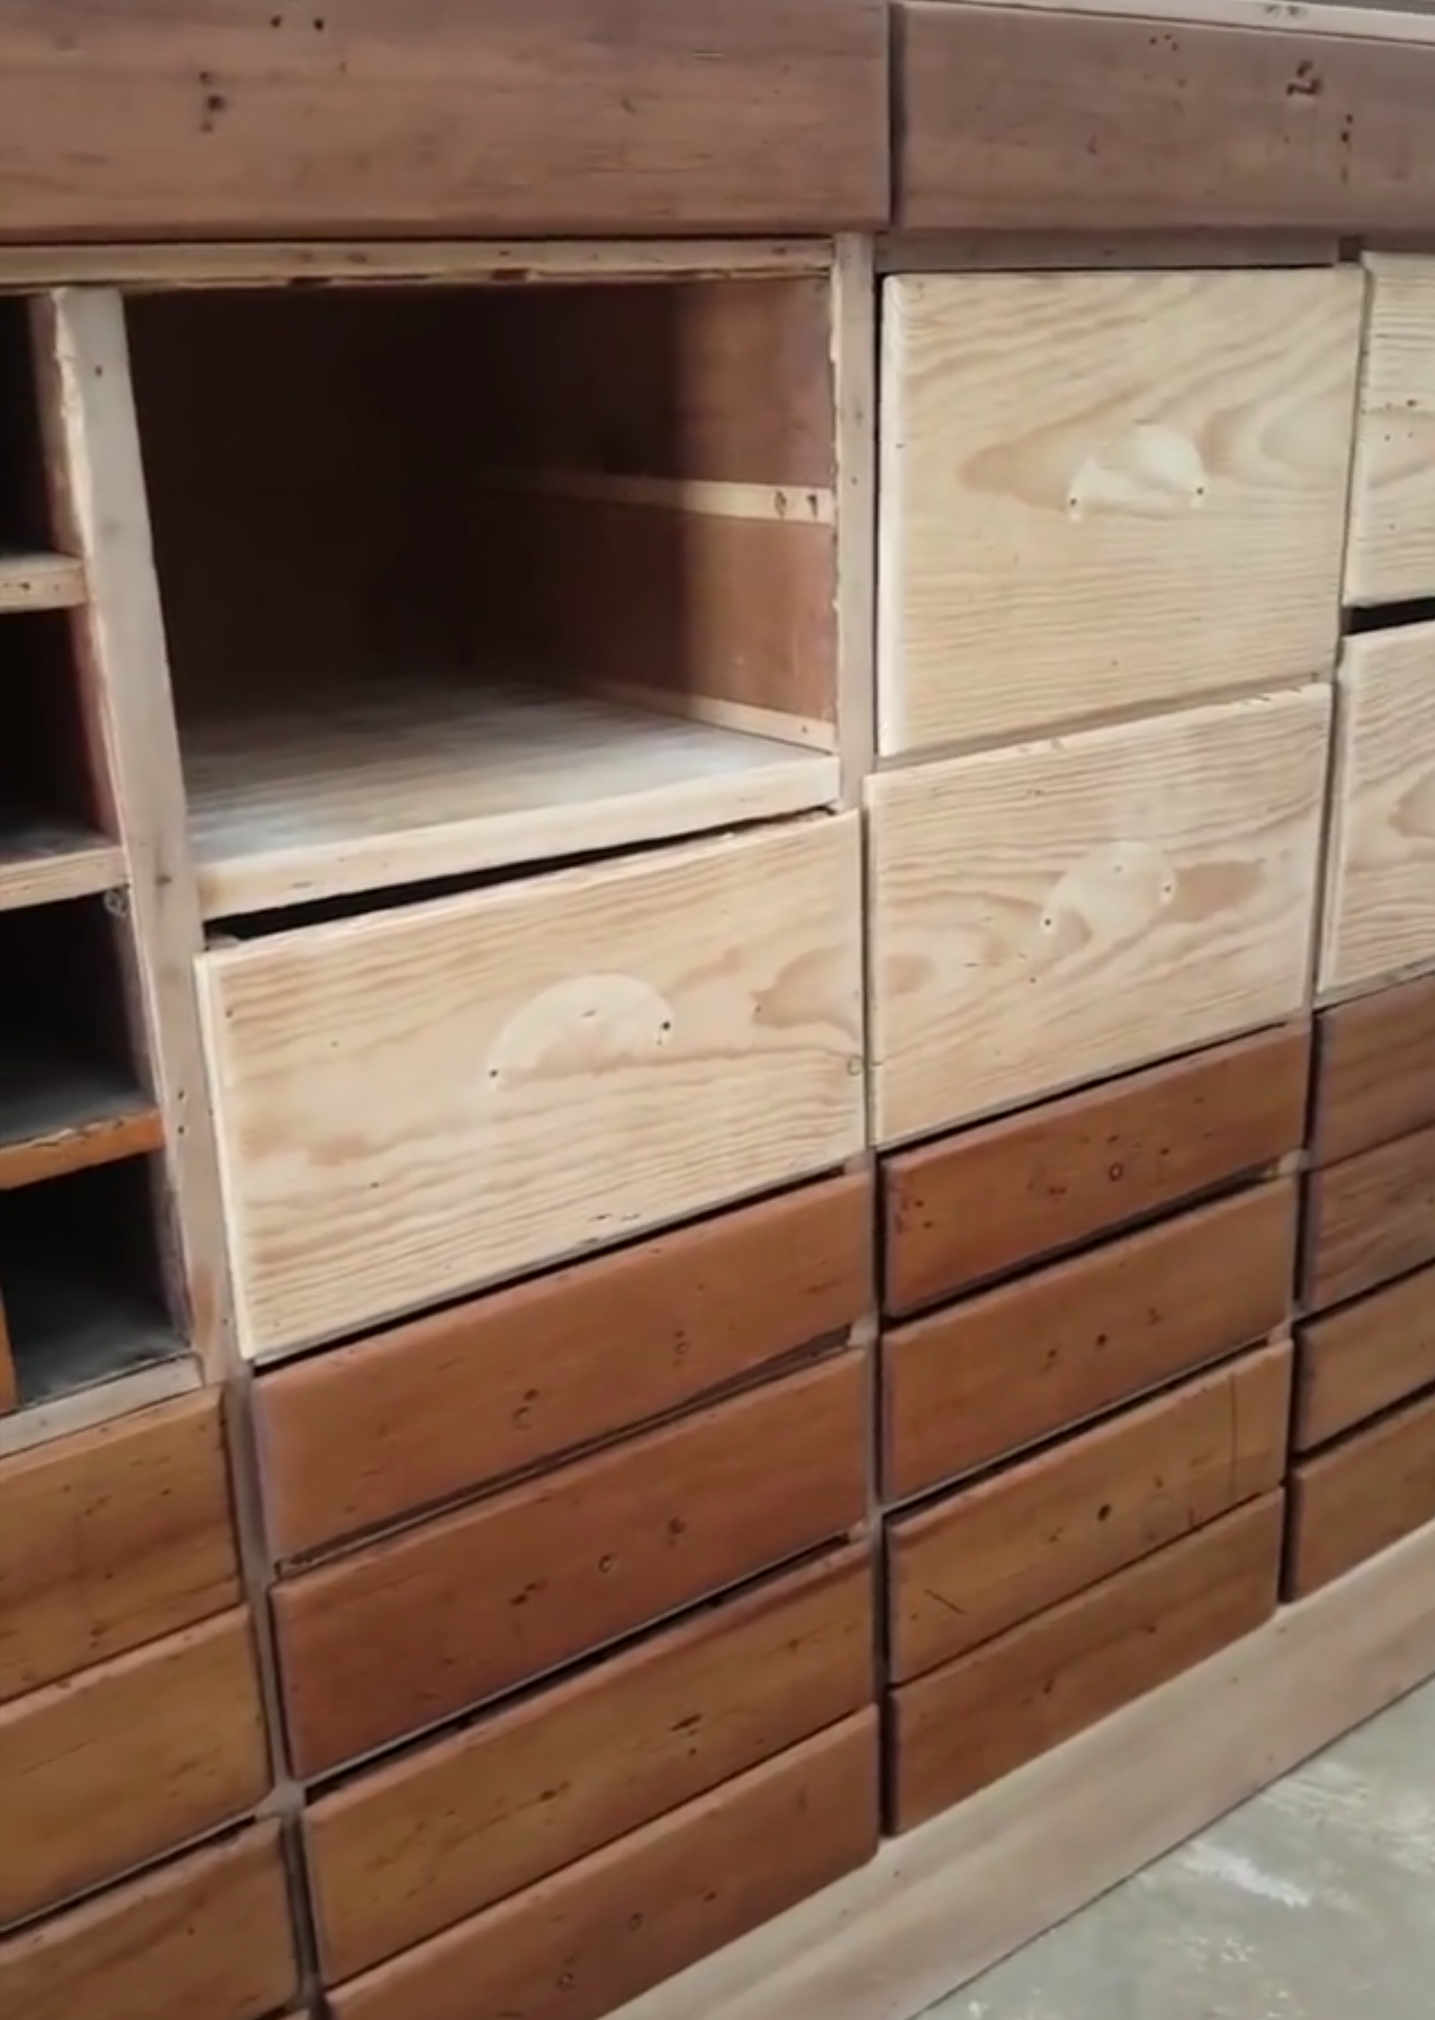
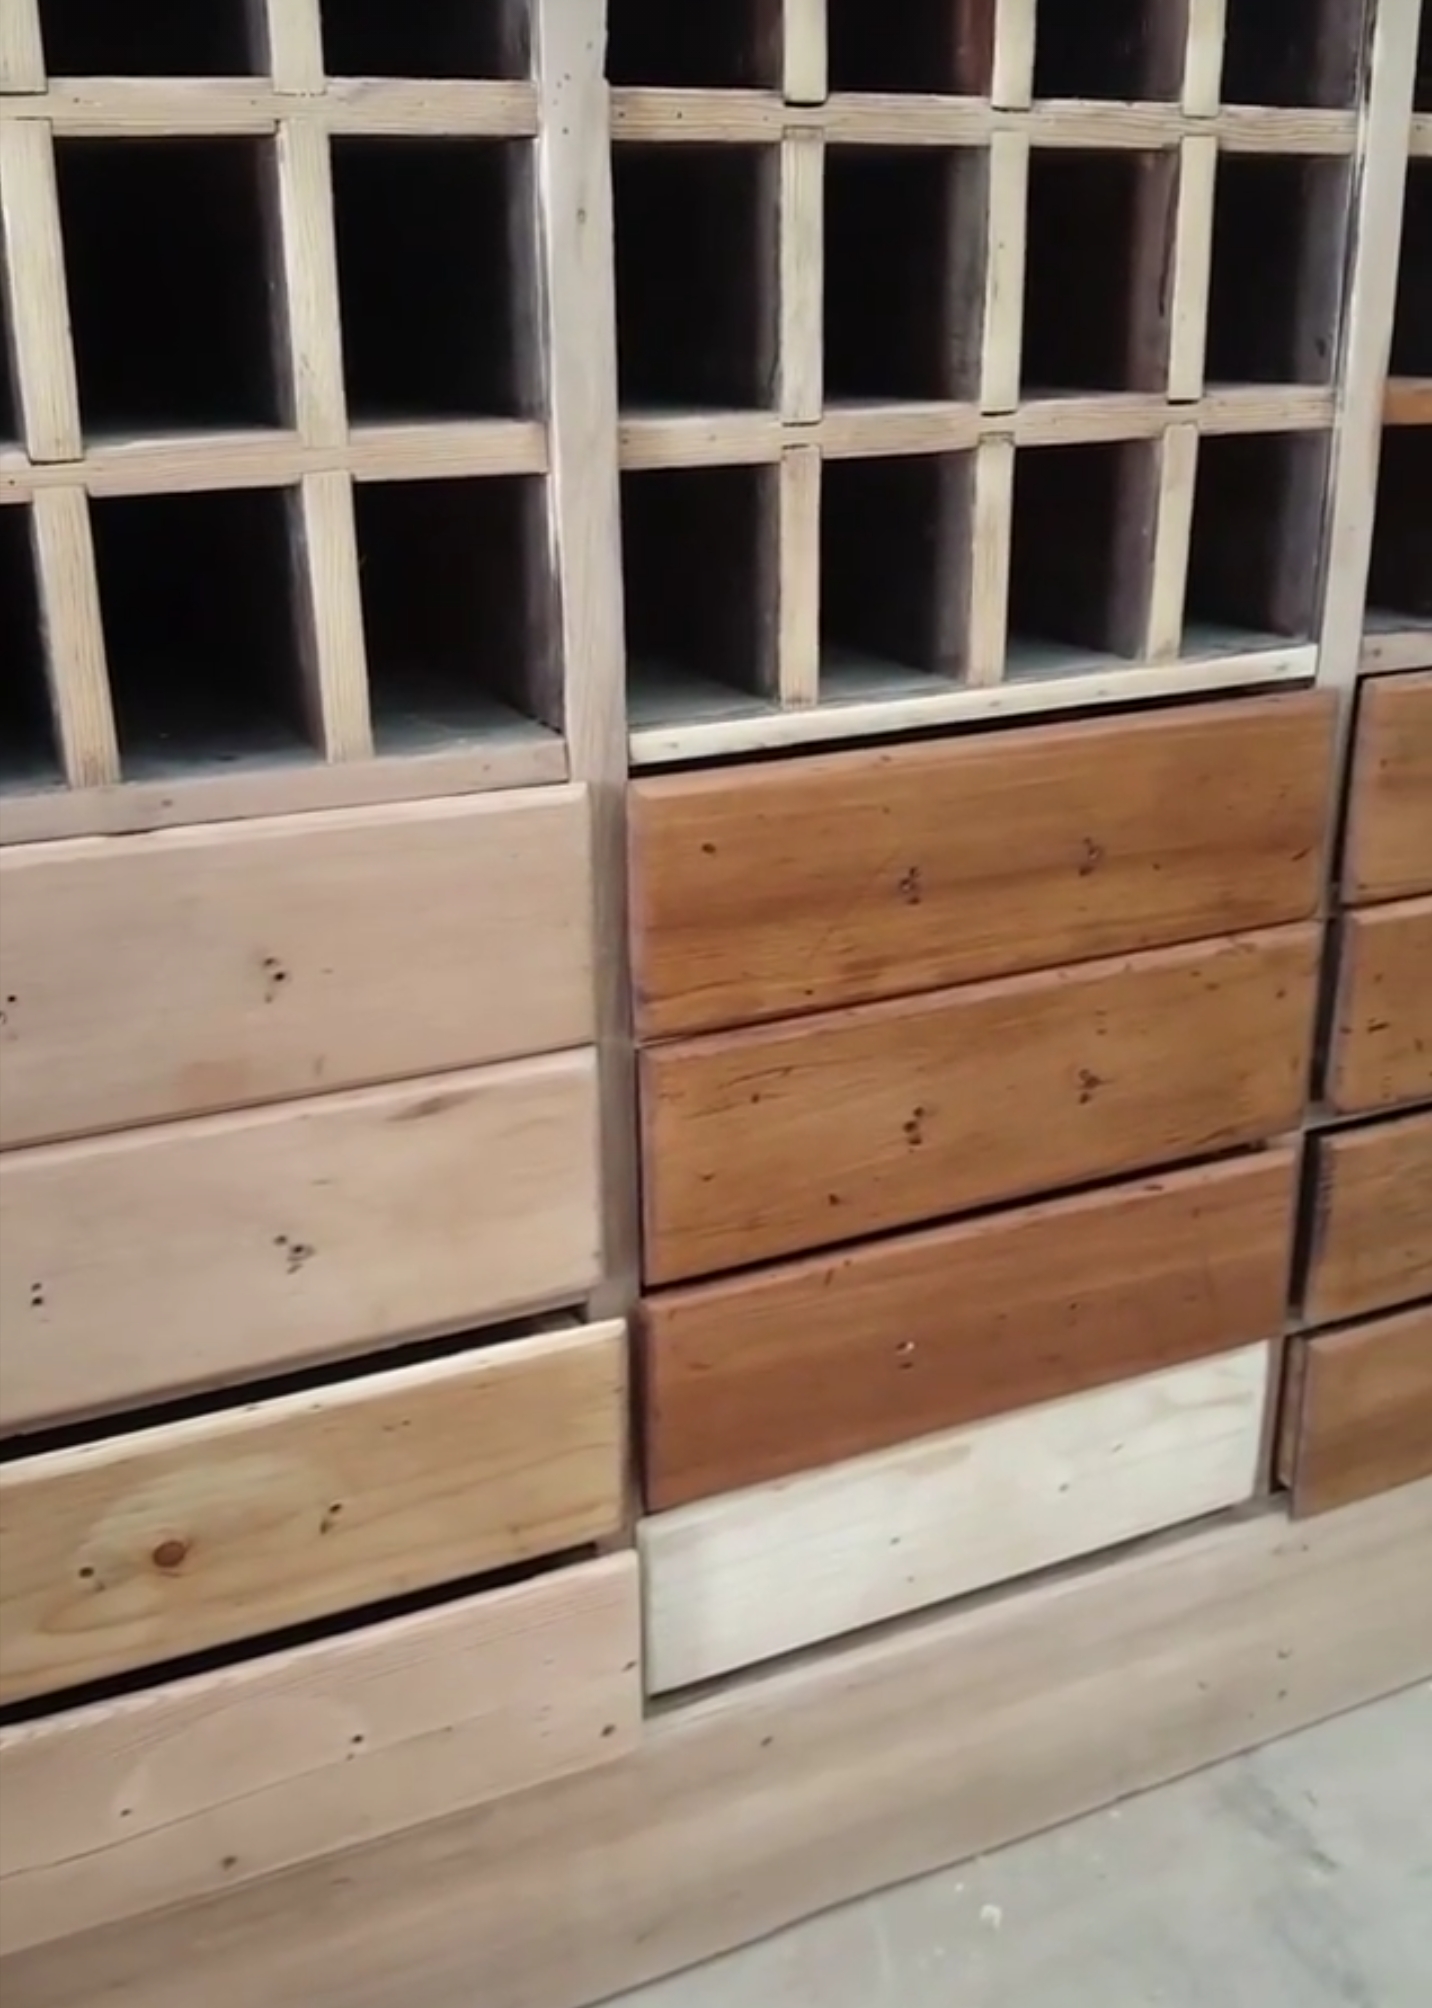
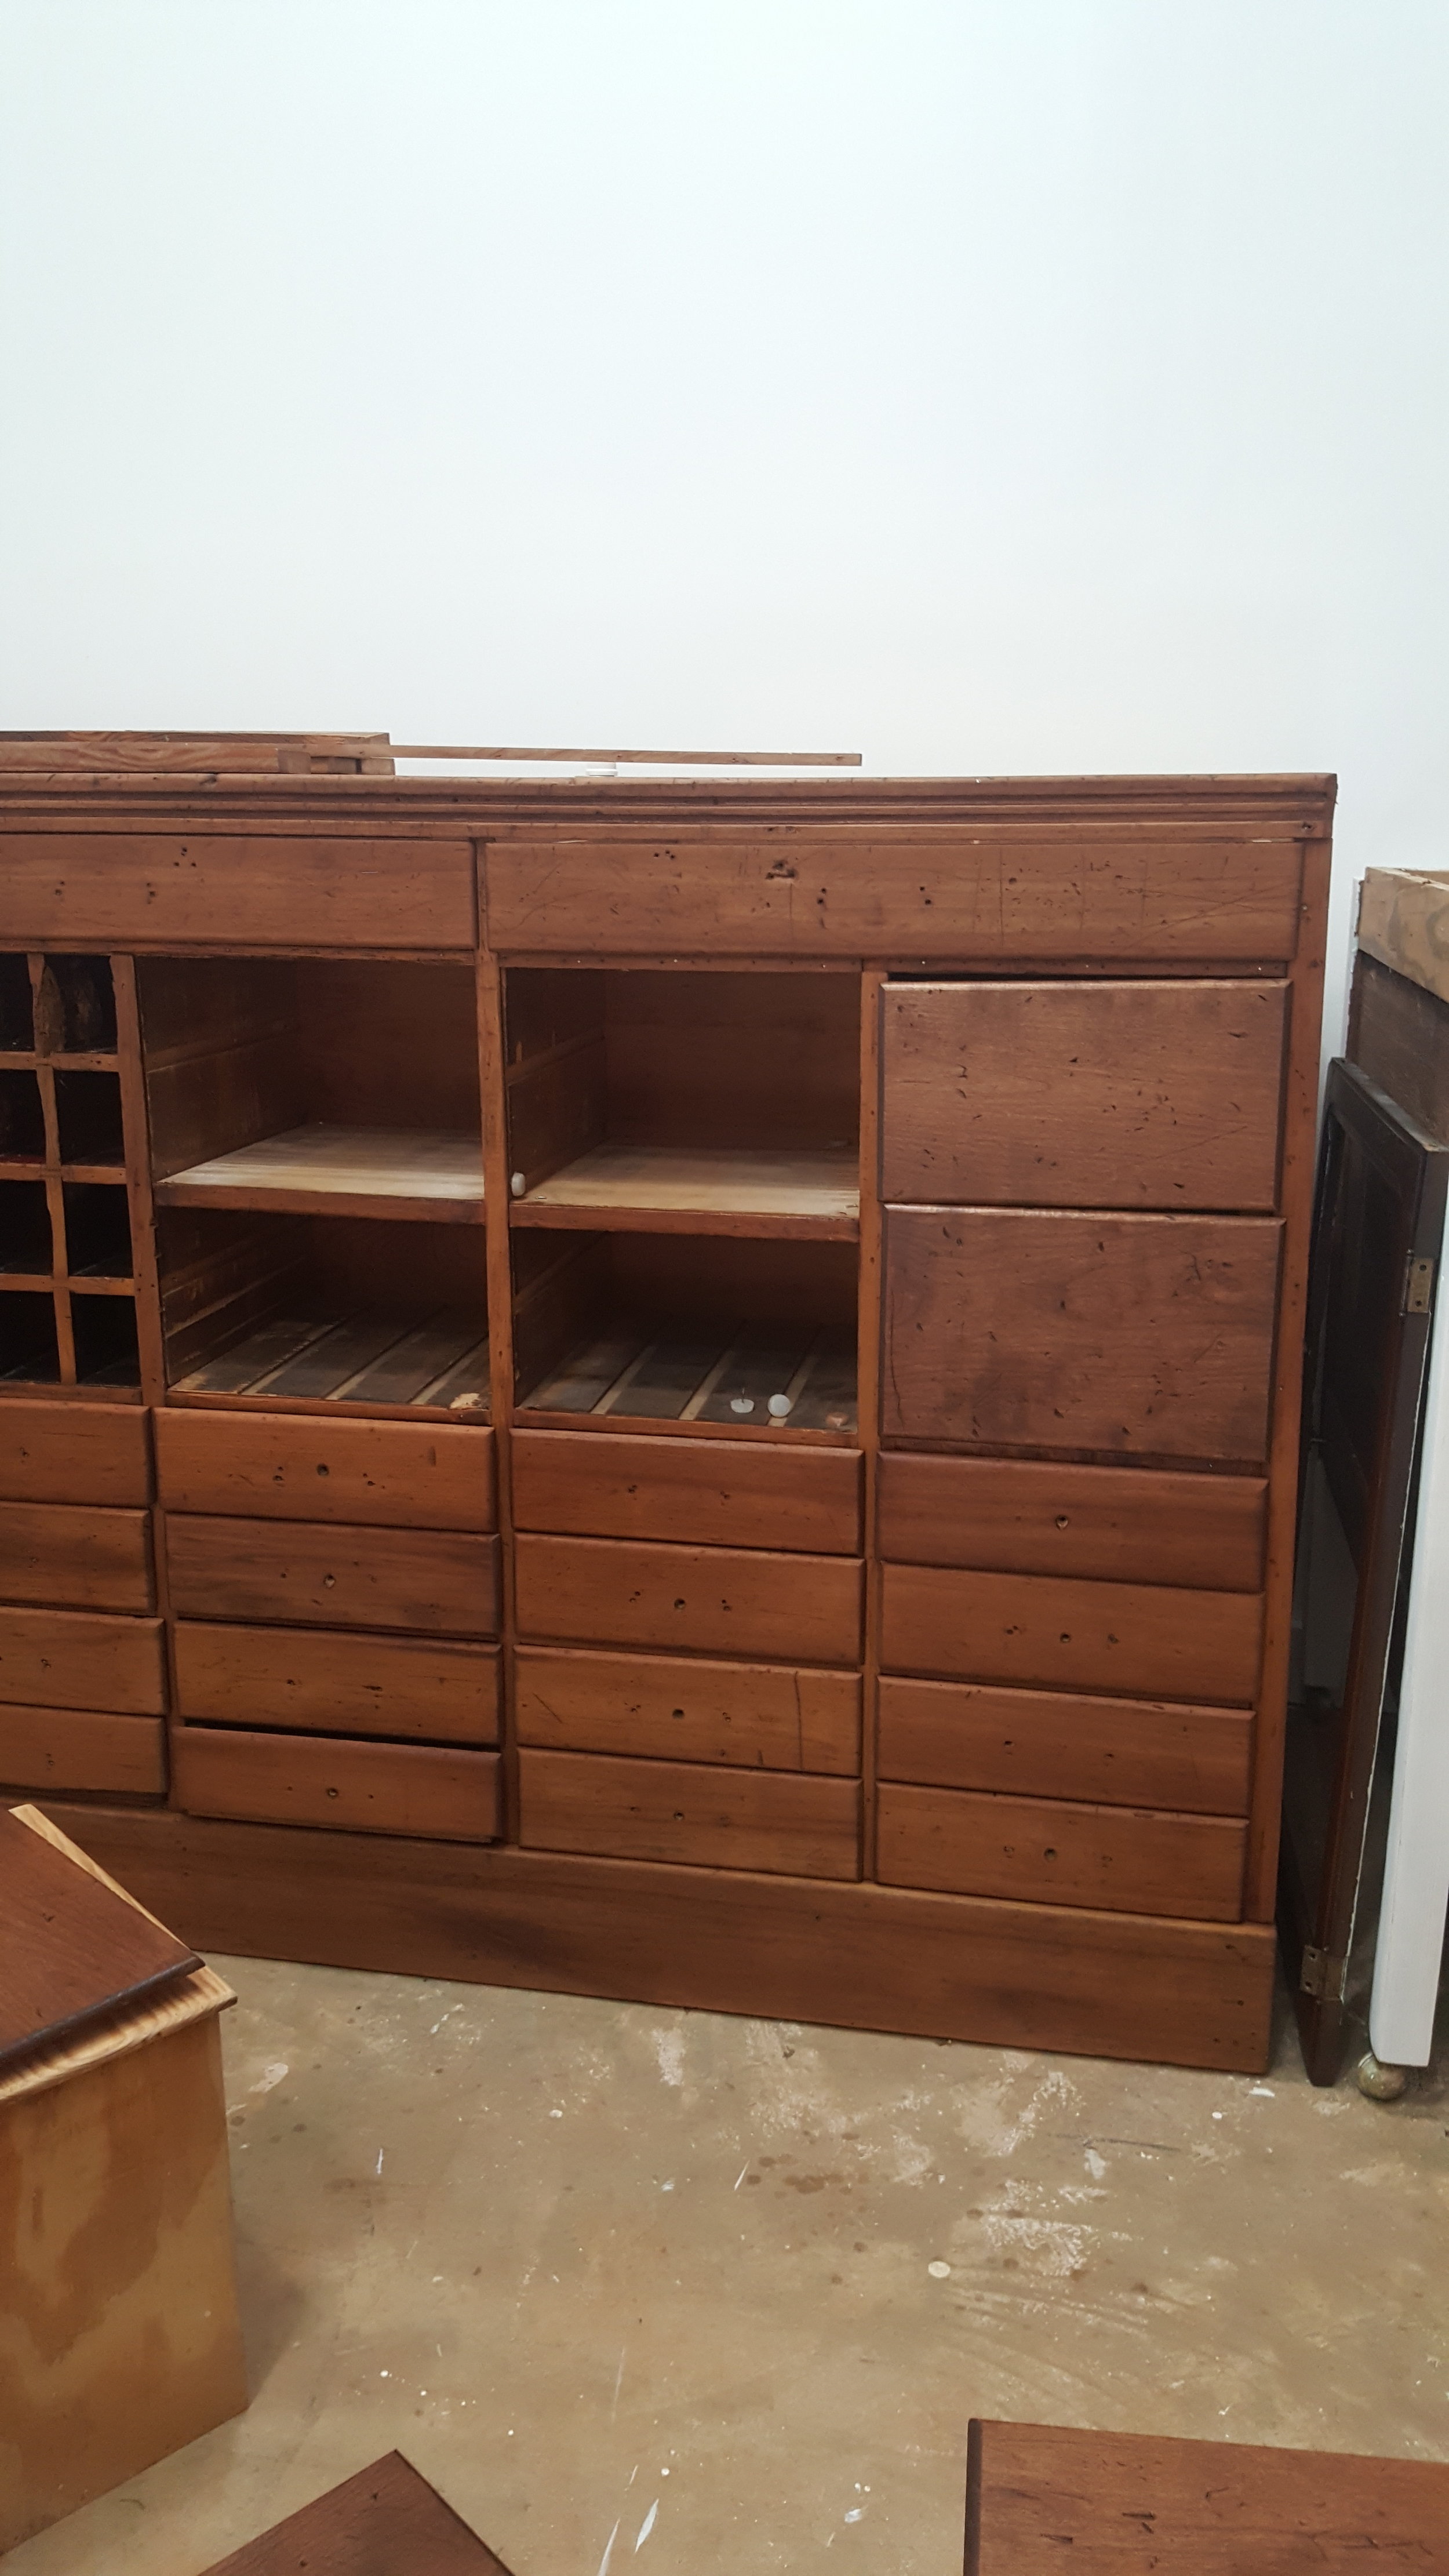
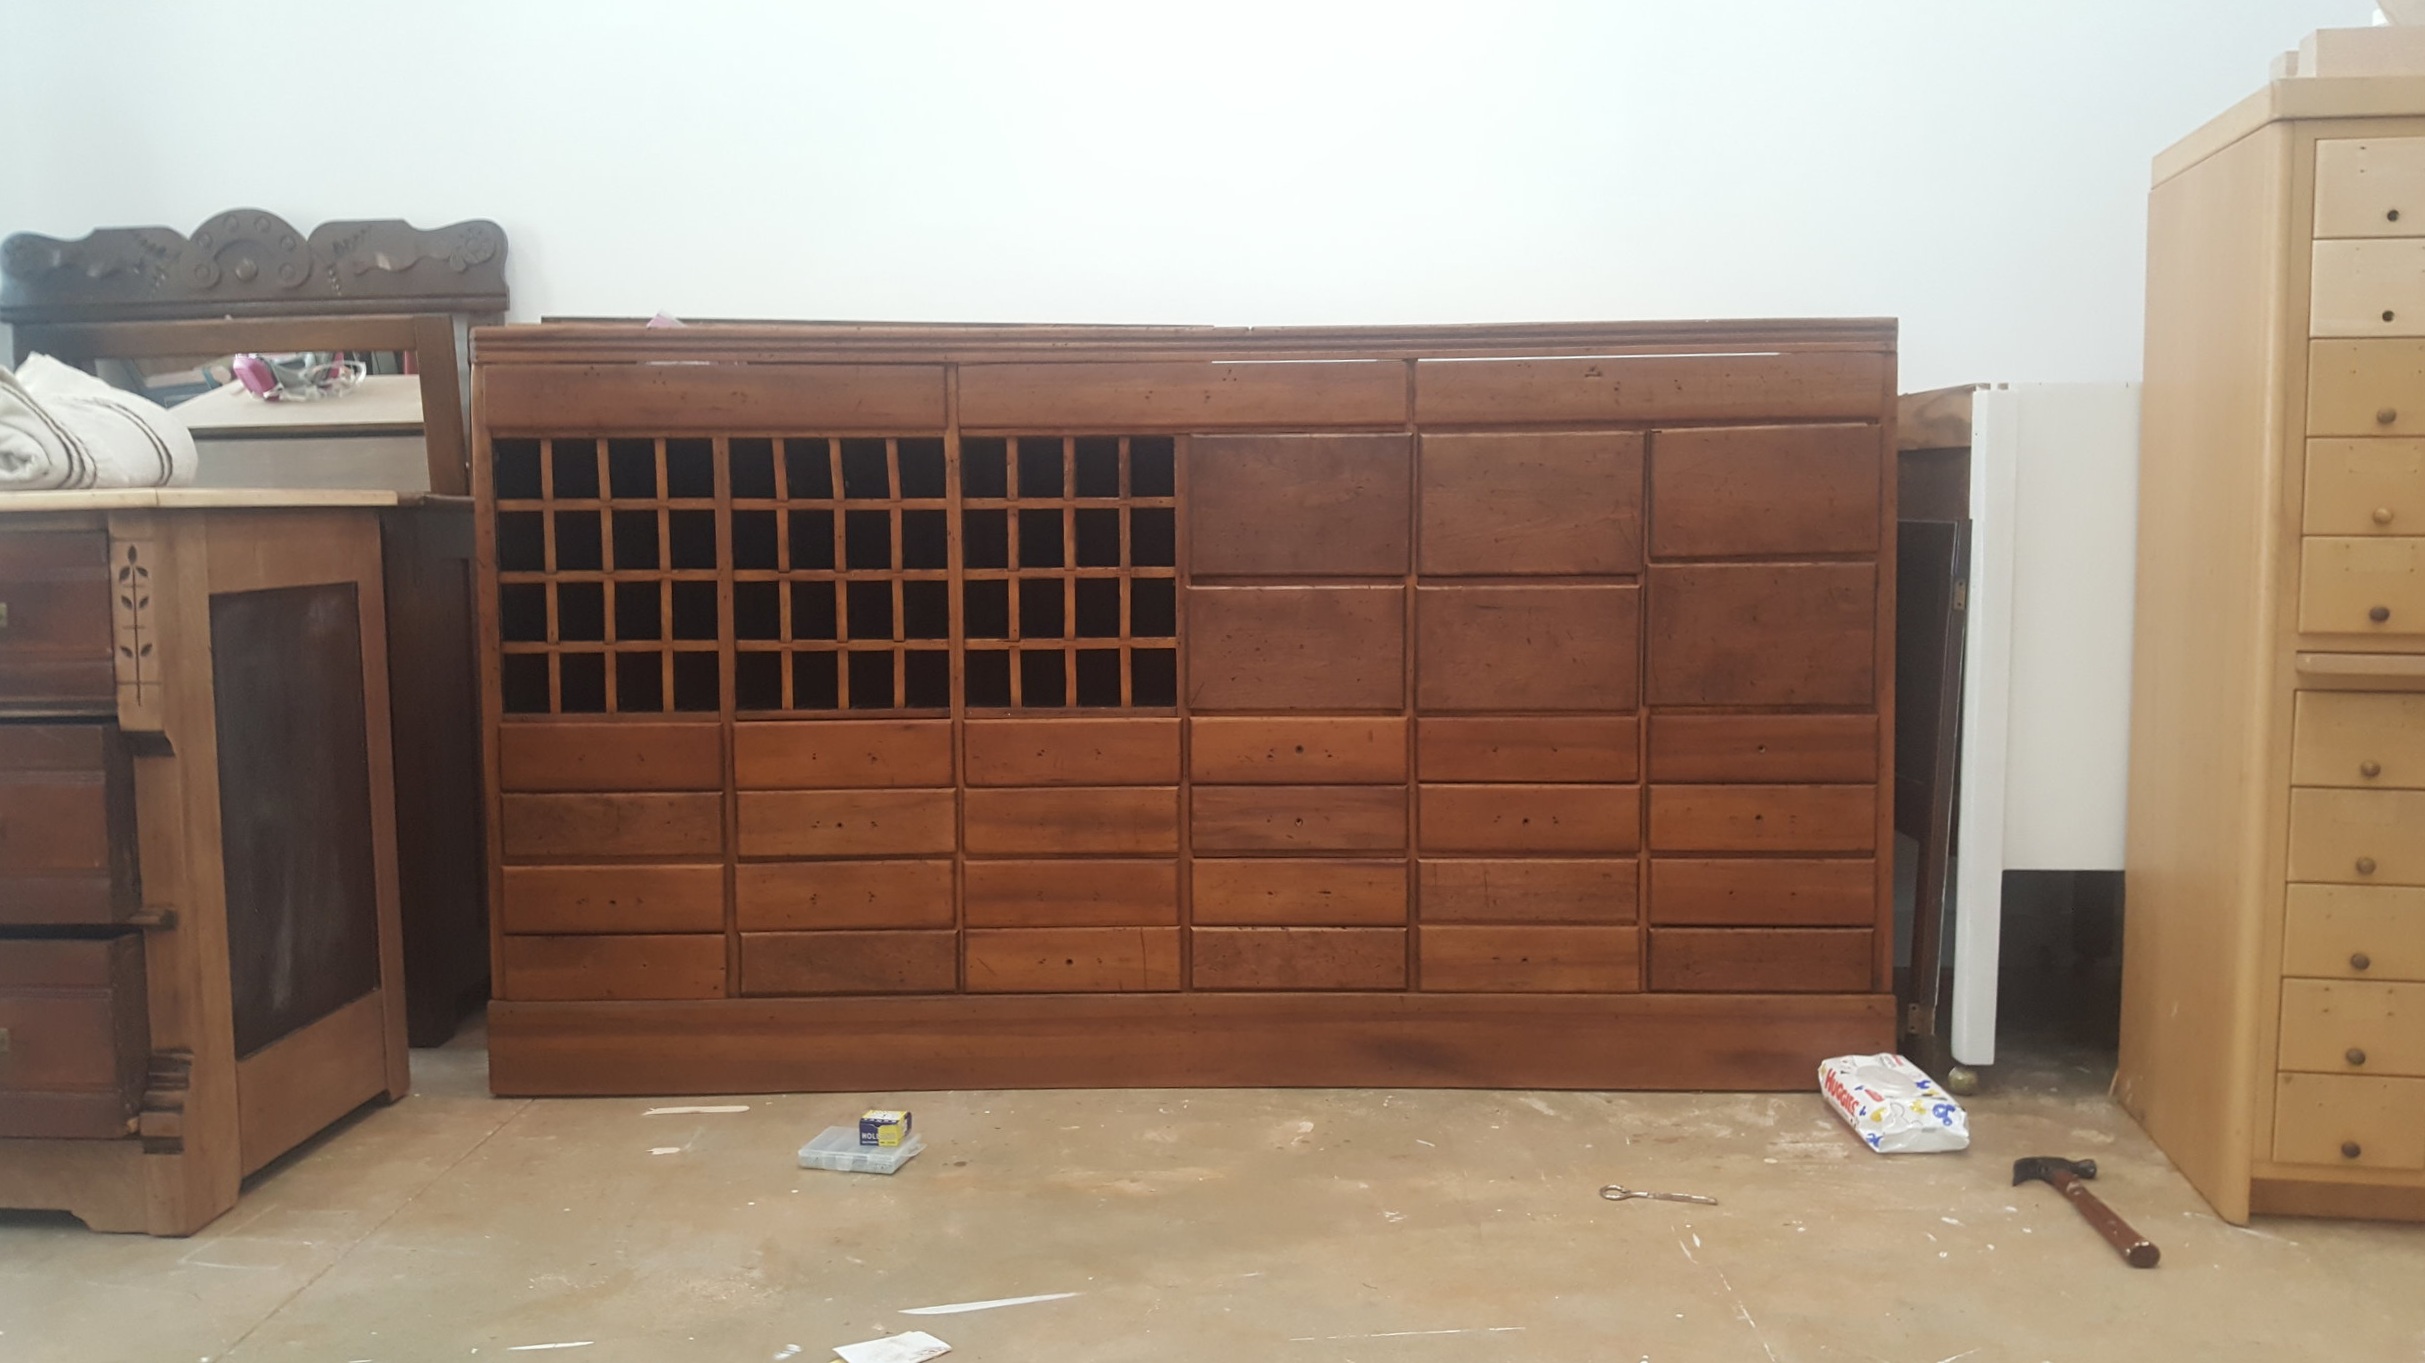
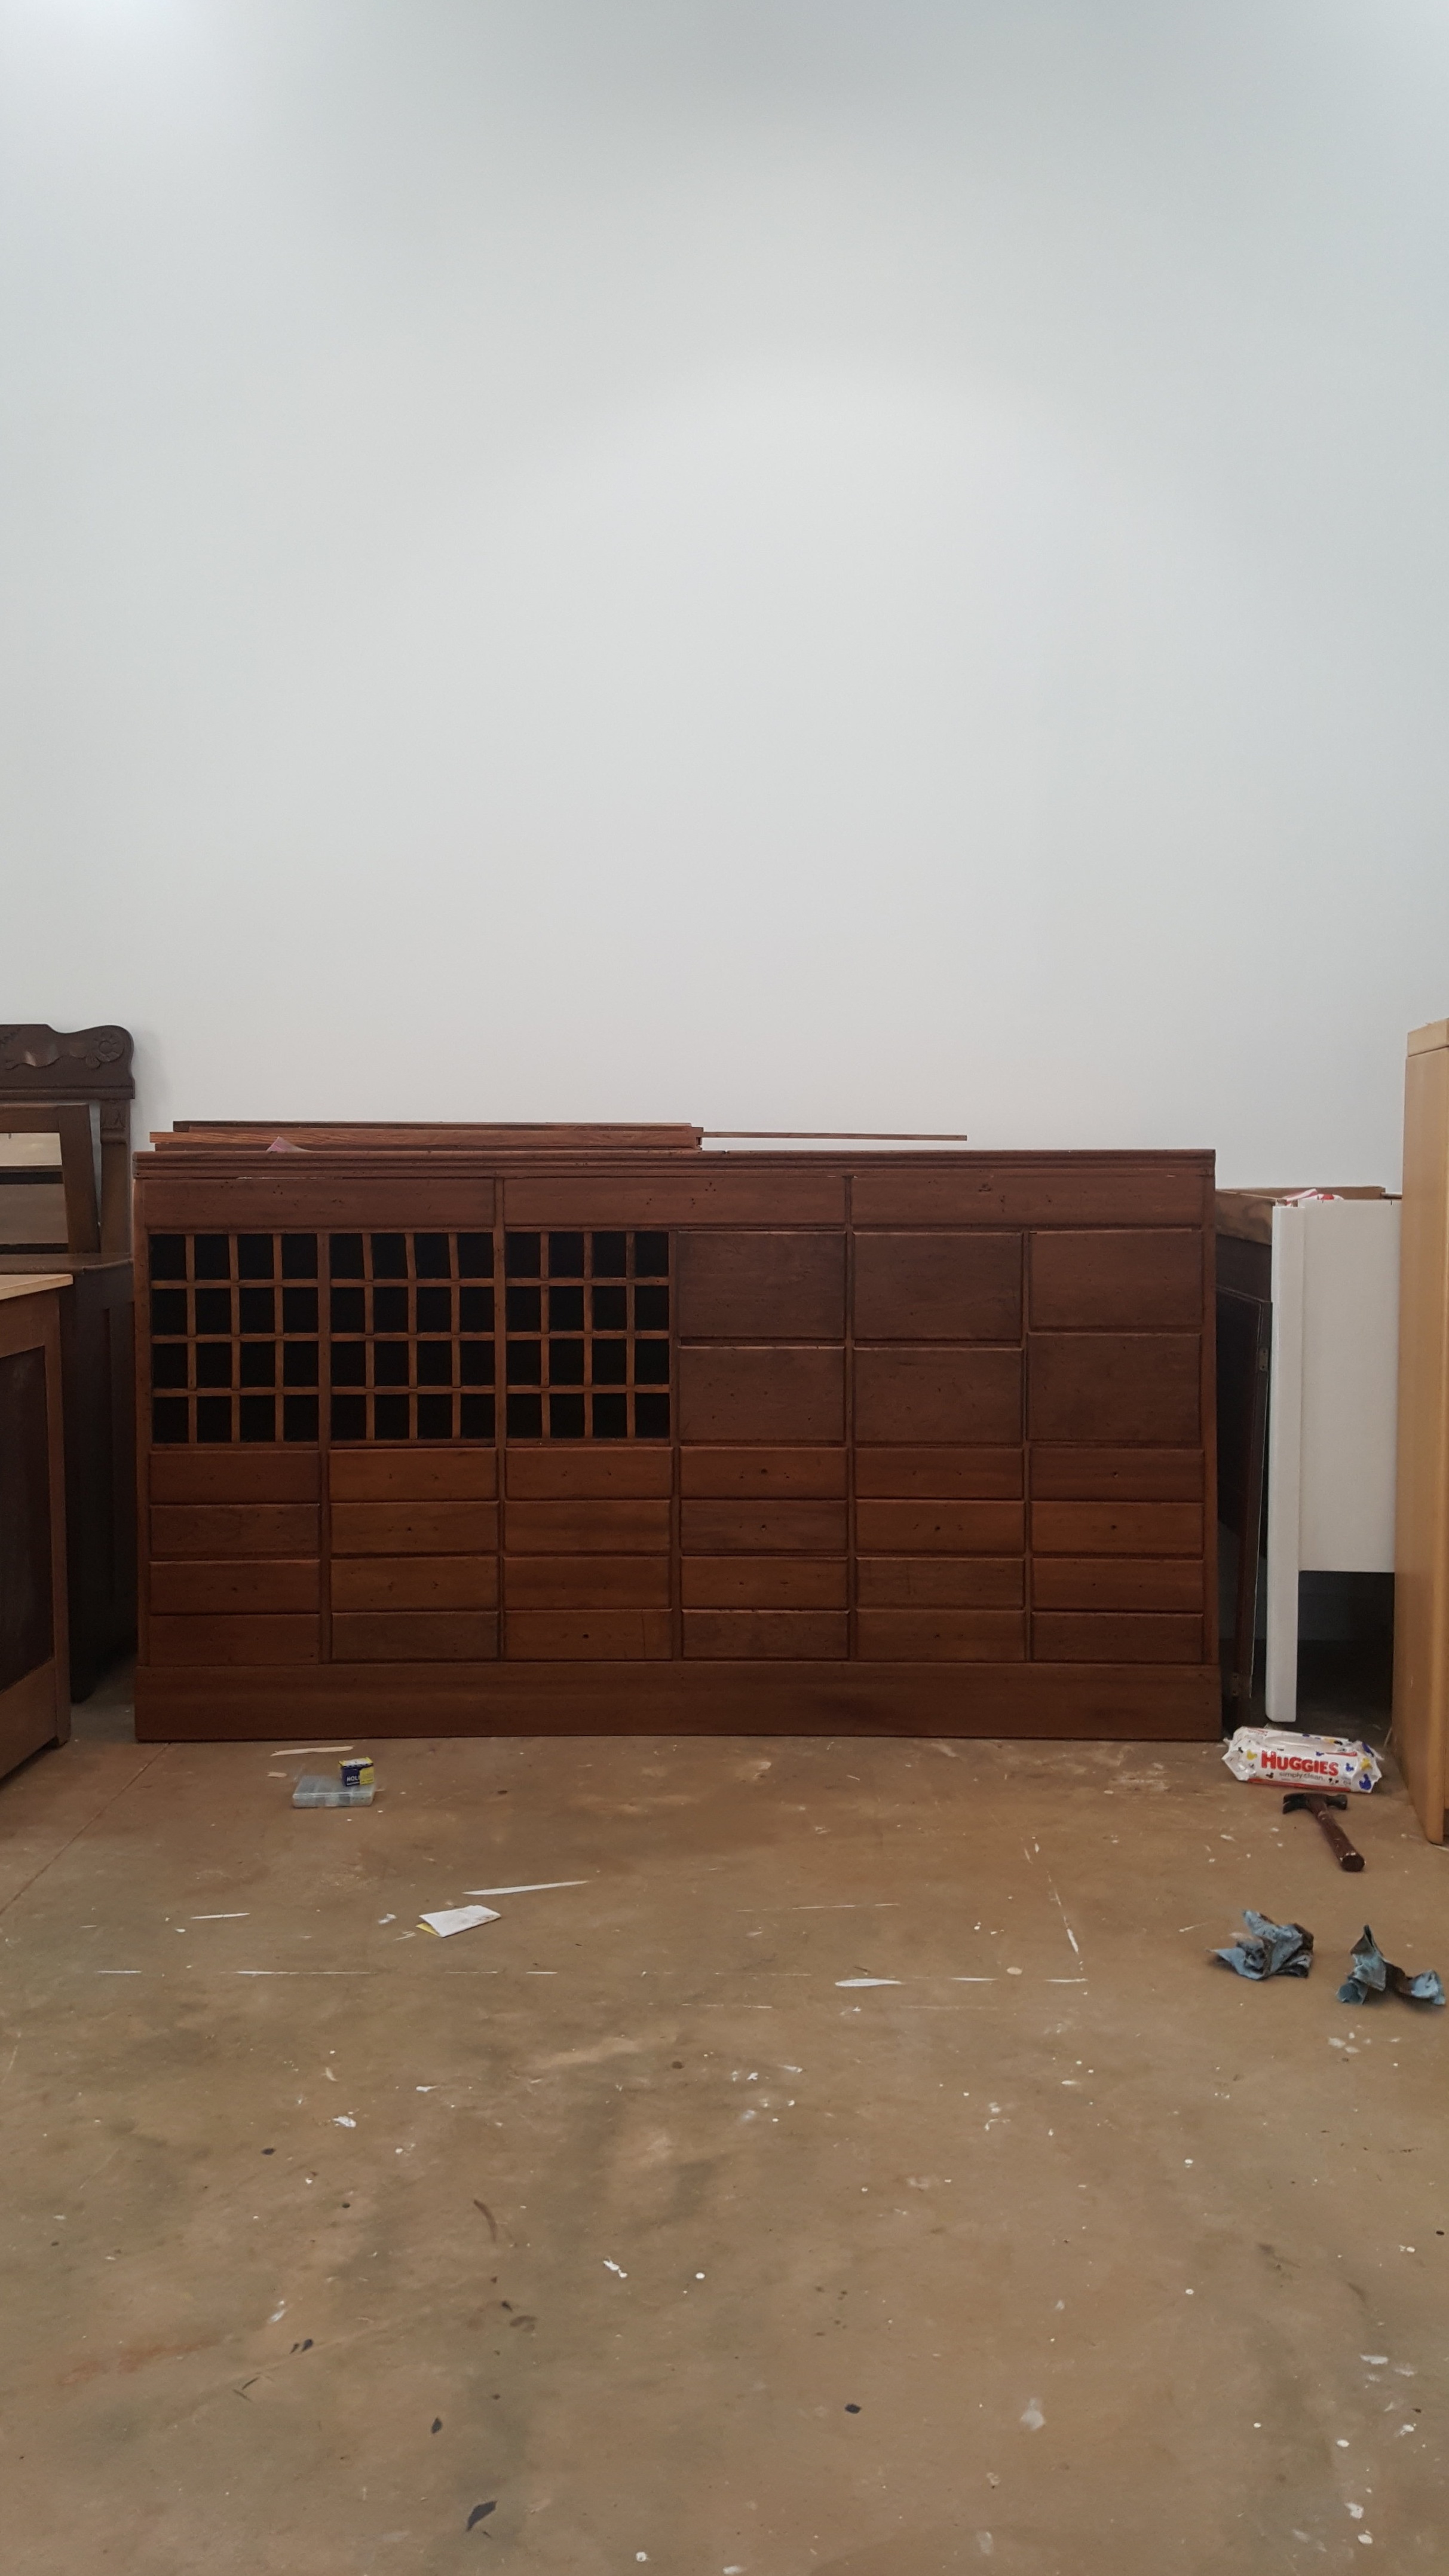
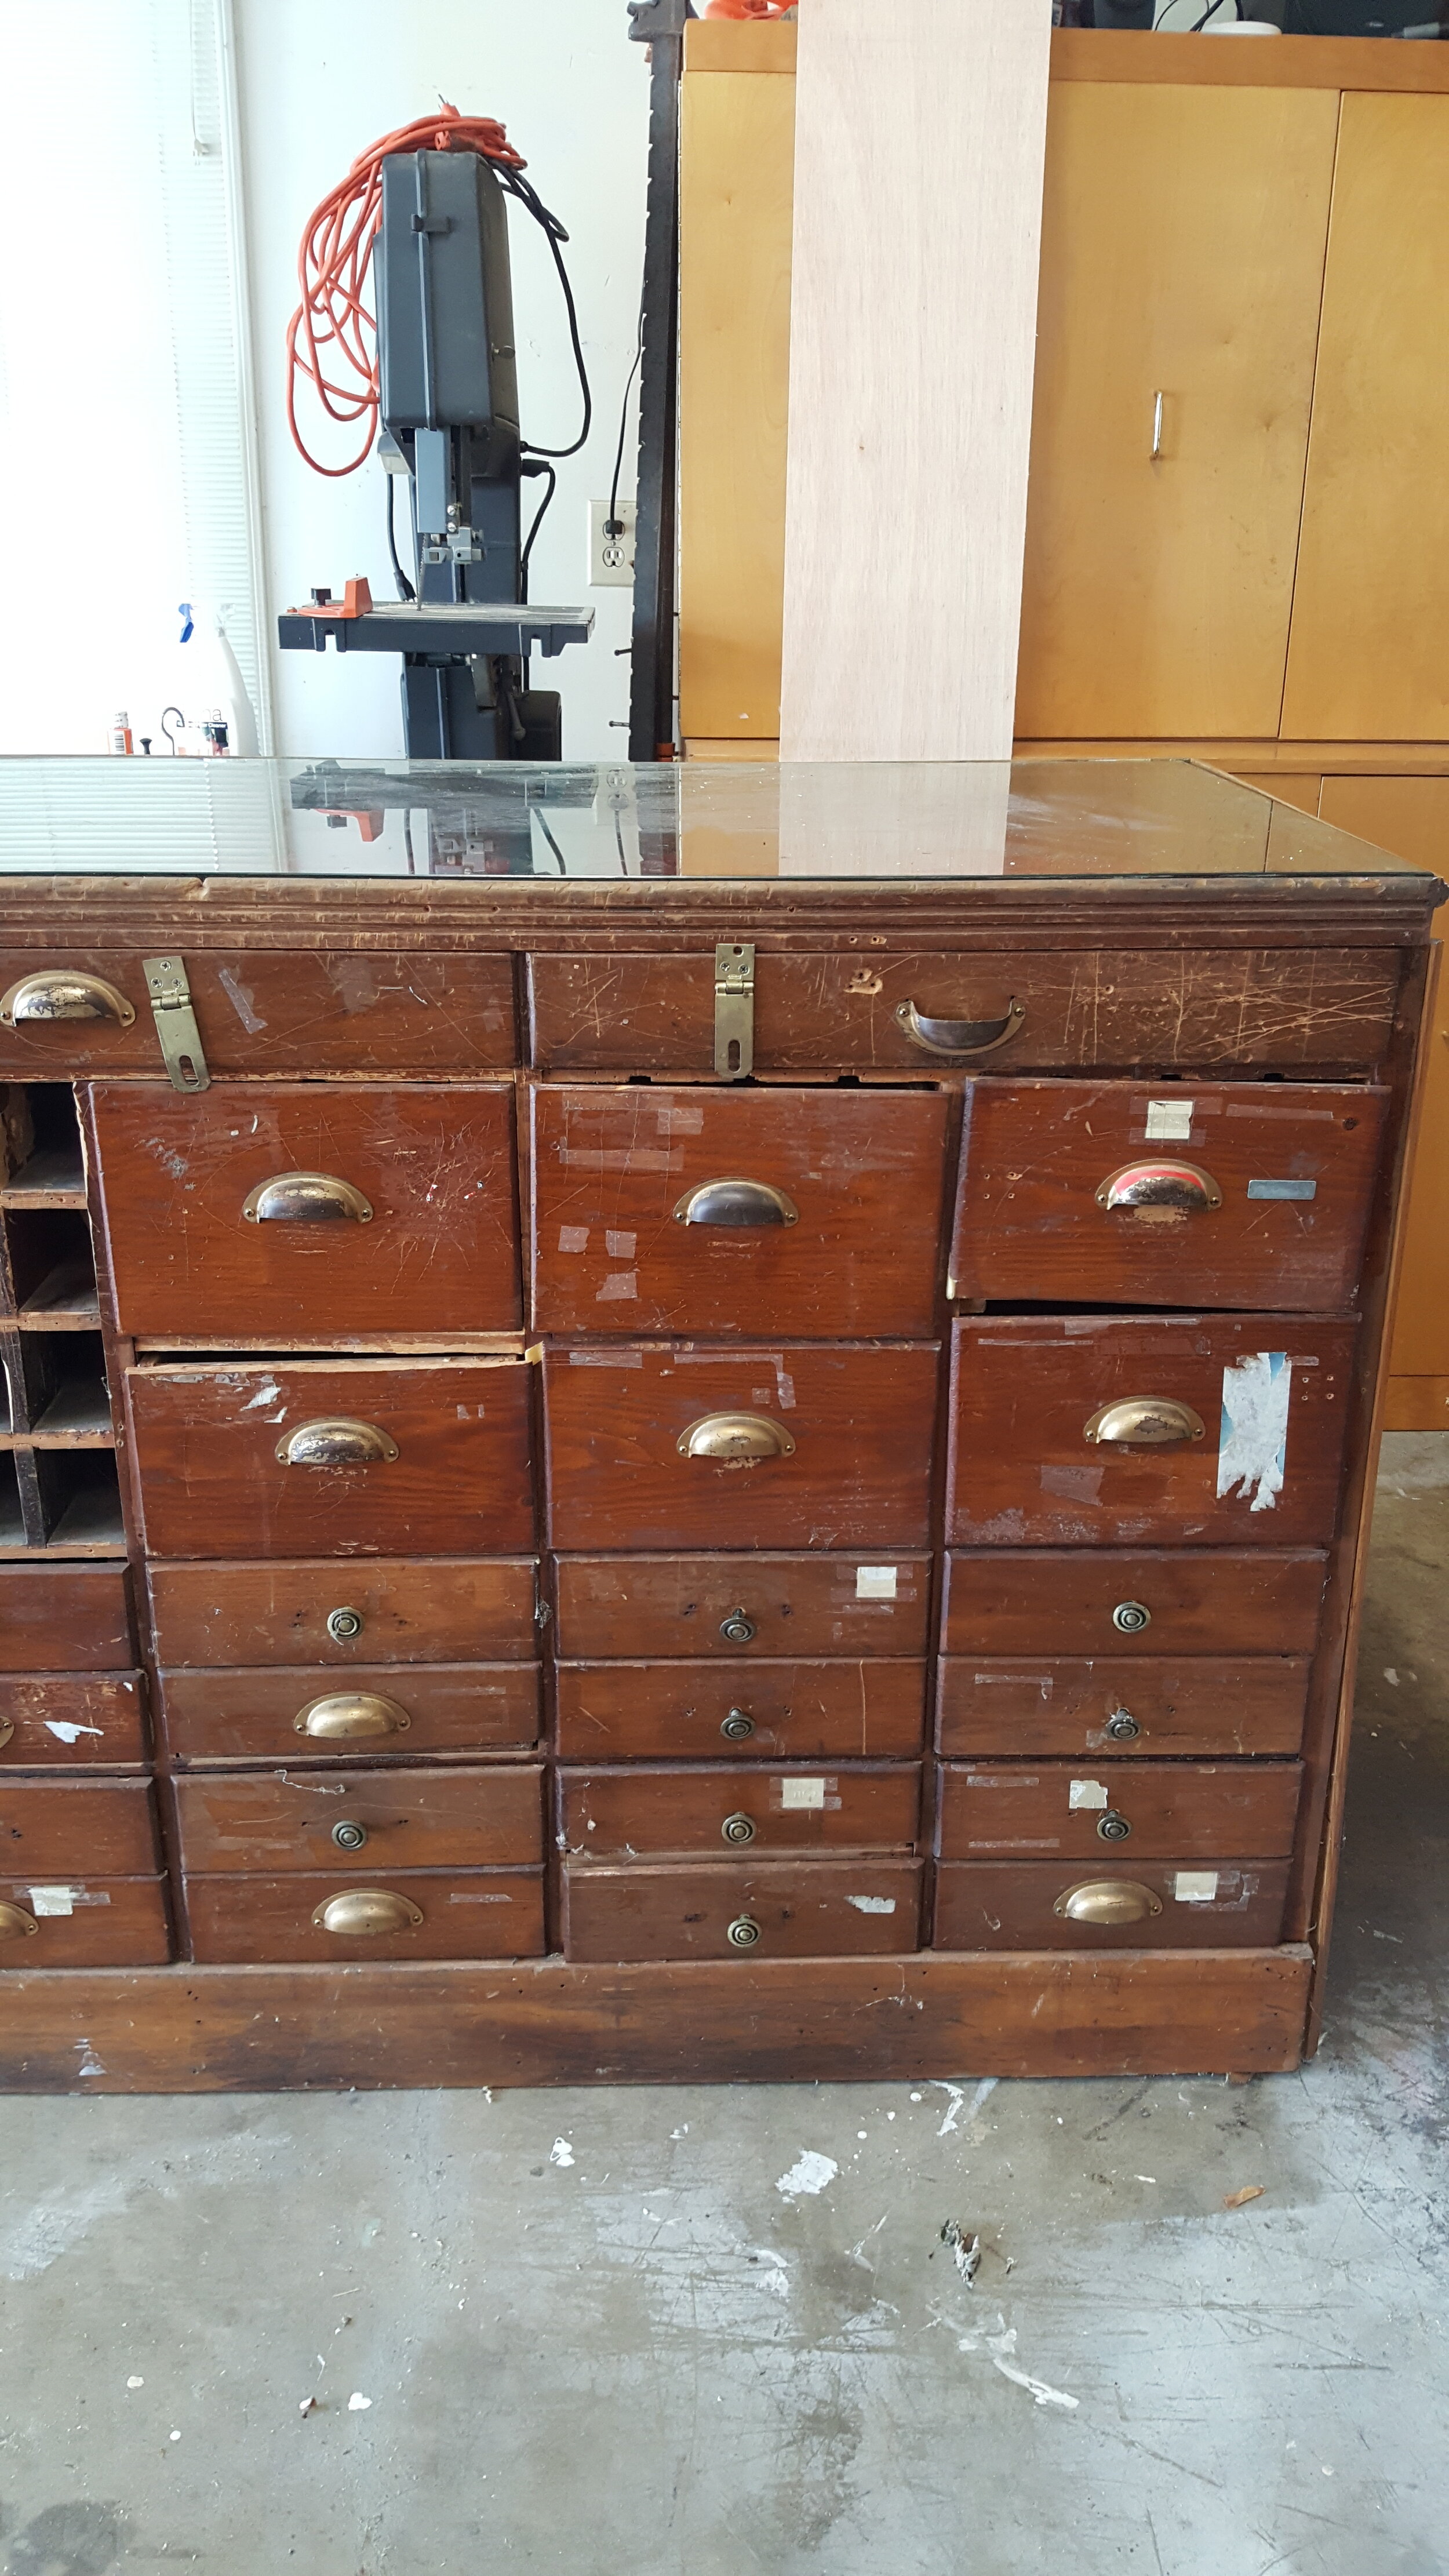
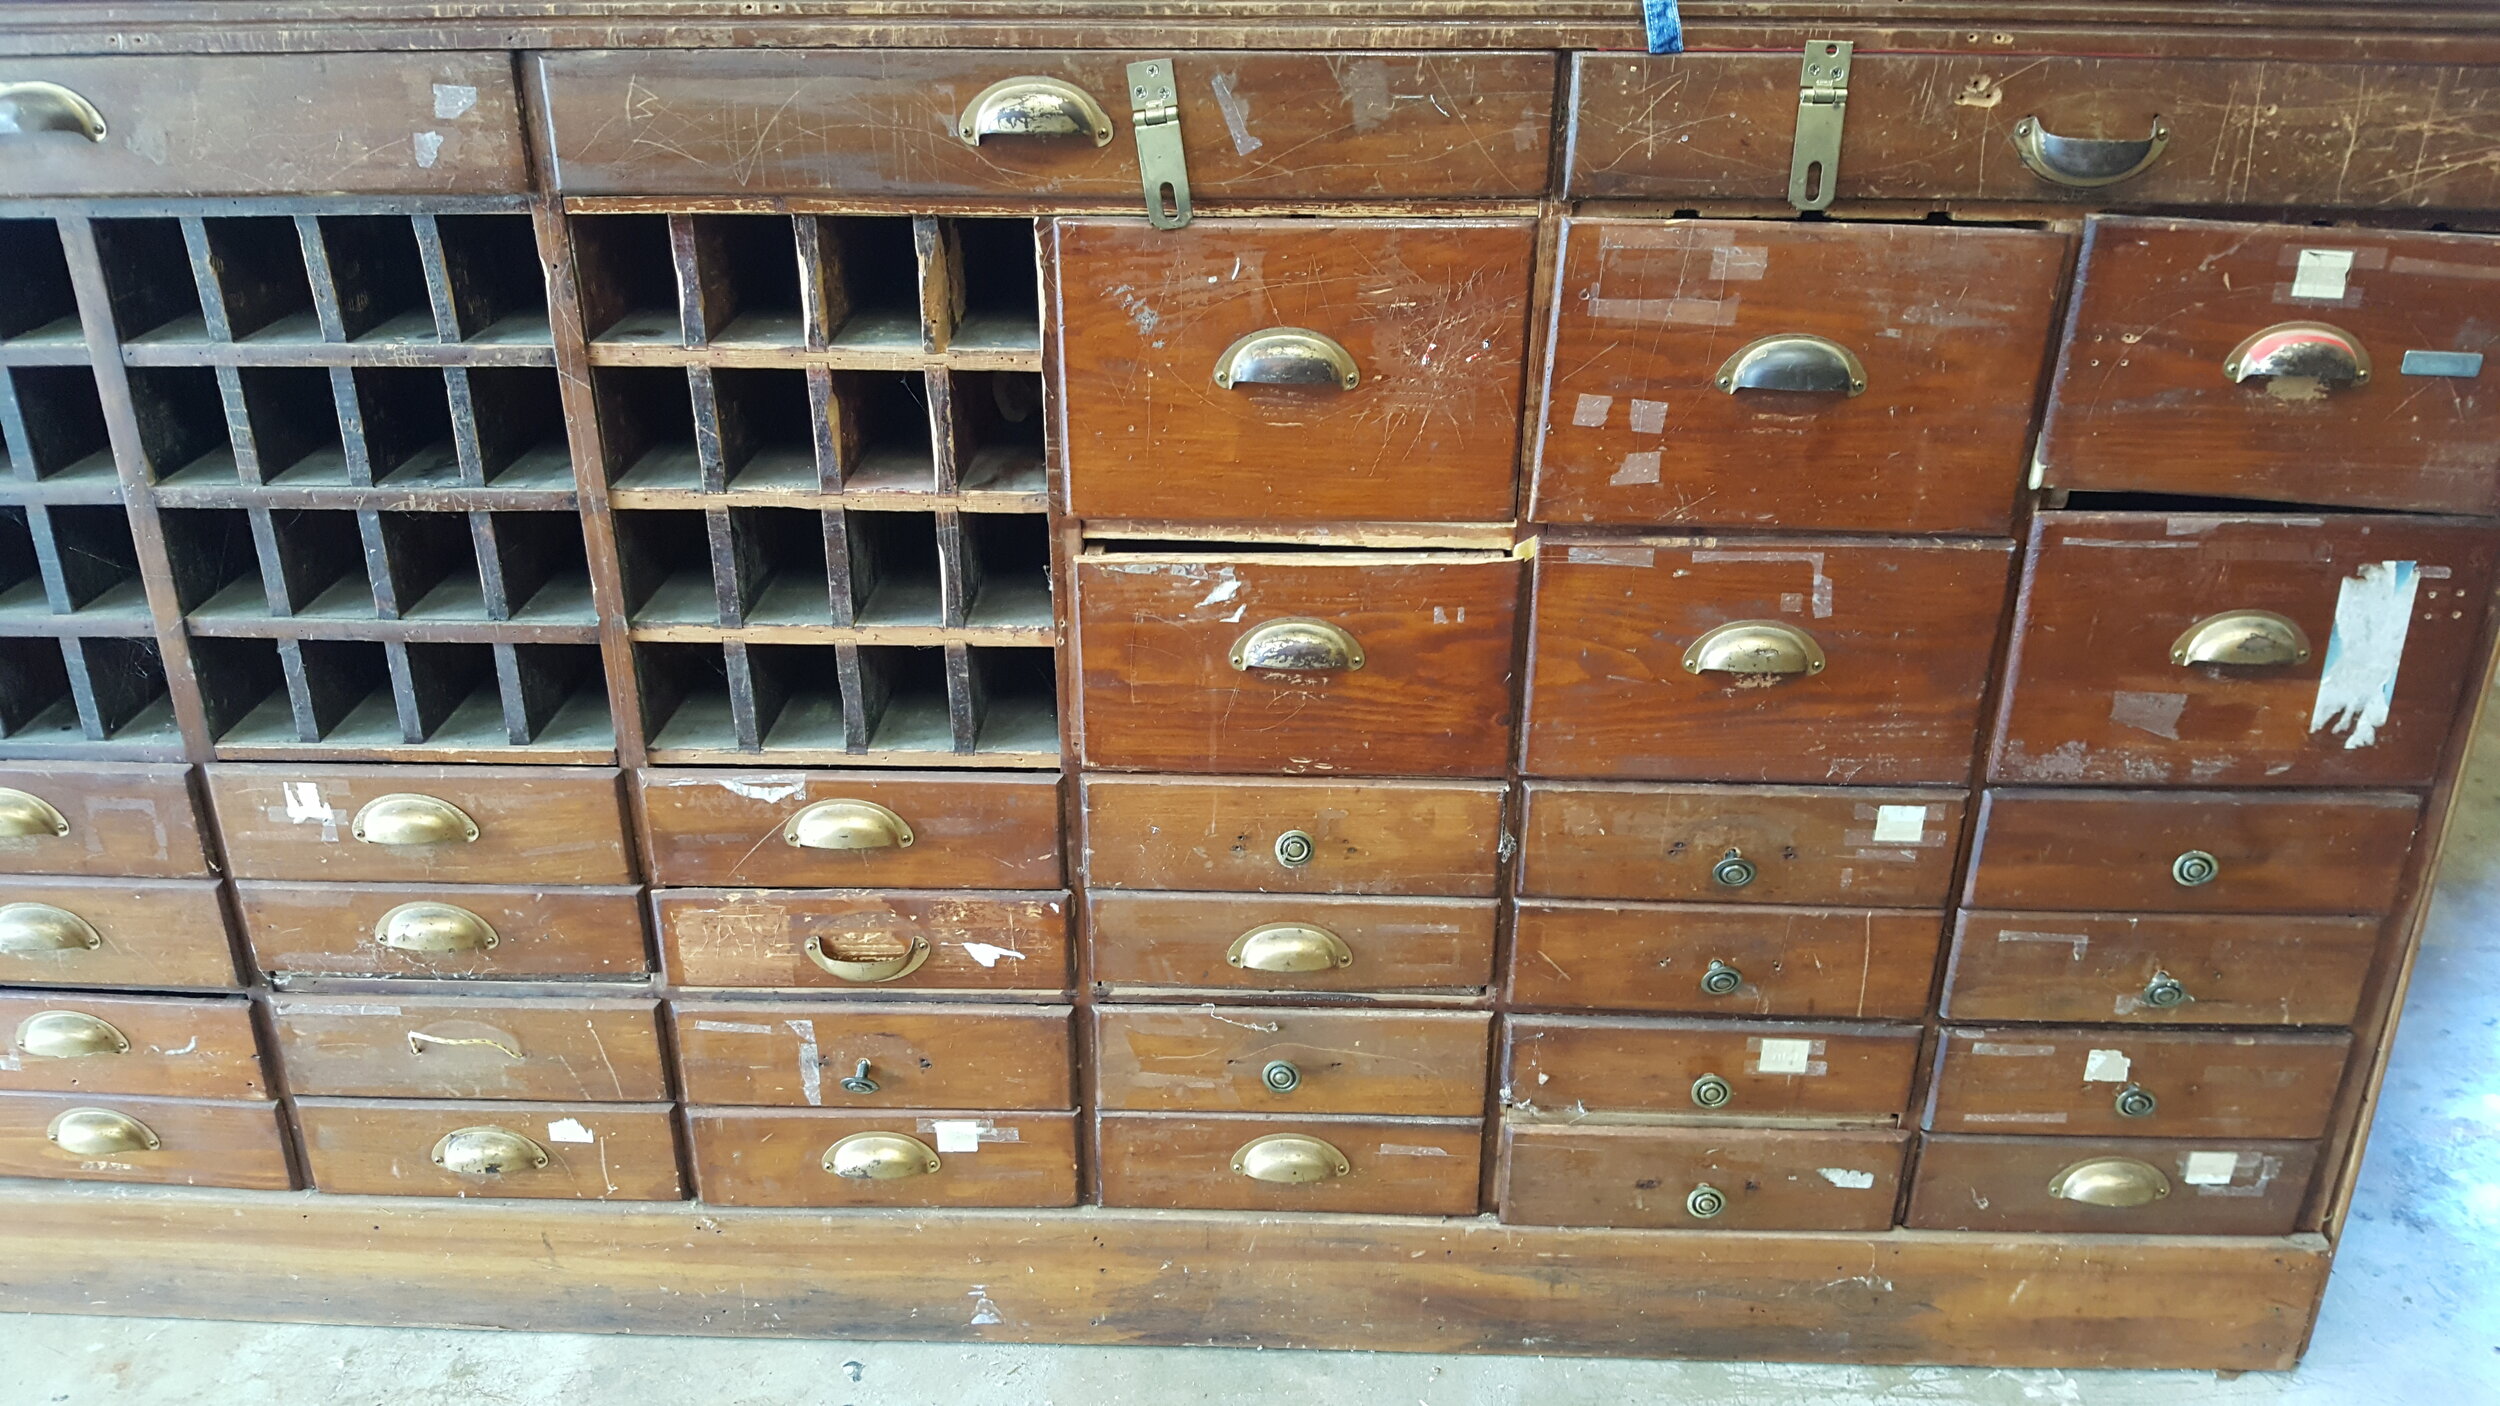
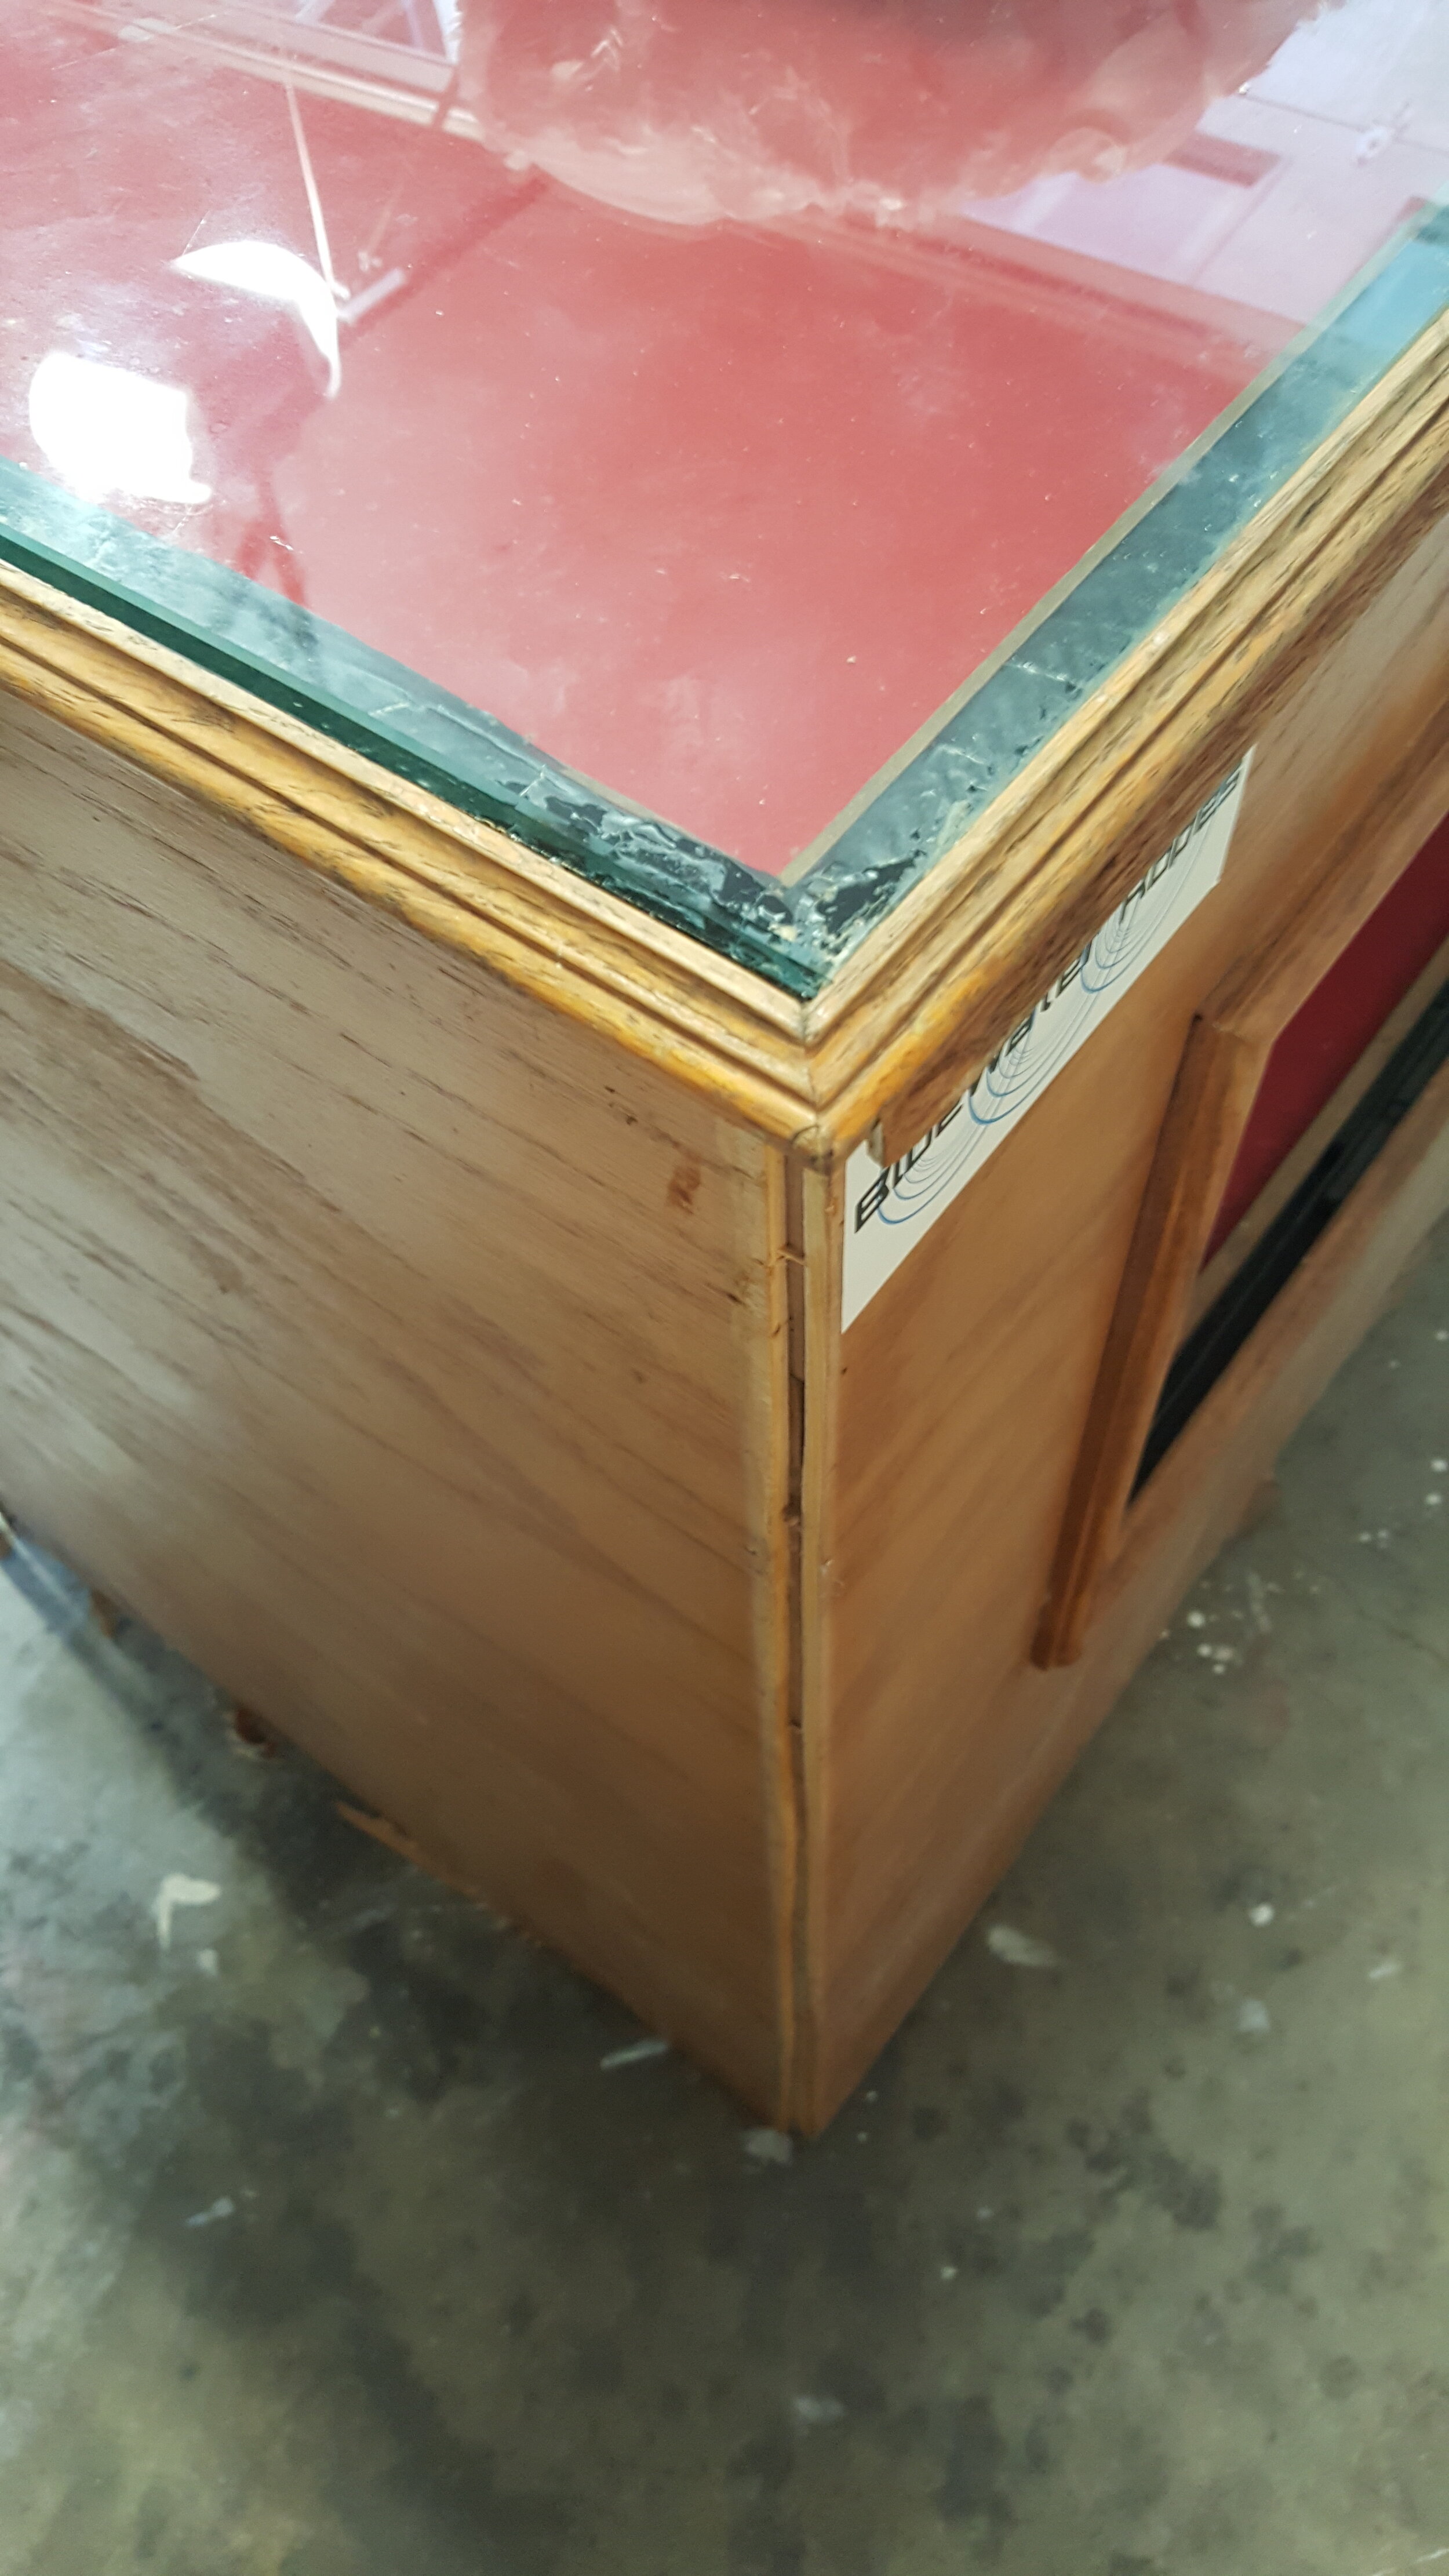
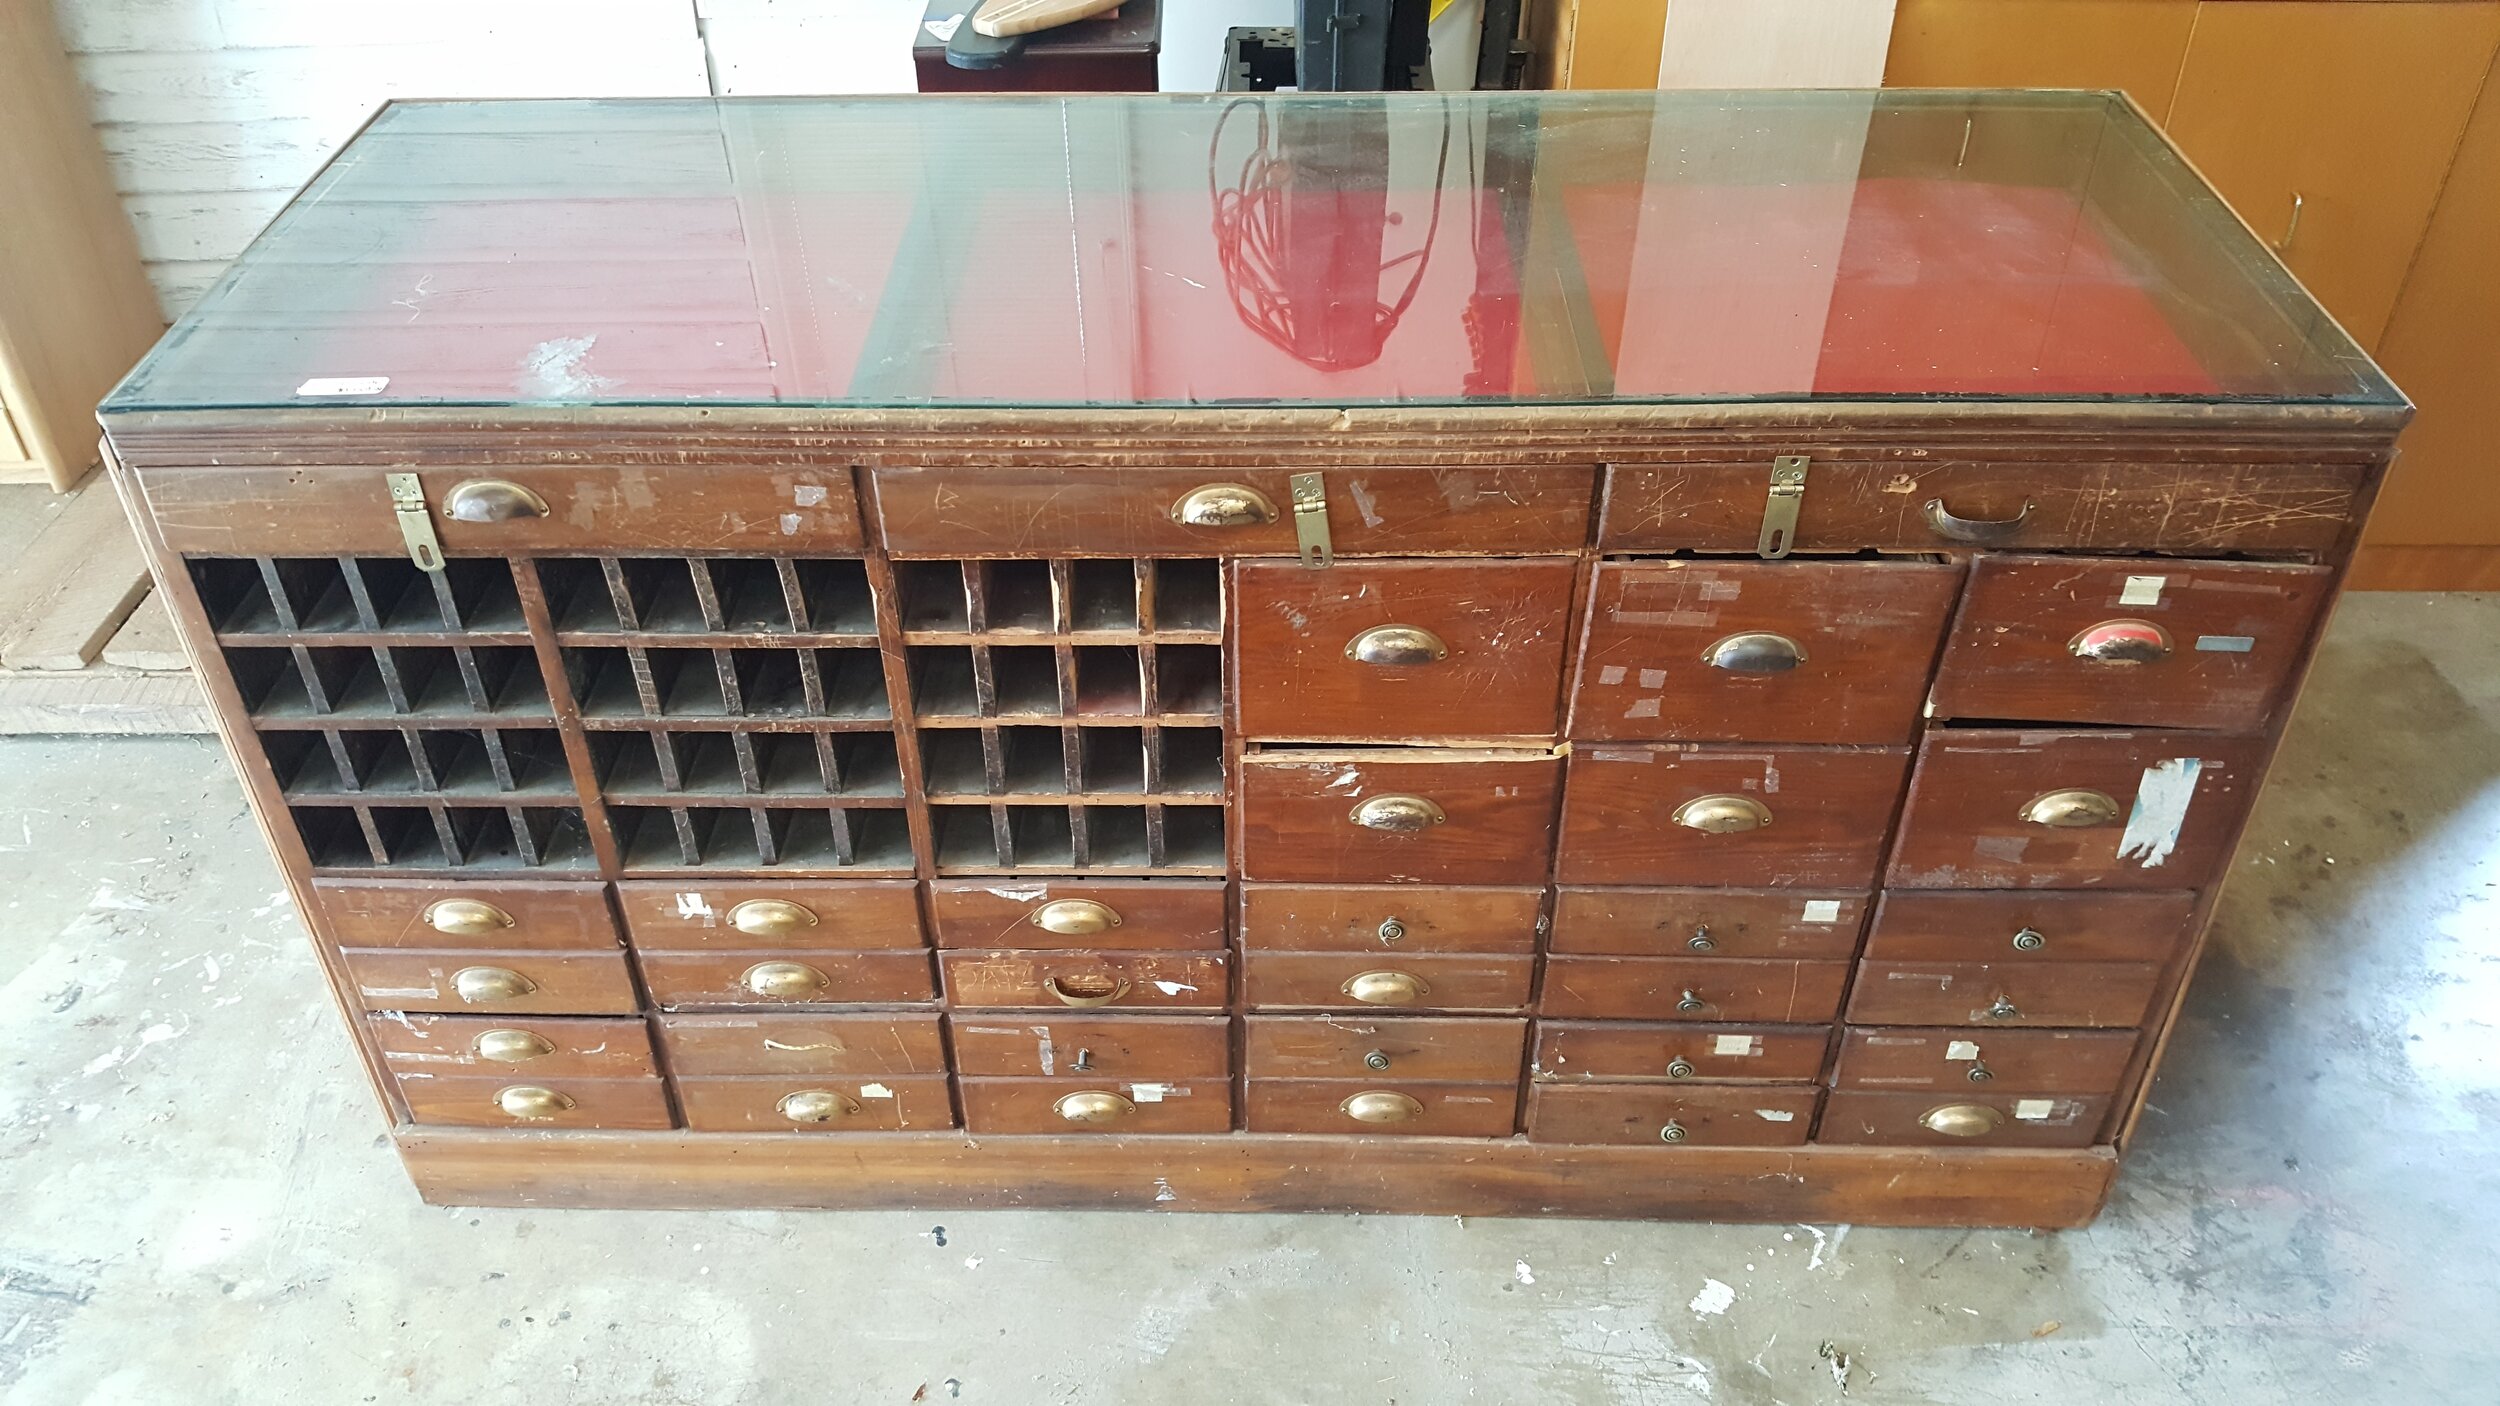
BEFORE PICTURES:


THE PREP PROCESS:
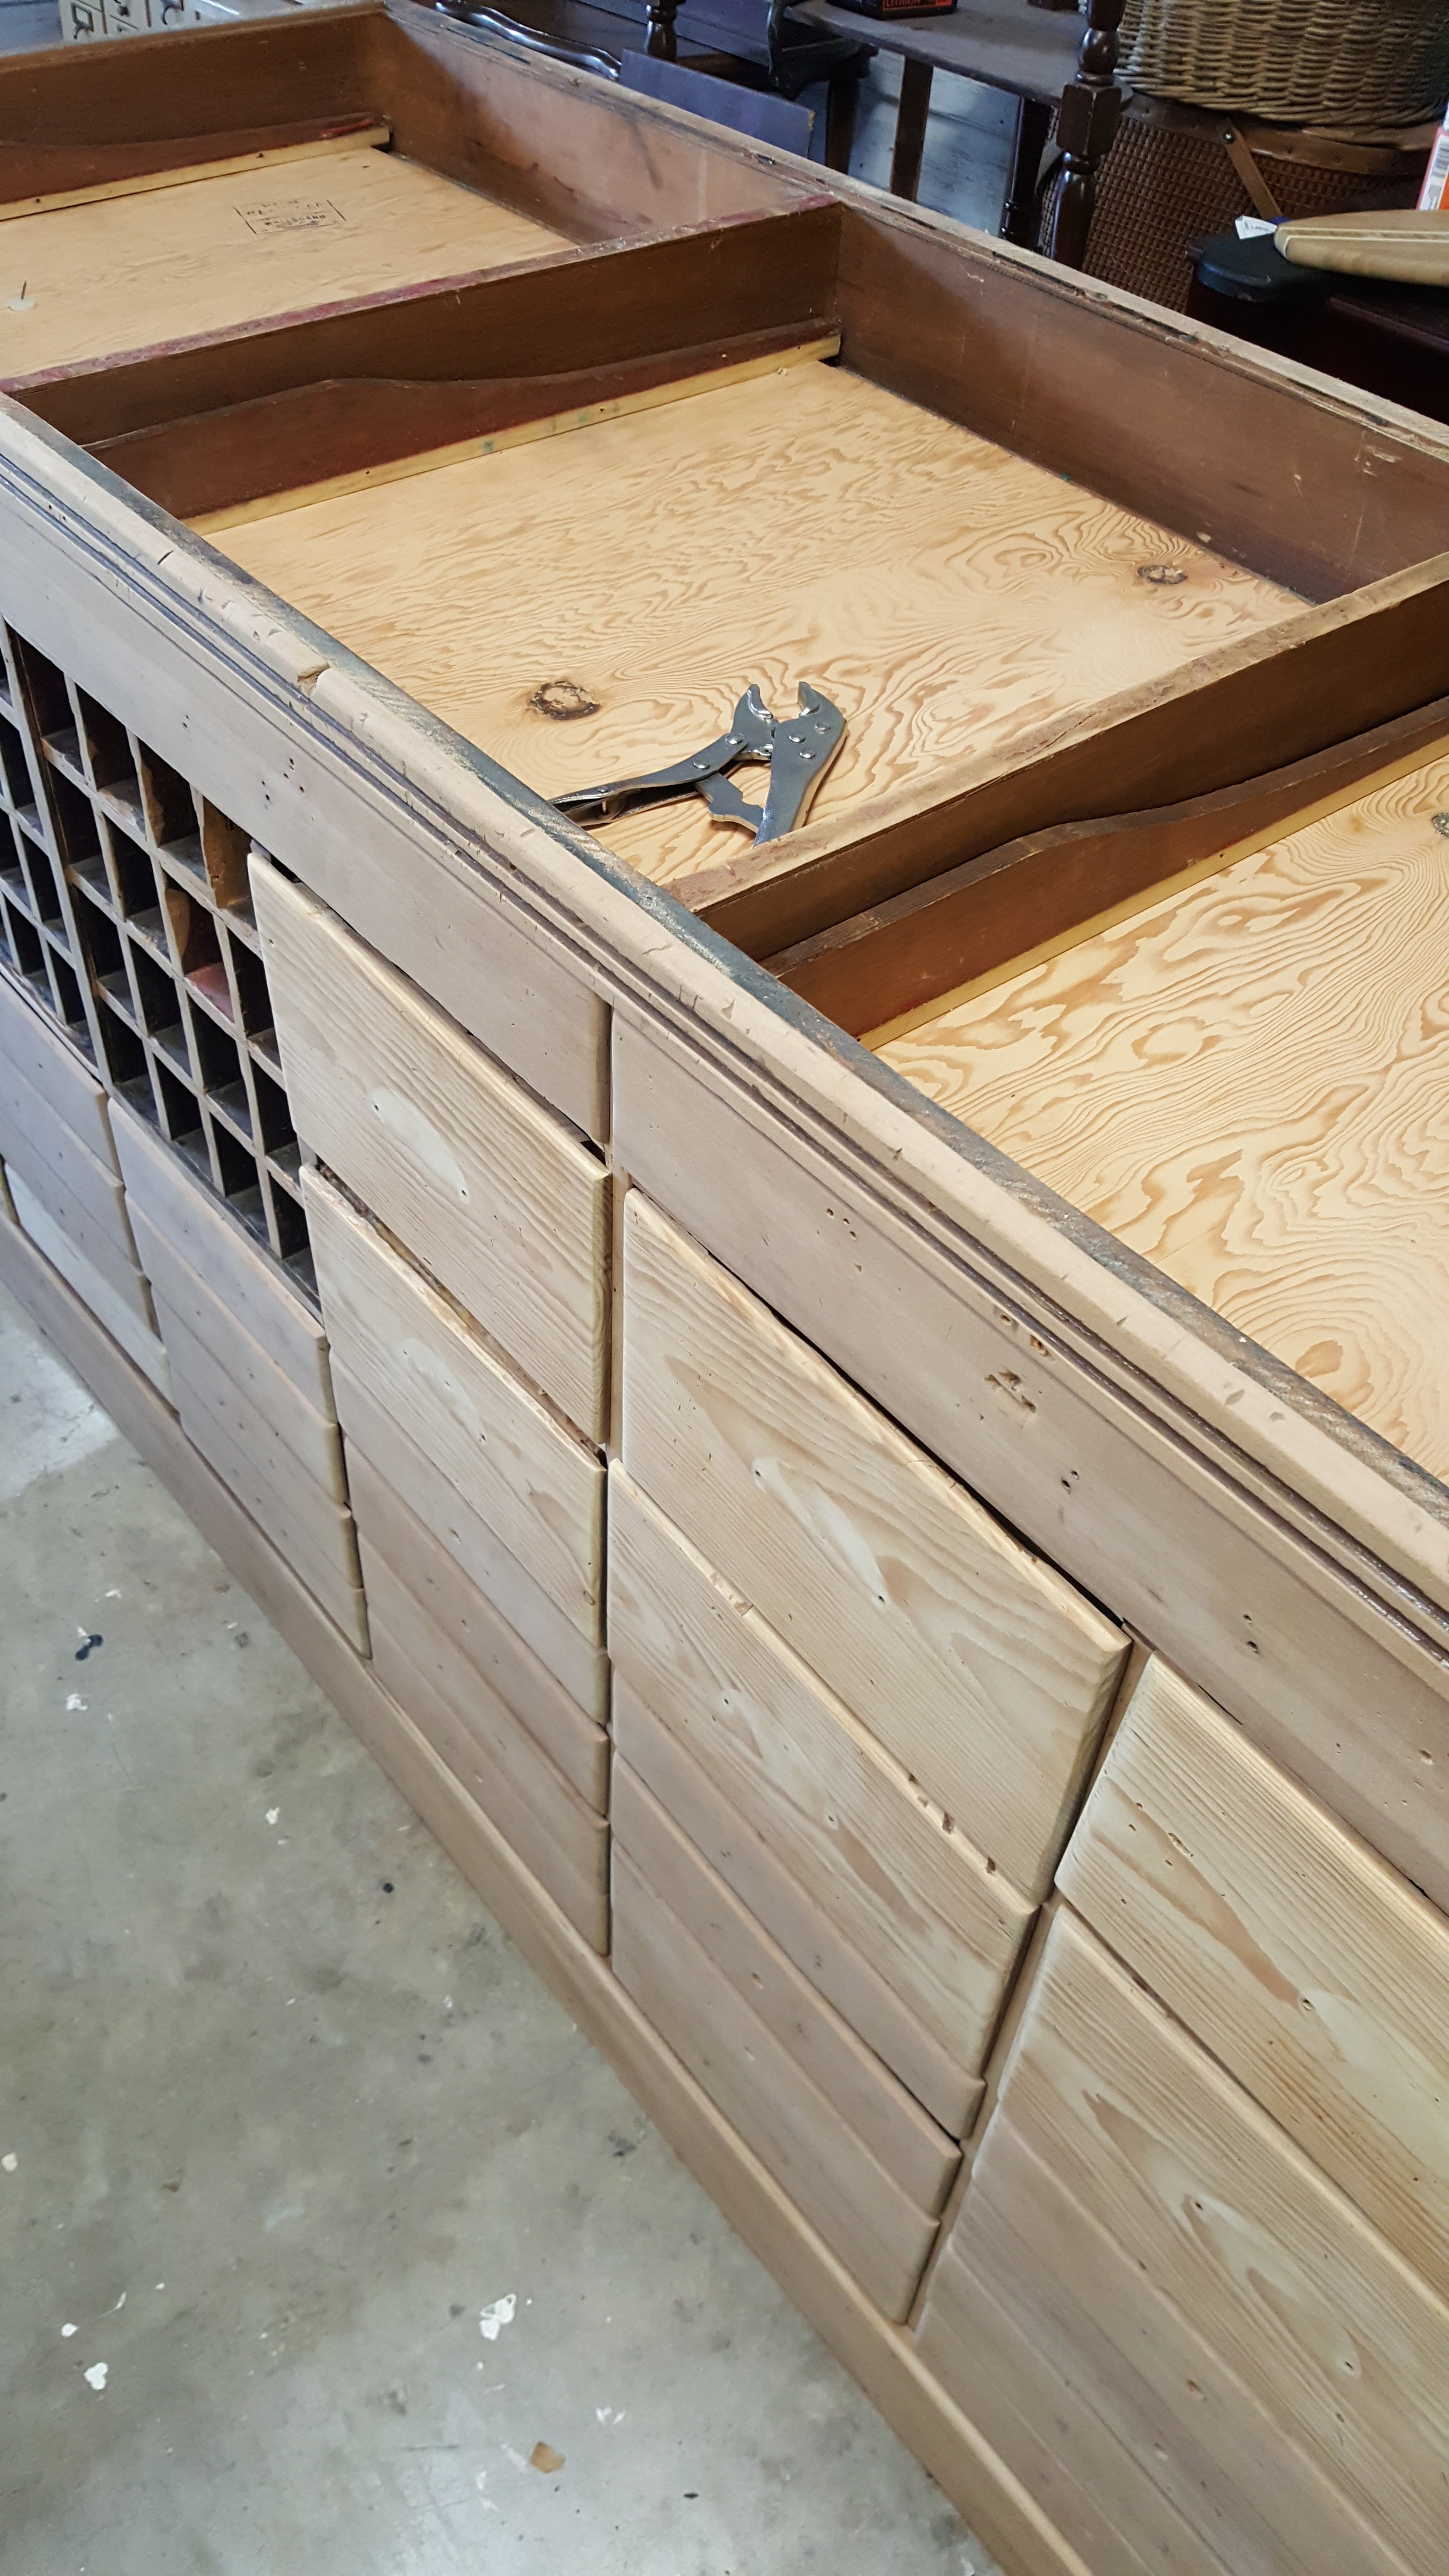
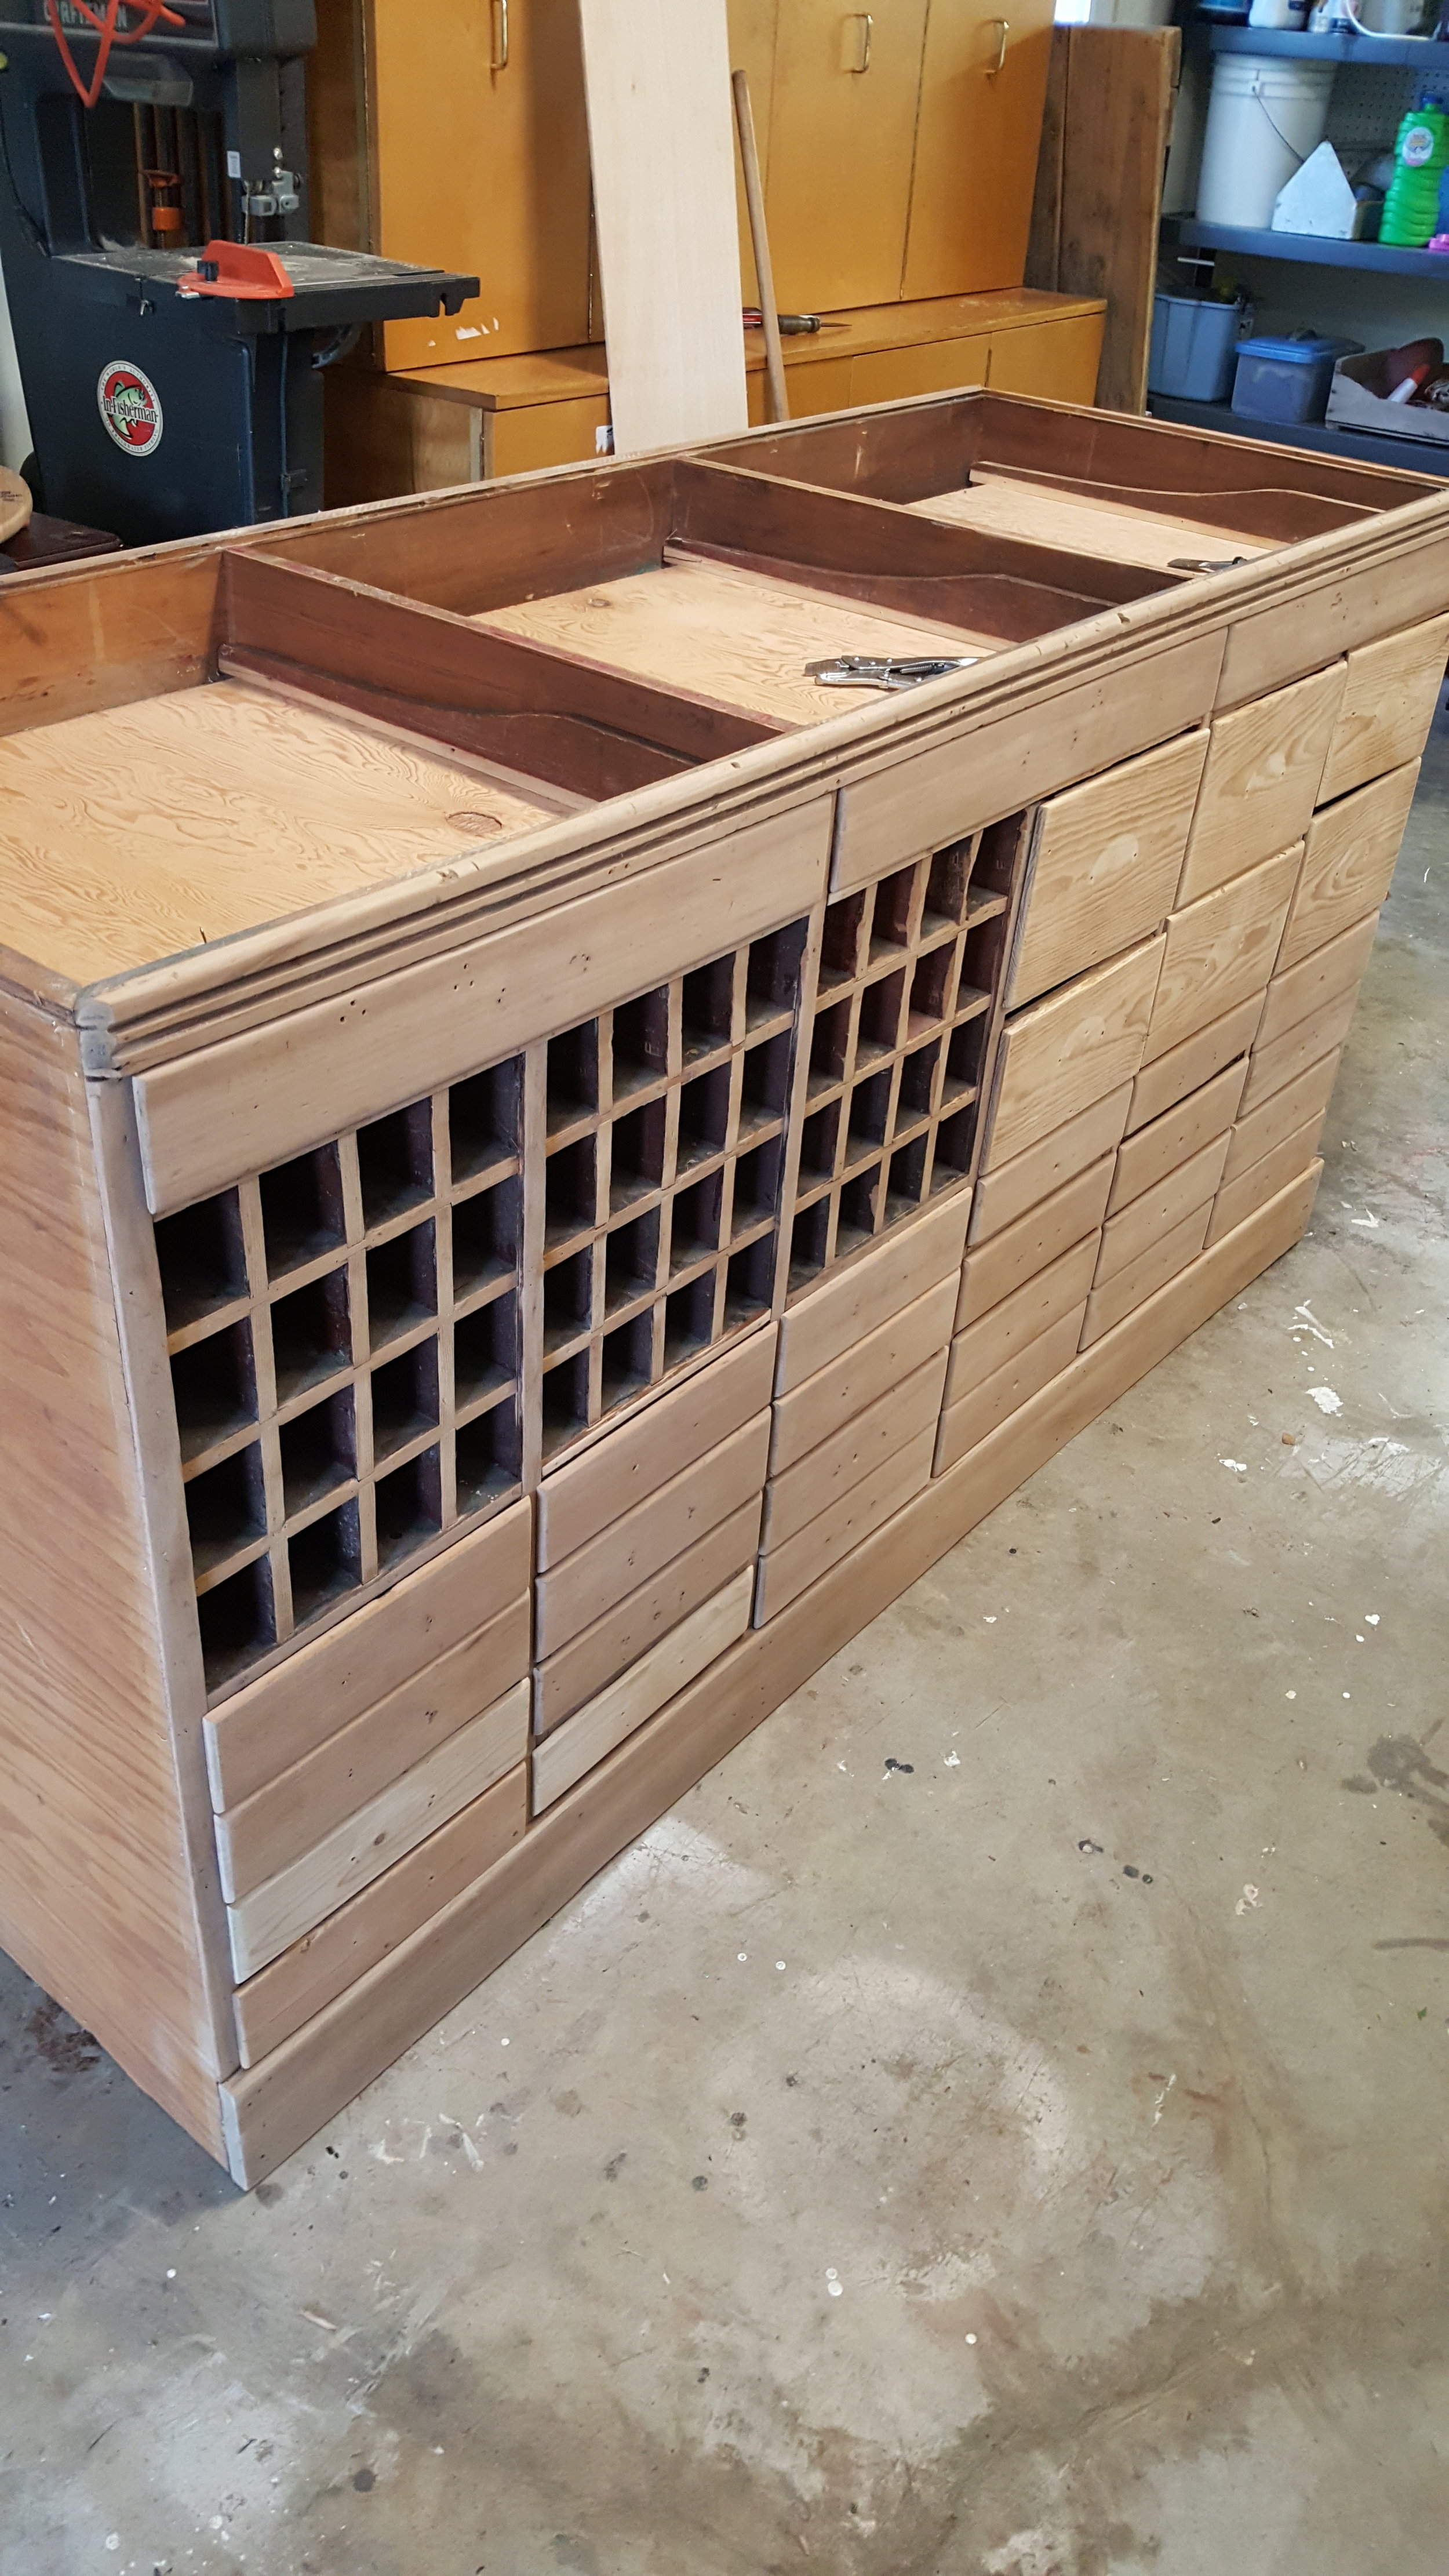
First, I removed all of the drawers and vacuumed everything
I used 60 grit sandpaper on my orbital sander and went to town! There was so much glue, old paint, tape and stickers on the wood, I just dove in and let the low-grit sand paper do most of the work. Since I wasn’t going for “perfection” on this piece, I figured that would be okay. I think I went through about 50 pieces of sandpaper. Ha!
I removed all of the old felt that was attached in the top drawers. Yuck! Thankfully, most of it pulled off with ease, but there were a few stubborn areas that I had to use Goo Gone and a scraper to get it off.
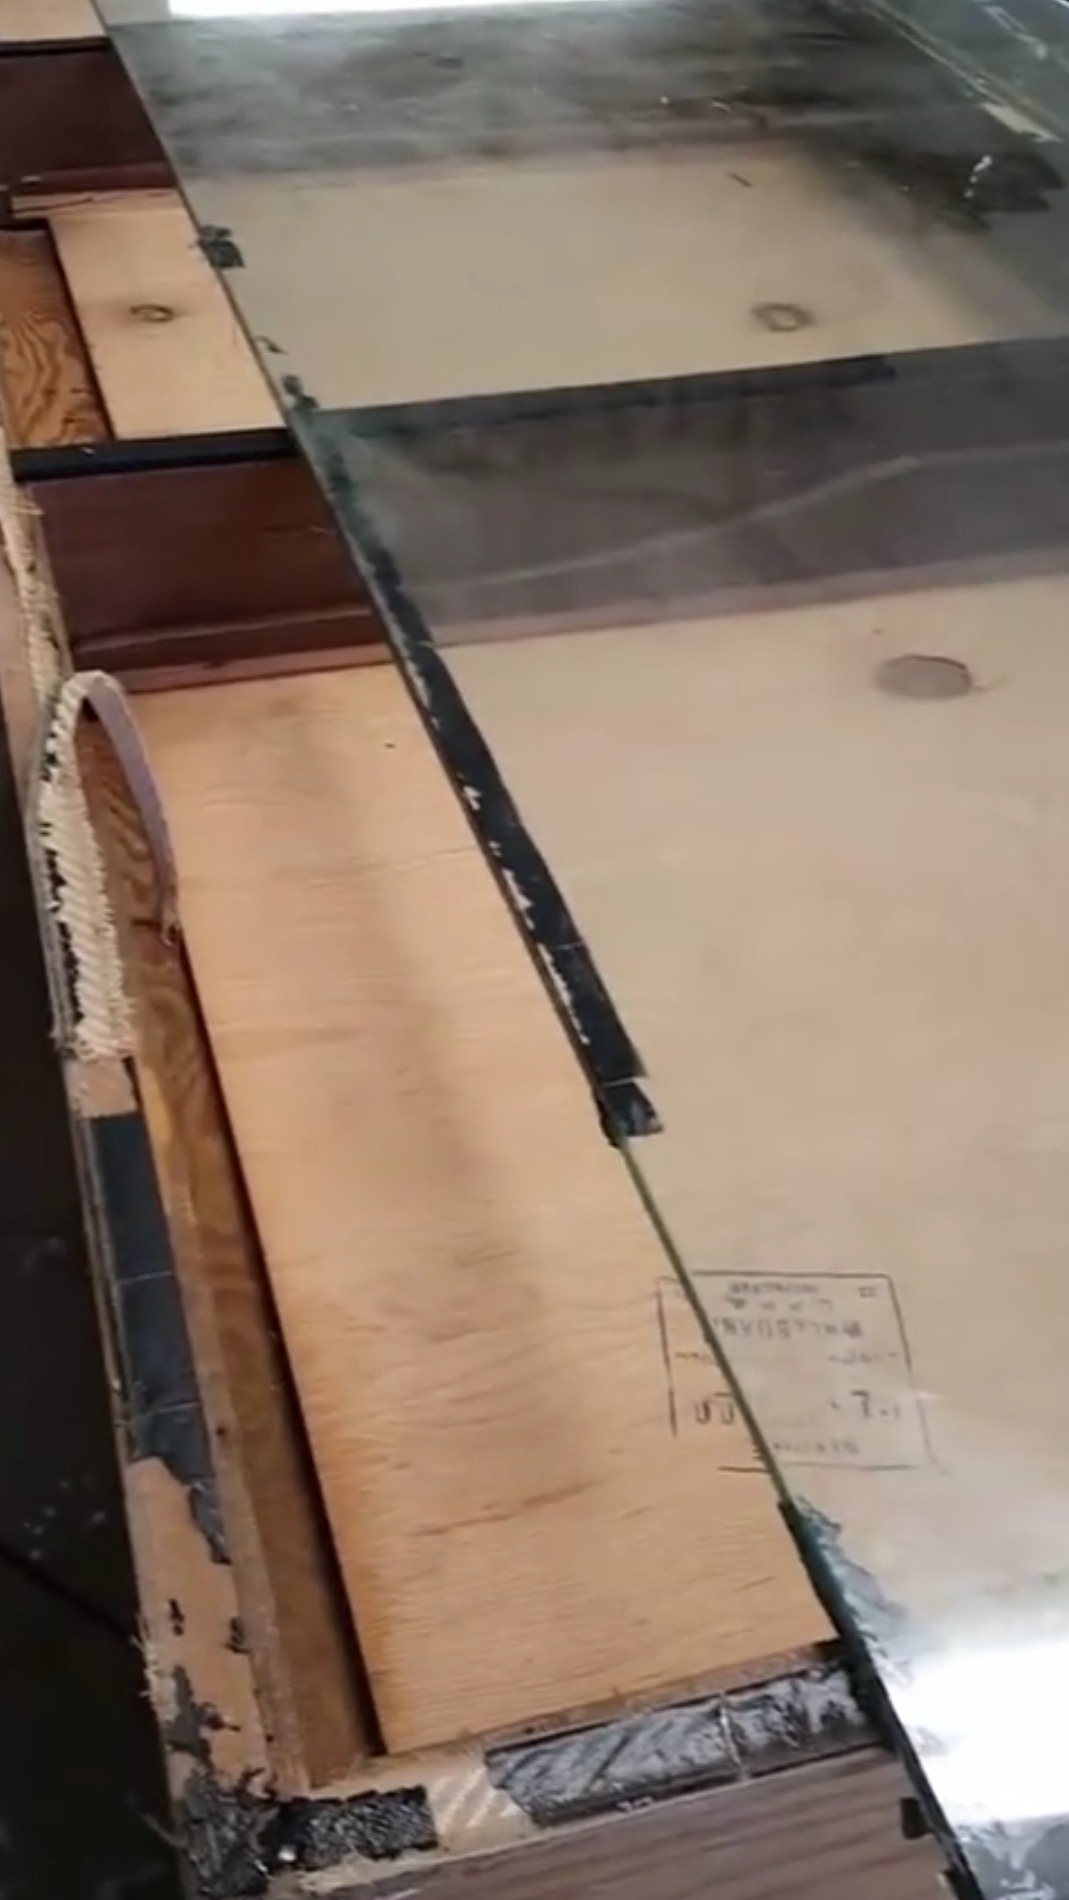
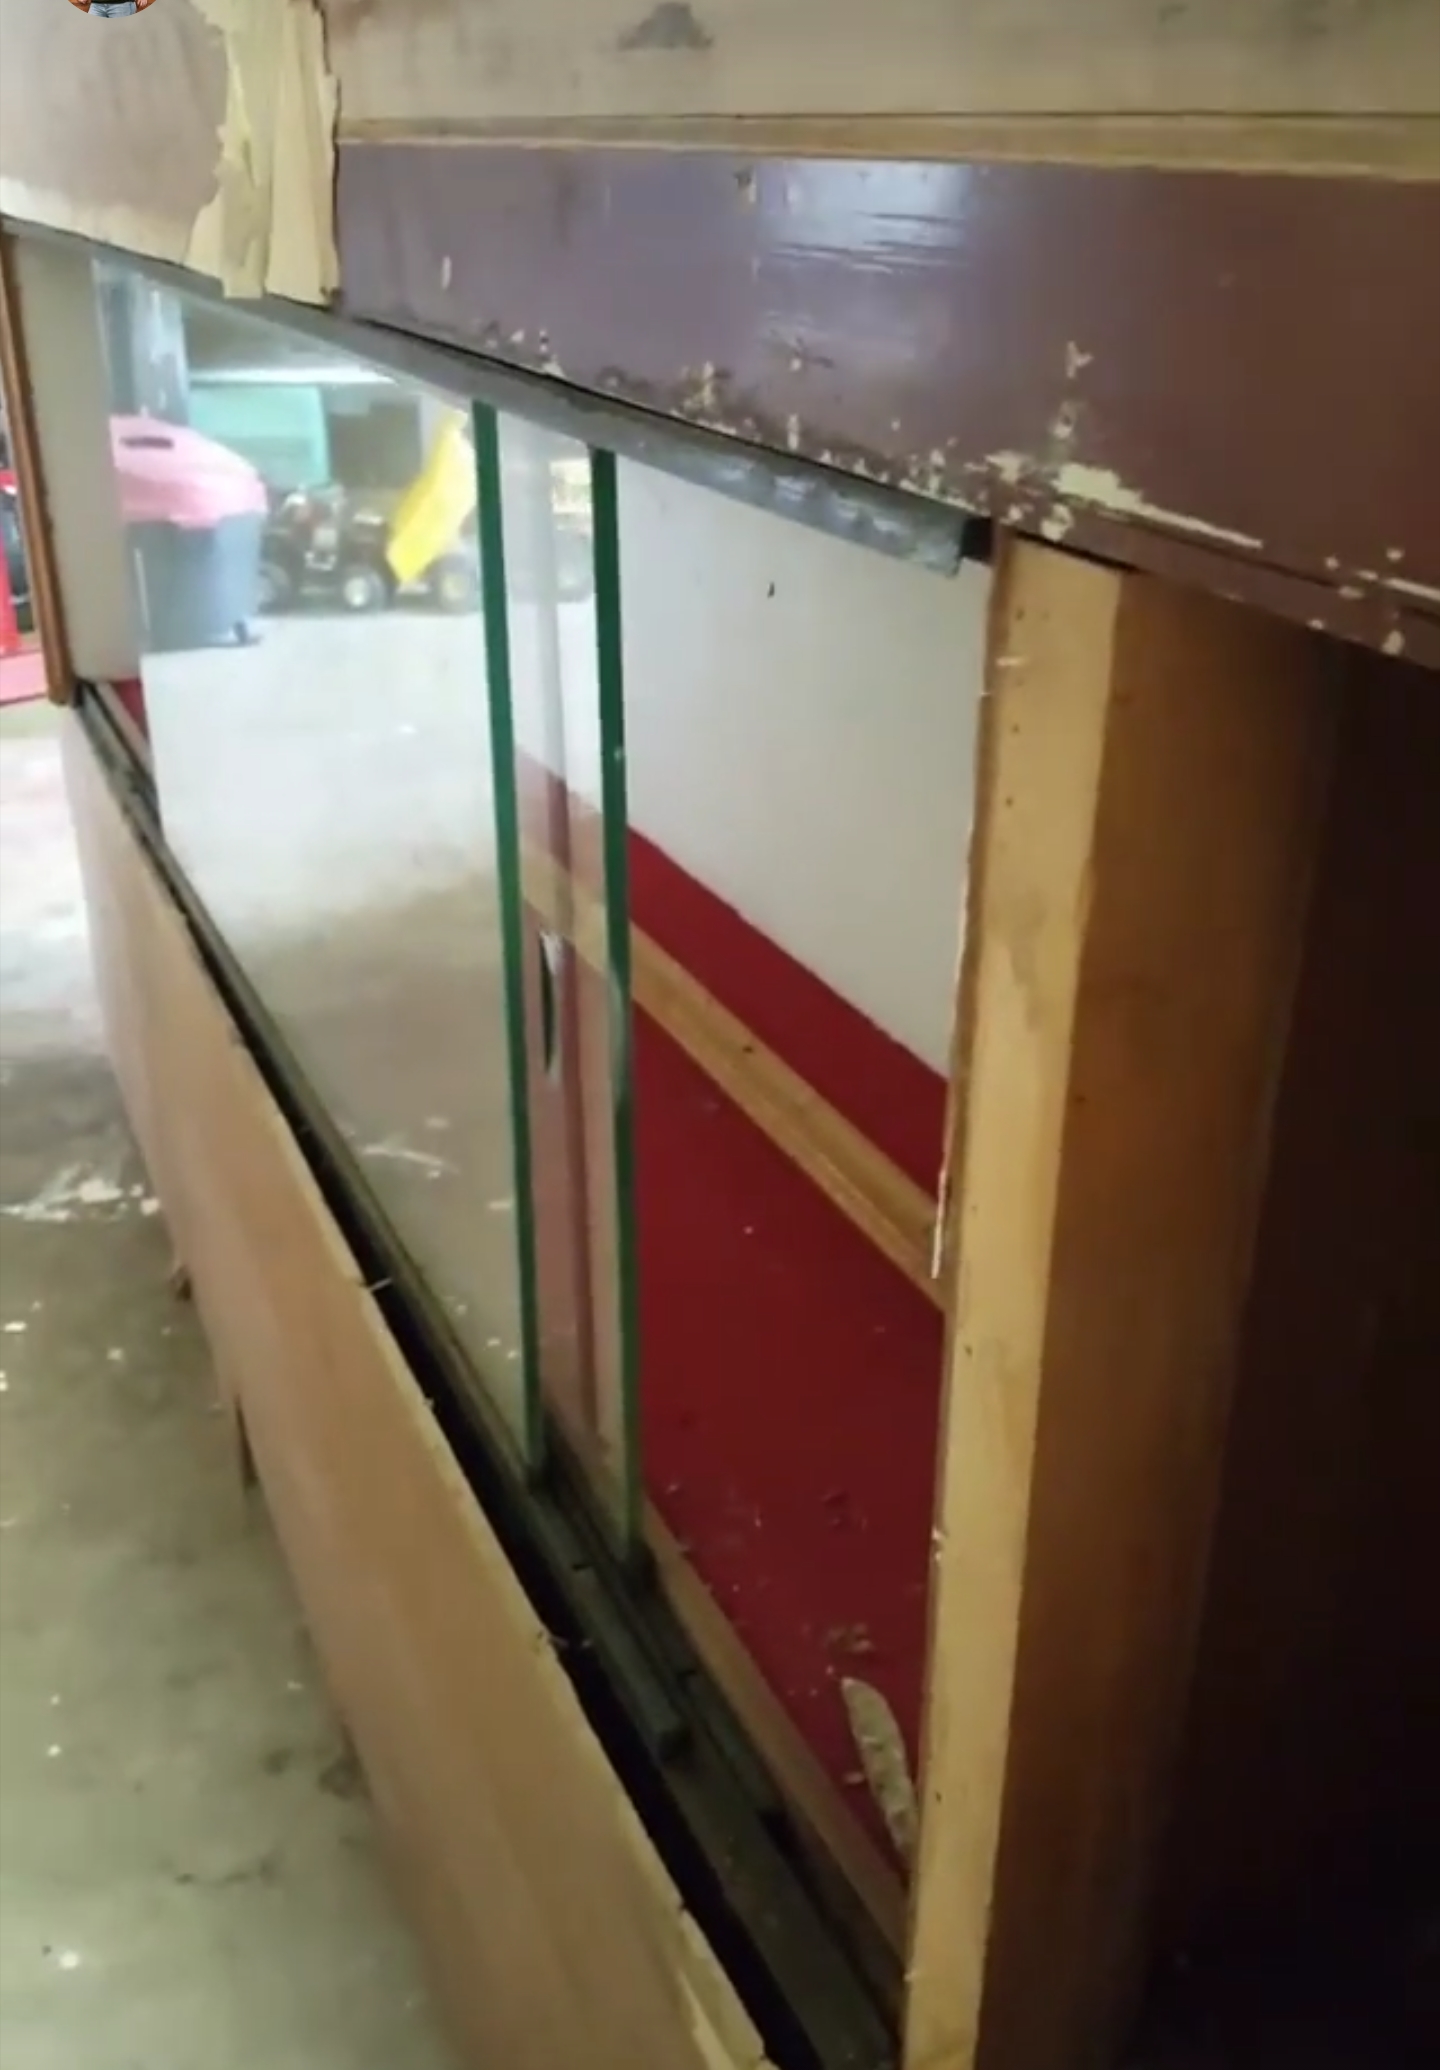
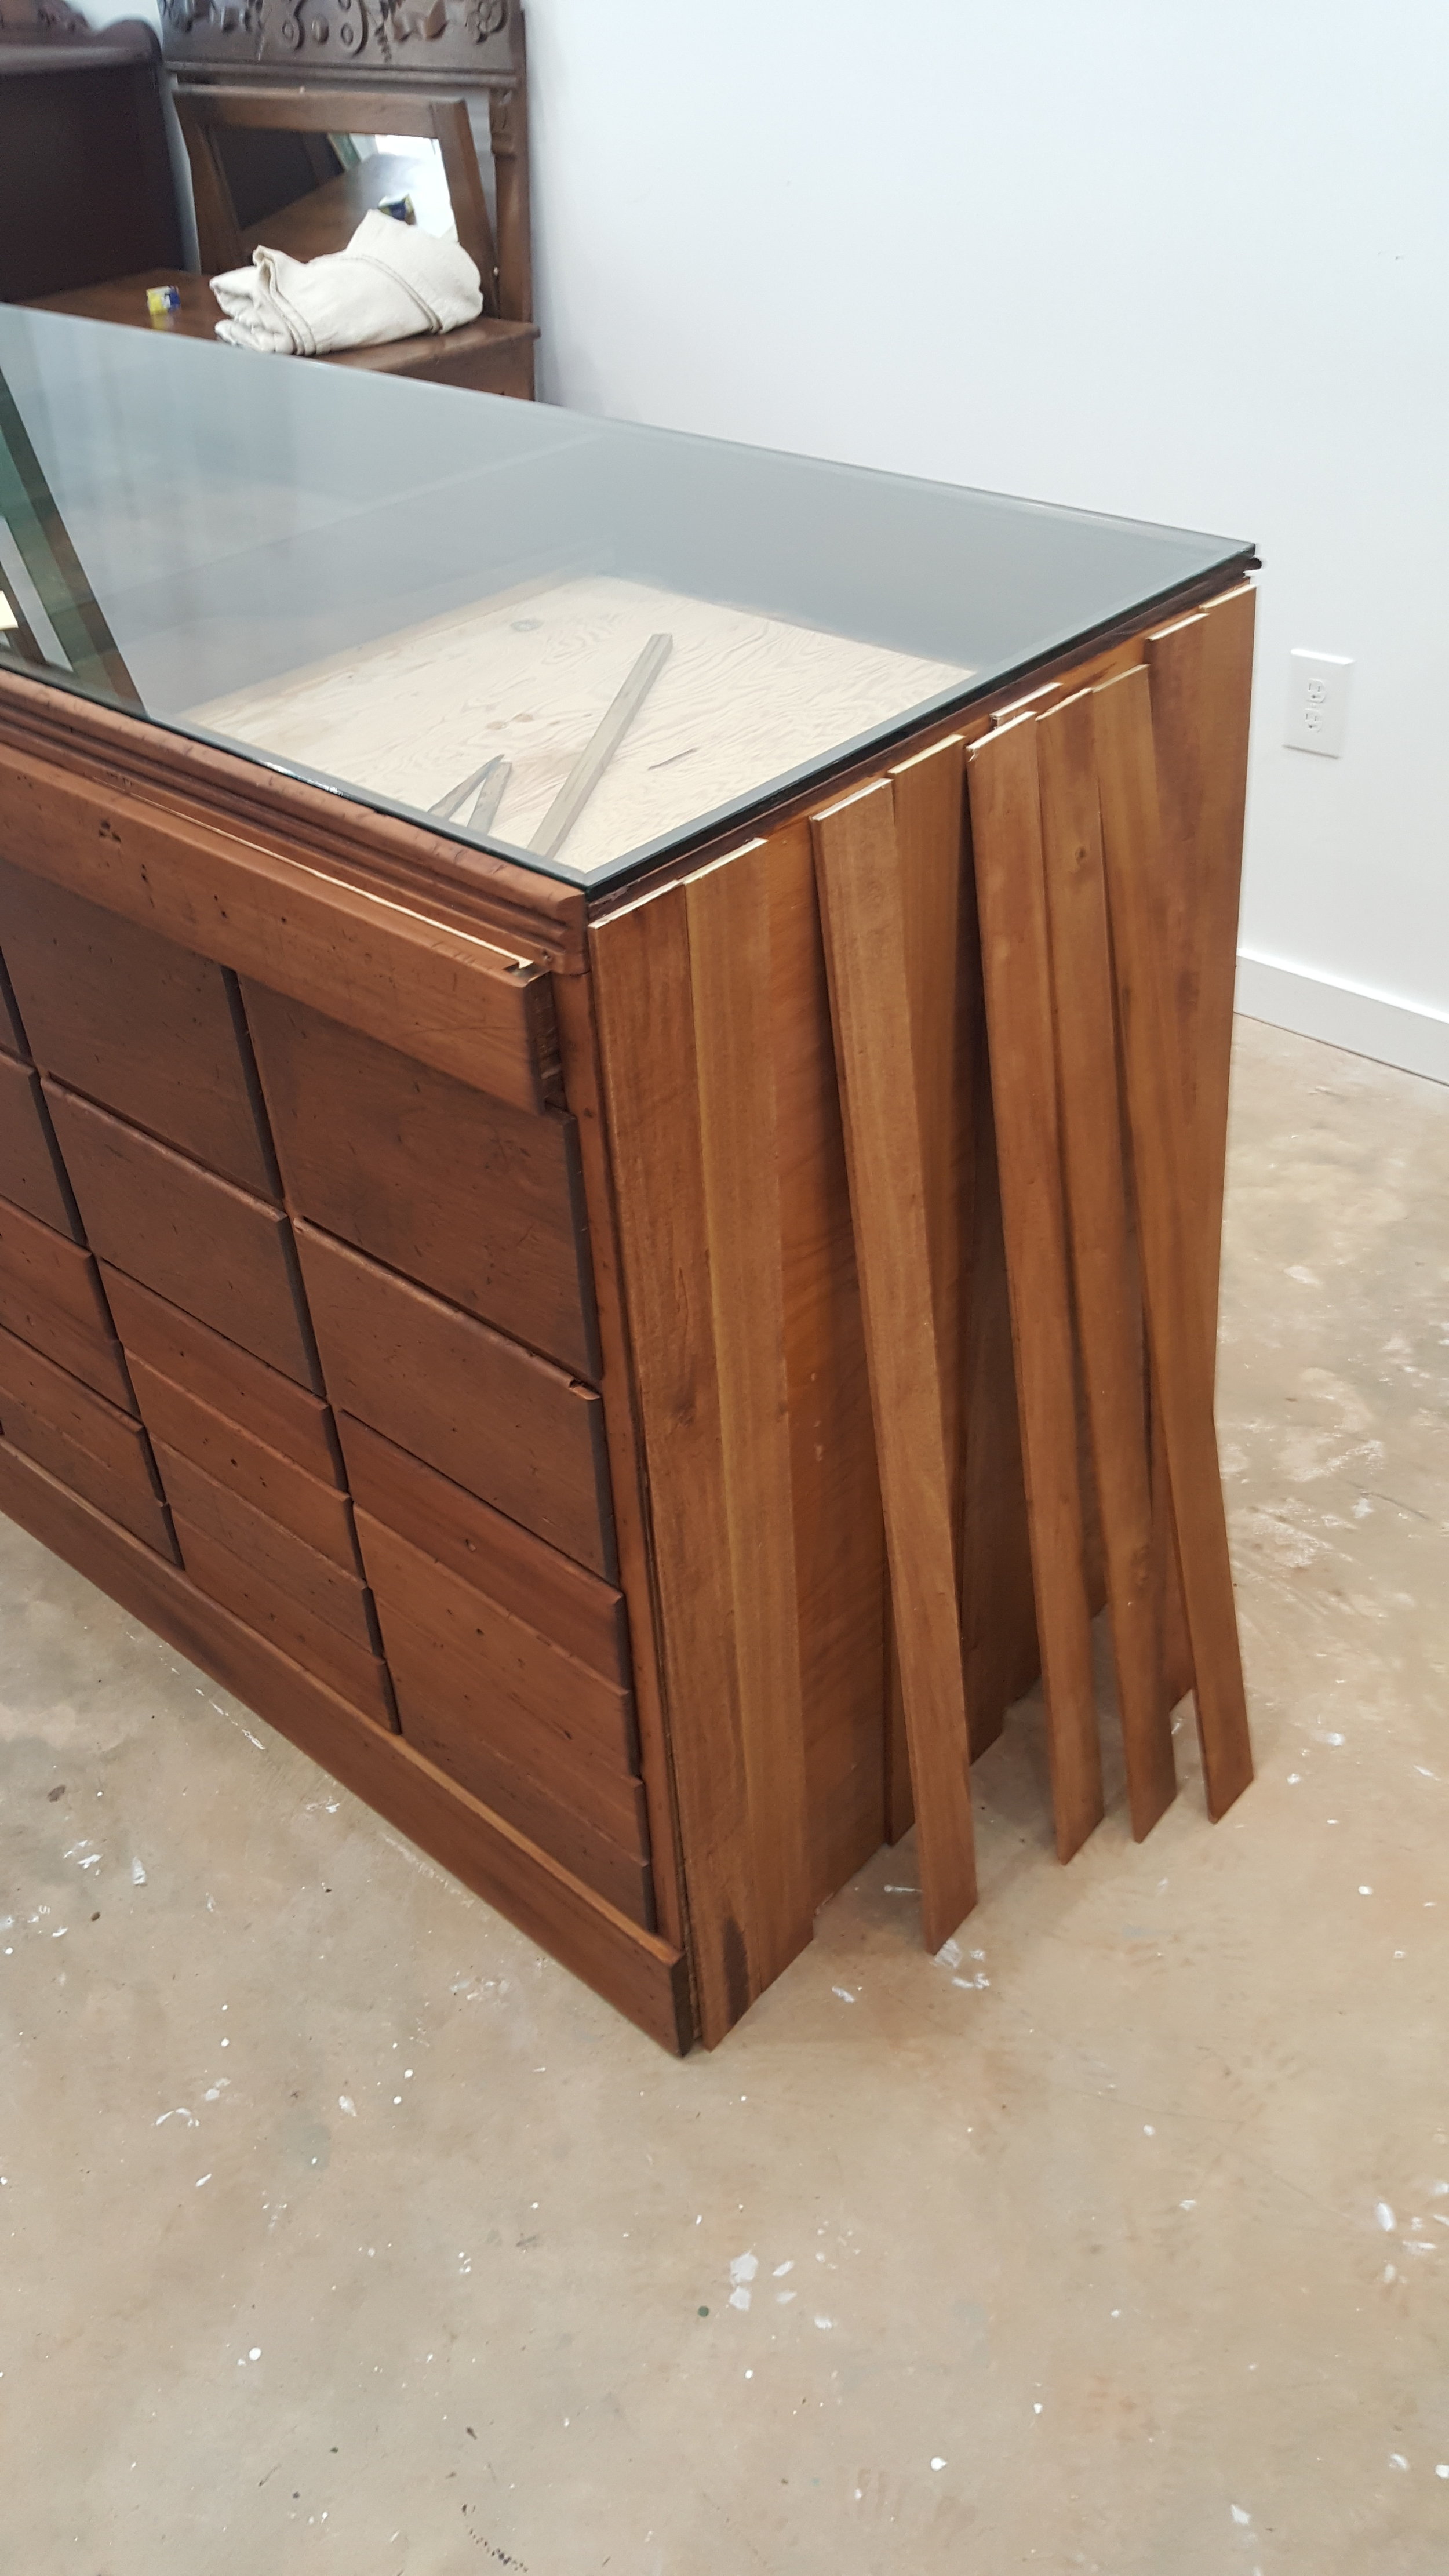
I took off the top piece of glass and cleaned it really well. There was a ton of duct tape on it, so I used Goo Gone and a scraper to get rid of that as well. In the beginning I wasn’t sure if I wanted to keep the glass or replace it with wood. I ended up keeping it though to keep the piece as authentic as possible and I’m so glad I did!
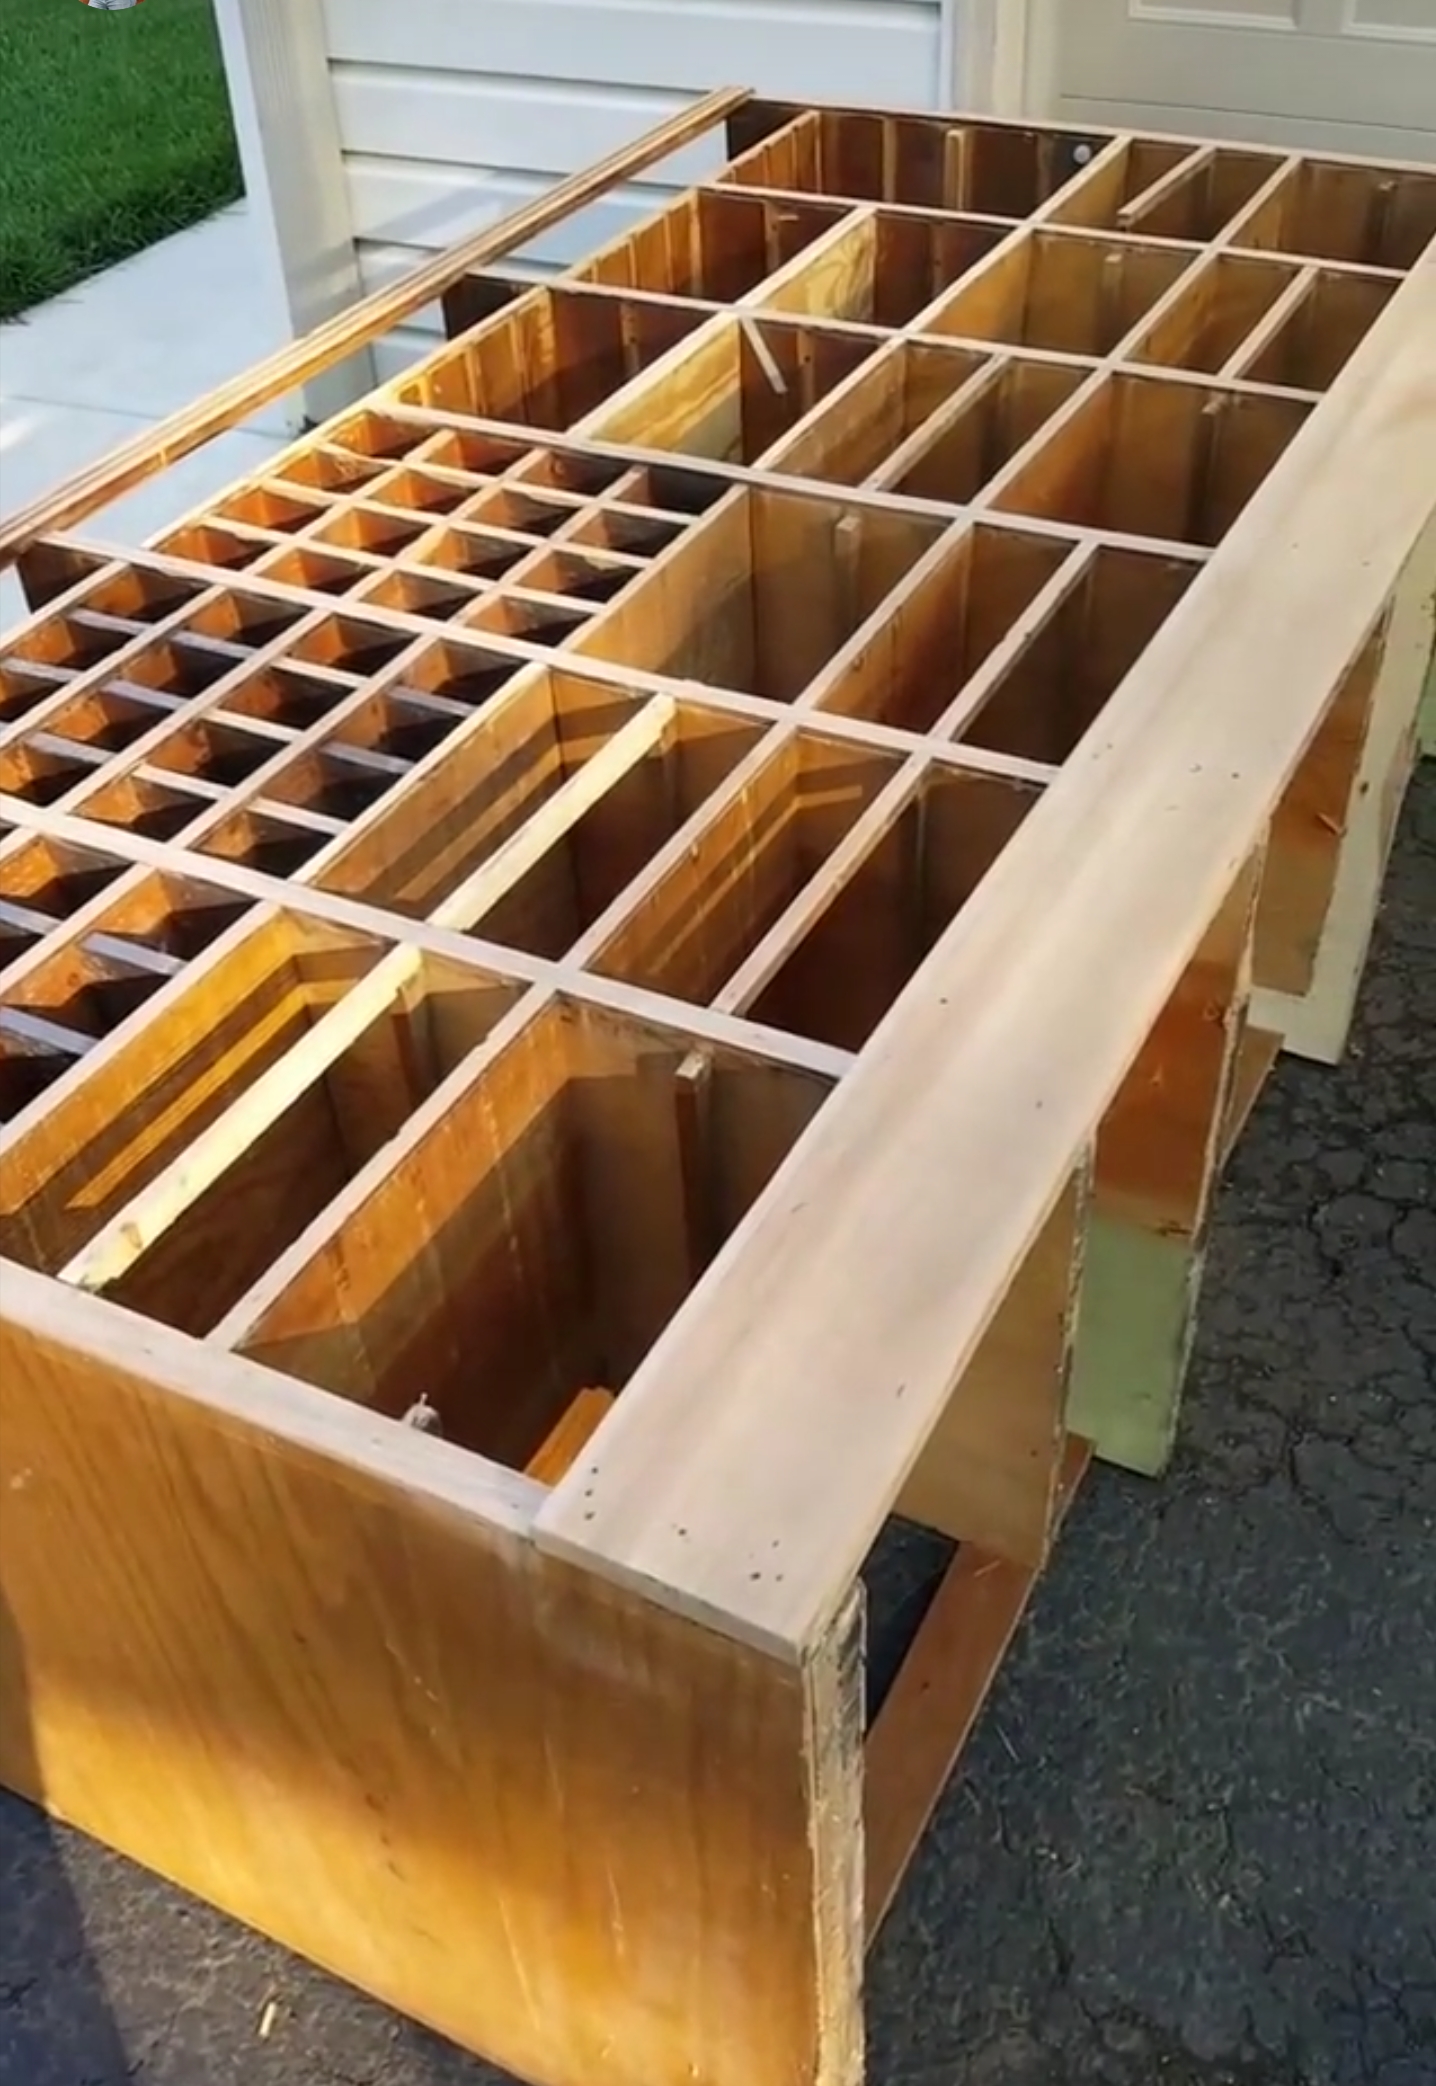
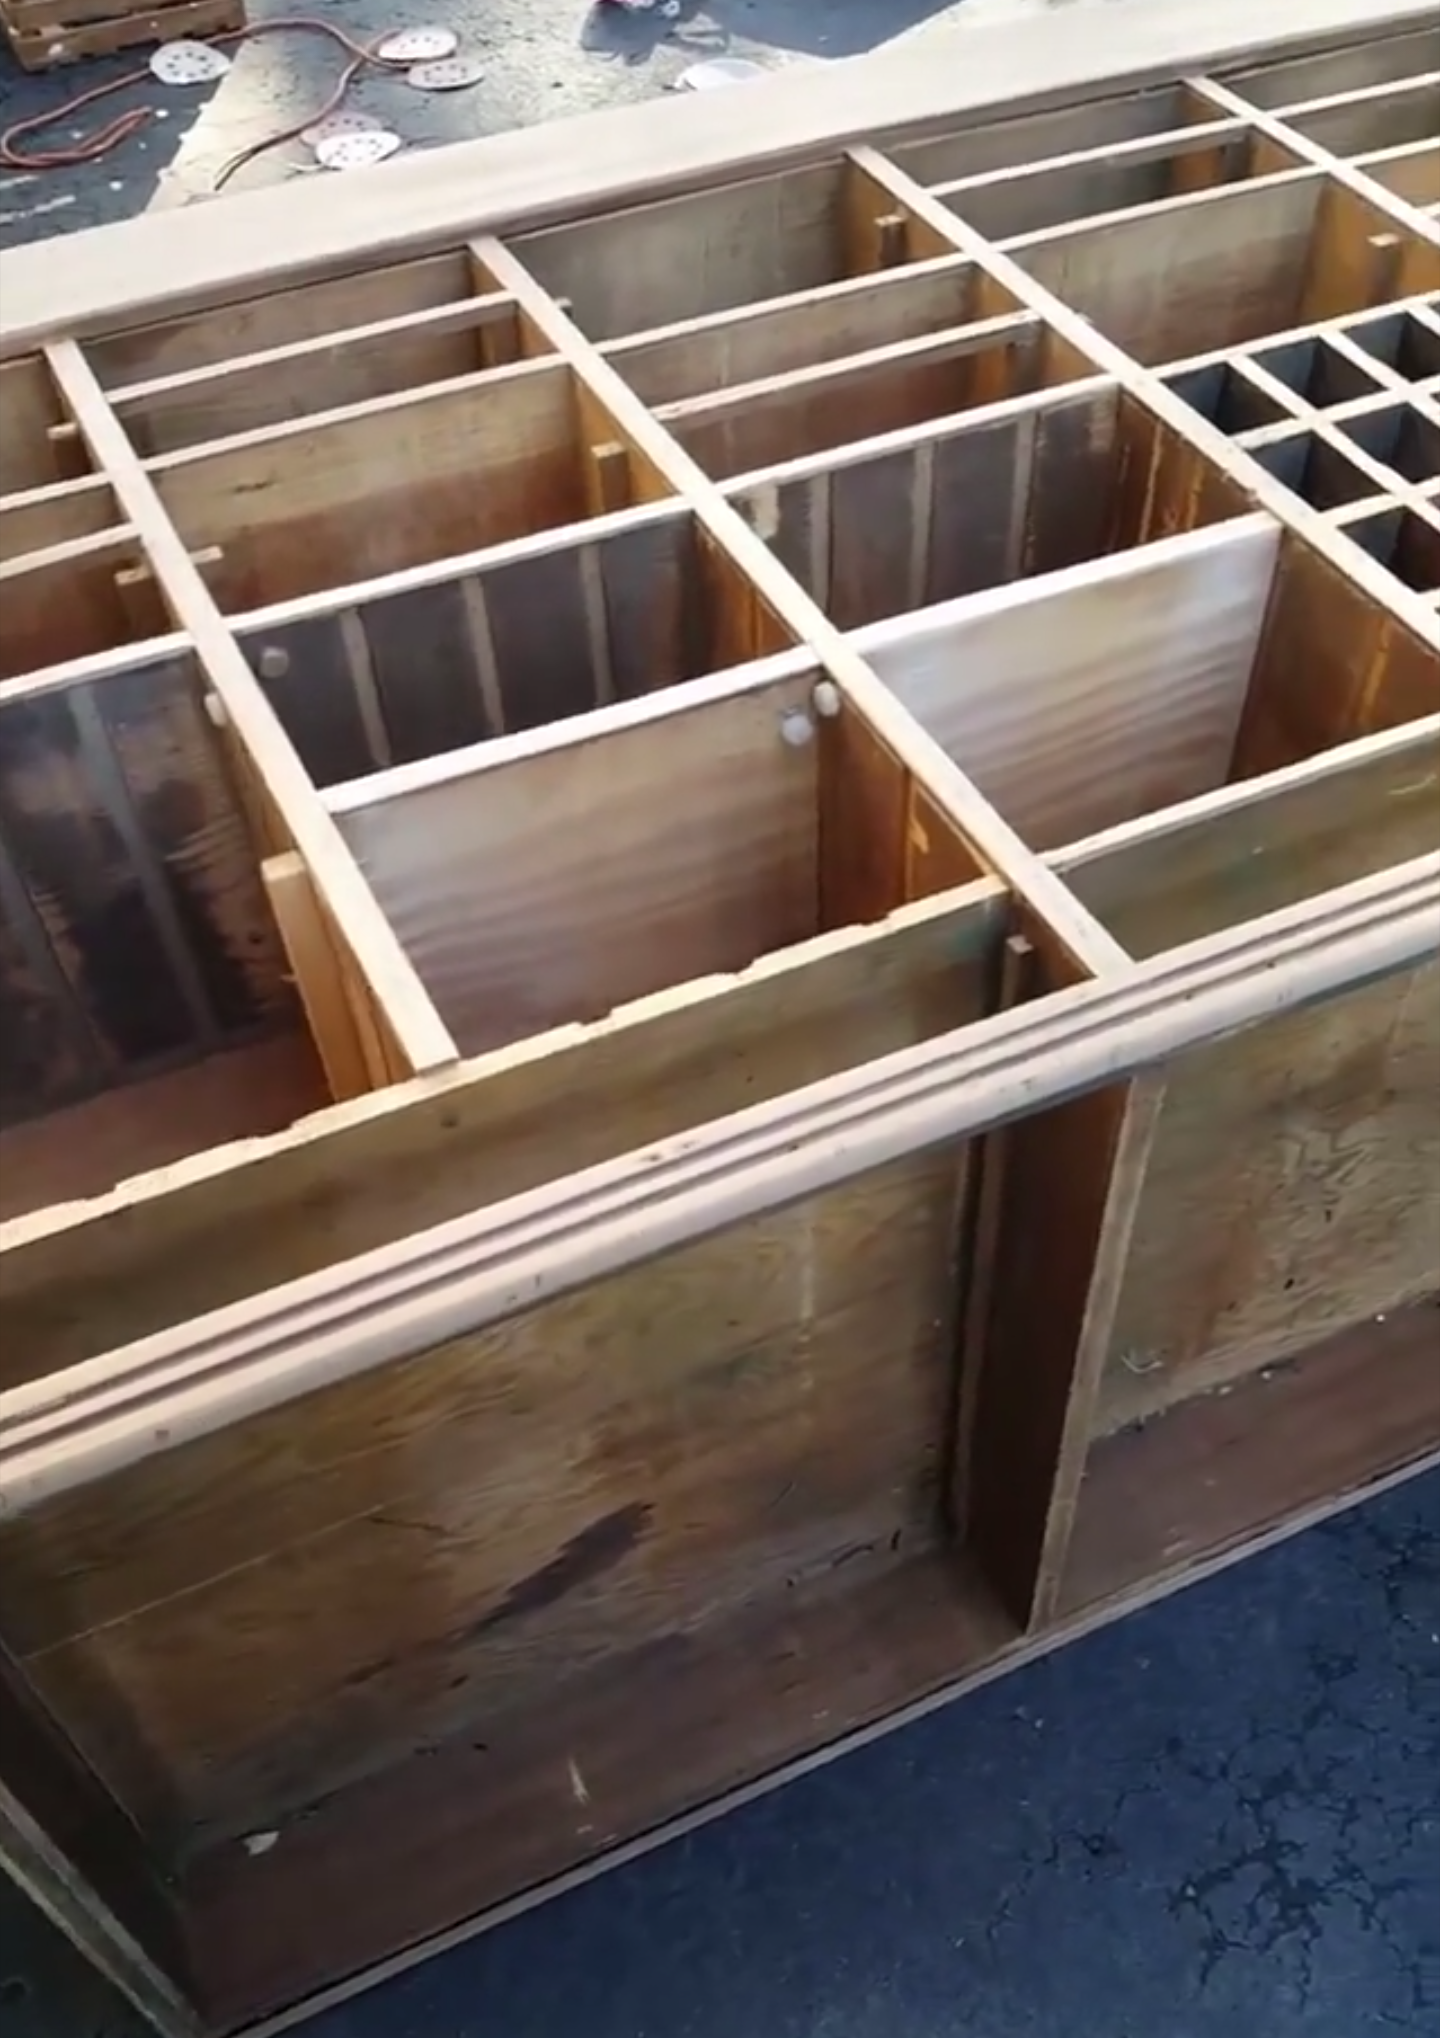
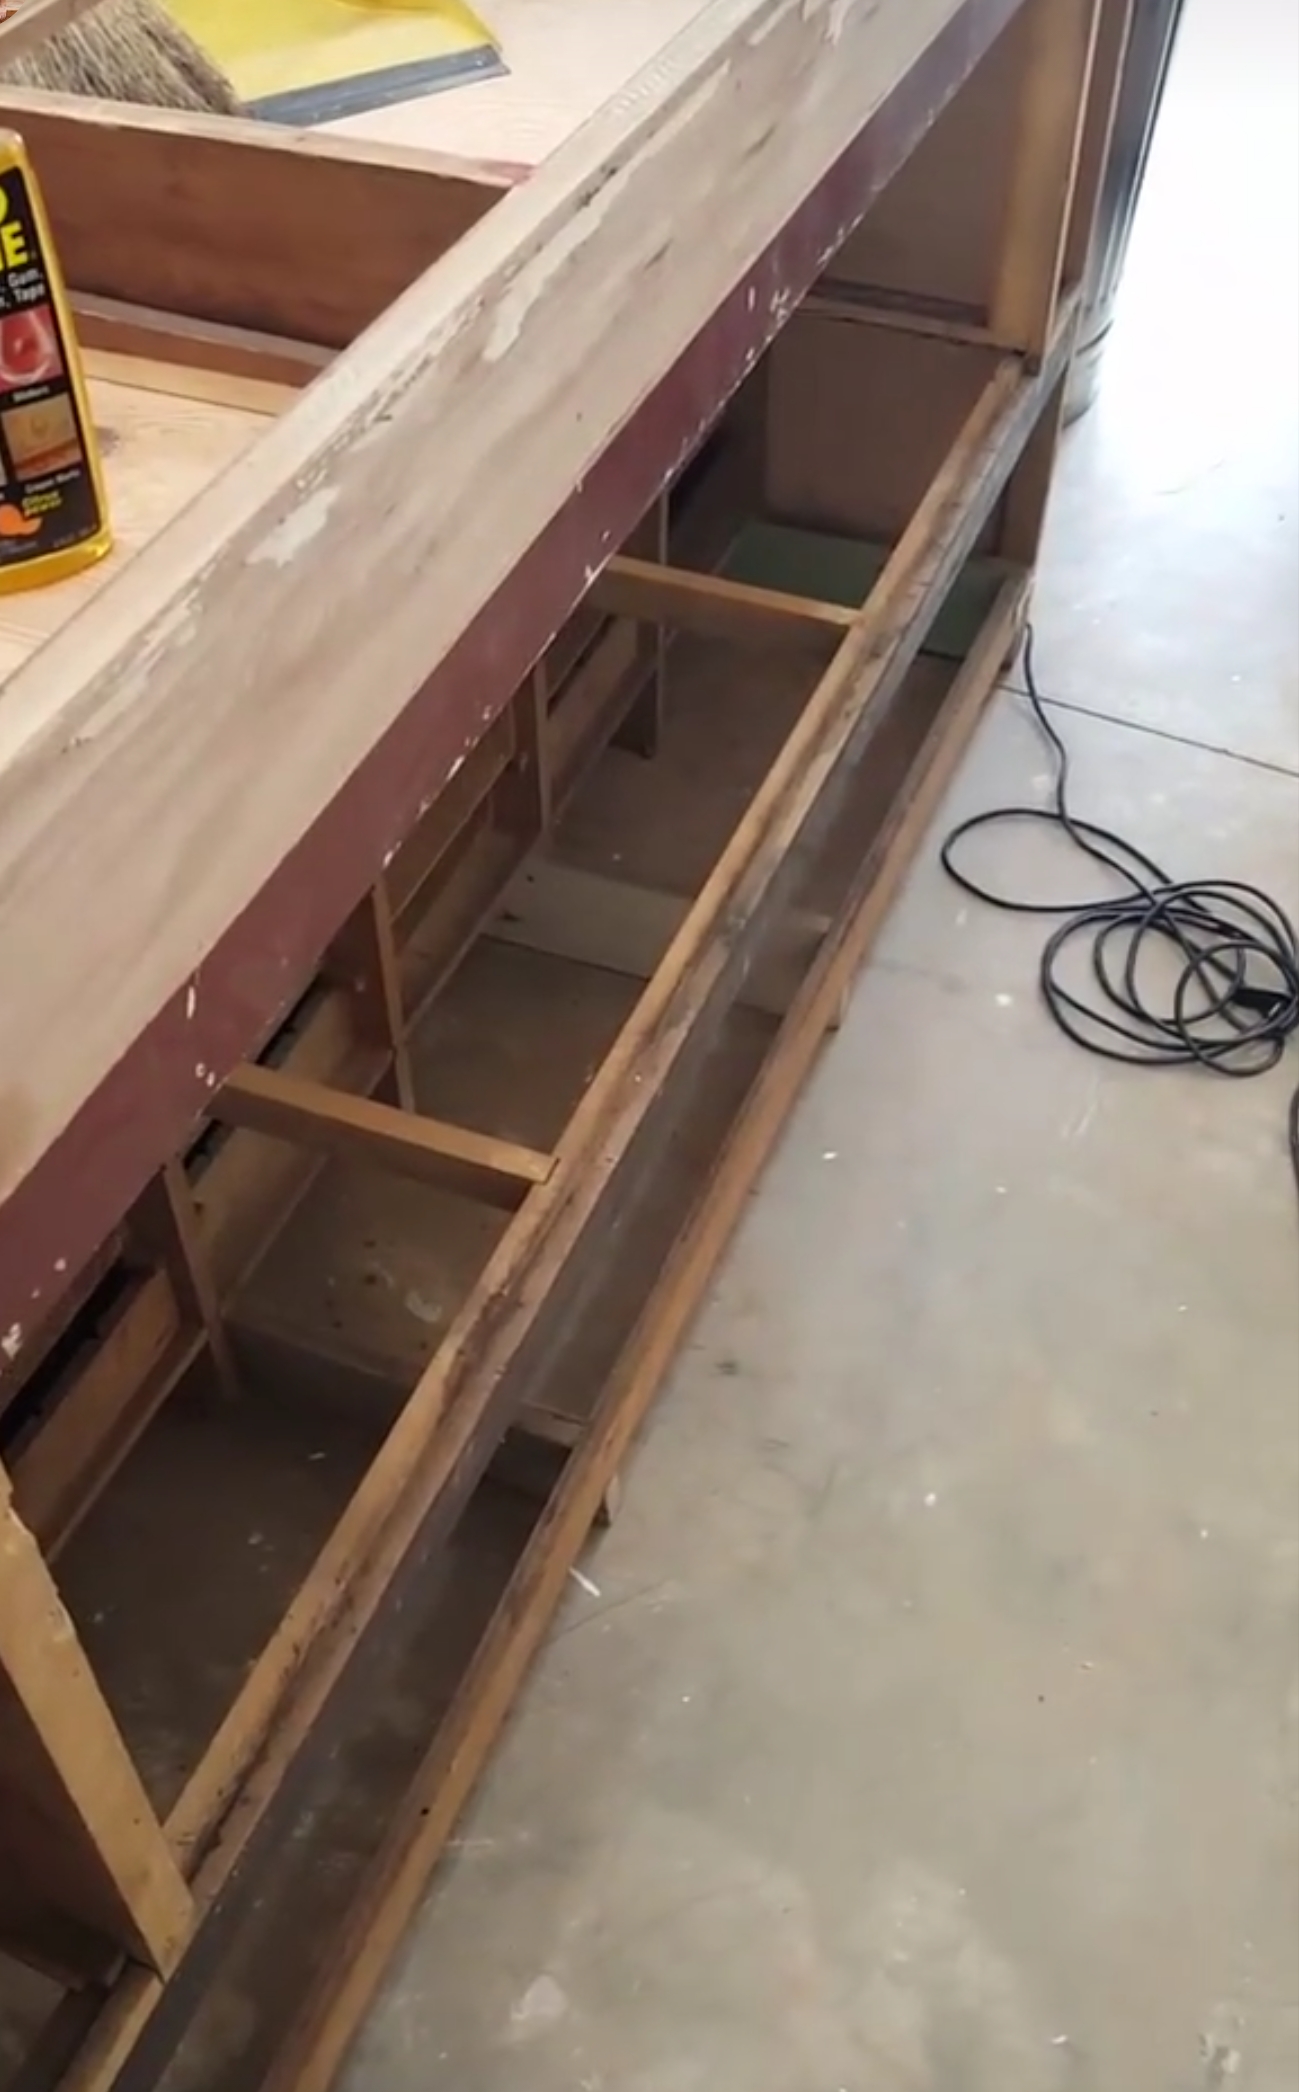
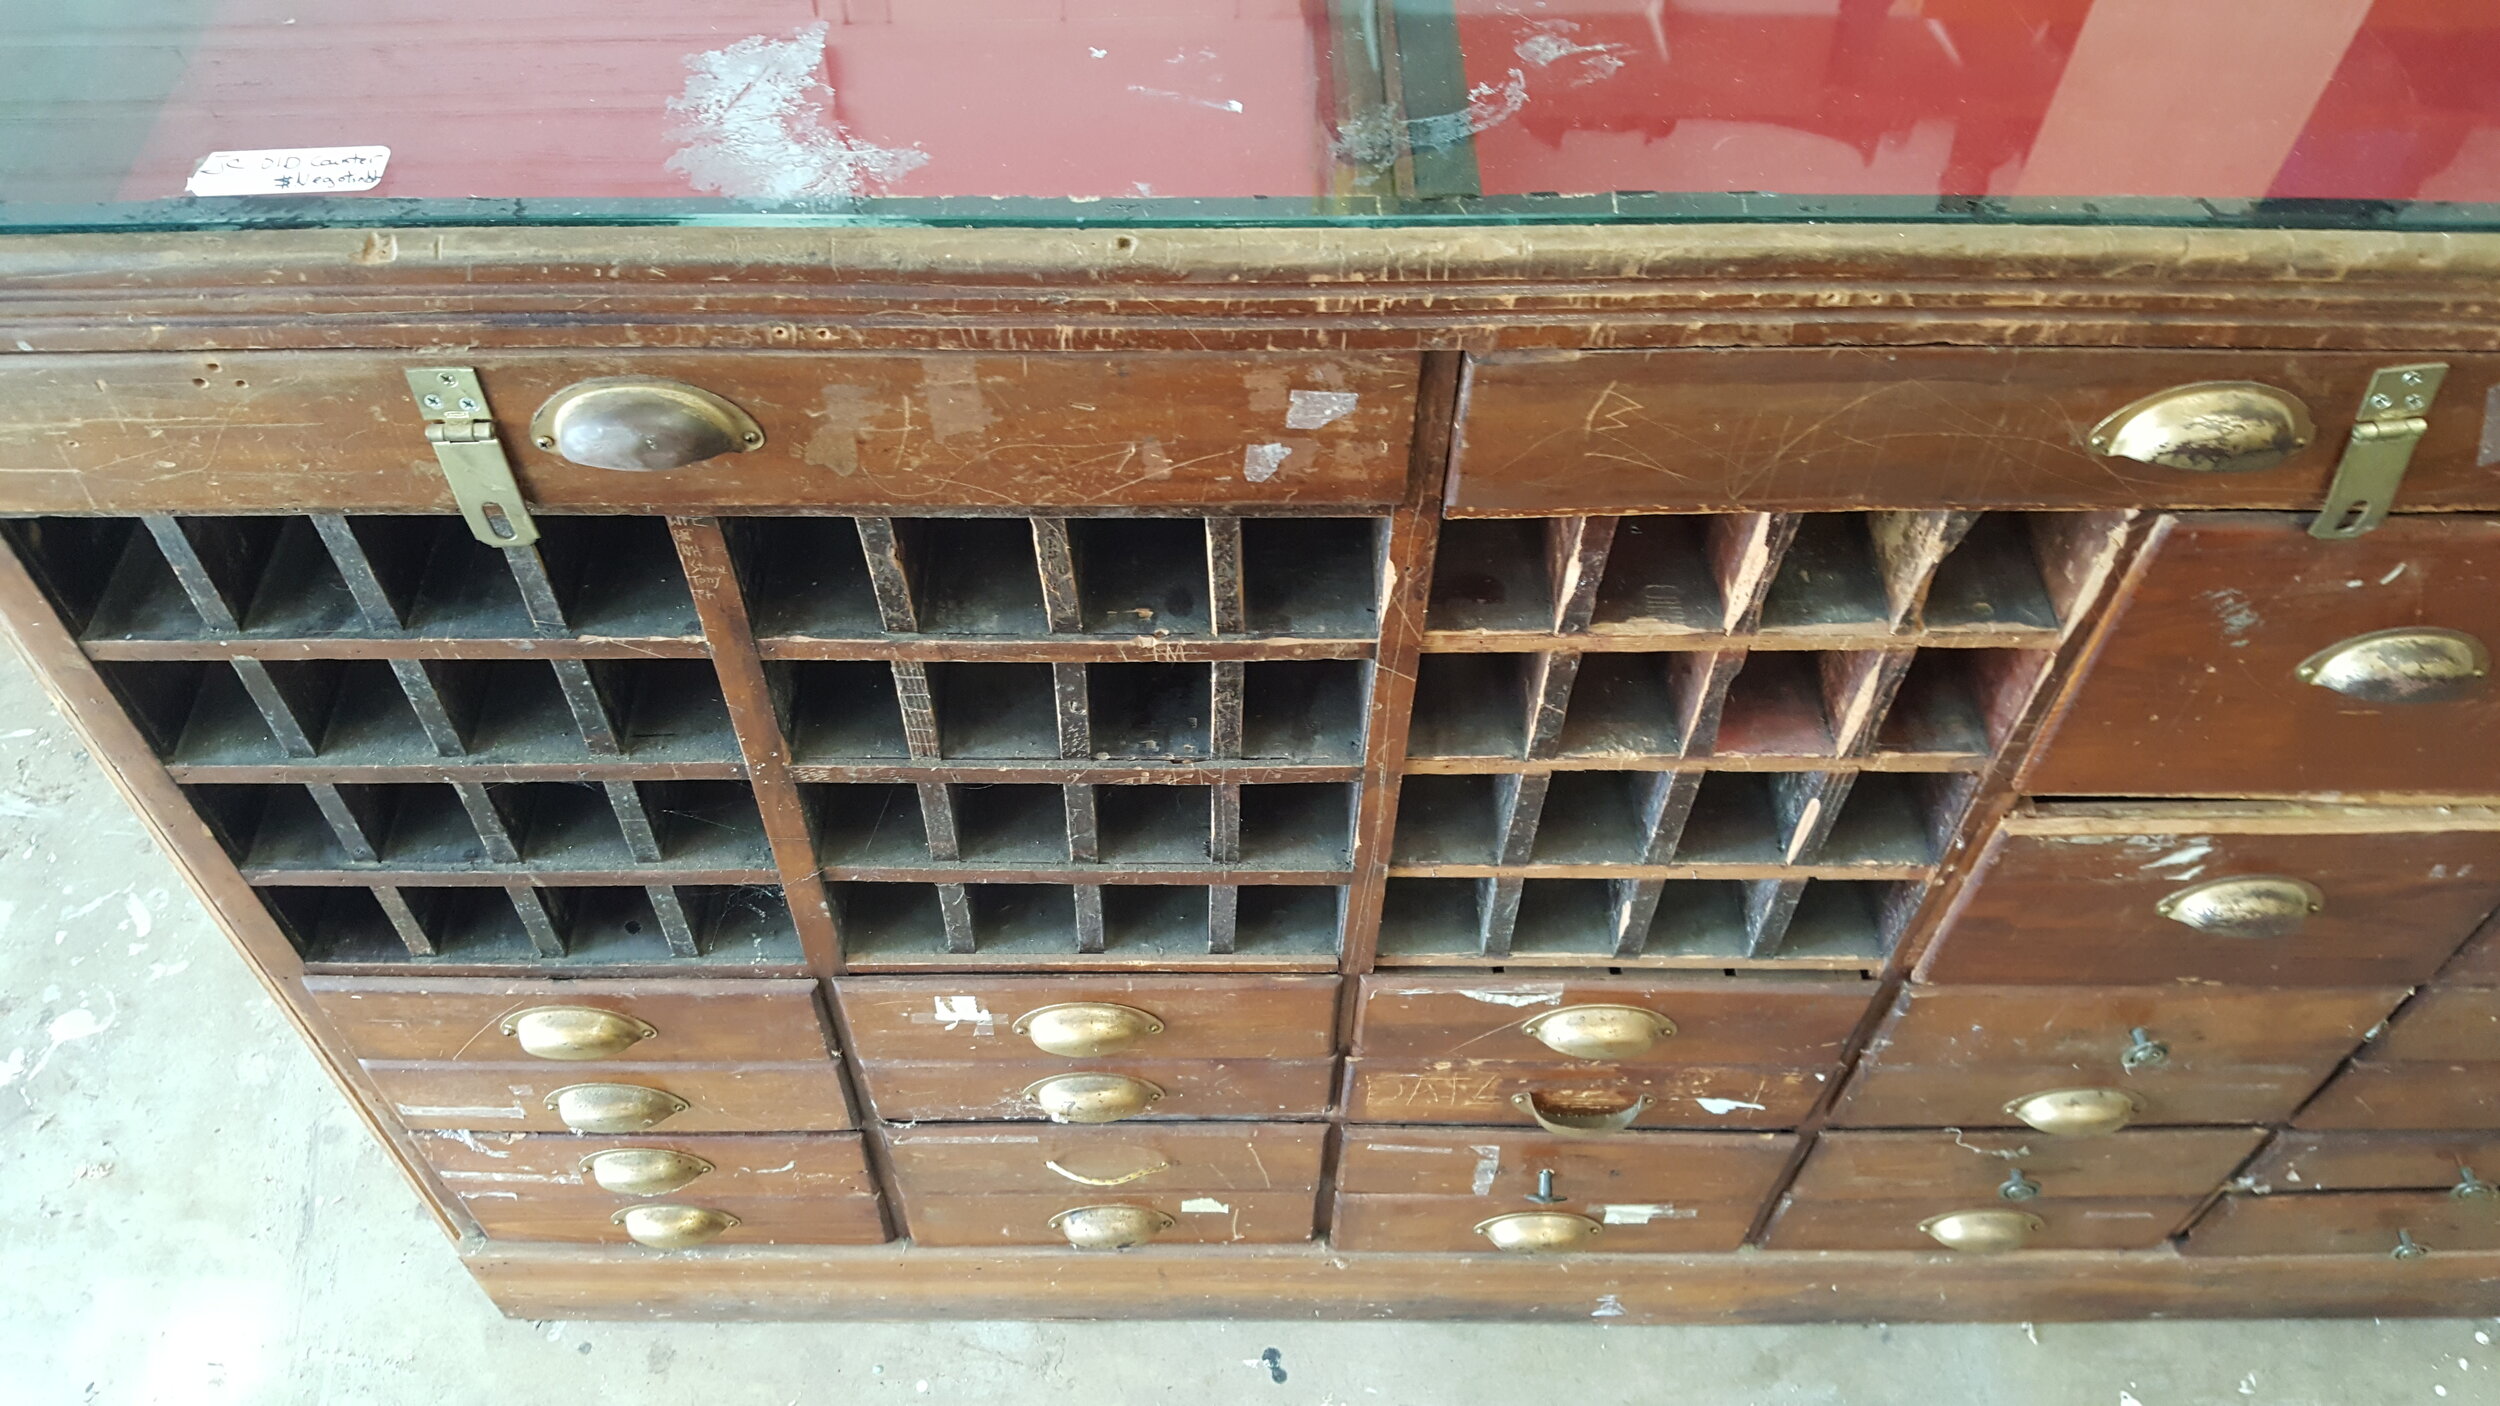
I took out the sliding glass doors on the backside (actually, it would be the front side if you were shopping at the counter). I also decided to go ahead and remove the old lights and shelving that were currently there because after I removed the red felt that area looked pretty rough and needed to be taken out.
I vacuumed everything again and then scrubbed the piece with a mixture of water and vinegar. Once it was nice and dry I started the staining process.


MATCHING THE WOOD:
The wood was chipped, broken, scratched, covered in tape and stickers and the wood was mismatched. The mismatched wood is something I did not initially notice. The six larger drawers on the top right were made of pine and the old small drawers, along with the rest of the piece, were made with wood from a sweet gum tree. At some point, someone removed some of the tiny receipt cubbies and added six large drawers and by doing this the wood they used did not match the original wood. While that may not seem like a big deal, when I sanded everything down, the wood didn’t match AT all even after I tried to stain it. So, I thought, I’ll just find the wood that was originally used and replace it, but of course there is always a catch!! There was a blight many years ago and finding wood from a sweet gum tree to help everything match well wasn’t possible. UGH!
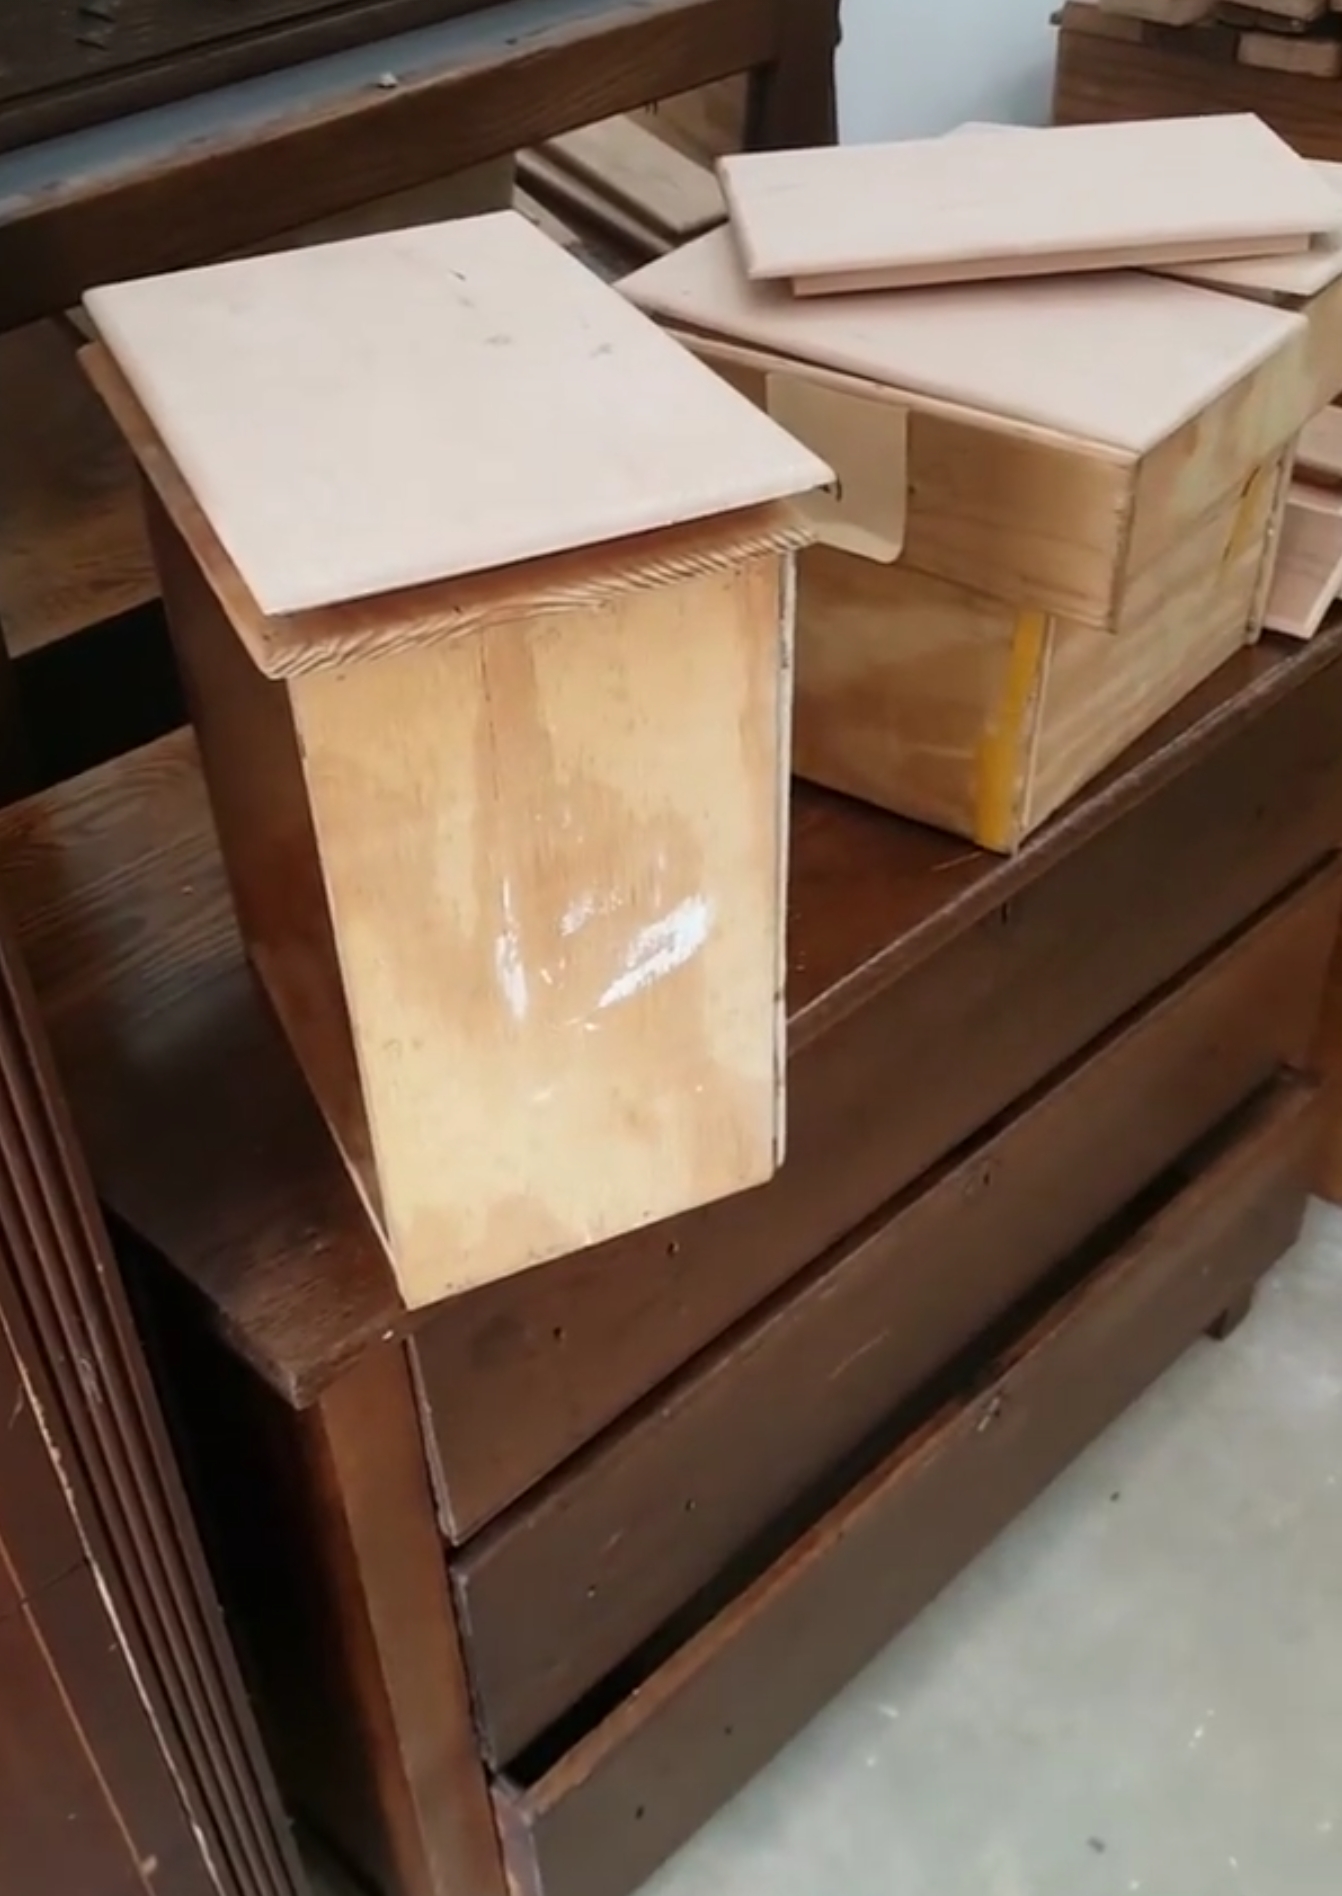
I went to my brother-in-law who works at a local lumber mill for help. We went through a bunch of samples of wood to try and find the best match, but nothing seemed to work. The only thing I could do was find something similar and do my best to make it look original to the sweet gum wood. My best option was to go with cherry. My brother-in-law made me new drawer fronts and my husband re-built the drawers and added the new fronts.

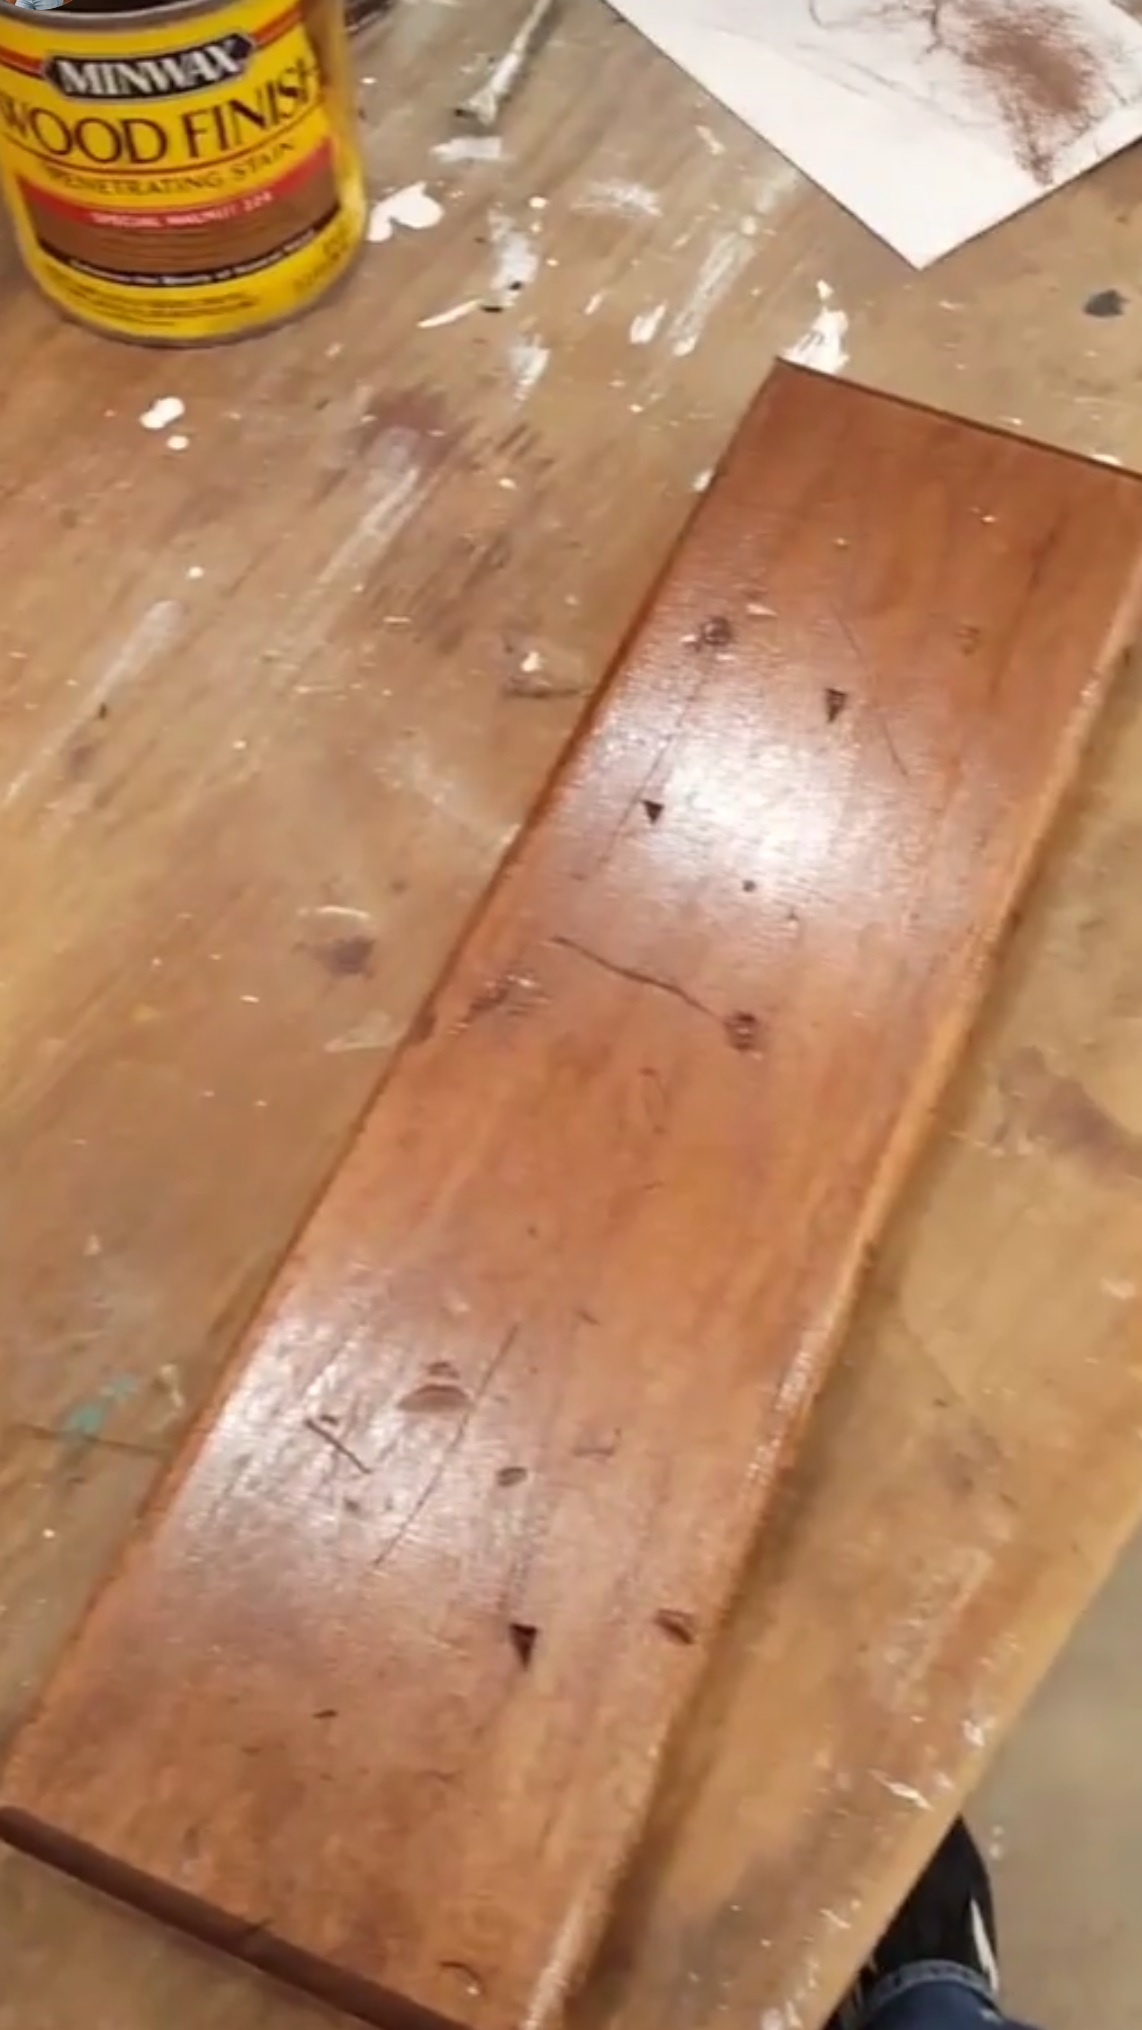
THE STAINING/MATCHING PROCESS:
On the base of the piece and on the original drawers I used Howard Restor-A-Finish in Dark Walnut. On the new (cherry) drawer fronts, I had to get a little creative.
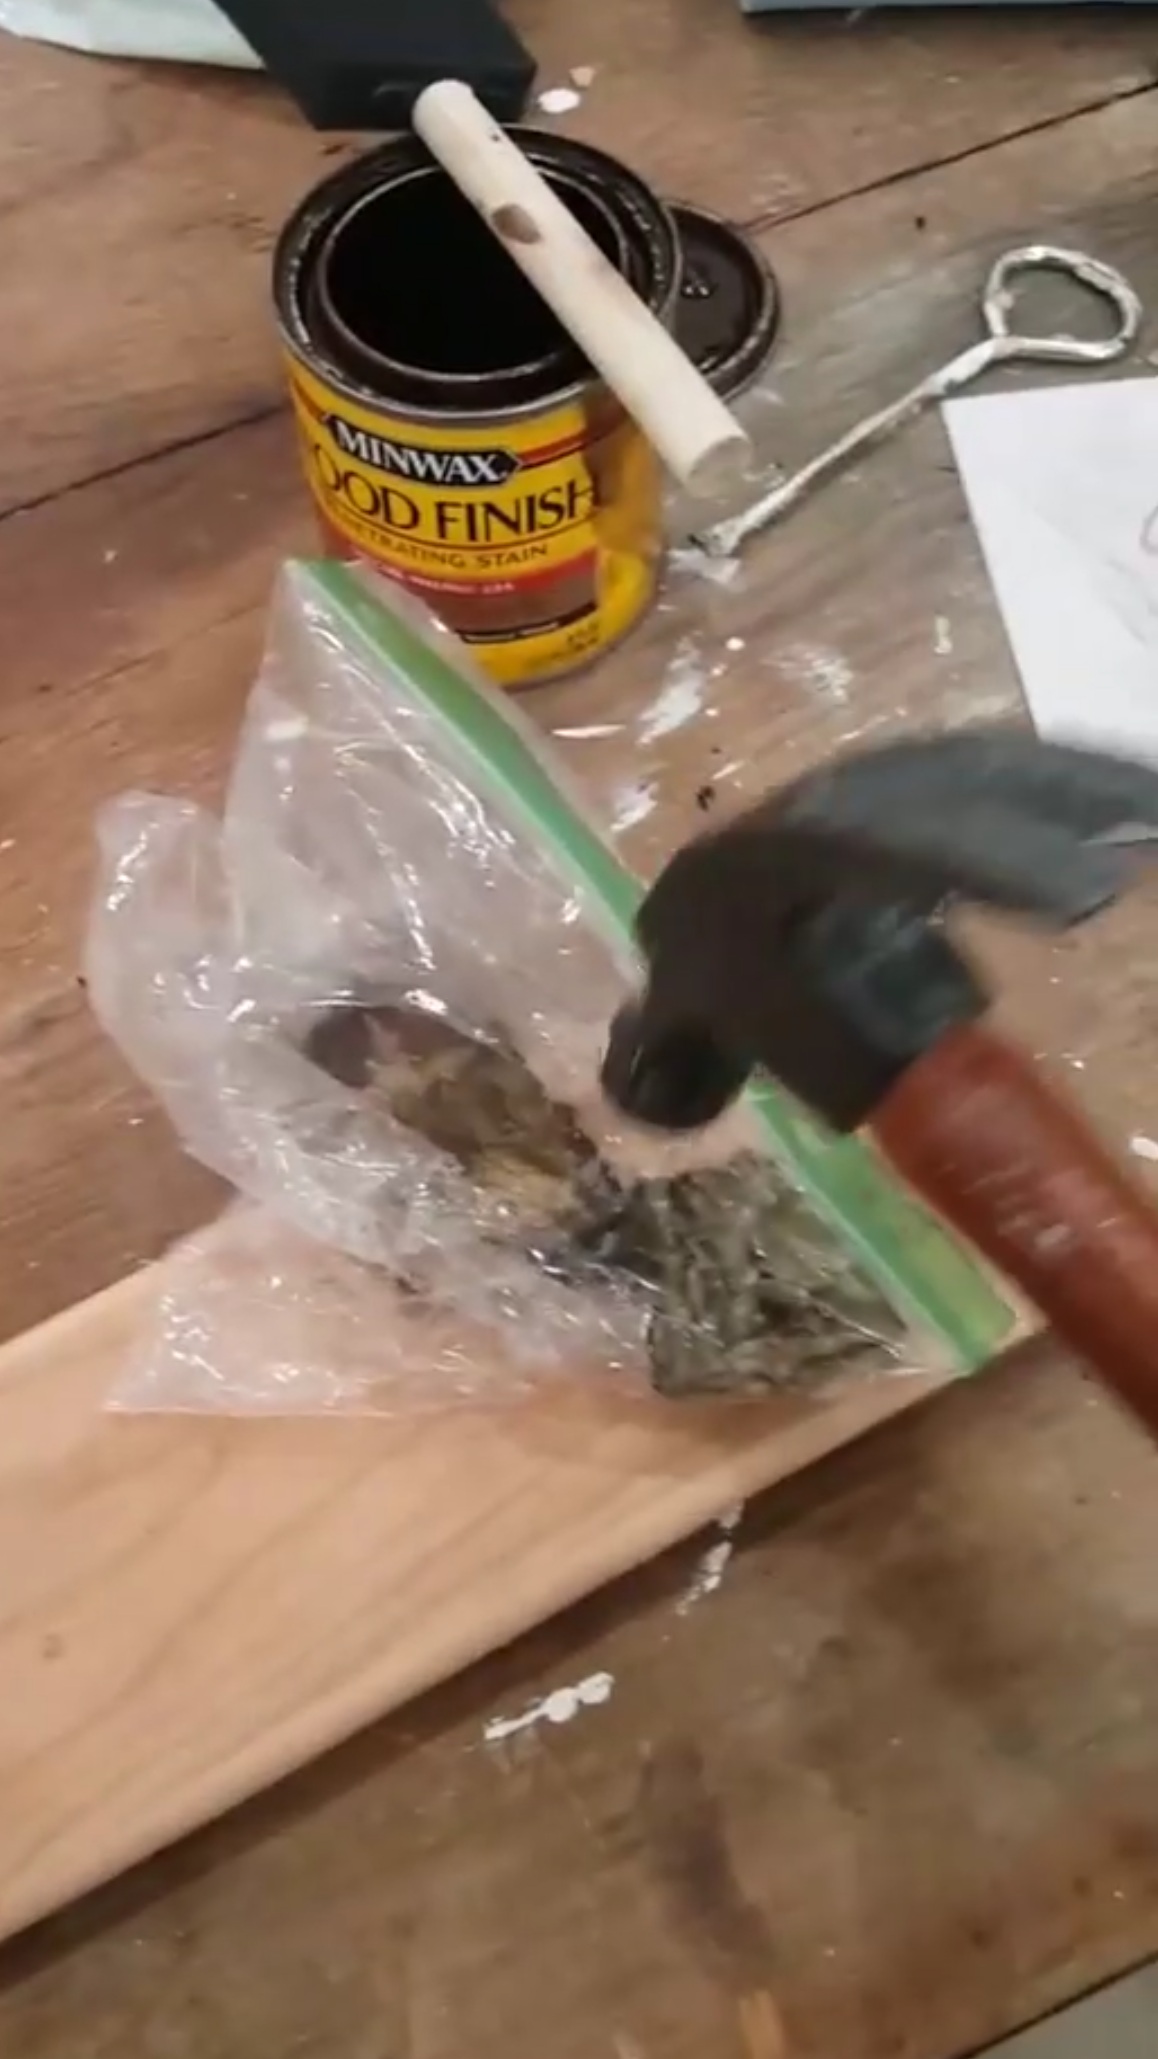
With my hammer and a bag of nails I beat the new wood to give it an “aged” look.
I then applied Miniwax, Special Walnut over the wood and wiped it off so that the stain would darken and set in the knicks and scratches that I intentionally put in the new wood.
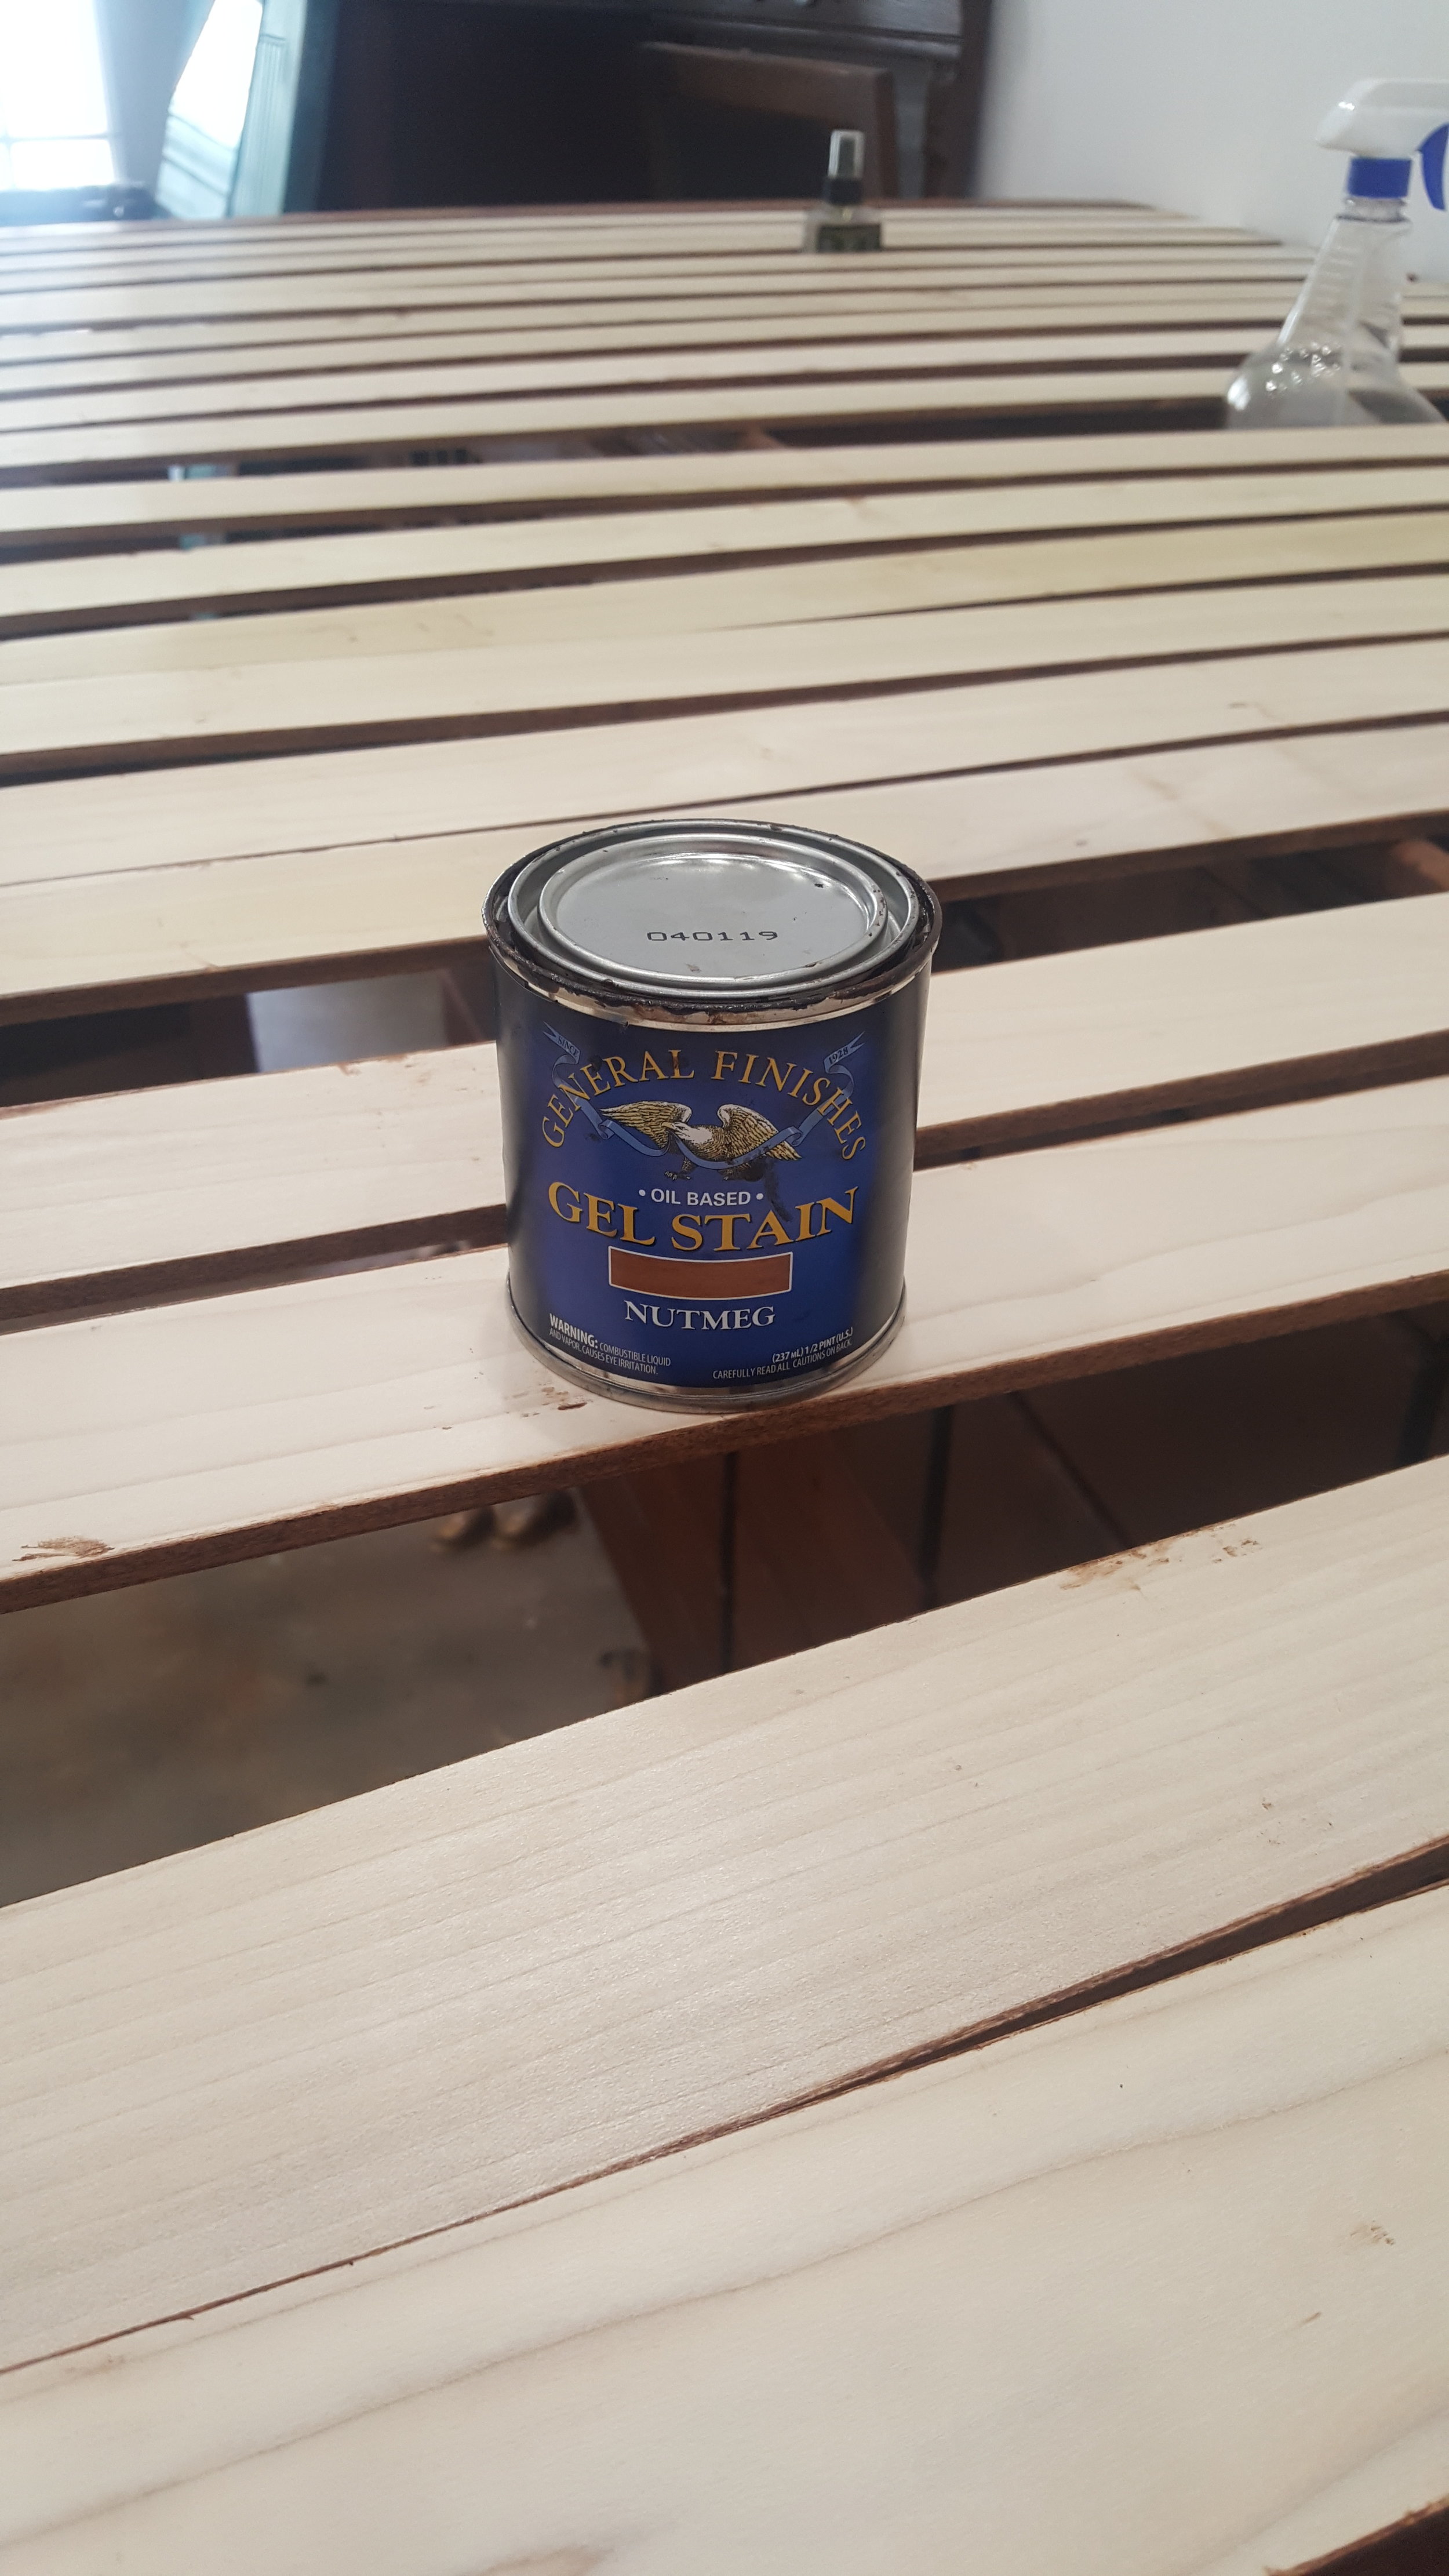
I applied a coat of General Finishes Gel Stain in Nutmeg.
Once everything was dry and since I wasn’t going for perfection, I randomly applied a coat of Howard Restor-A-Finish in Dark Walnut to the drawer fronts.


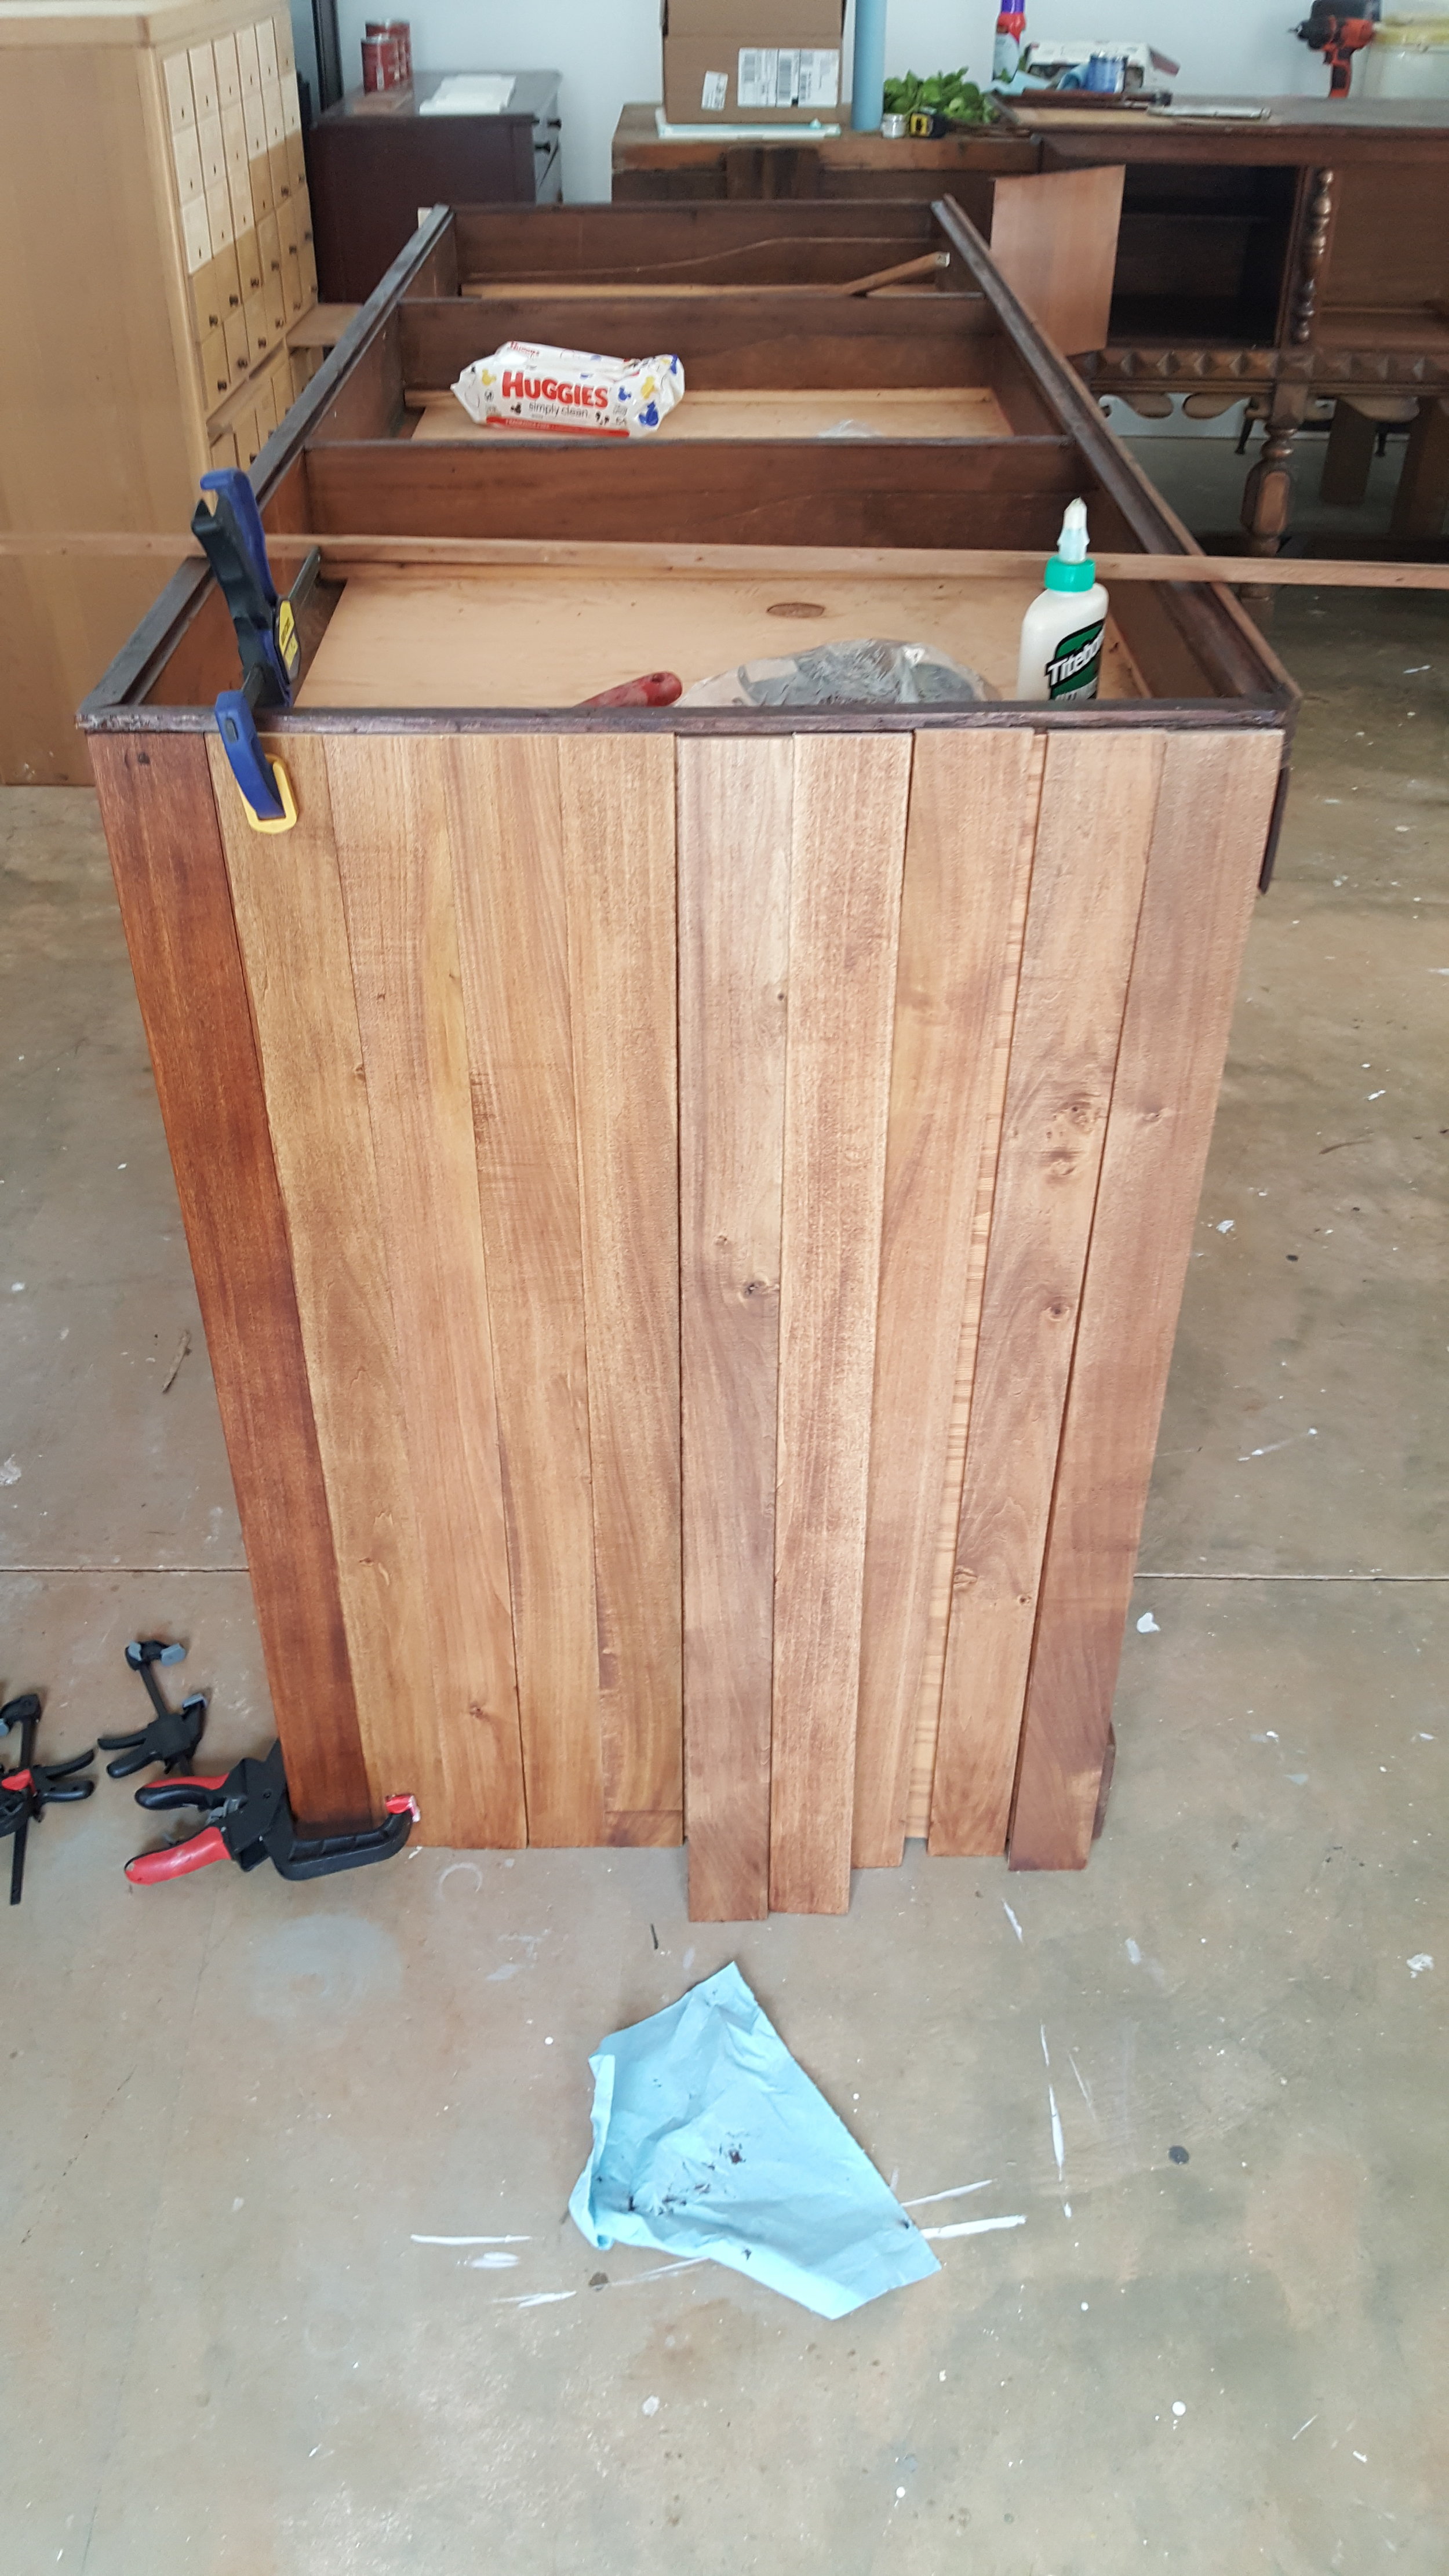
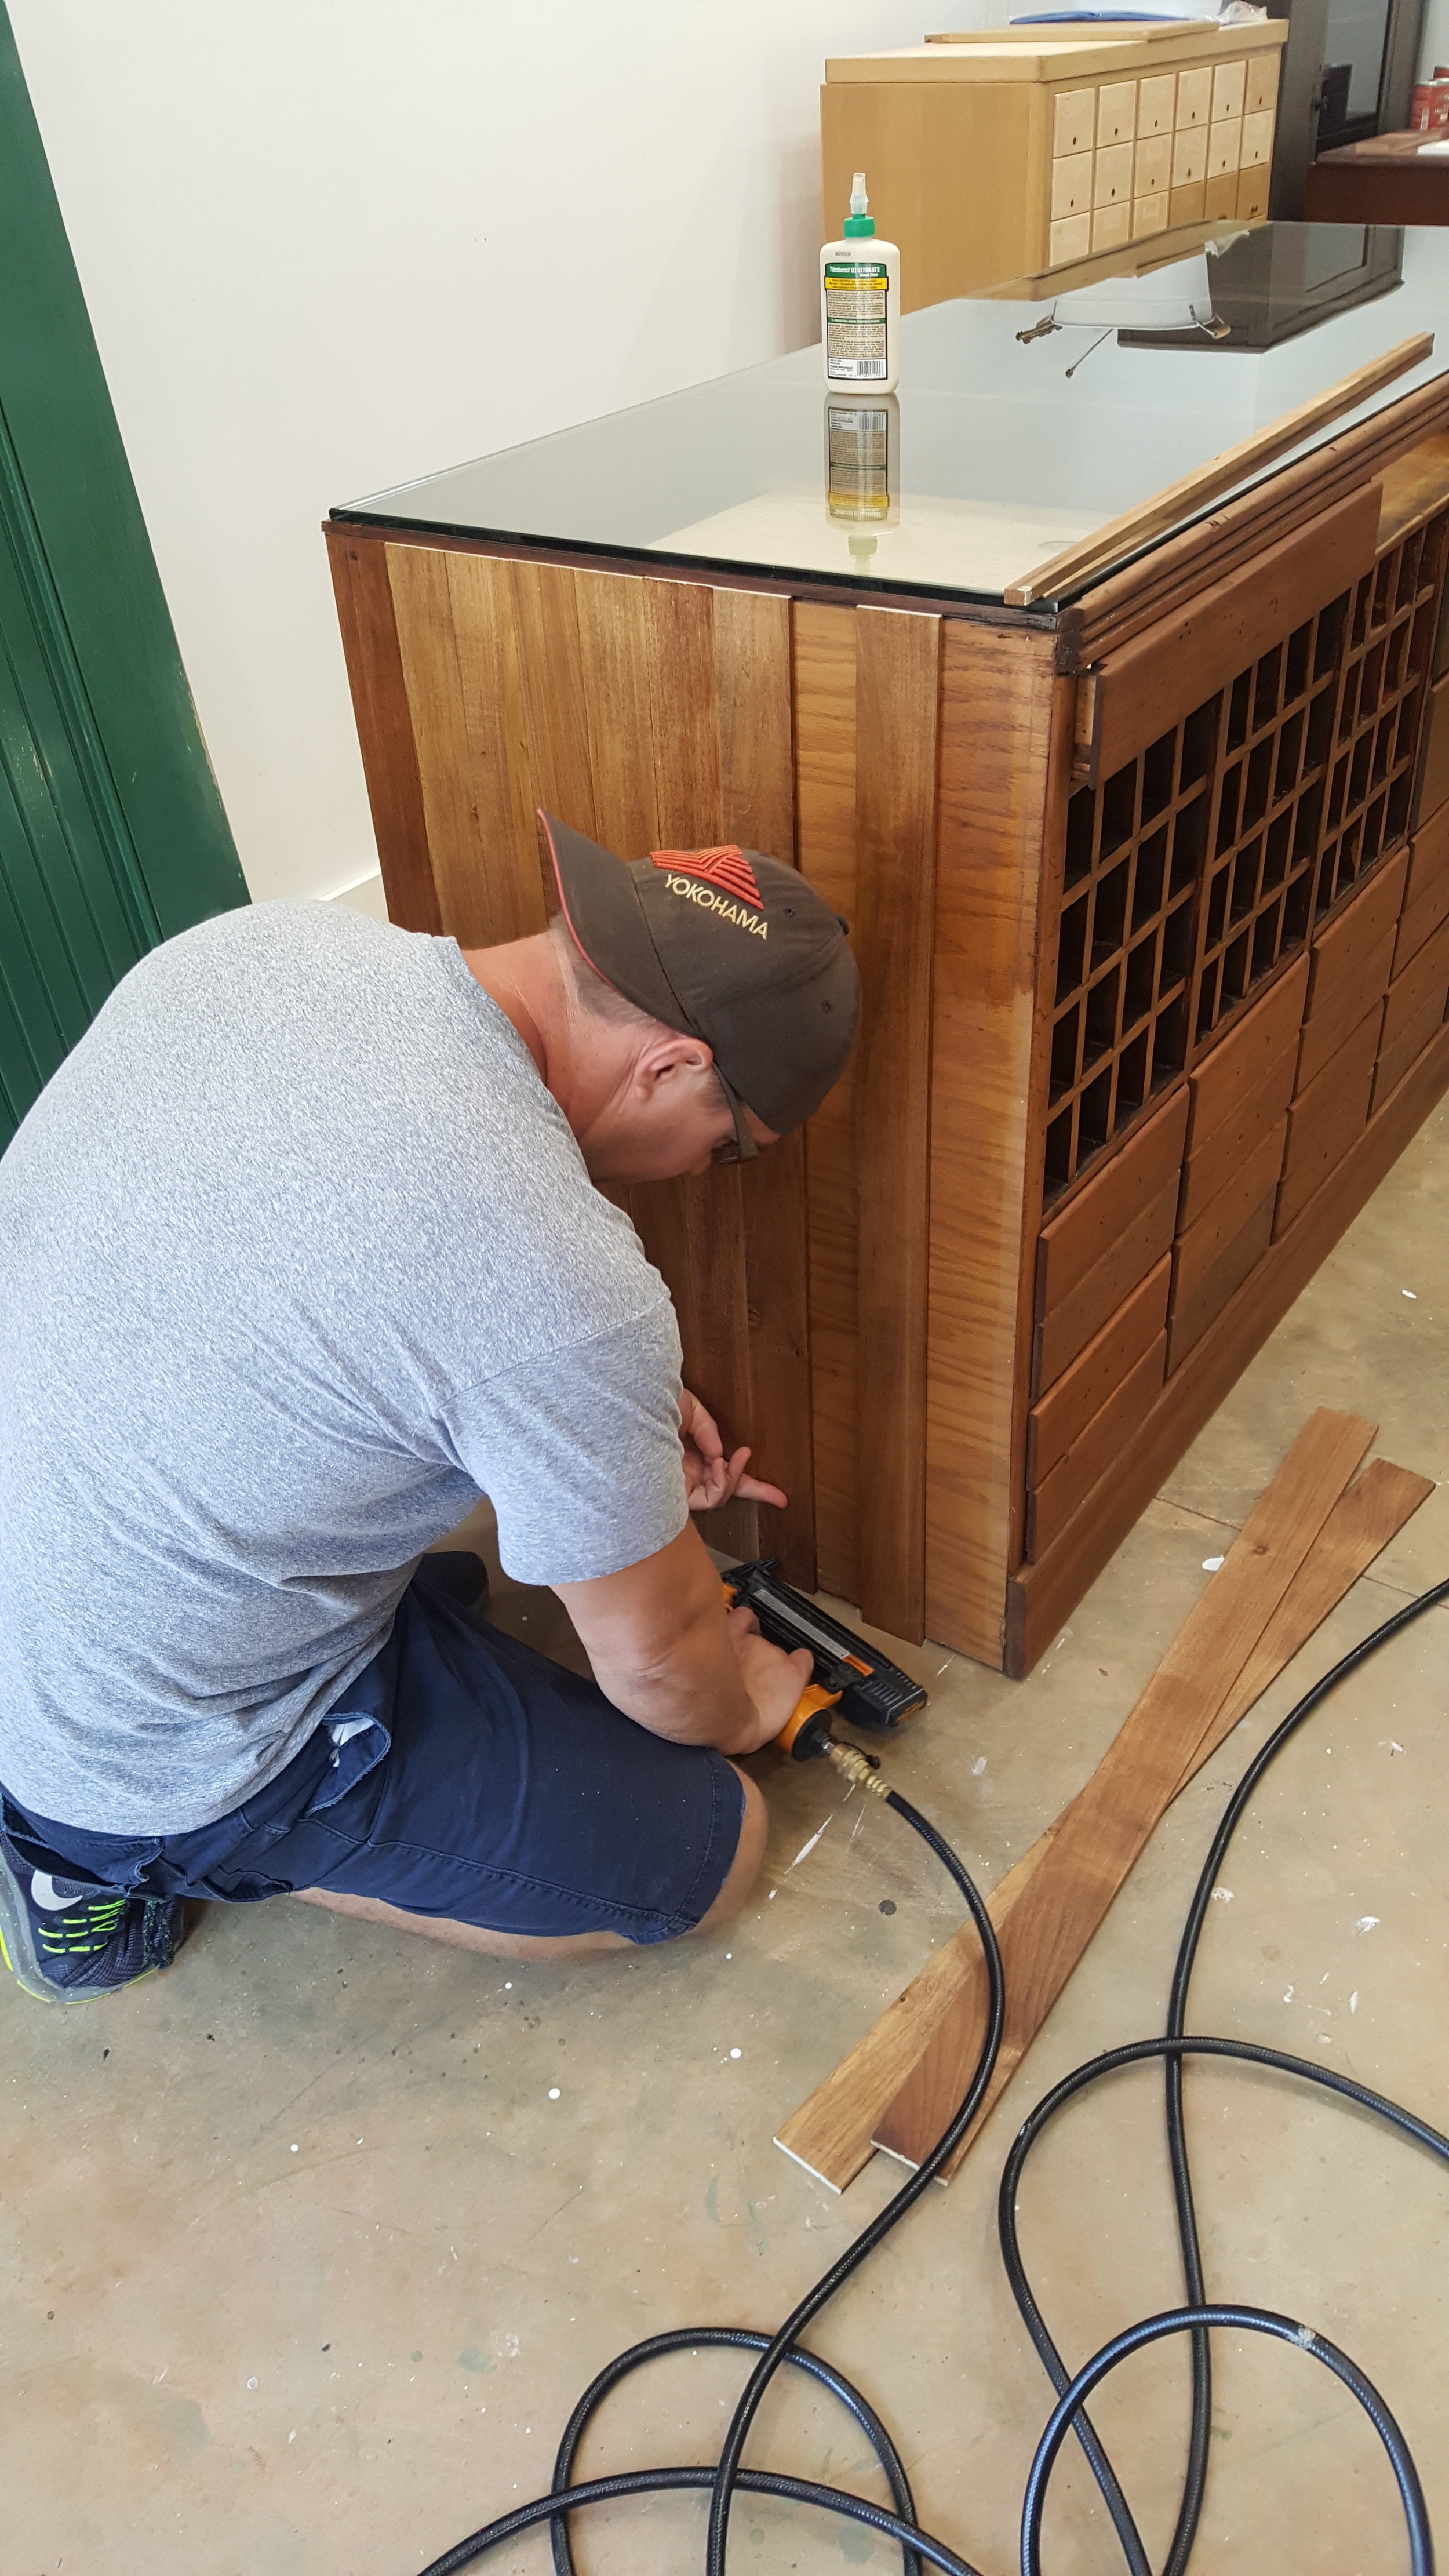
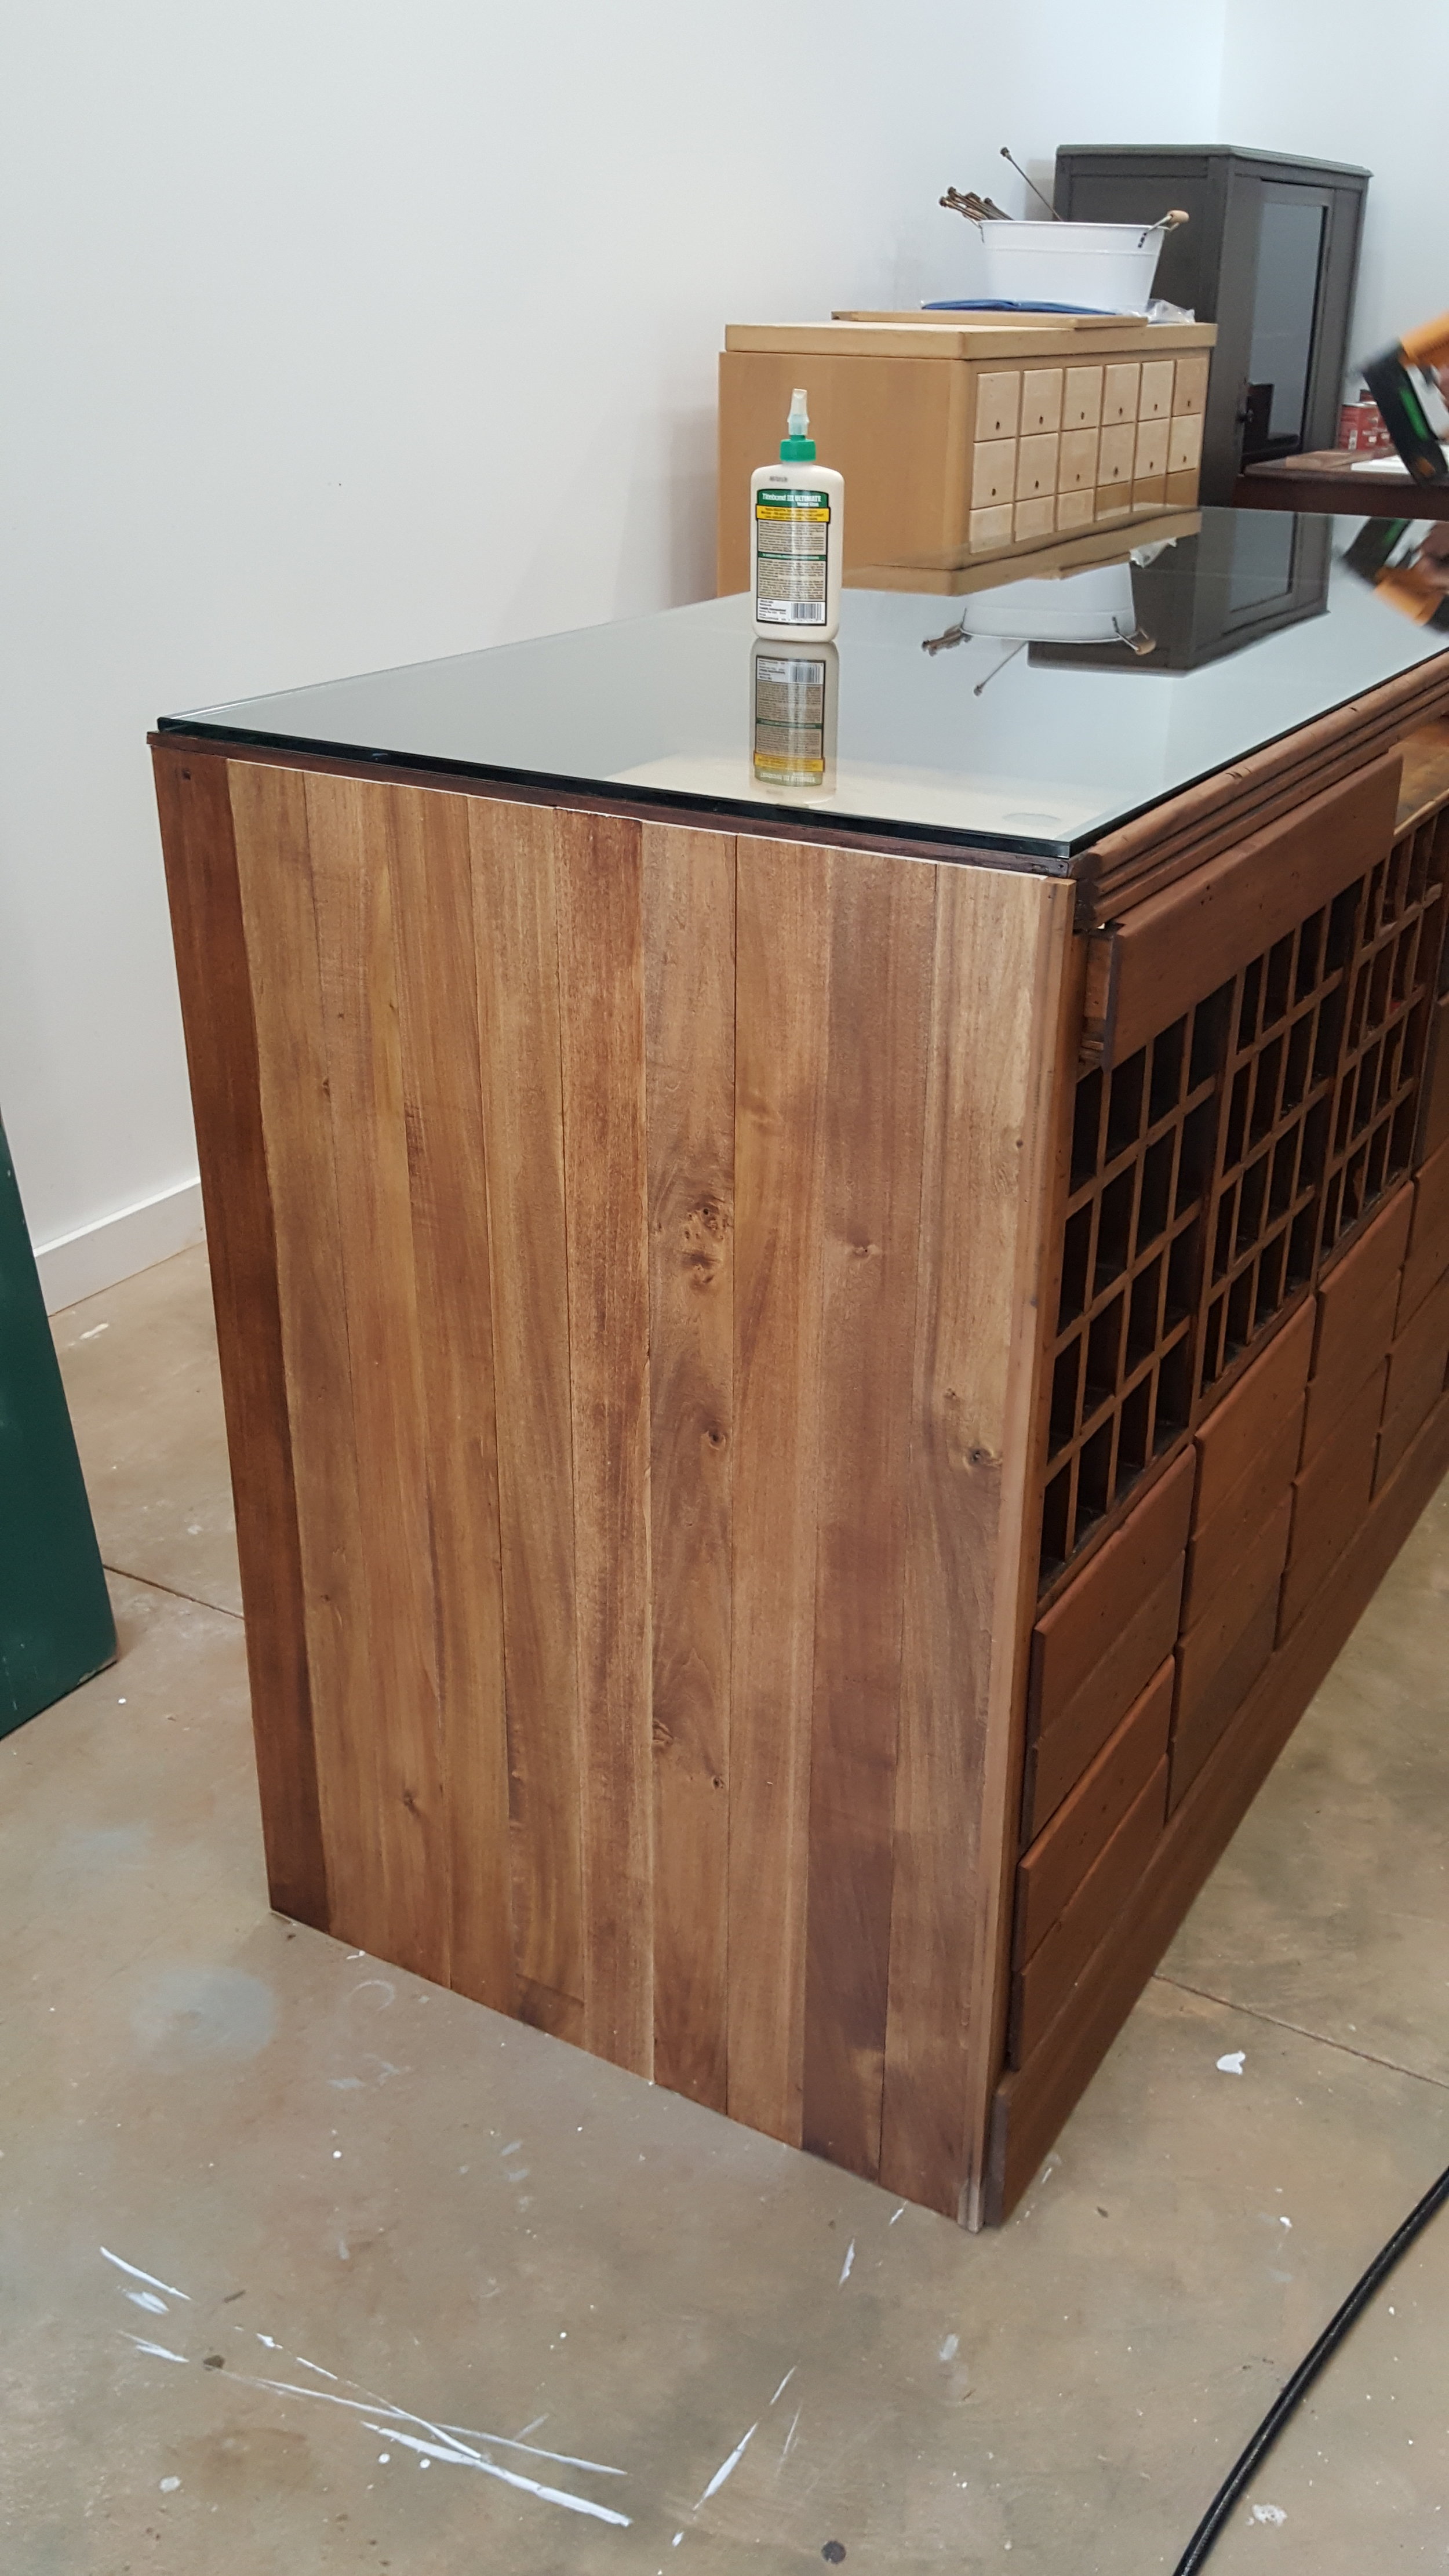
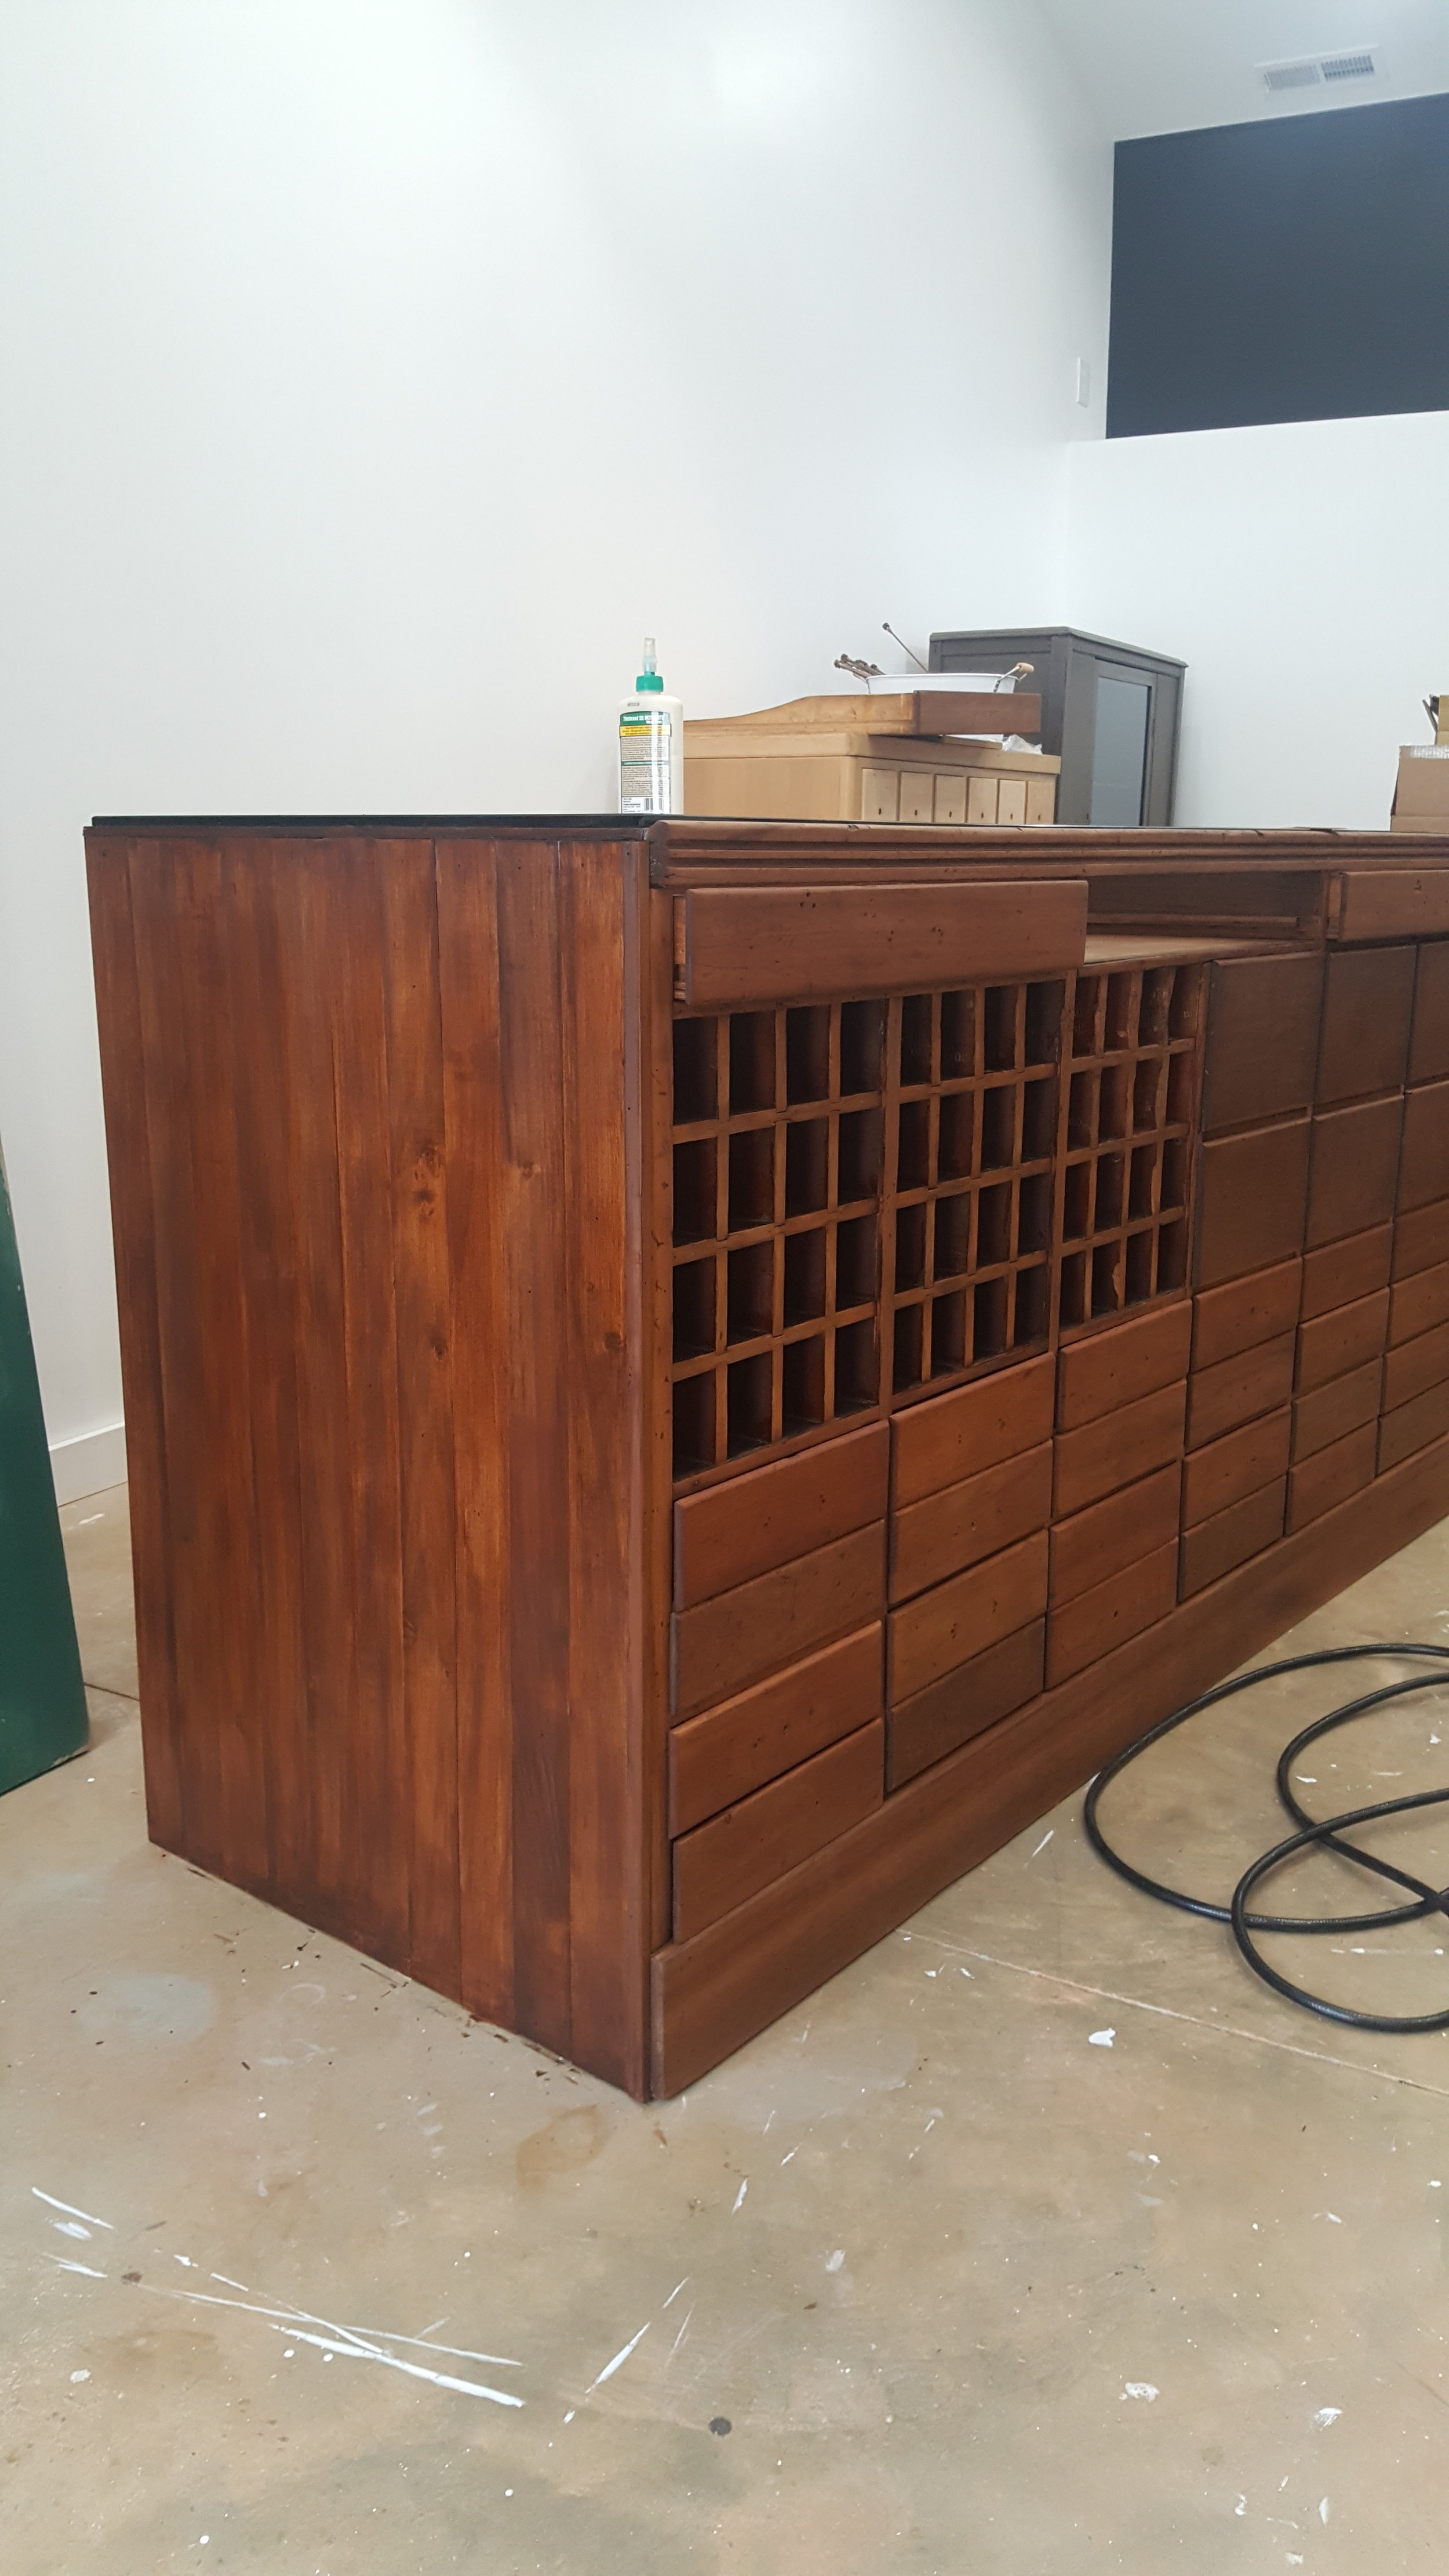
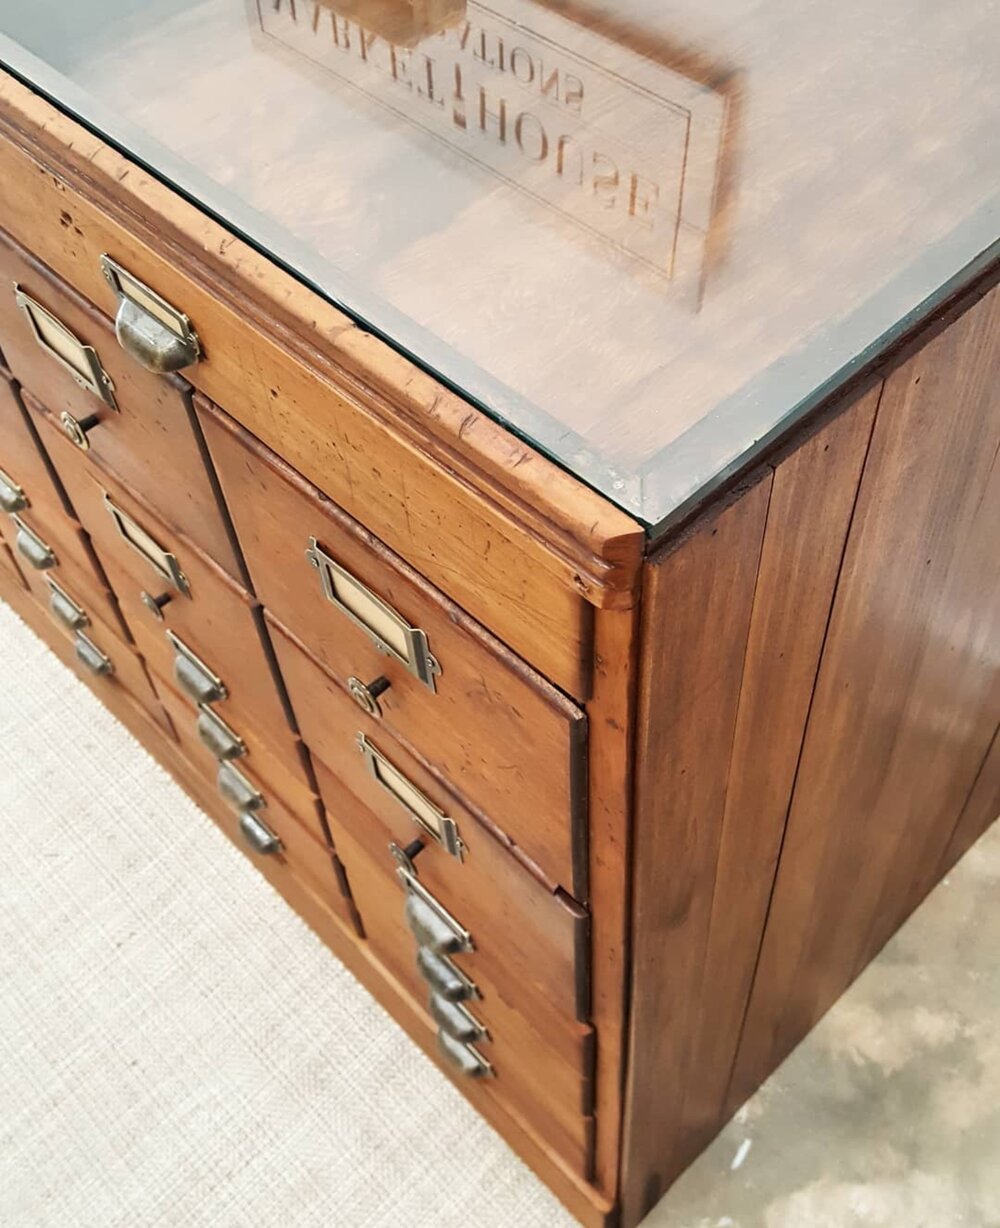
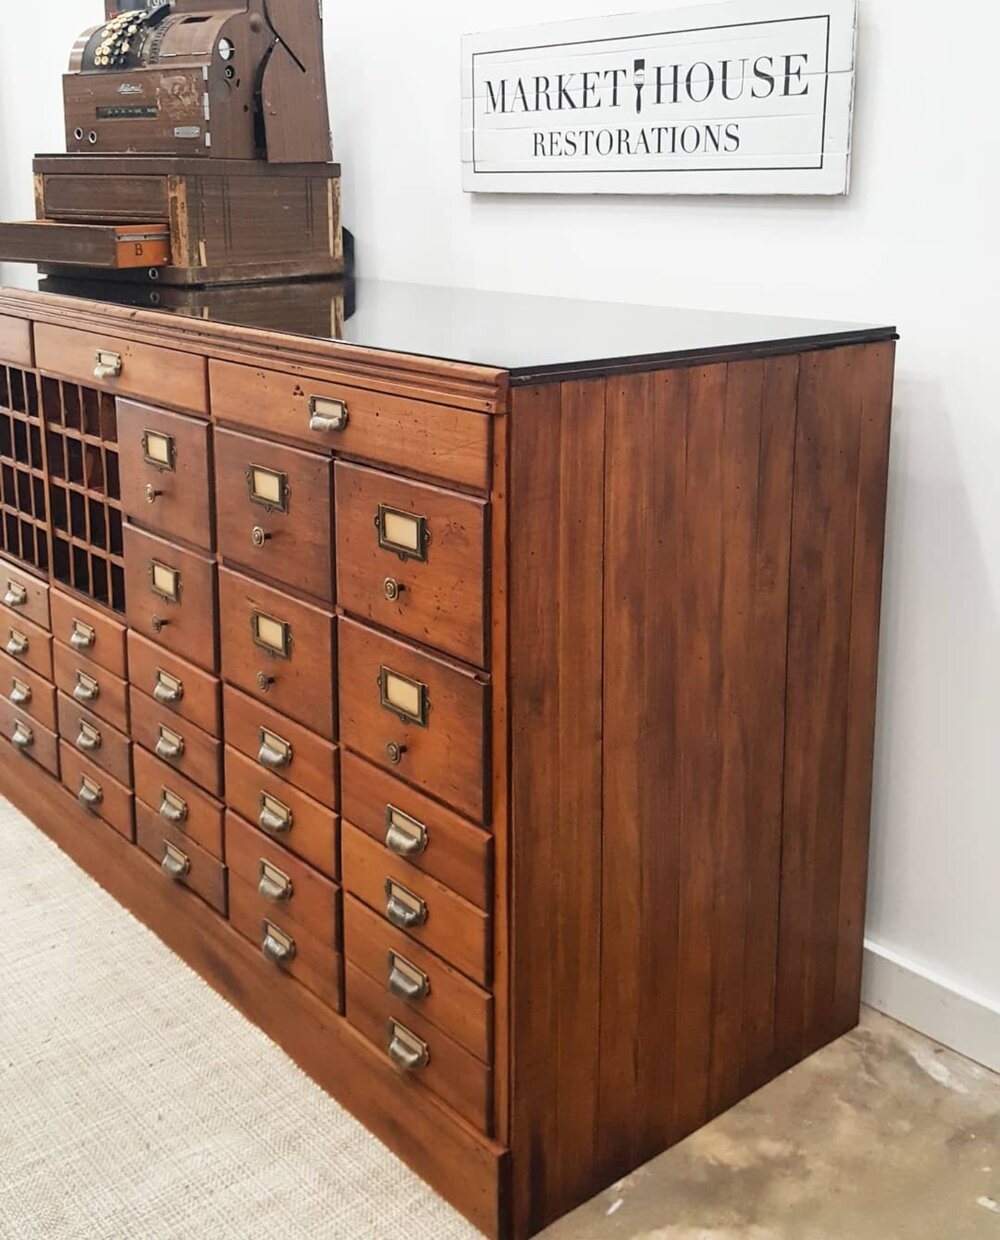
NEW SIDES:
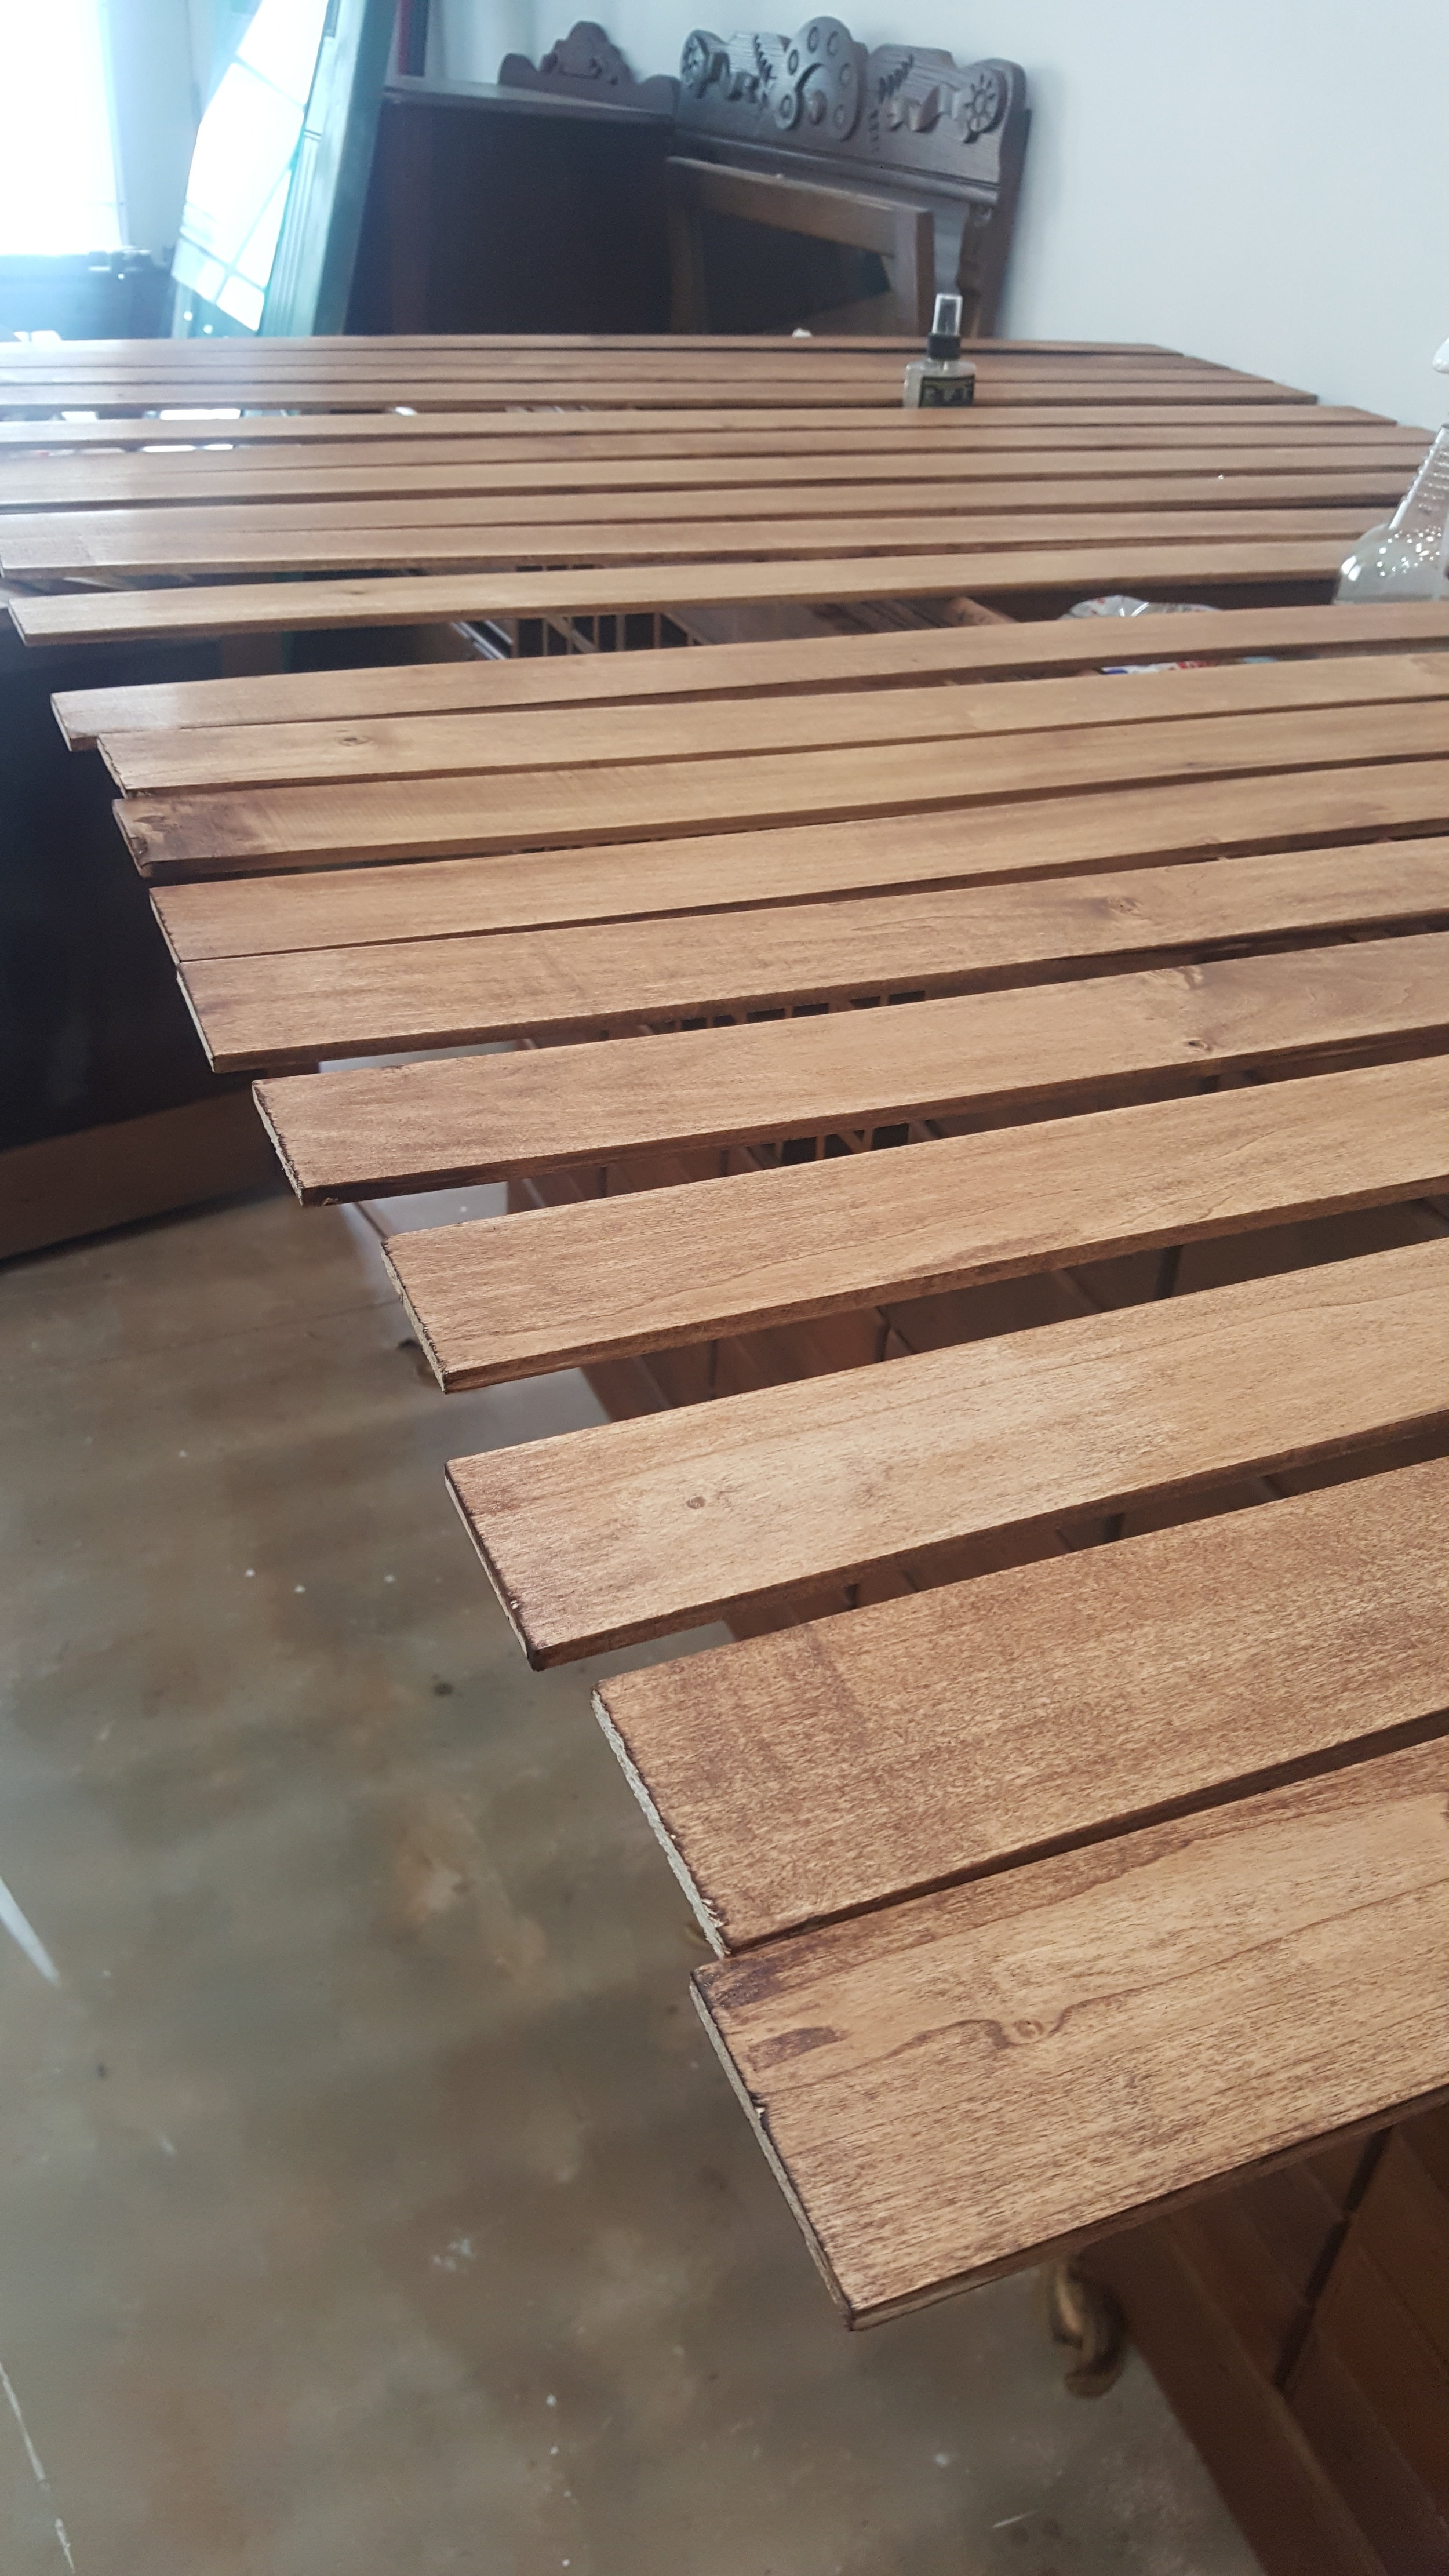
I wasn’t crazy about the plywood sides, so I decided to spruce them up with 2.5” slats that I purchased from Lowes. We attached them when Titebond and 1” finishing nails. I used three coats of General Finishes Gel Stain in Nutmeg to tie everything together.
Note, I did not wipe the gel stain off after I applied it because it caused the color to be too light. You can see in the third picture below, the slat on the left side was not wiped off. Since the slats were on the sides of the piece “wear and tear” didn’t really matter, therefore I applied/painted the gel stain on with a foam brush to darken the color and didn’t do anything else to it.
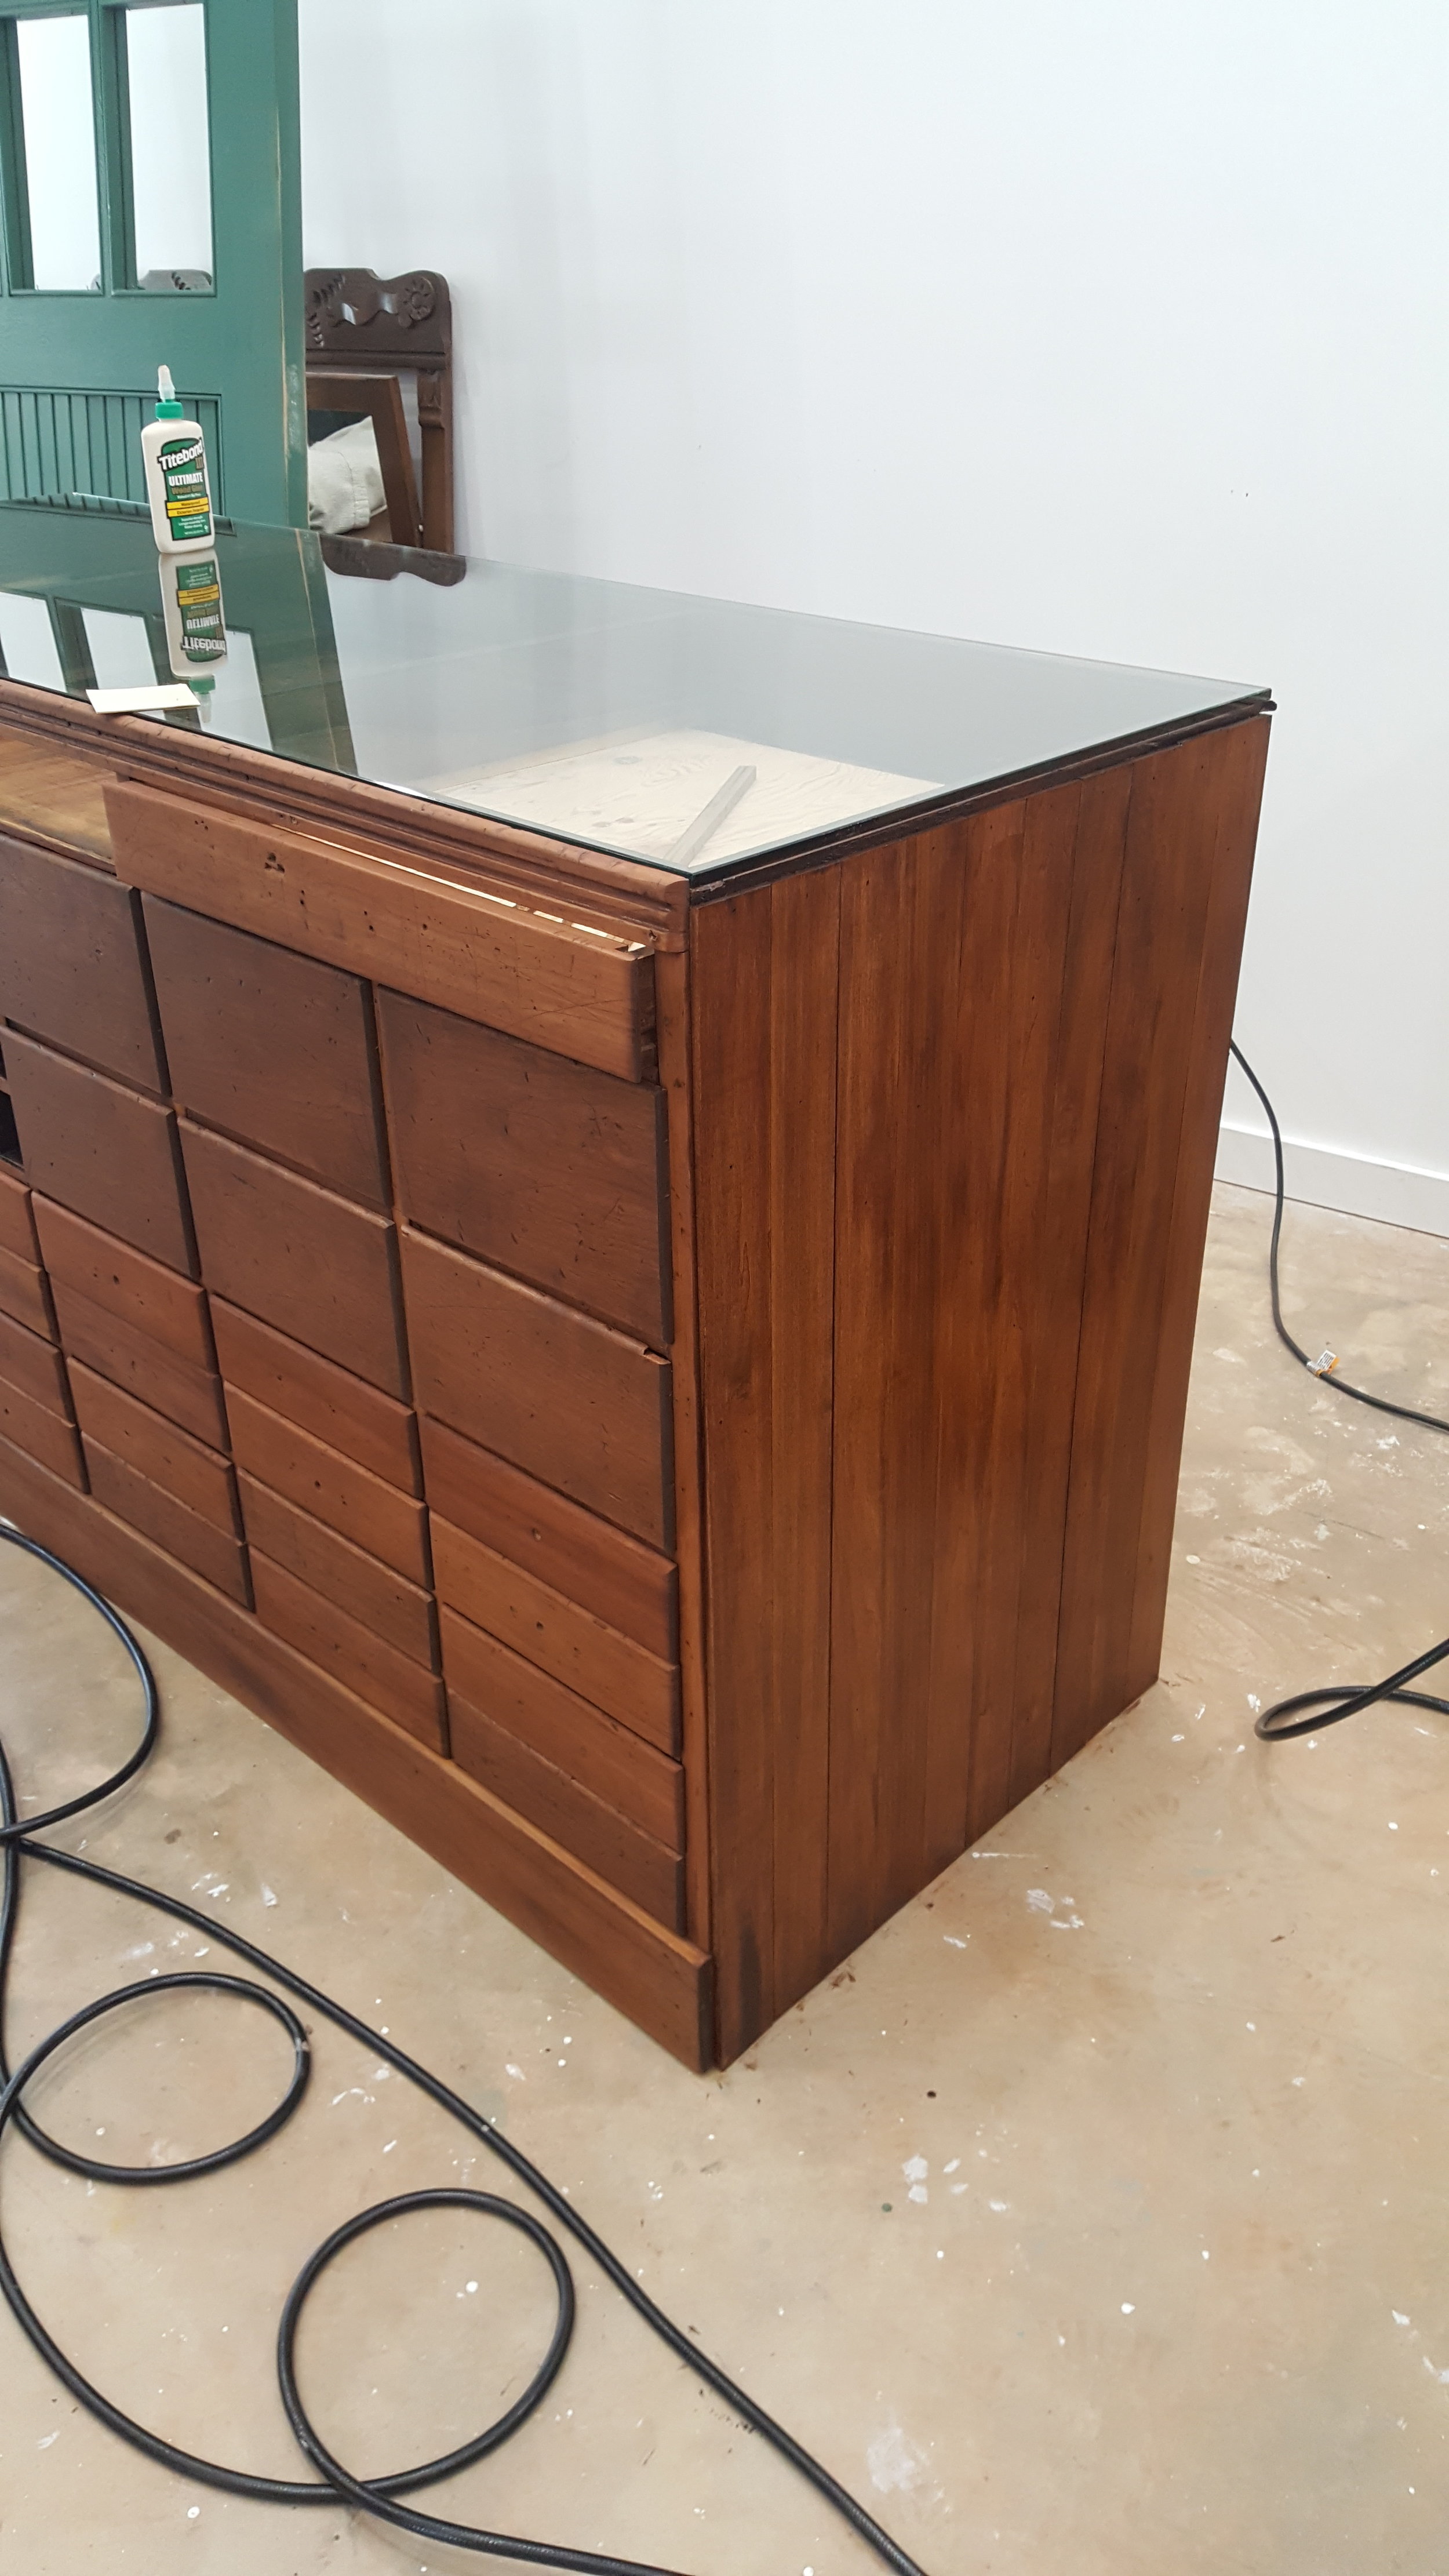
ADDING NEW HARDWARE:
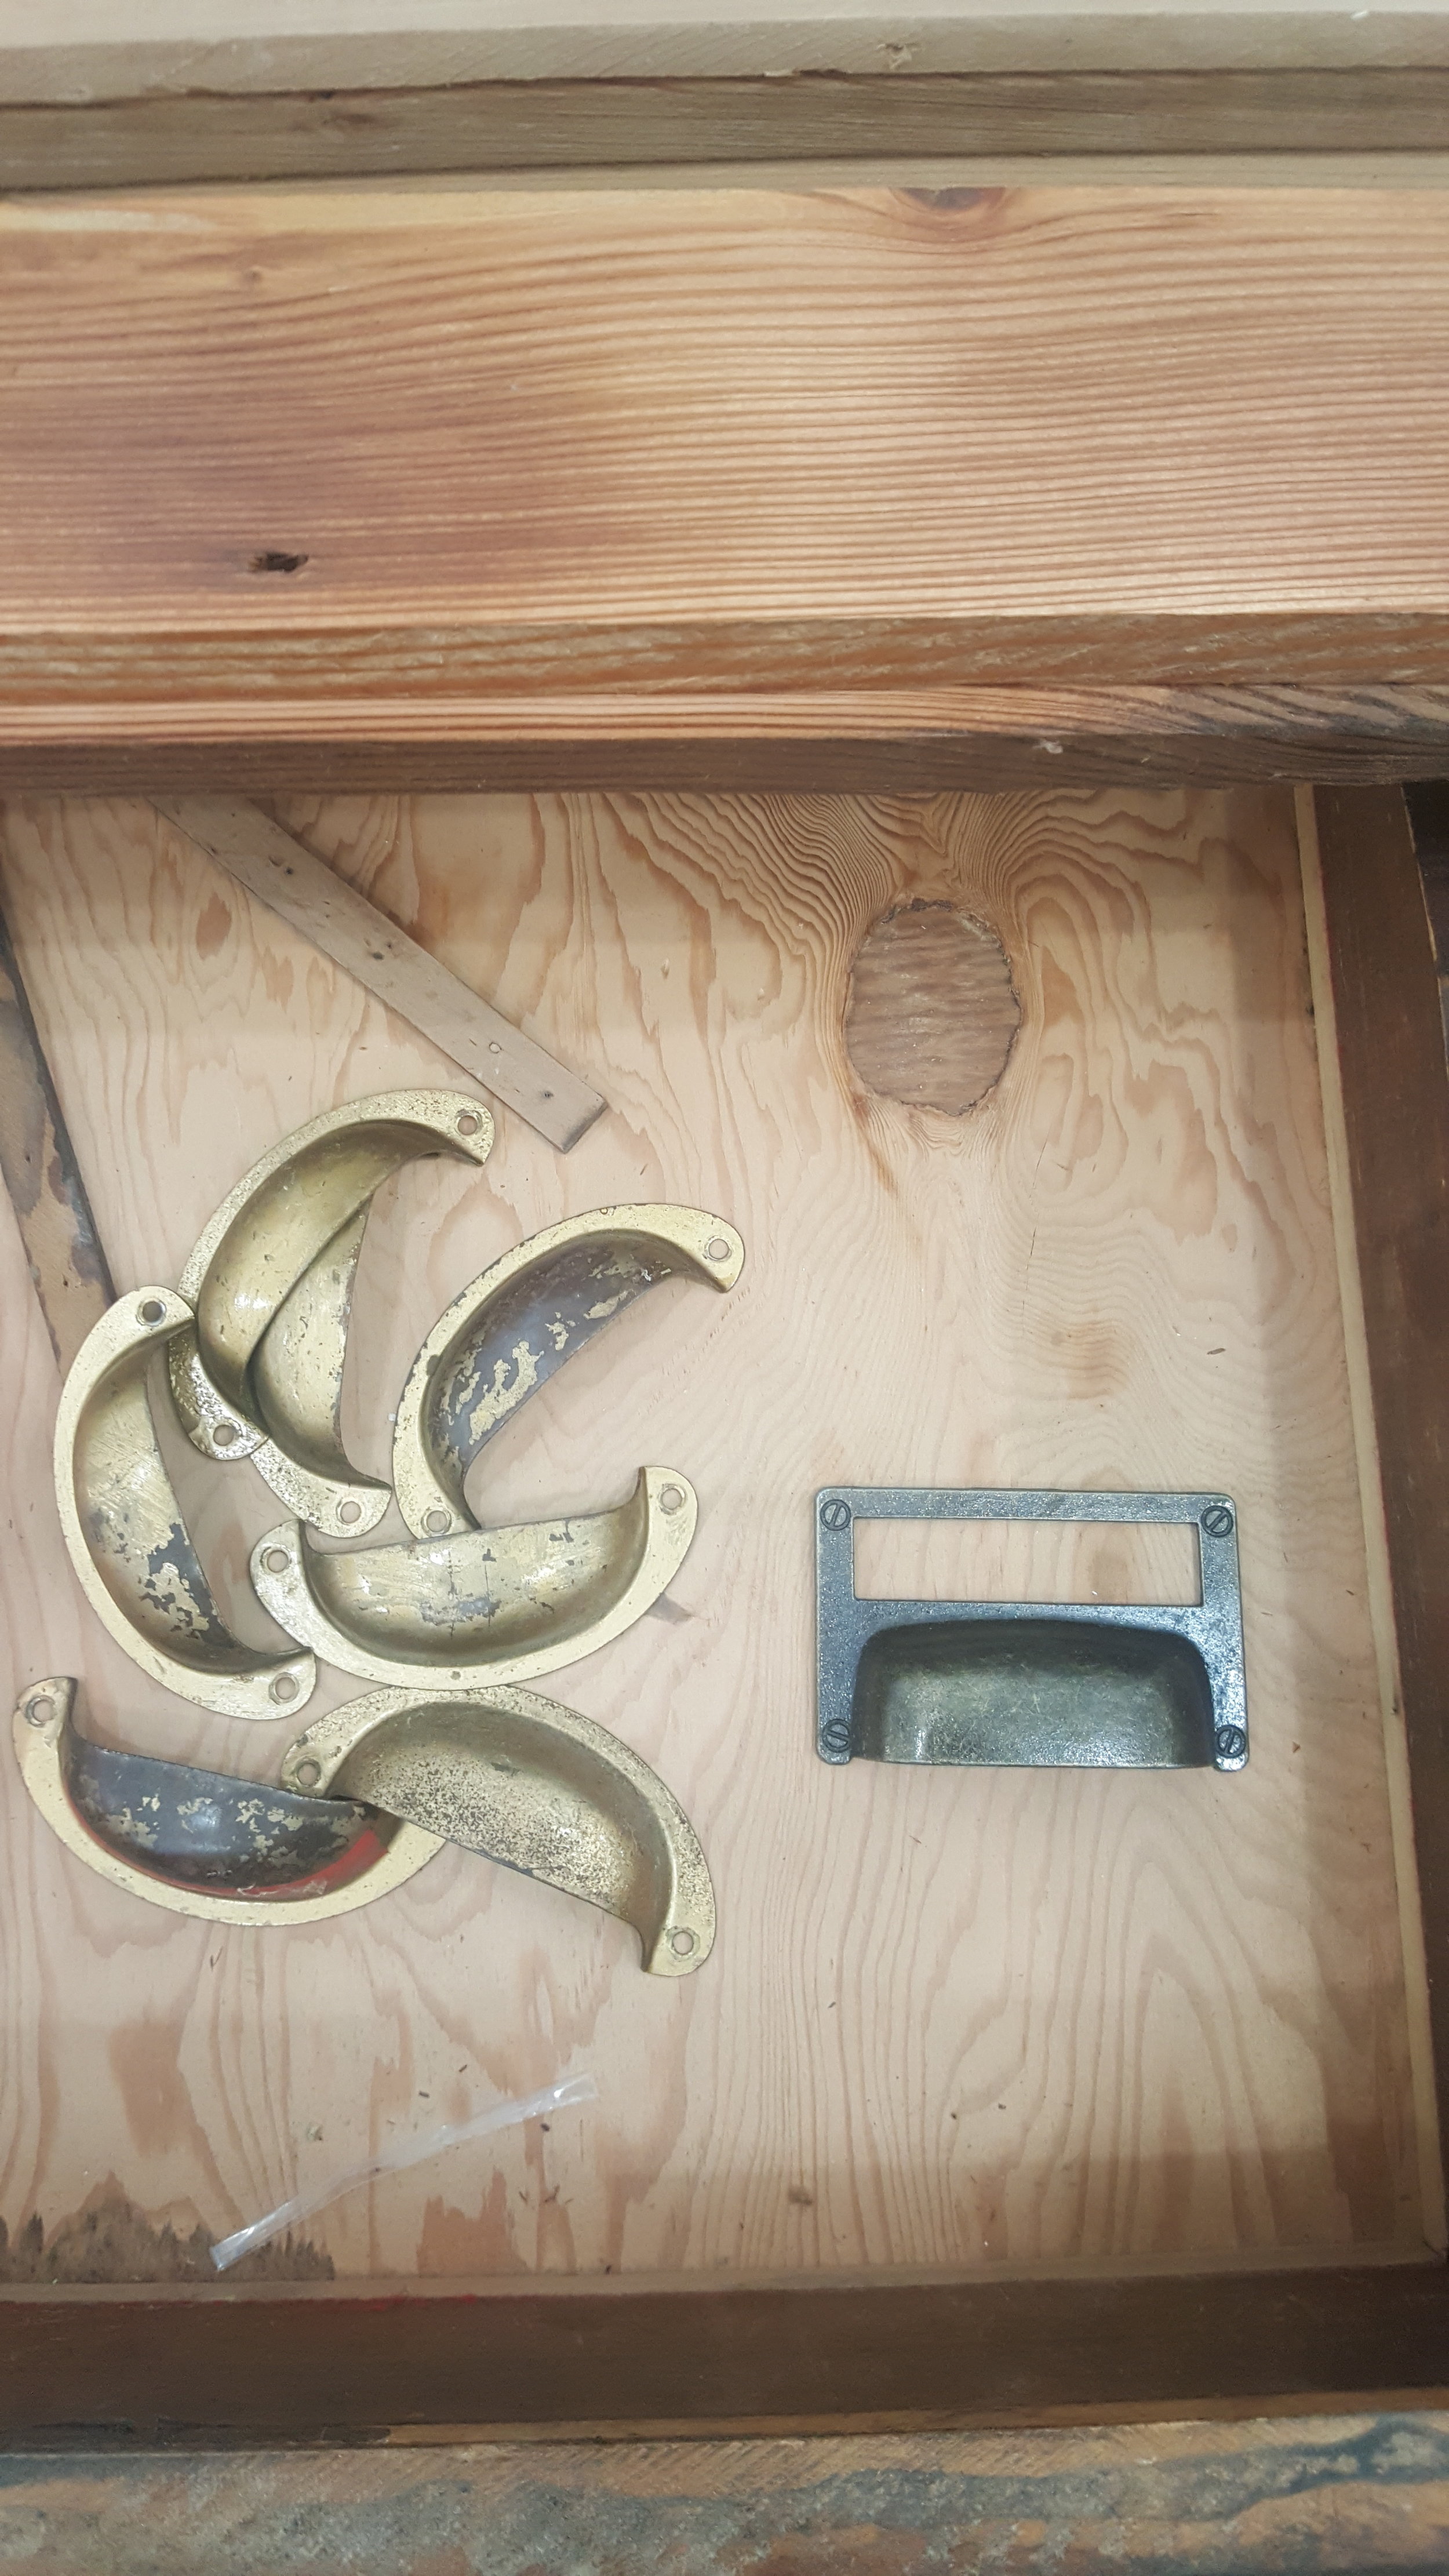
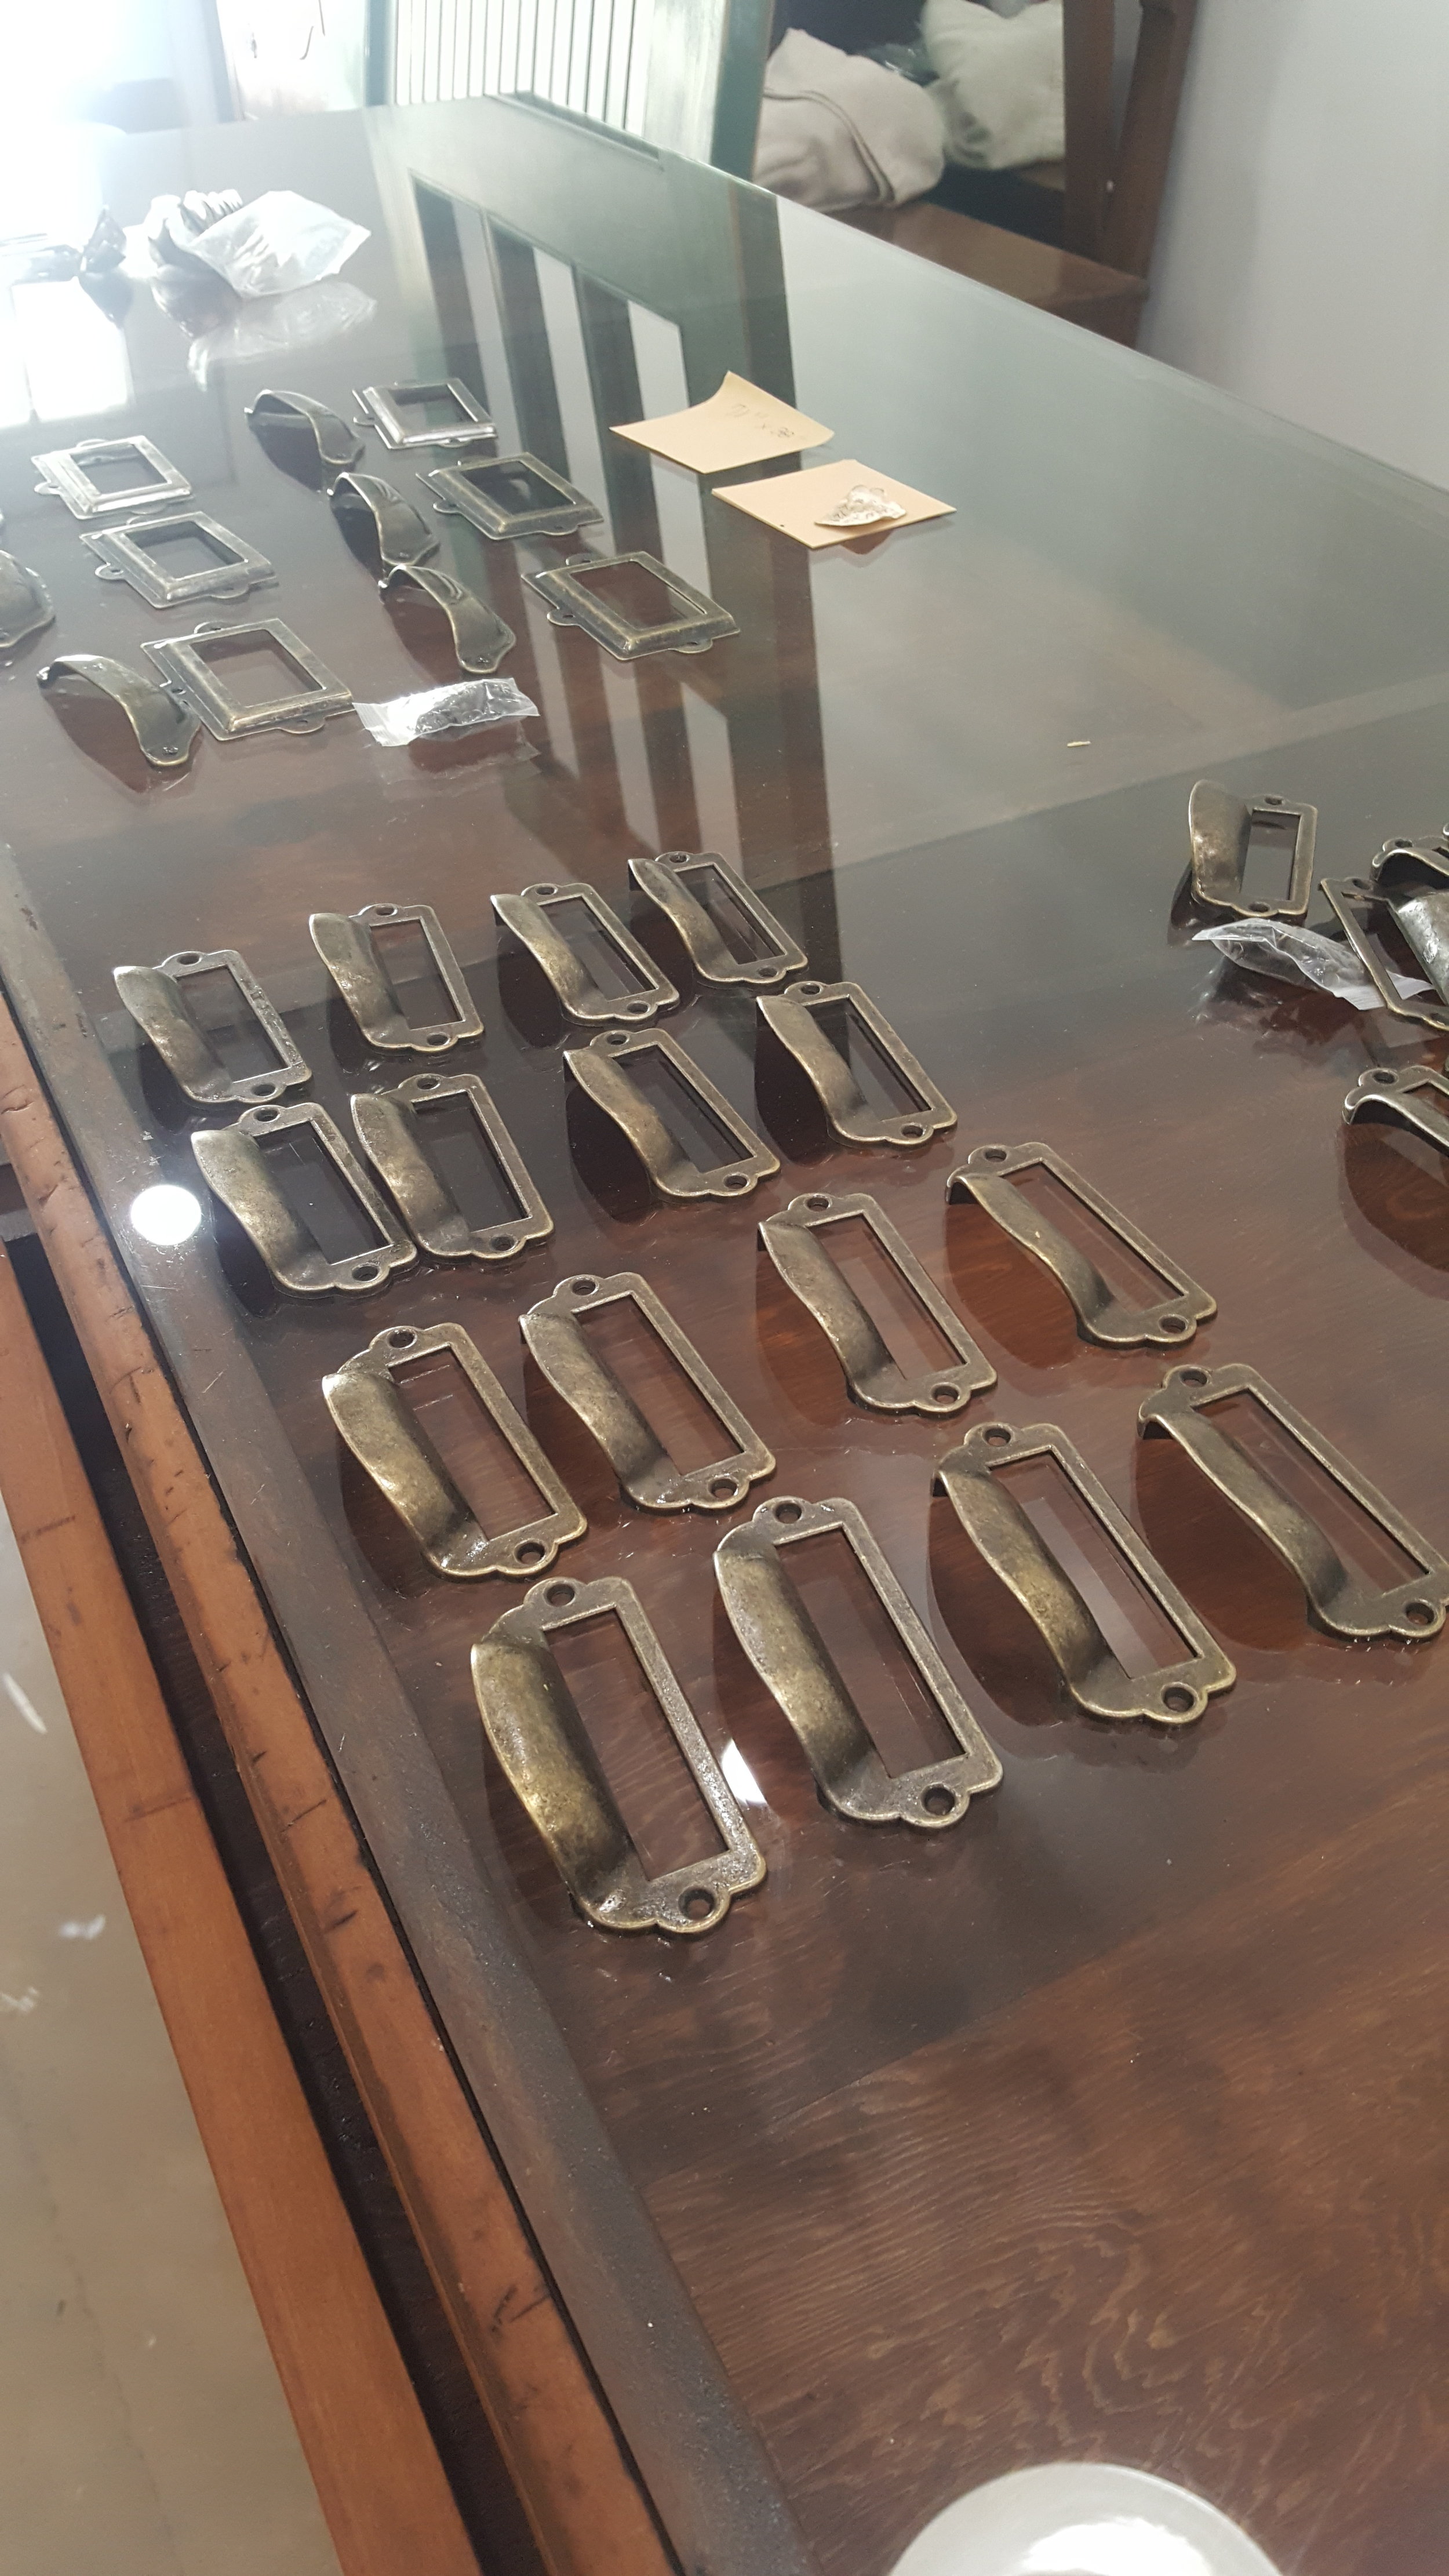
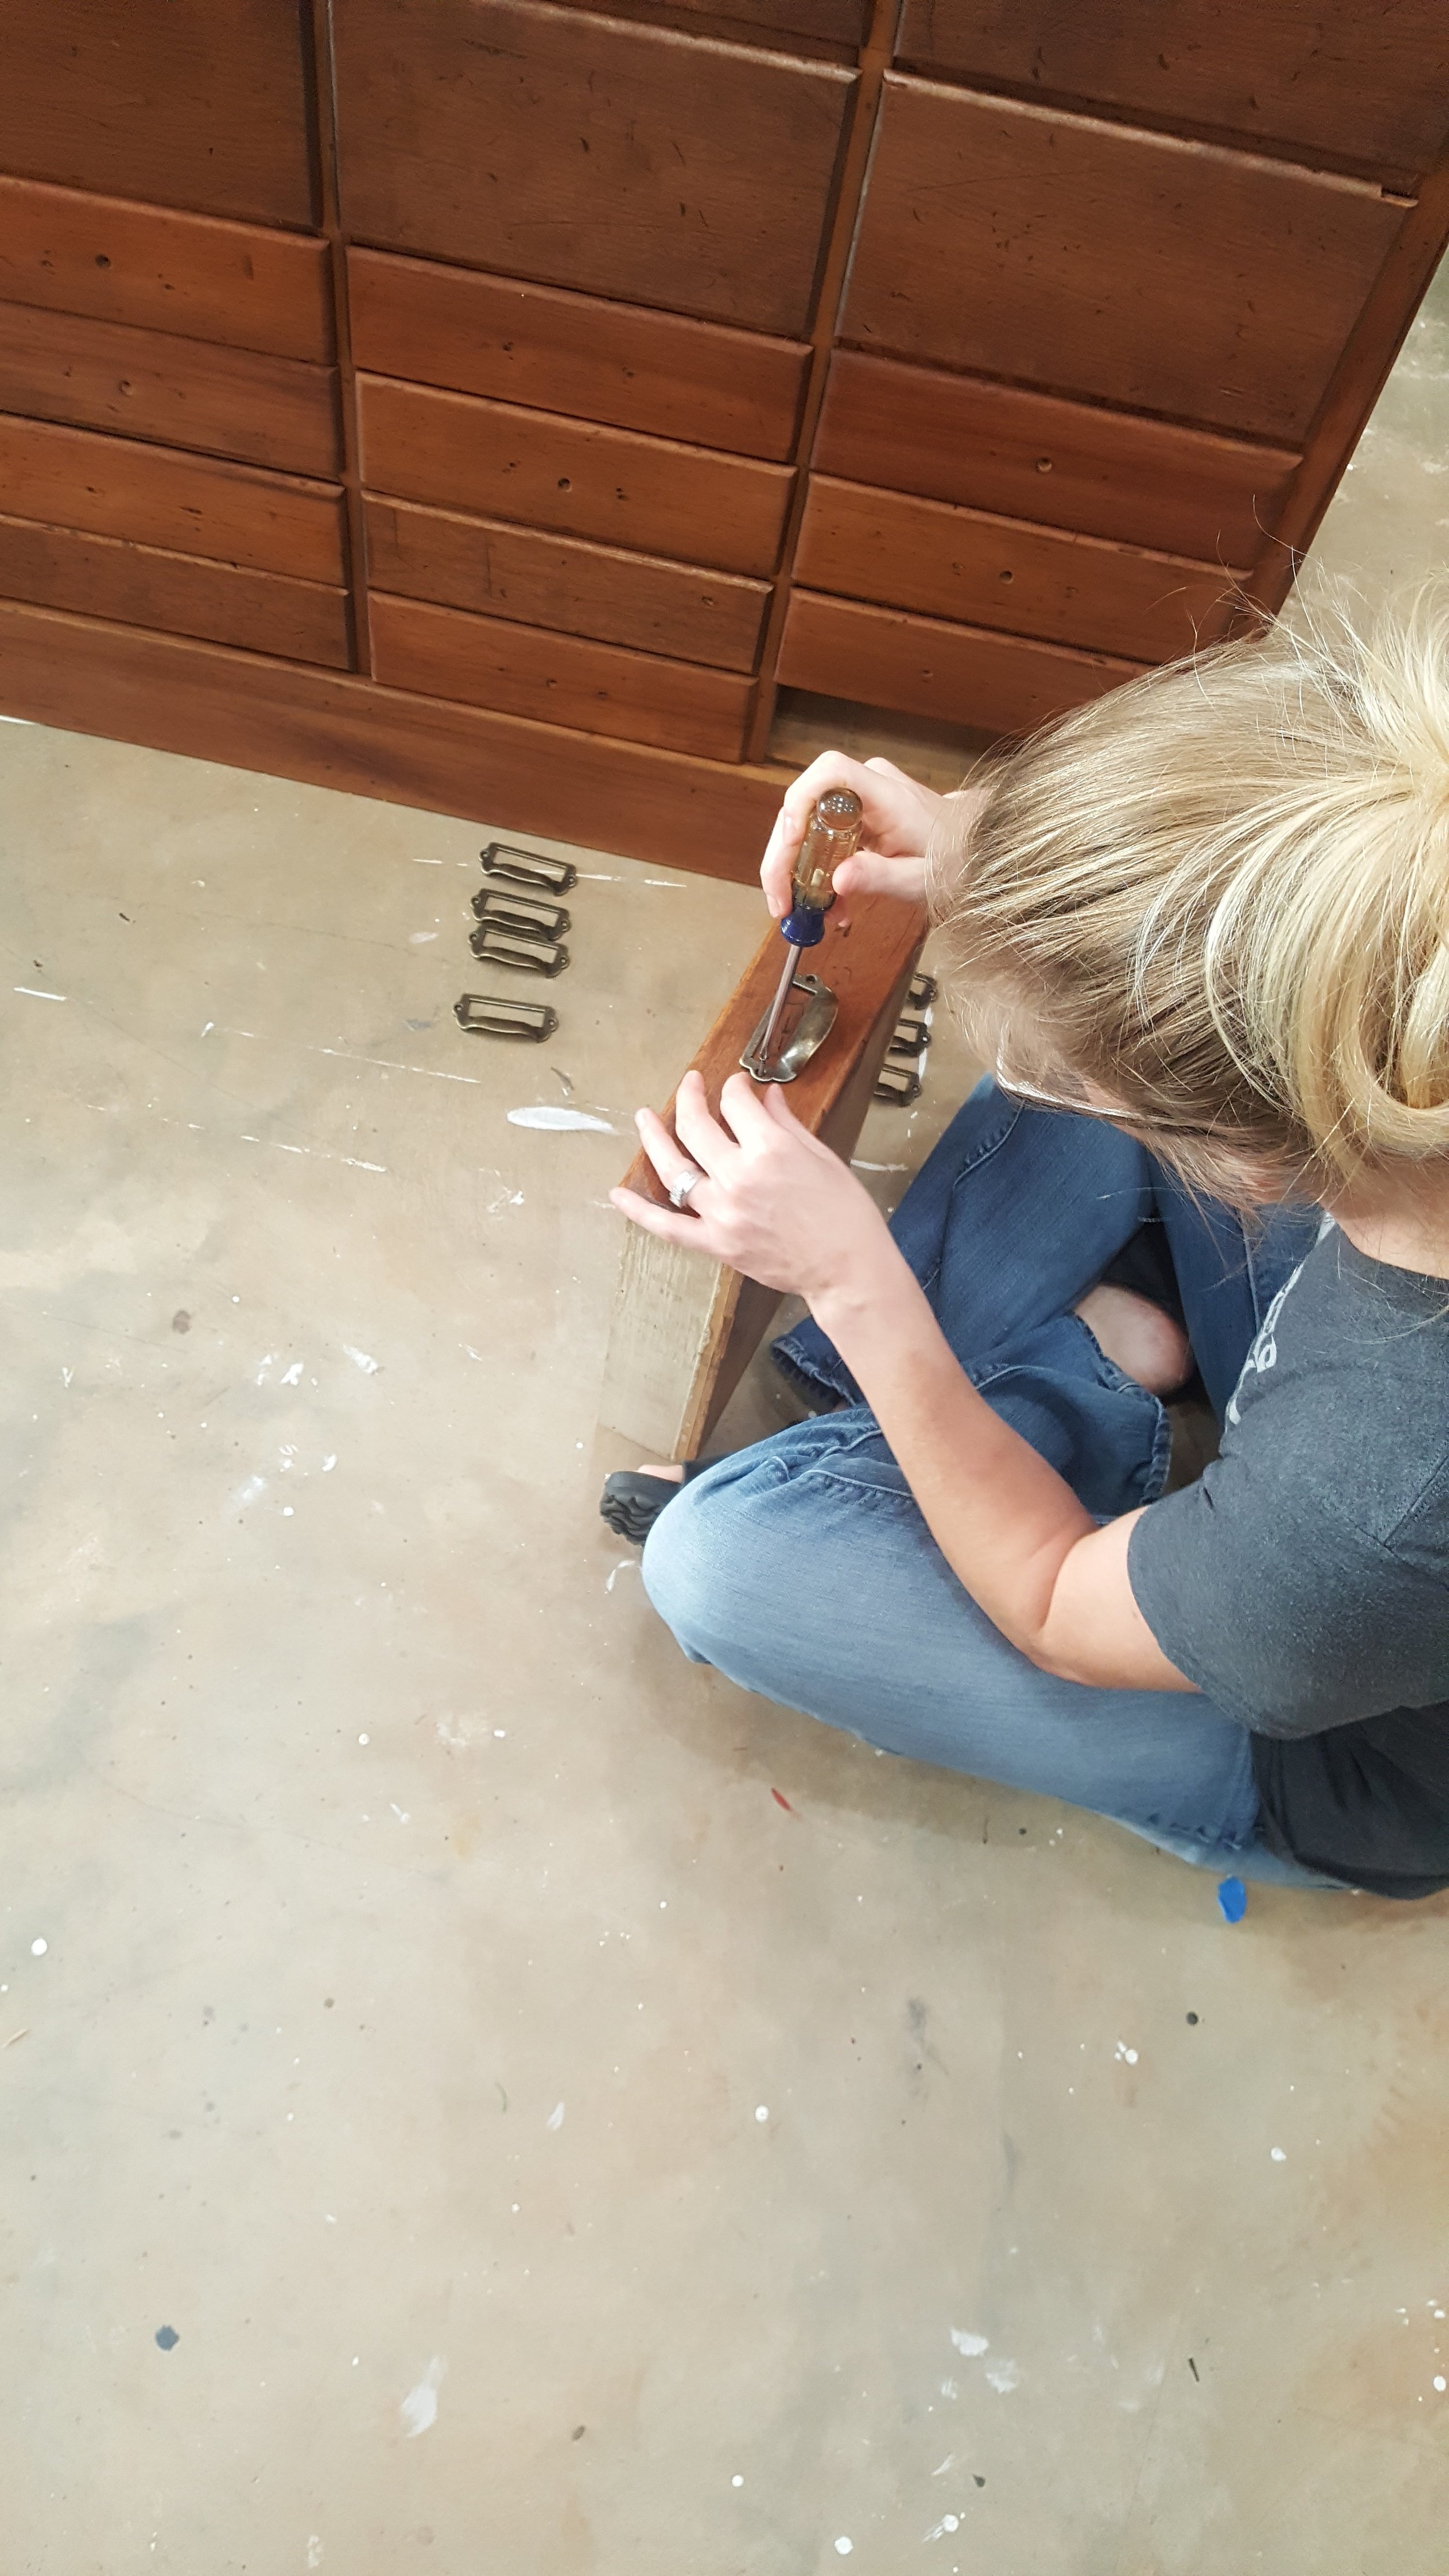
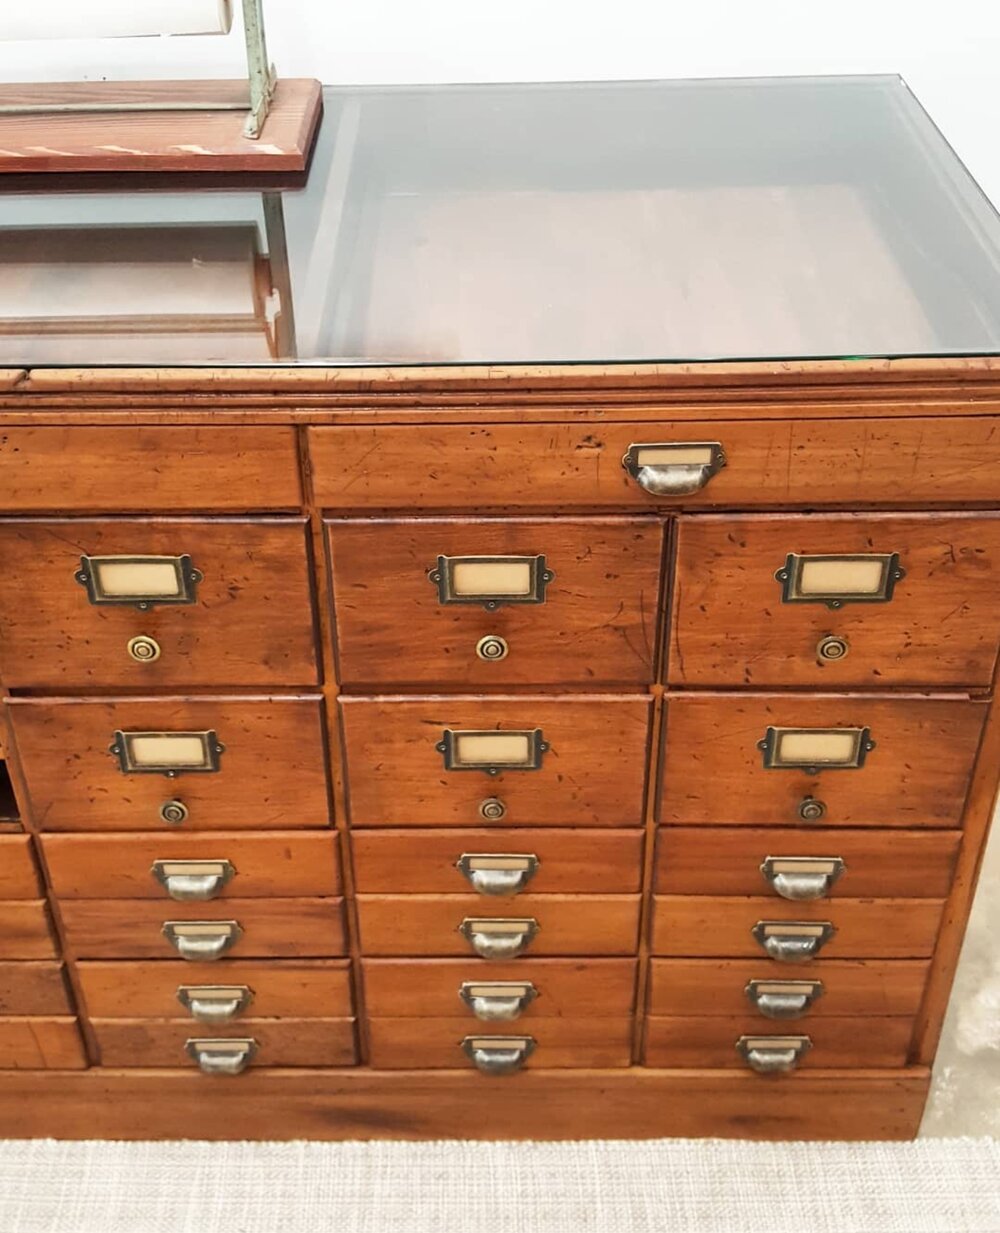
I really wanted to salvage the original pulls, but it was so mismatched, broken and scratched that I couldn’t get it to work no matter how hard I tried. There were even a couple of old bracelets being used to open the drawers. Ha!. Anyway, I did not have enough of the same pulls or knobs for everything to make sense, so I had to purchase new ones. On all of the small drawers I used card catalog pulls that I purchased off of Amazon. On the larger drawers, I wanted to do something slightly different, so I purchased separate card label frames and reused the knobs that originally came on the piece to complete the look.

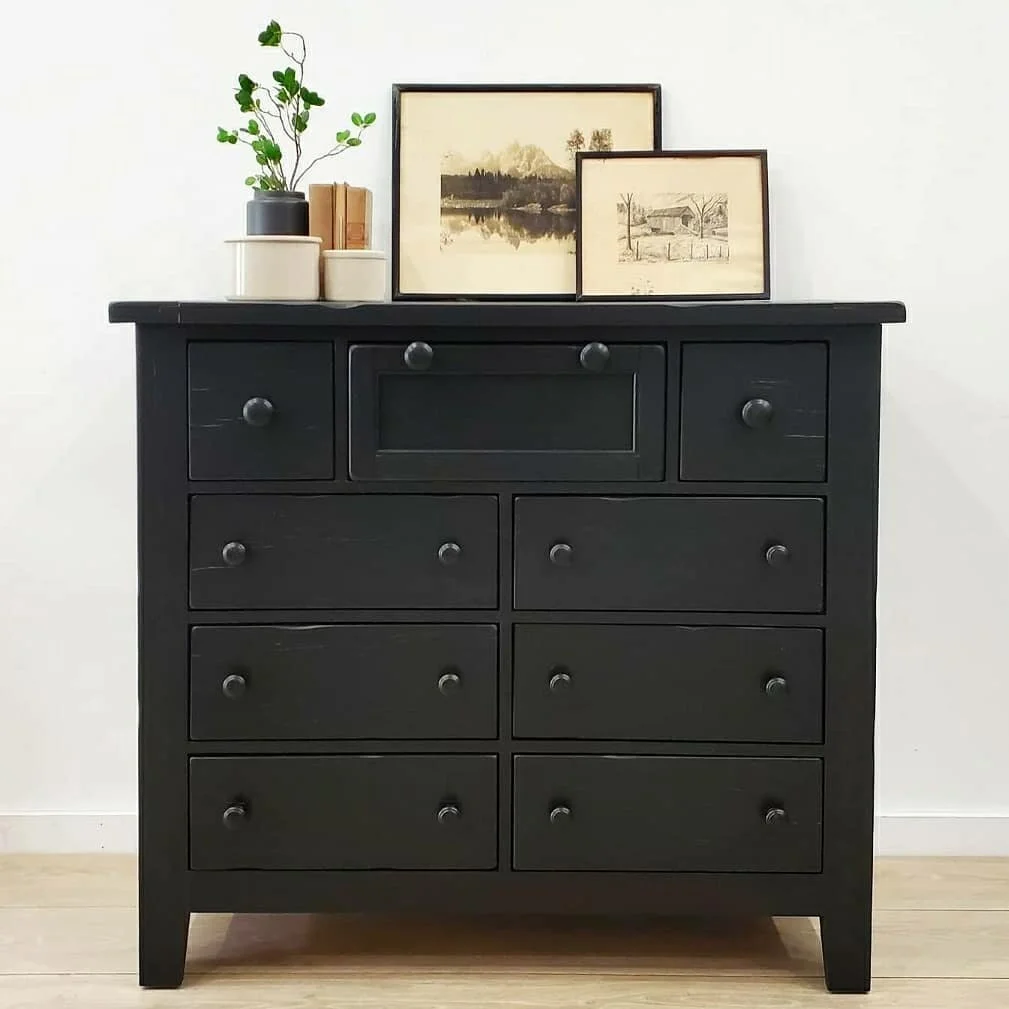
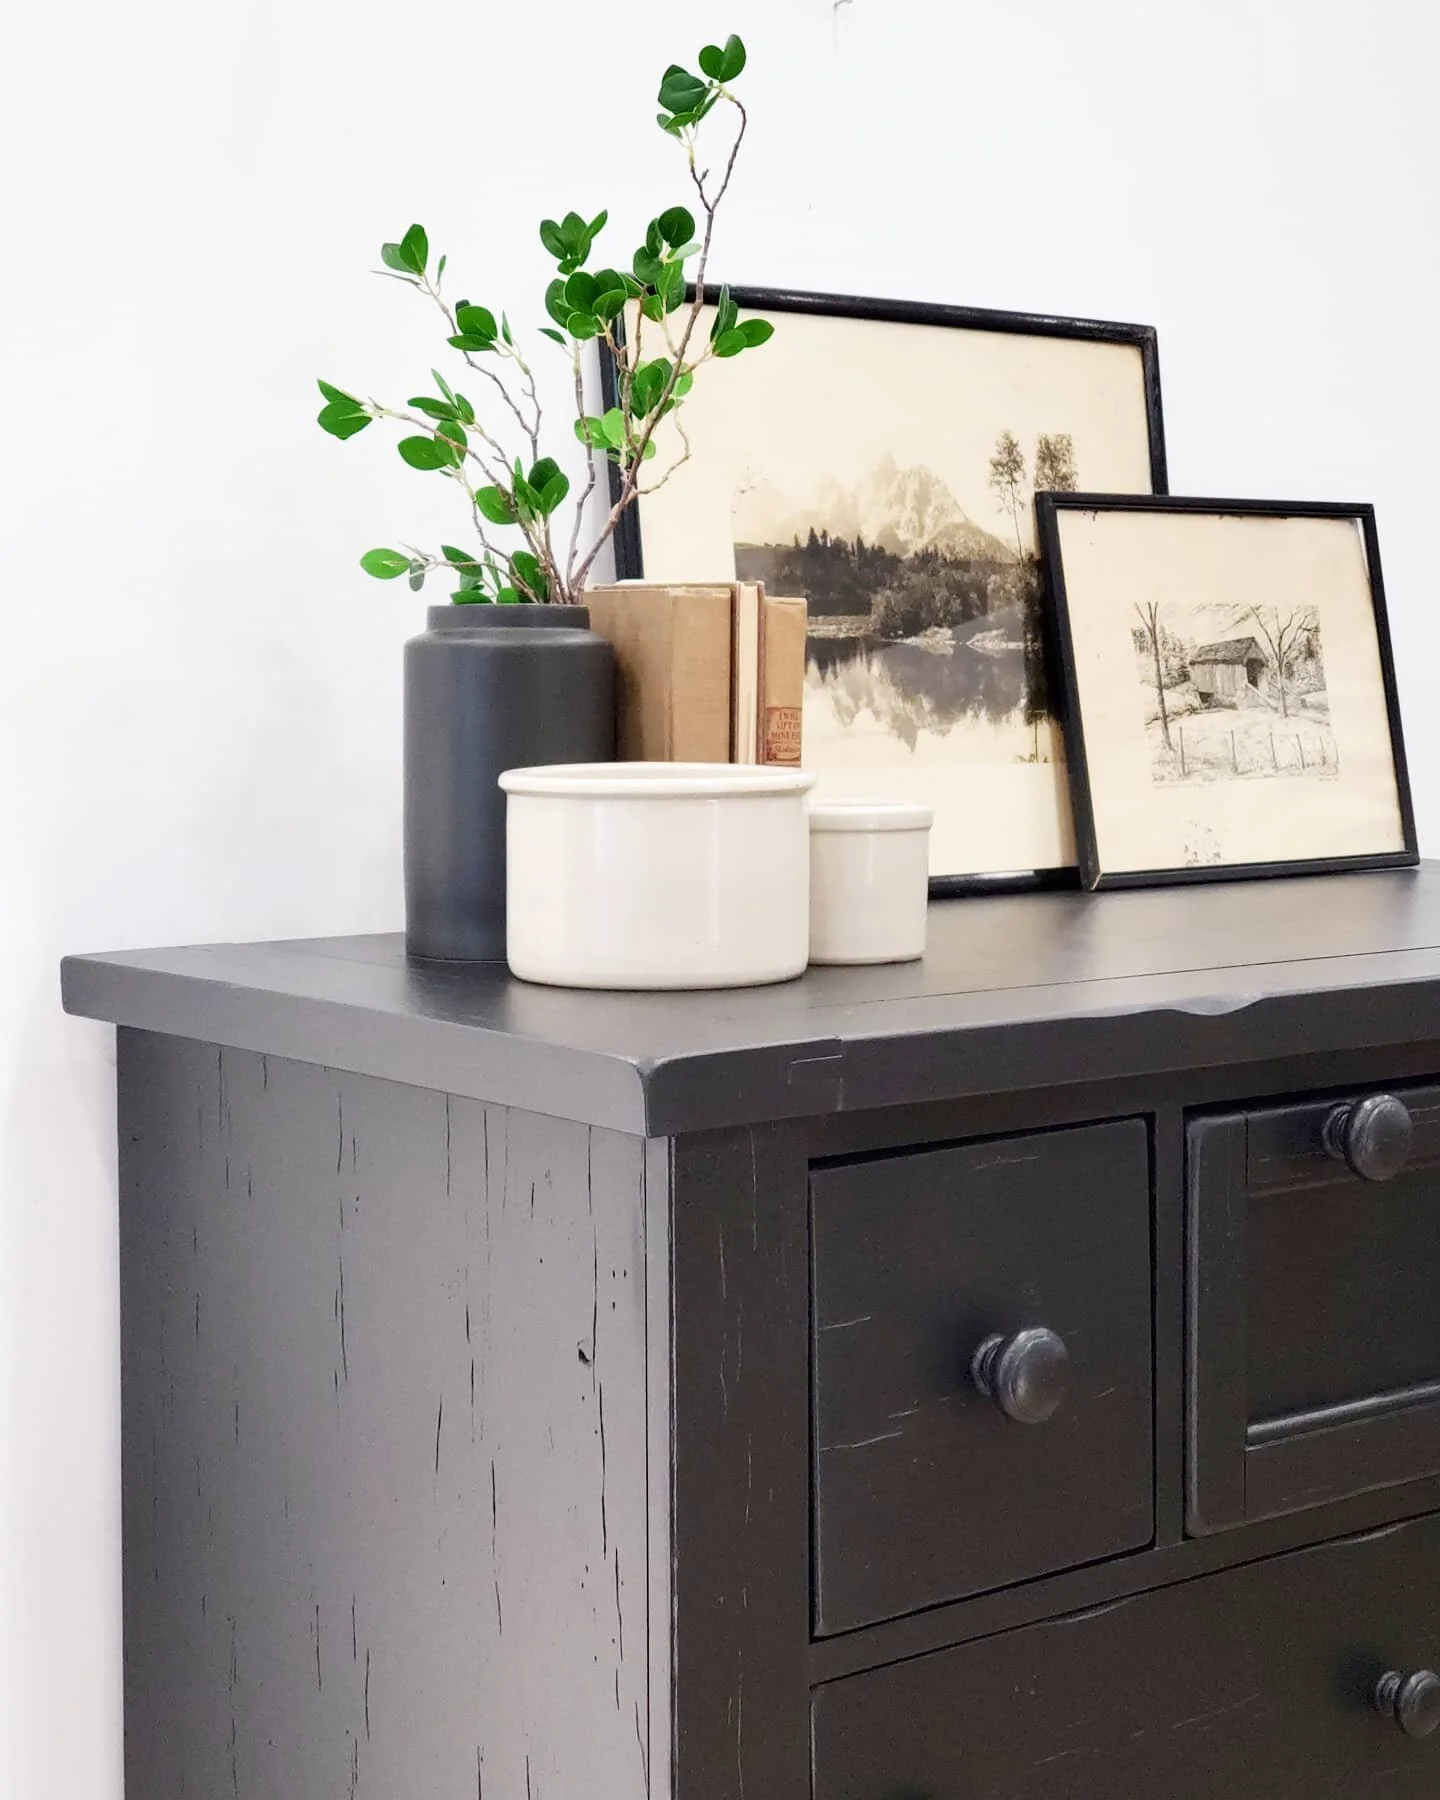
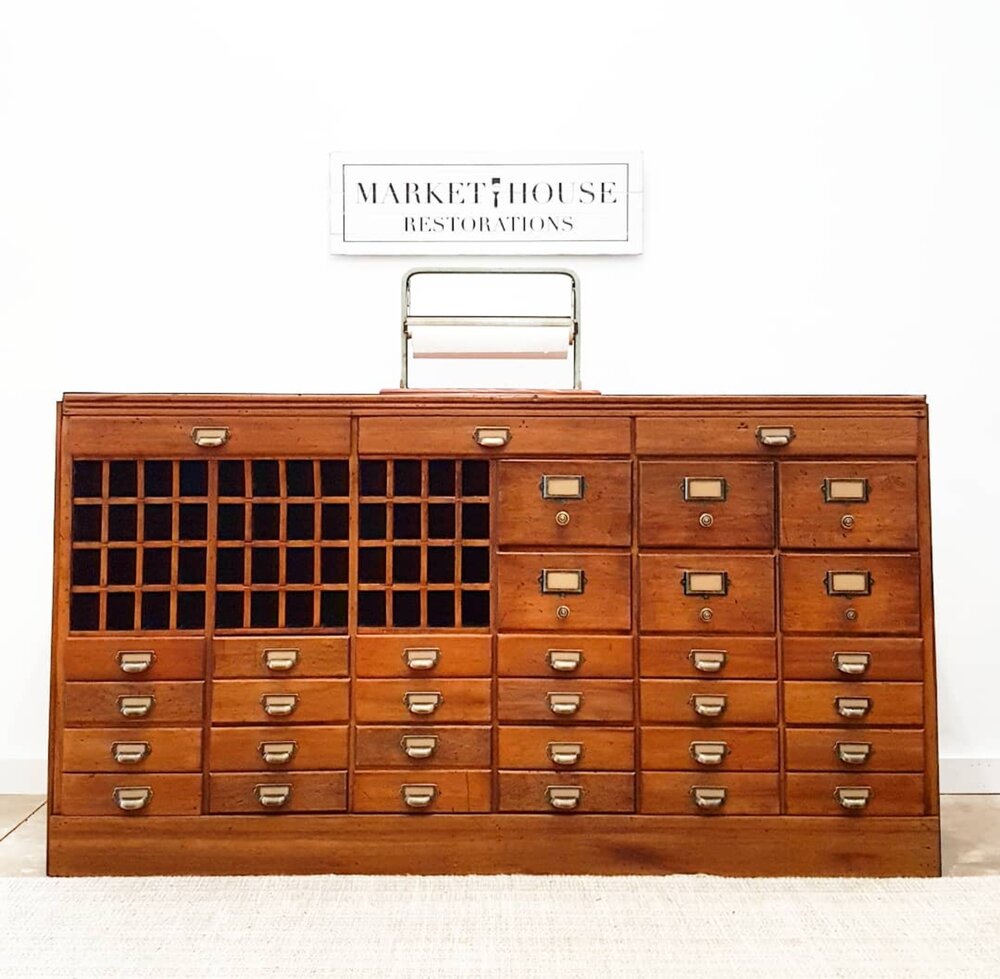
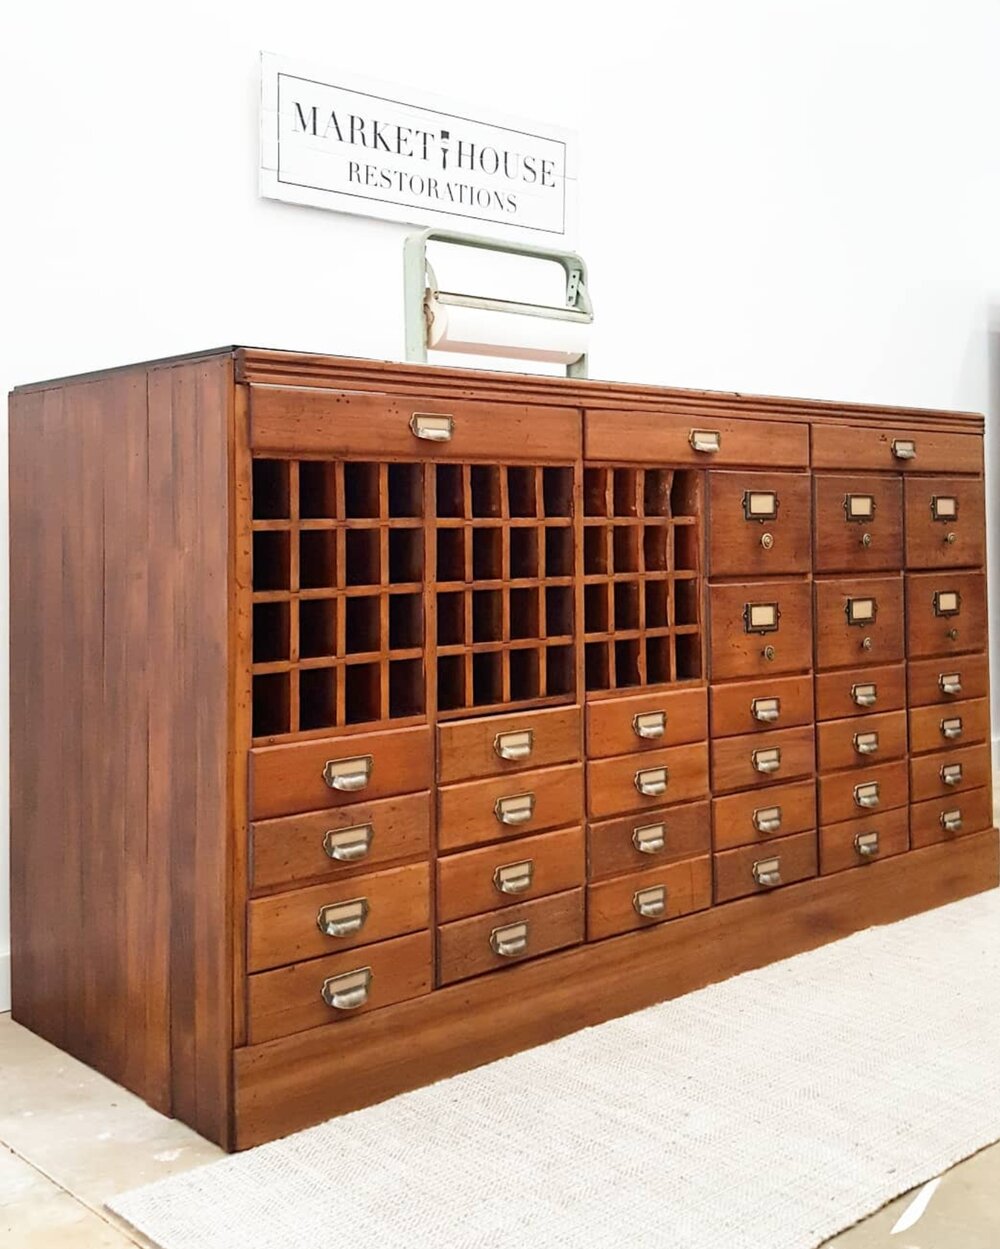
BEFORE AND AFTER PICTURES:
This piece took a little longer than planned because of the mismatched wood dilemma, but now it has an even better story, right!? I’m excited to get it in our home and use it as our TV stand. Hey, and ya never know, maybe our children (or me!?) will own a store one day and use this piece for the check-out counter!
![Screenshot_20190810-104903[1].jpg](https://images.squarespace-cdn.com/content/v1/595f0cefdb29d6676c8f4ca9/1568407928885-S42XYPSUMPQRW64XDJOV/Screenshot_20190810-104903%5B1%5D.jpg)

![LogoLicious_20190913_140153[1].png](https://images.squarespace-cdn.com/content/v1/595f0cefdb29d6676c8f4ca9/1568405825972-CTEPNNHBV4UIL7BWRCRH/LogoLicious_20190913_140153%5B1%5D.png)


As always, thank you so much for tuning in for #MondayMakeoversWithFallon. If you want to save this blog post so you can refer back to it, make sure you pin it to your Pinterest page and/or feel free to share it elsewhere. Don’t forget to check out my previous #MondayMakeoversWithFallon blog posts below as well as my other educating #TuesdayTipsWithFallon video tips/tutorials!
*Please note, this post does contain affiliate links.


Did you know I have an eBook plus three different staging and styling guides that help you stage your furniture!? Between all three guides you receive over 500 different ways to style and stage different pieces of furniture. Yes, 500!! They are not just for the furniture artist either. Maybe you are planning on selling your home and need help staging your furniture so it doesn’t look cluttered or maybe you just have no clue how to style the furniture that you currently have and you want it to look nice?! No worries! These are for you!! Between all three guides and my second edition eBook you get over 200 pages of information! You do not have to worry about staging and styling your furniture ever again!!Here is the link to my eBook, Your Virtual Storefront. The Complete Guide to Staging Painted Furniture. It jammed packed information that will help you take your staging to the next level! I also have three separate staging and styling guides that help you stage specific pieces of furniture.
Here is a breakdown of my eBook and Guides:
*Your Virtual Storefront. The Complete Guide to Staging Your Painted Furniture. 2nd EDITION: Everything you need to know to help you stage your furniture from, photography, the photo editing process, lighting, staging areas/locations, information about logo/watermarks…just to name a handful of the topics.
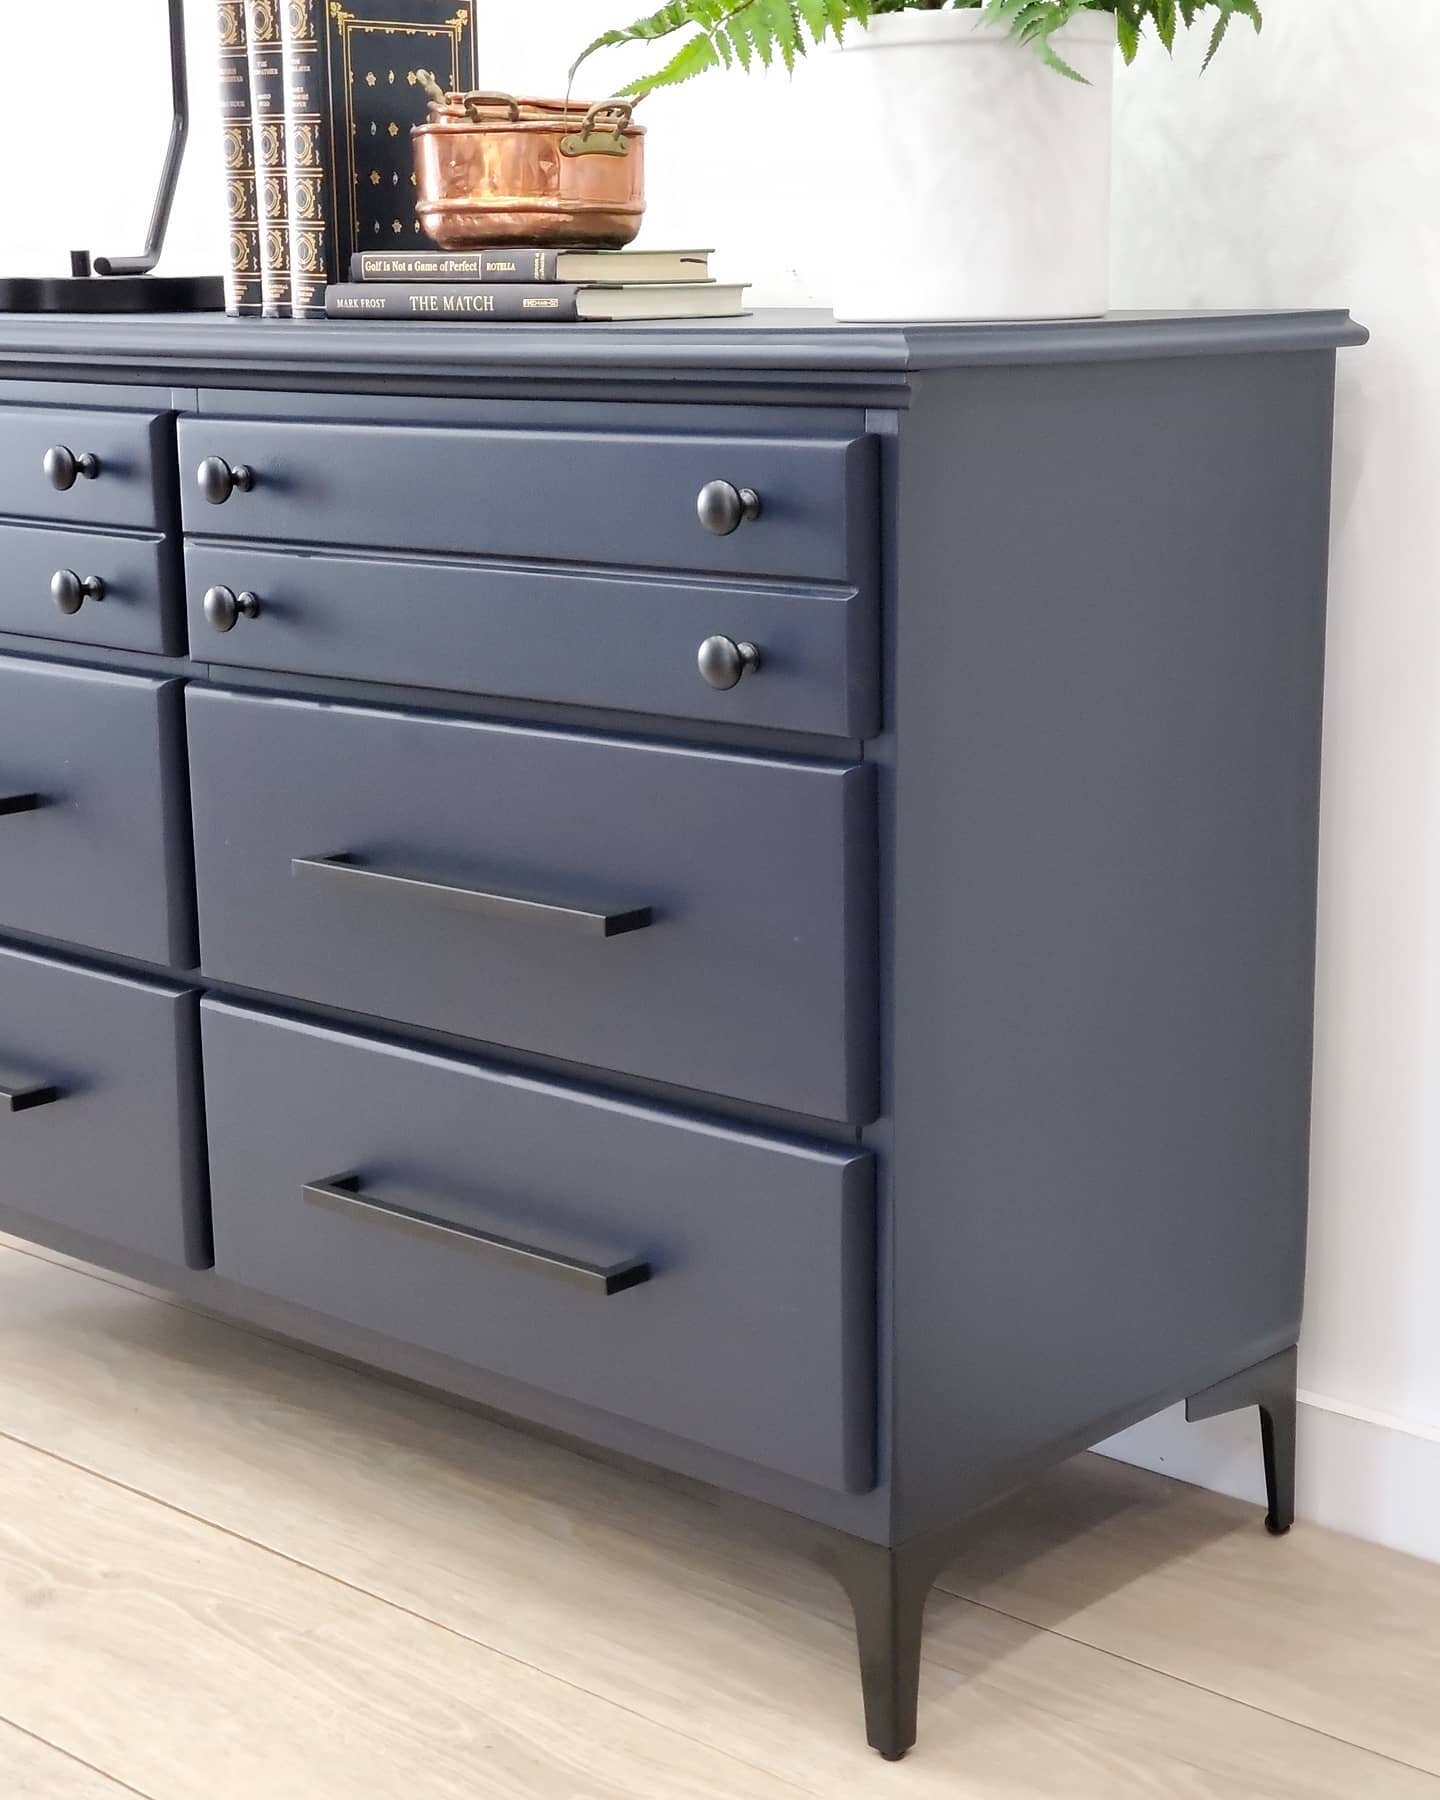
*The Bedroom Furniture Guide: Staging and Styling Chest of Drawers, Dressers, Nightstands, Wardrobes, Blanket Chests, Vanities, Beds and Bedroom Sets)
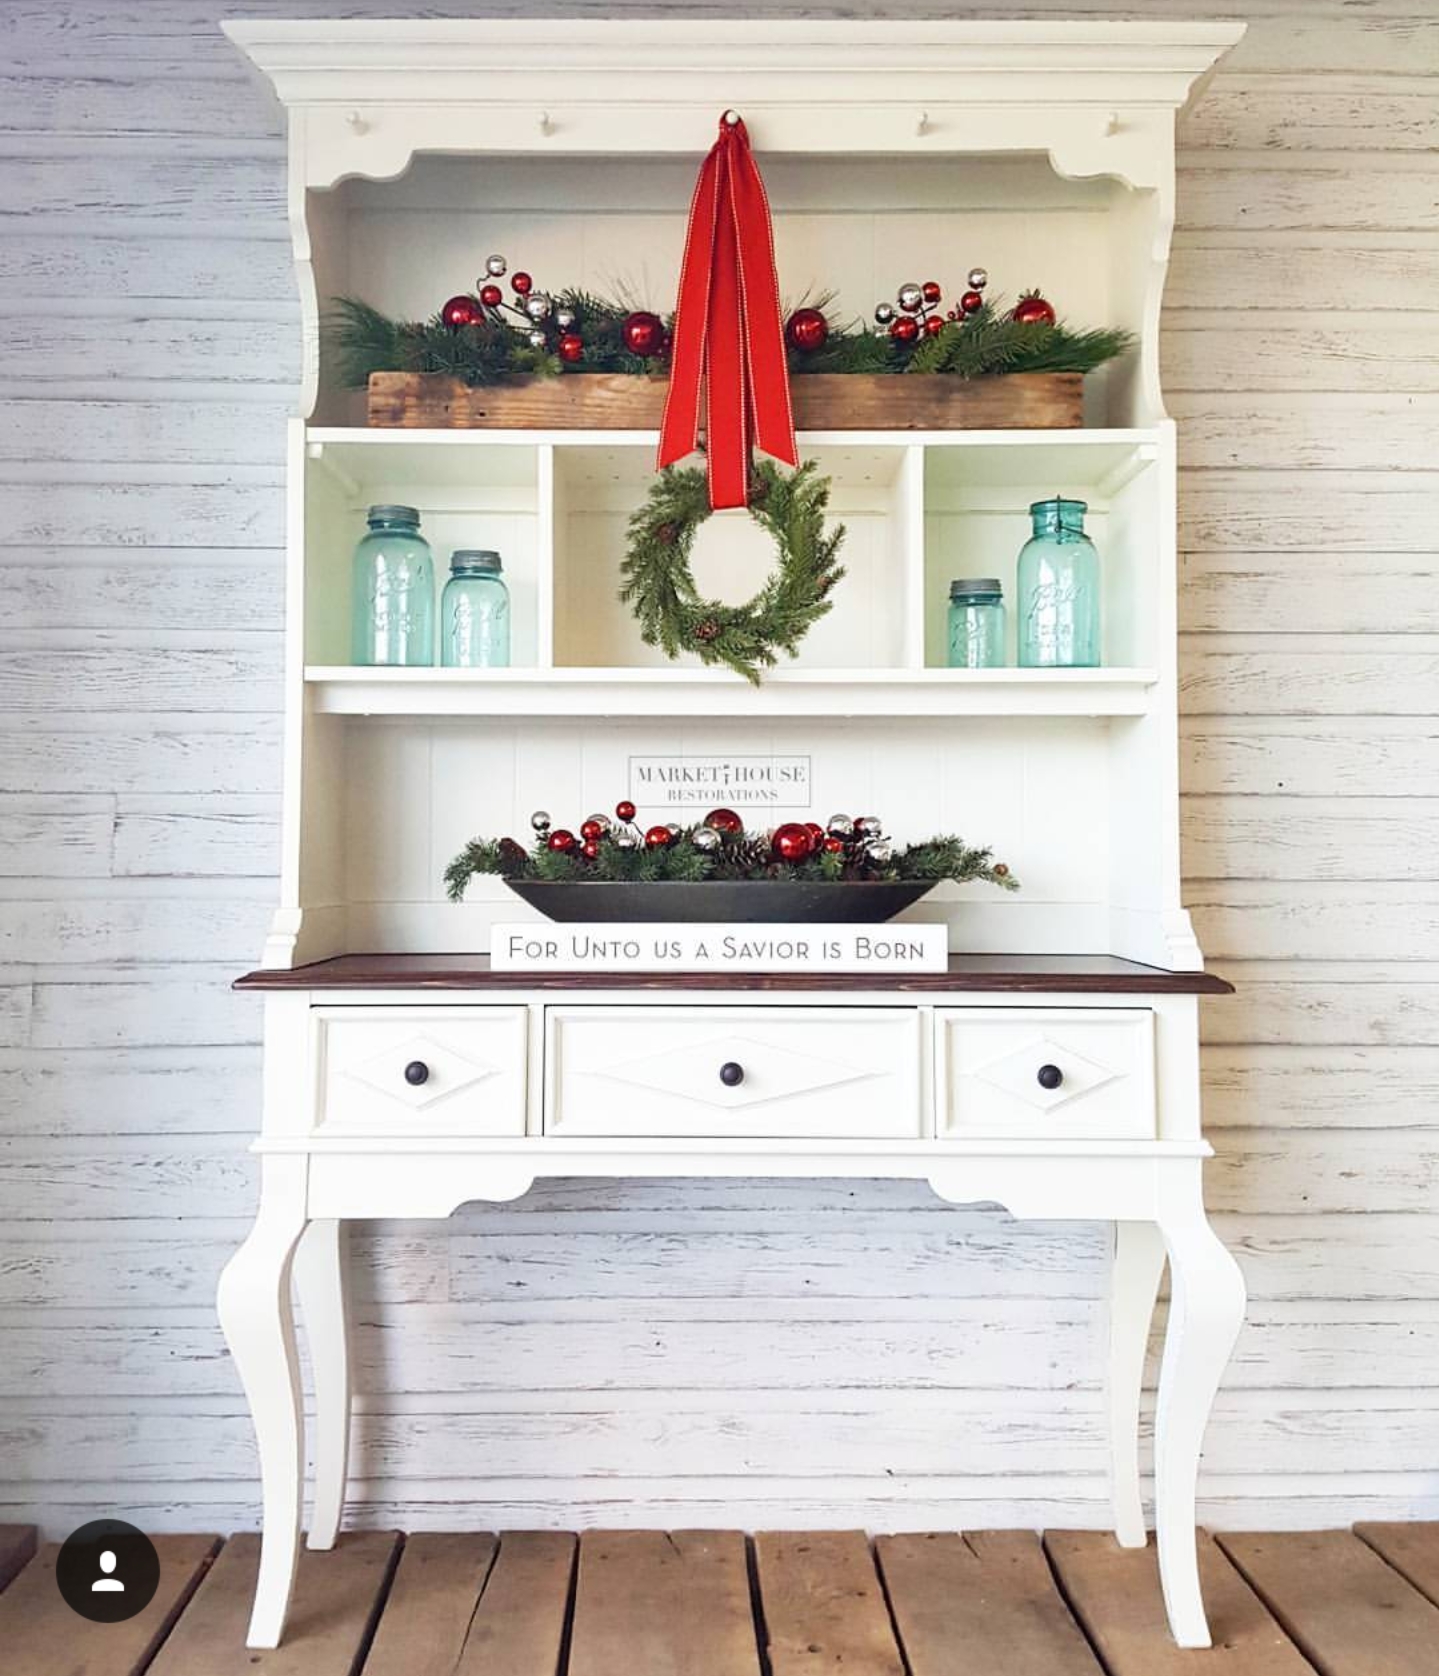
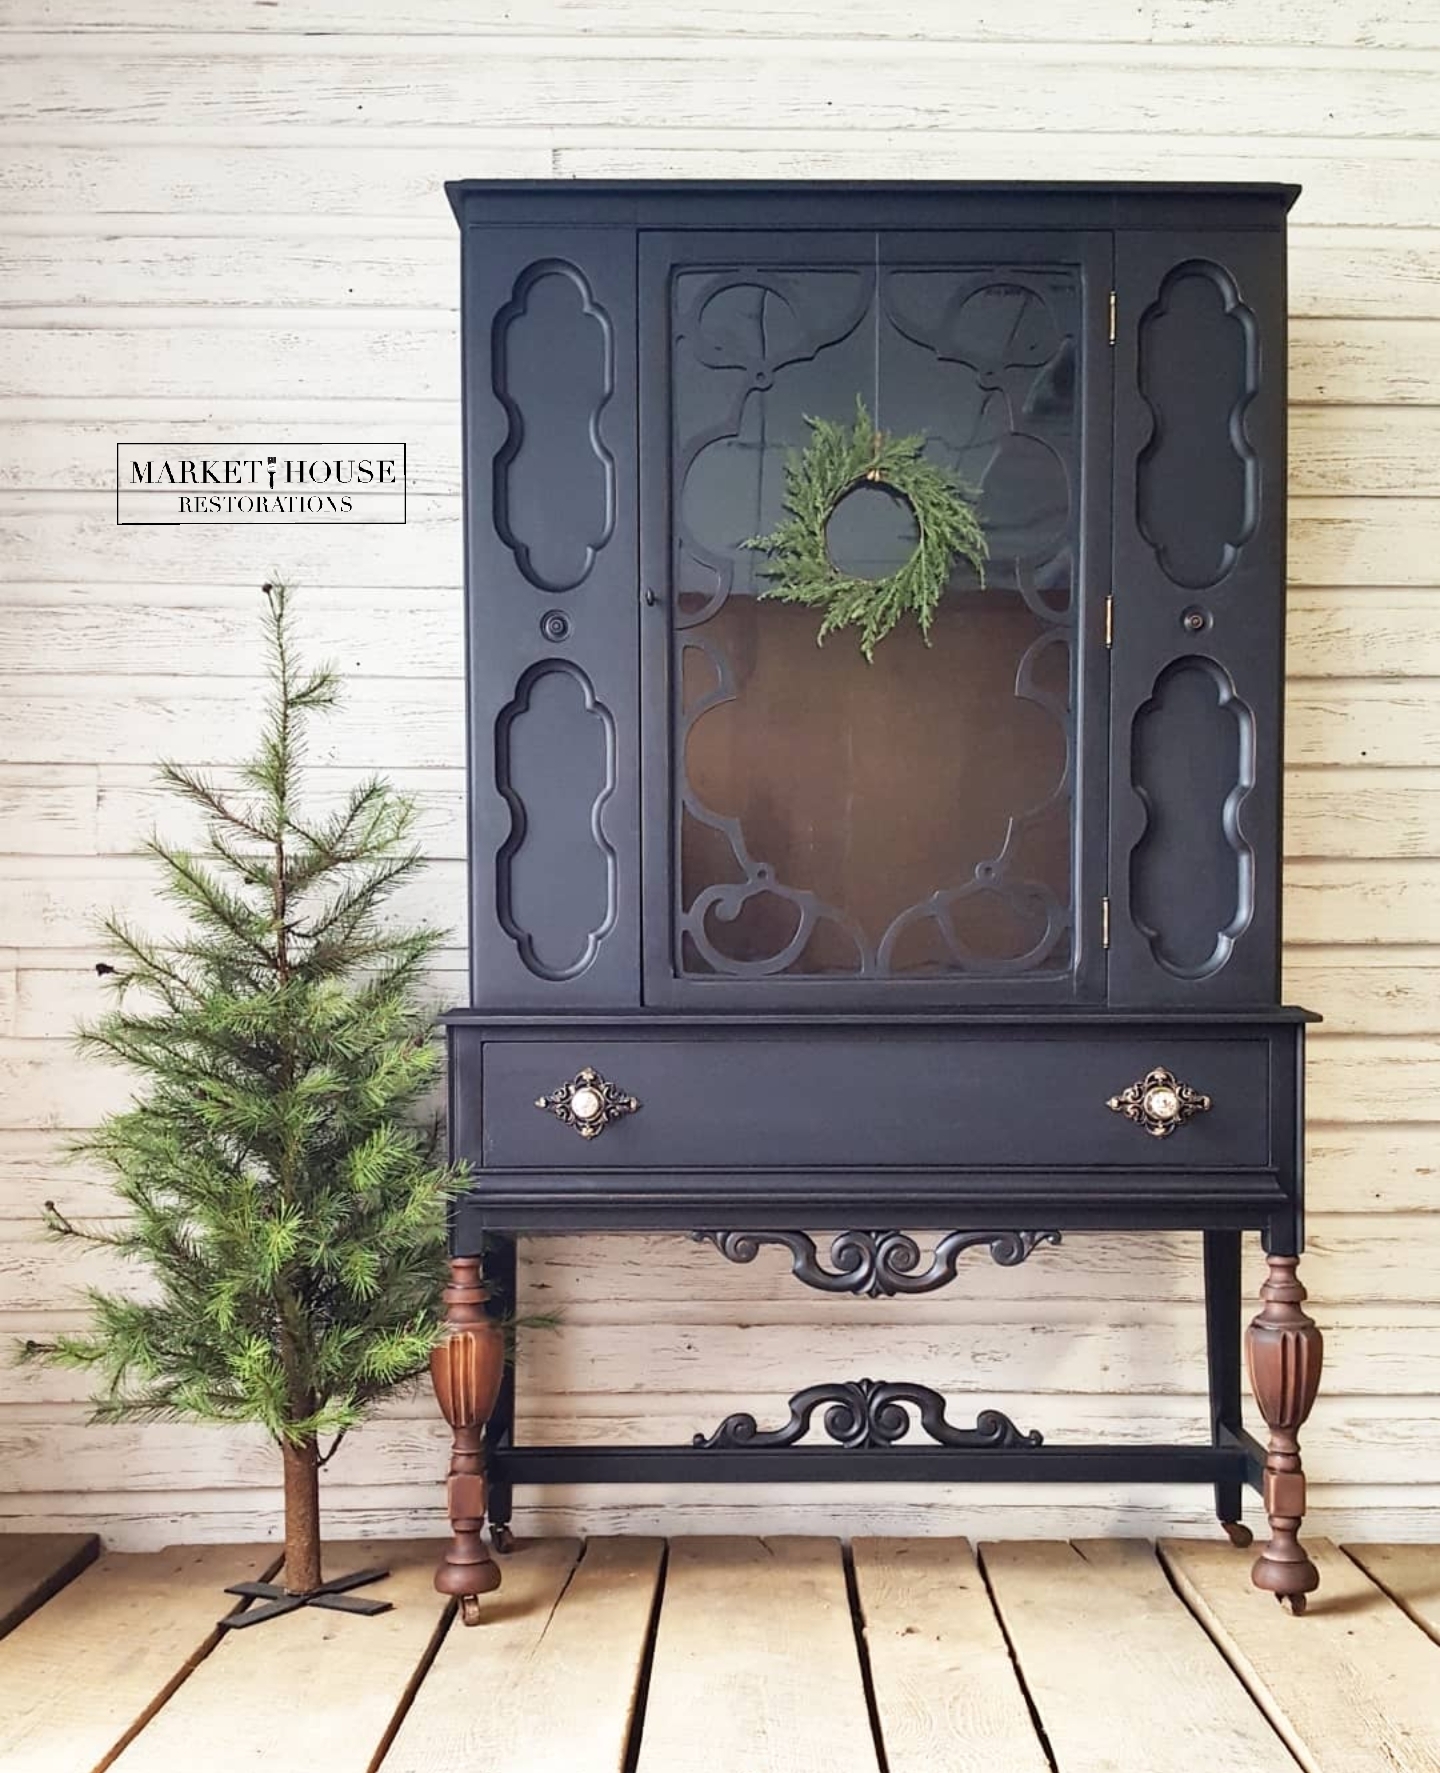
*The Dining Room Furniture Guide: Staging and Styling Buffets/Sideboards, China Hutches, Glass Front China Cabinets and Tables & Chairs
*The Everyday Living Furniture Guide: Staging and Styling Desks, Multi-Purpose Pieces, Sofa Tables, TV Stands, Side Tables, Coffee Tables, Benches and Bookshelves
I appreciate you stopping by!!