How To Remove Dark Stains On Wood. #TuesdayTipsWithFallon
/#TuesdayTipsWithFallon
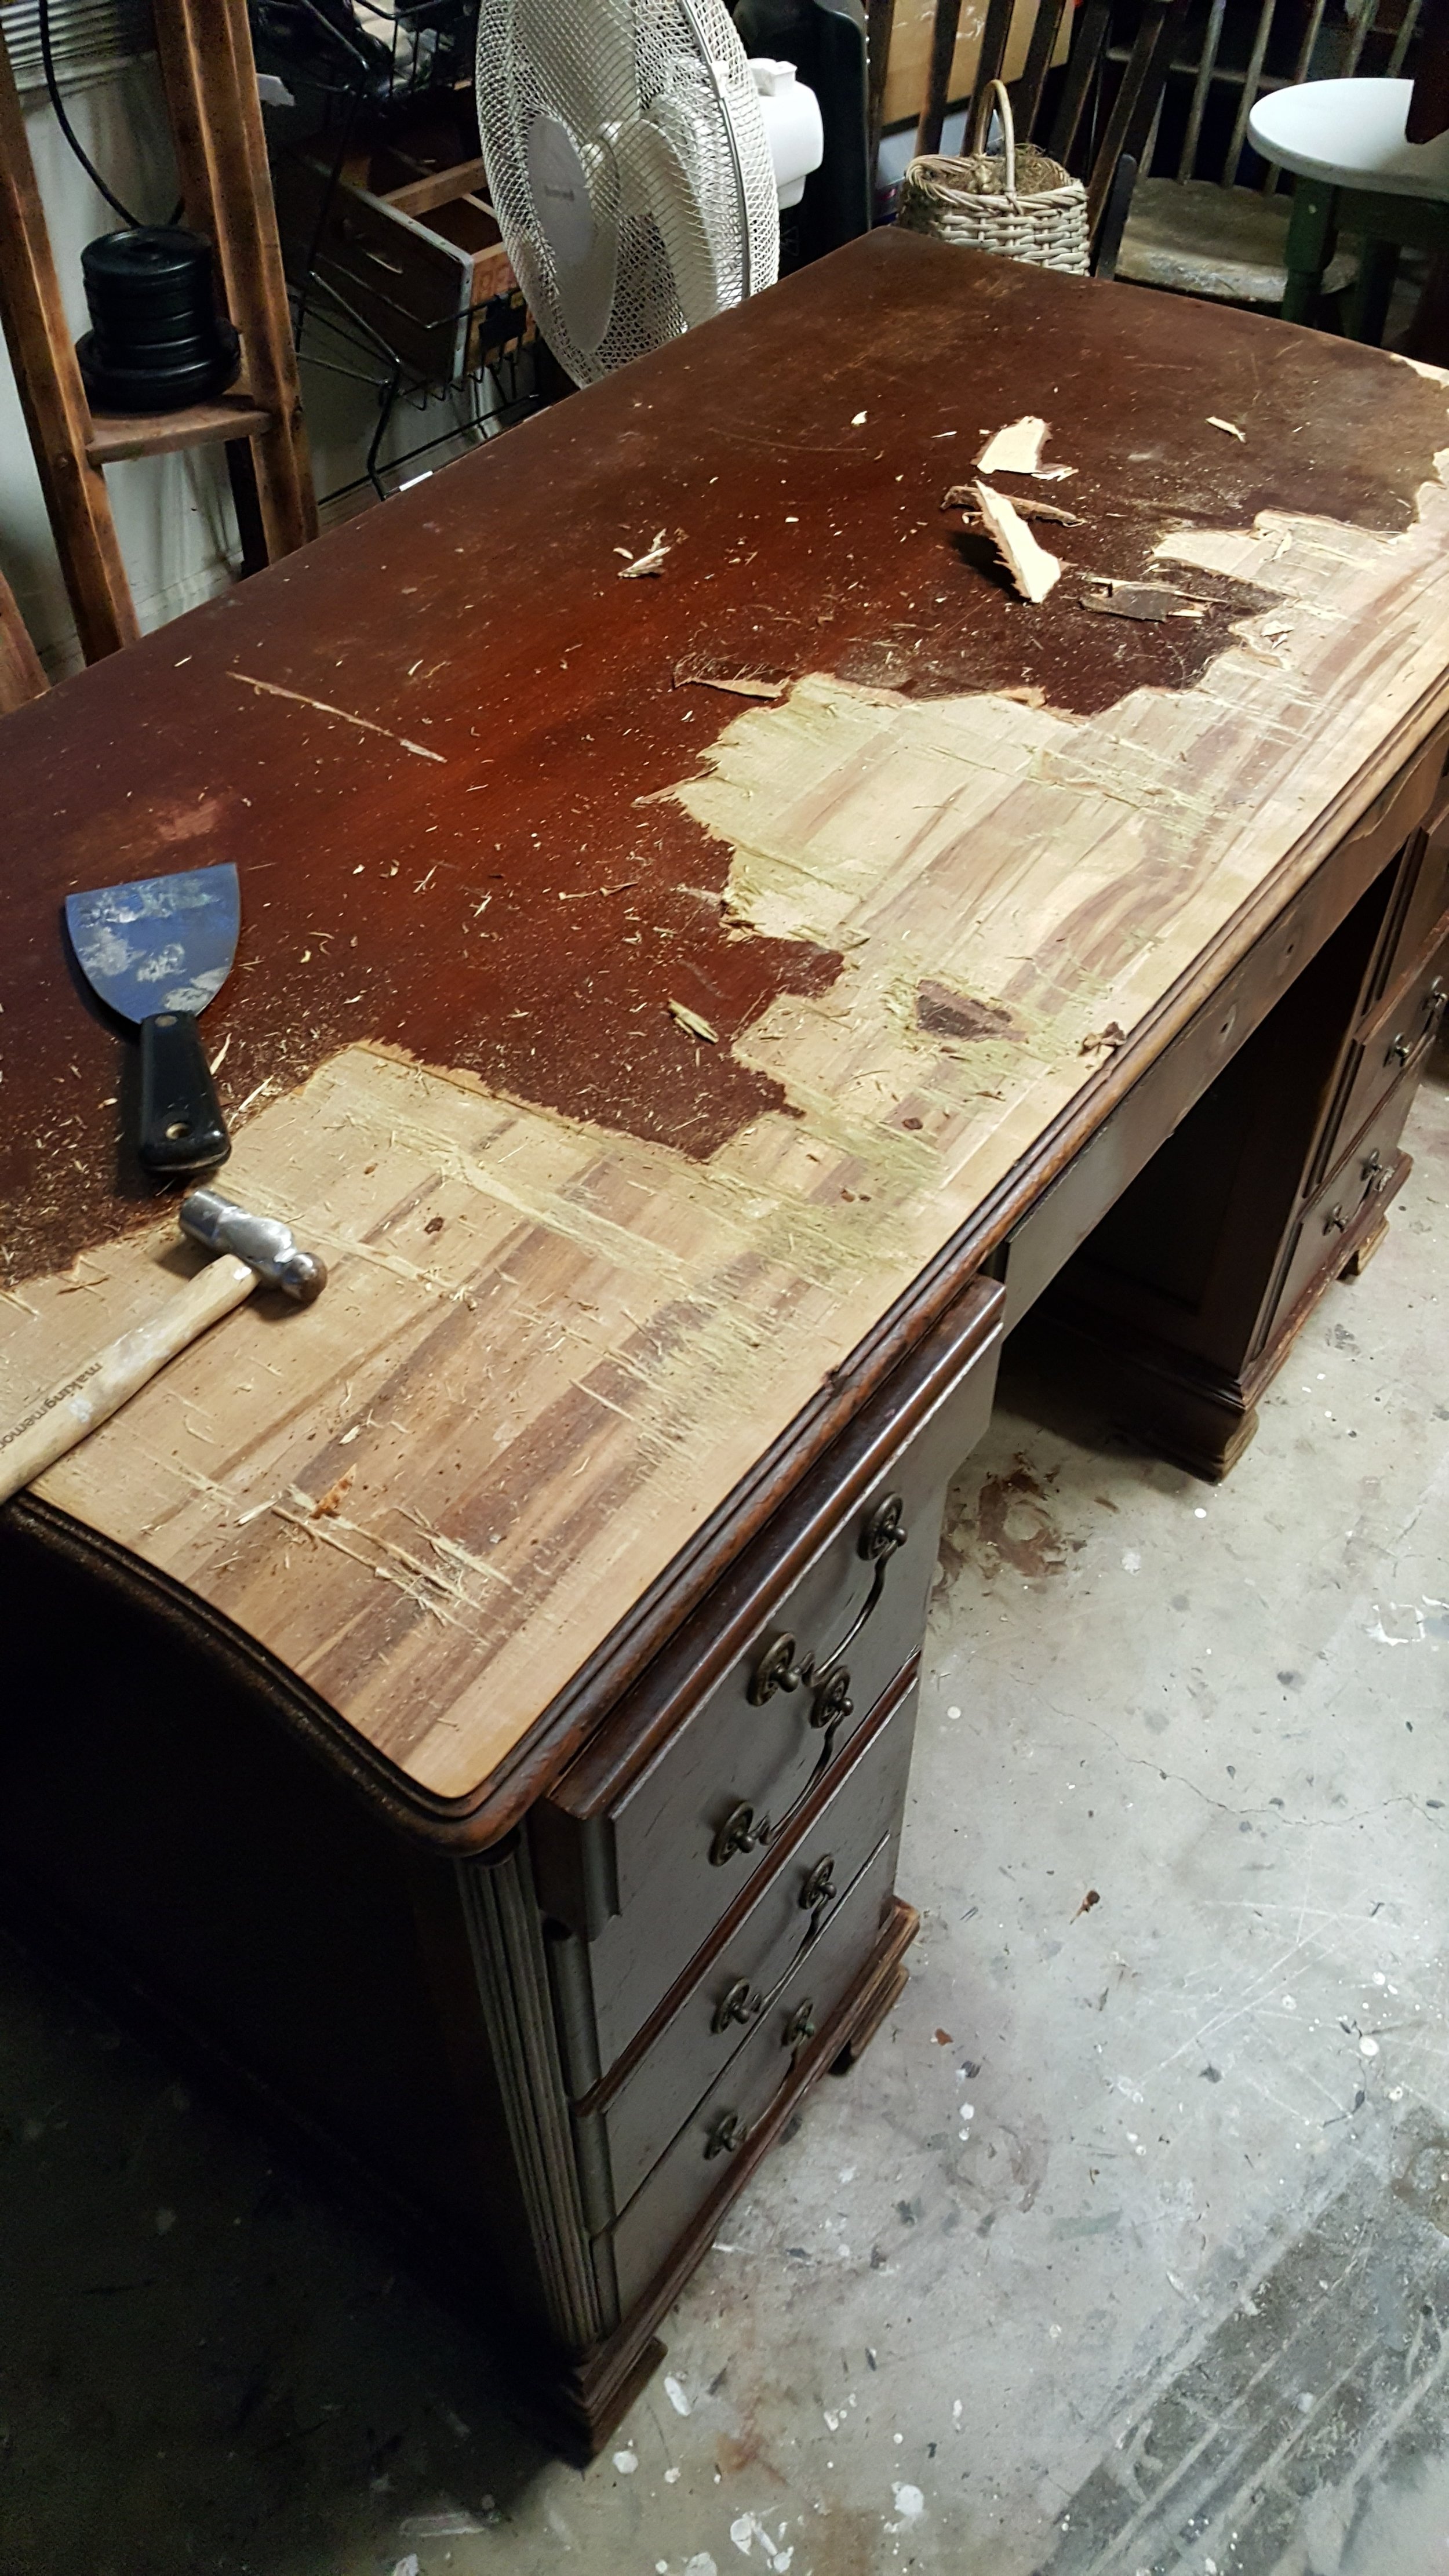
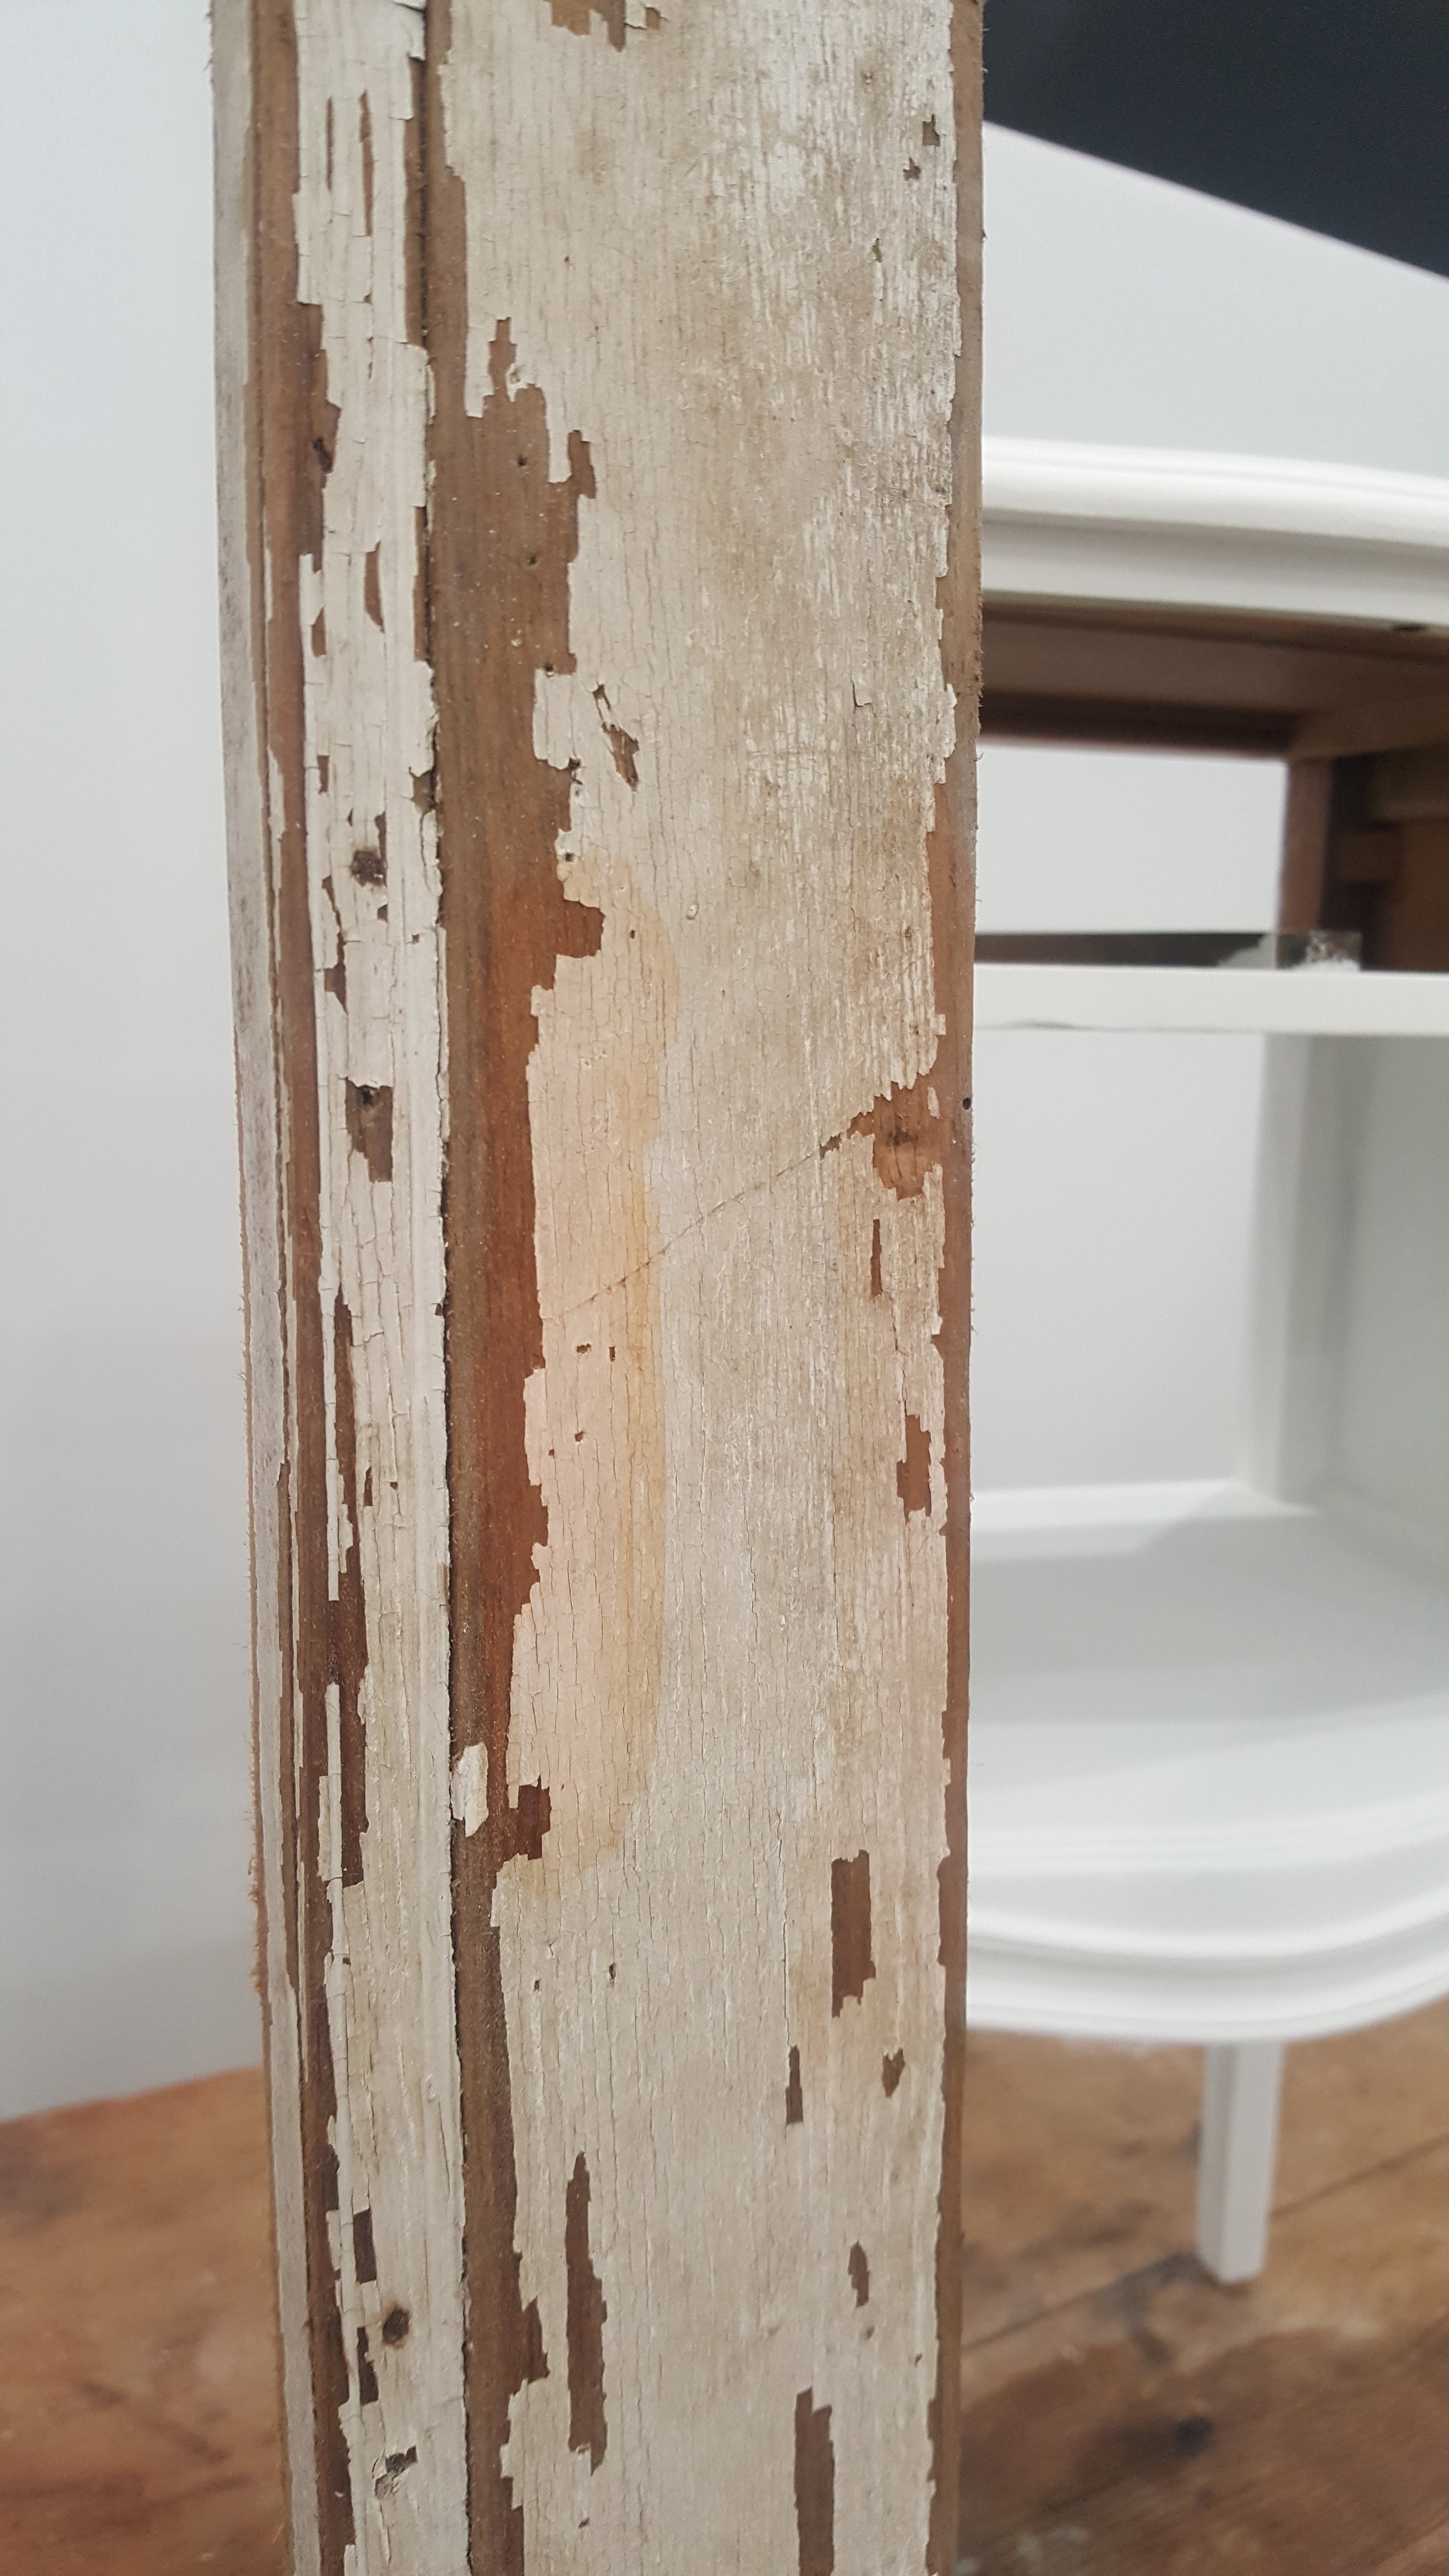
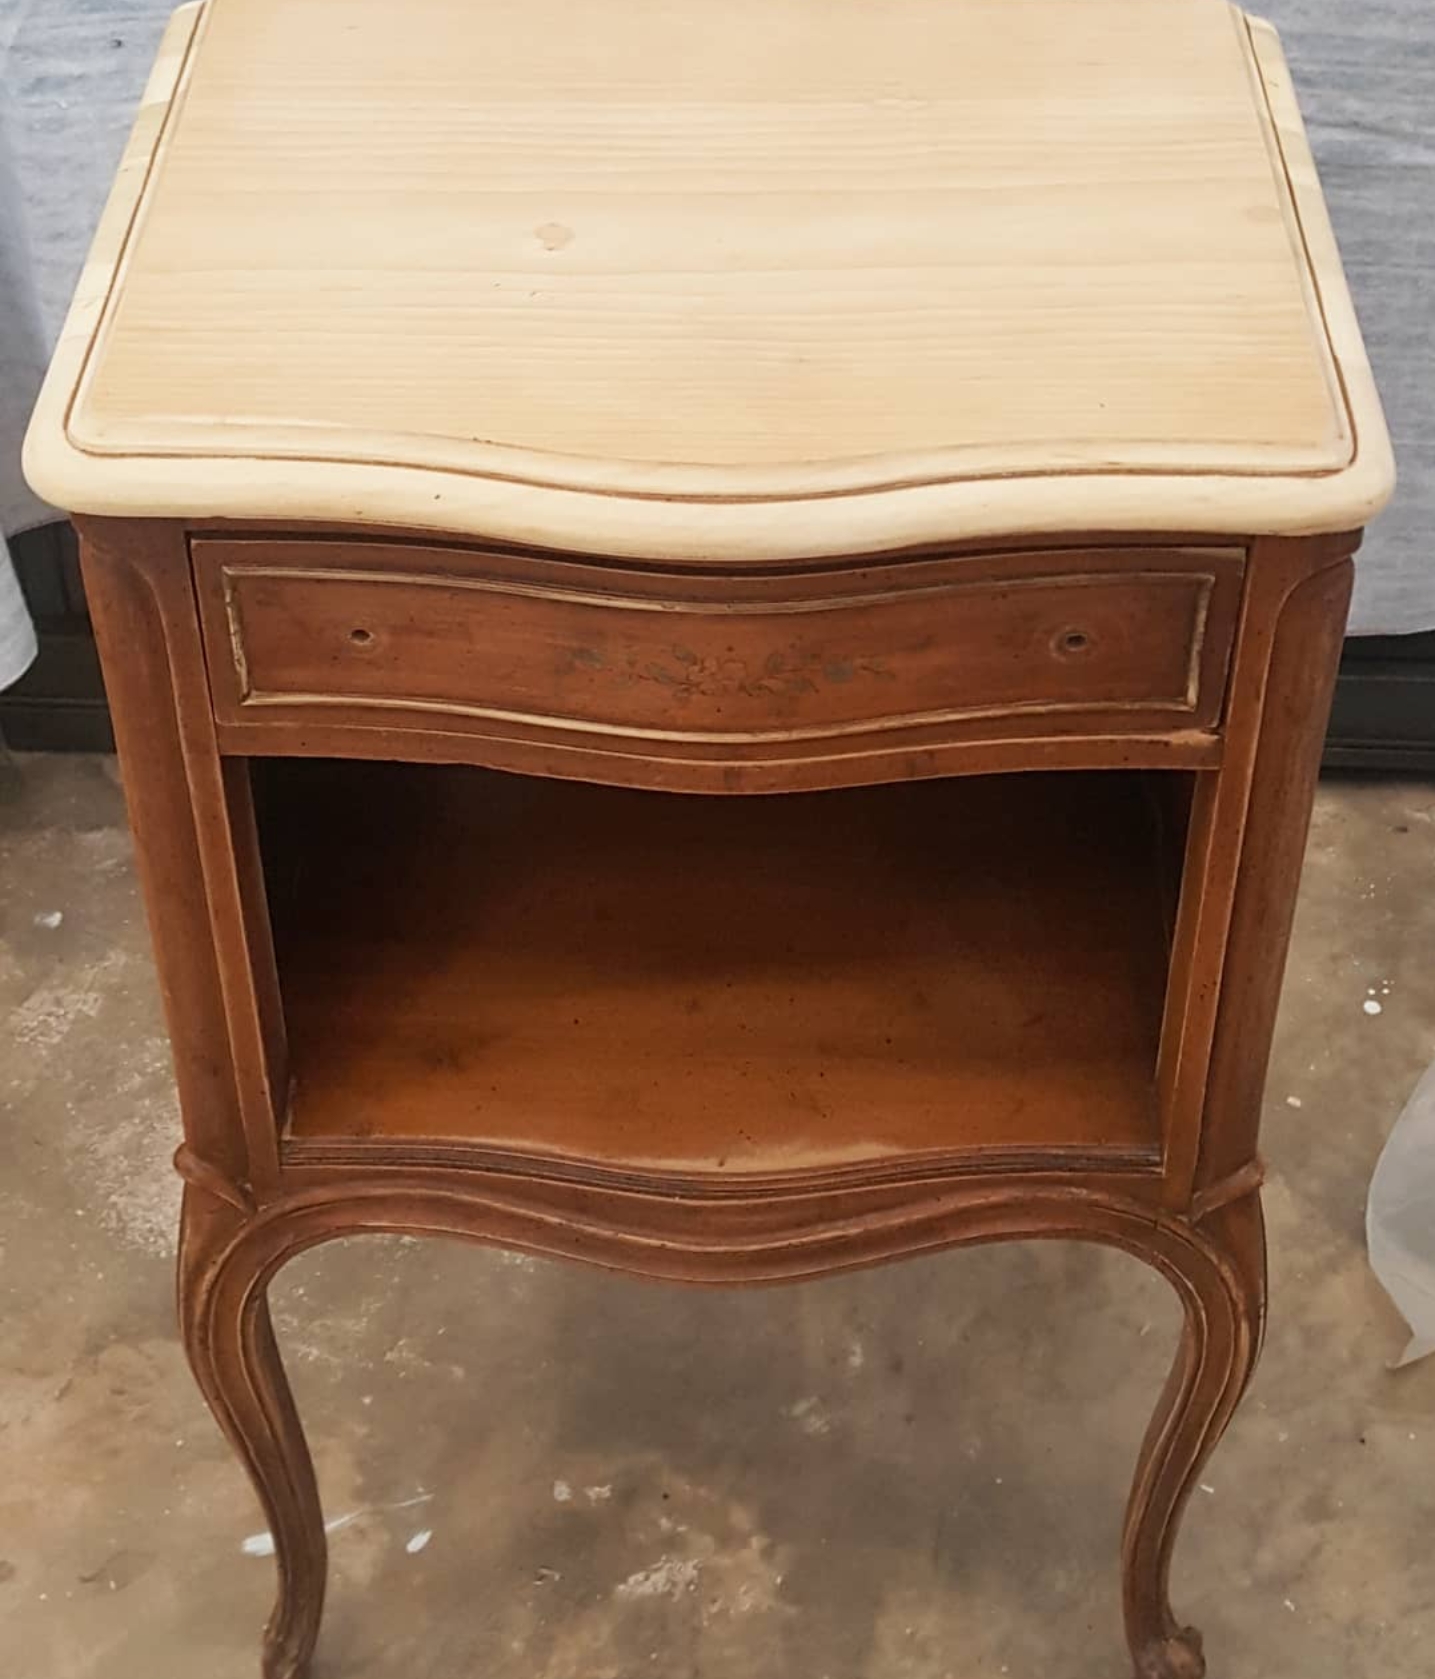
It can be really frustrating when you discover a dark area on your furniture. If you plan on re-staining the piece instead of painting it, this can be difficult because you have to figure out a way to blend the dark spot while still making the piece look nice. I originally planned on painting the top of the piece that you see in the video, but as I was prepping it, I saw a dark spot and I knew I had to stop and sand it all the way down so I could make it a #TuesdayTipsWithFallon tutorial.
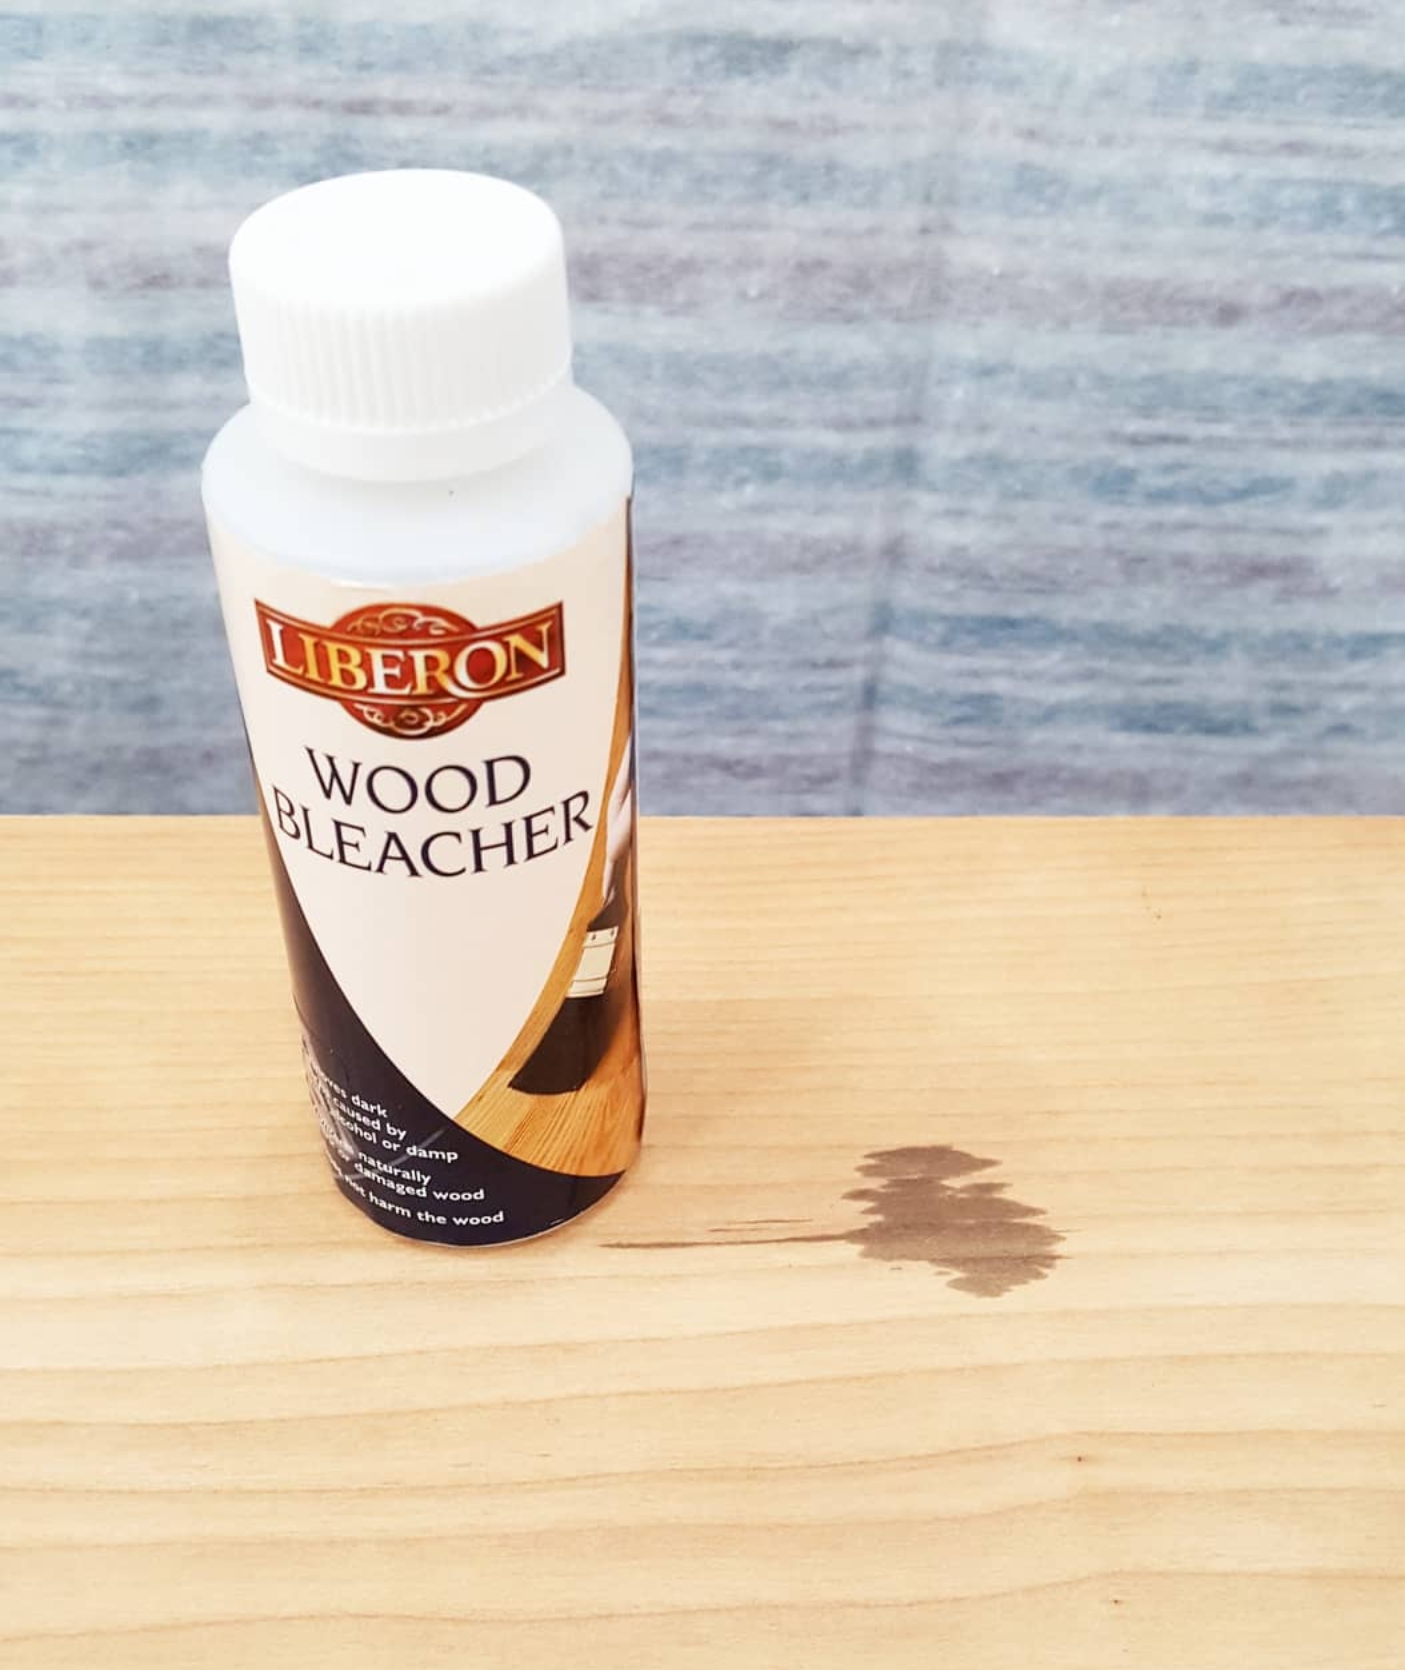
A little over a year ago I discovered a great product by Liberon called Wood Bleacher. It lightens naturally dark or damaged wood and doesn’t harm the wood in the process. It removes dark spots caused by rust, alcohol, ink, damp spots and/or ring marks where perhaps a cup of water or a potted plant may have sat for many years.
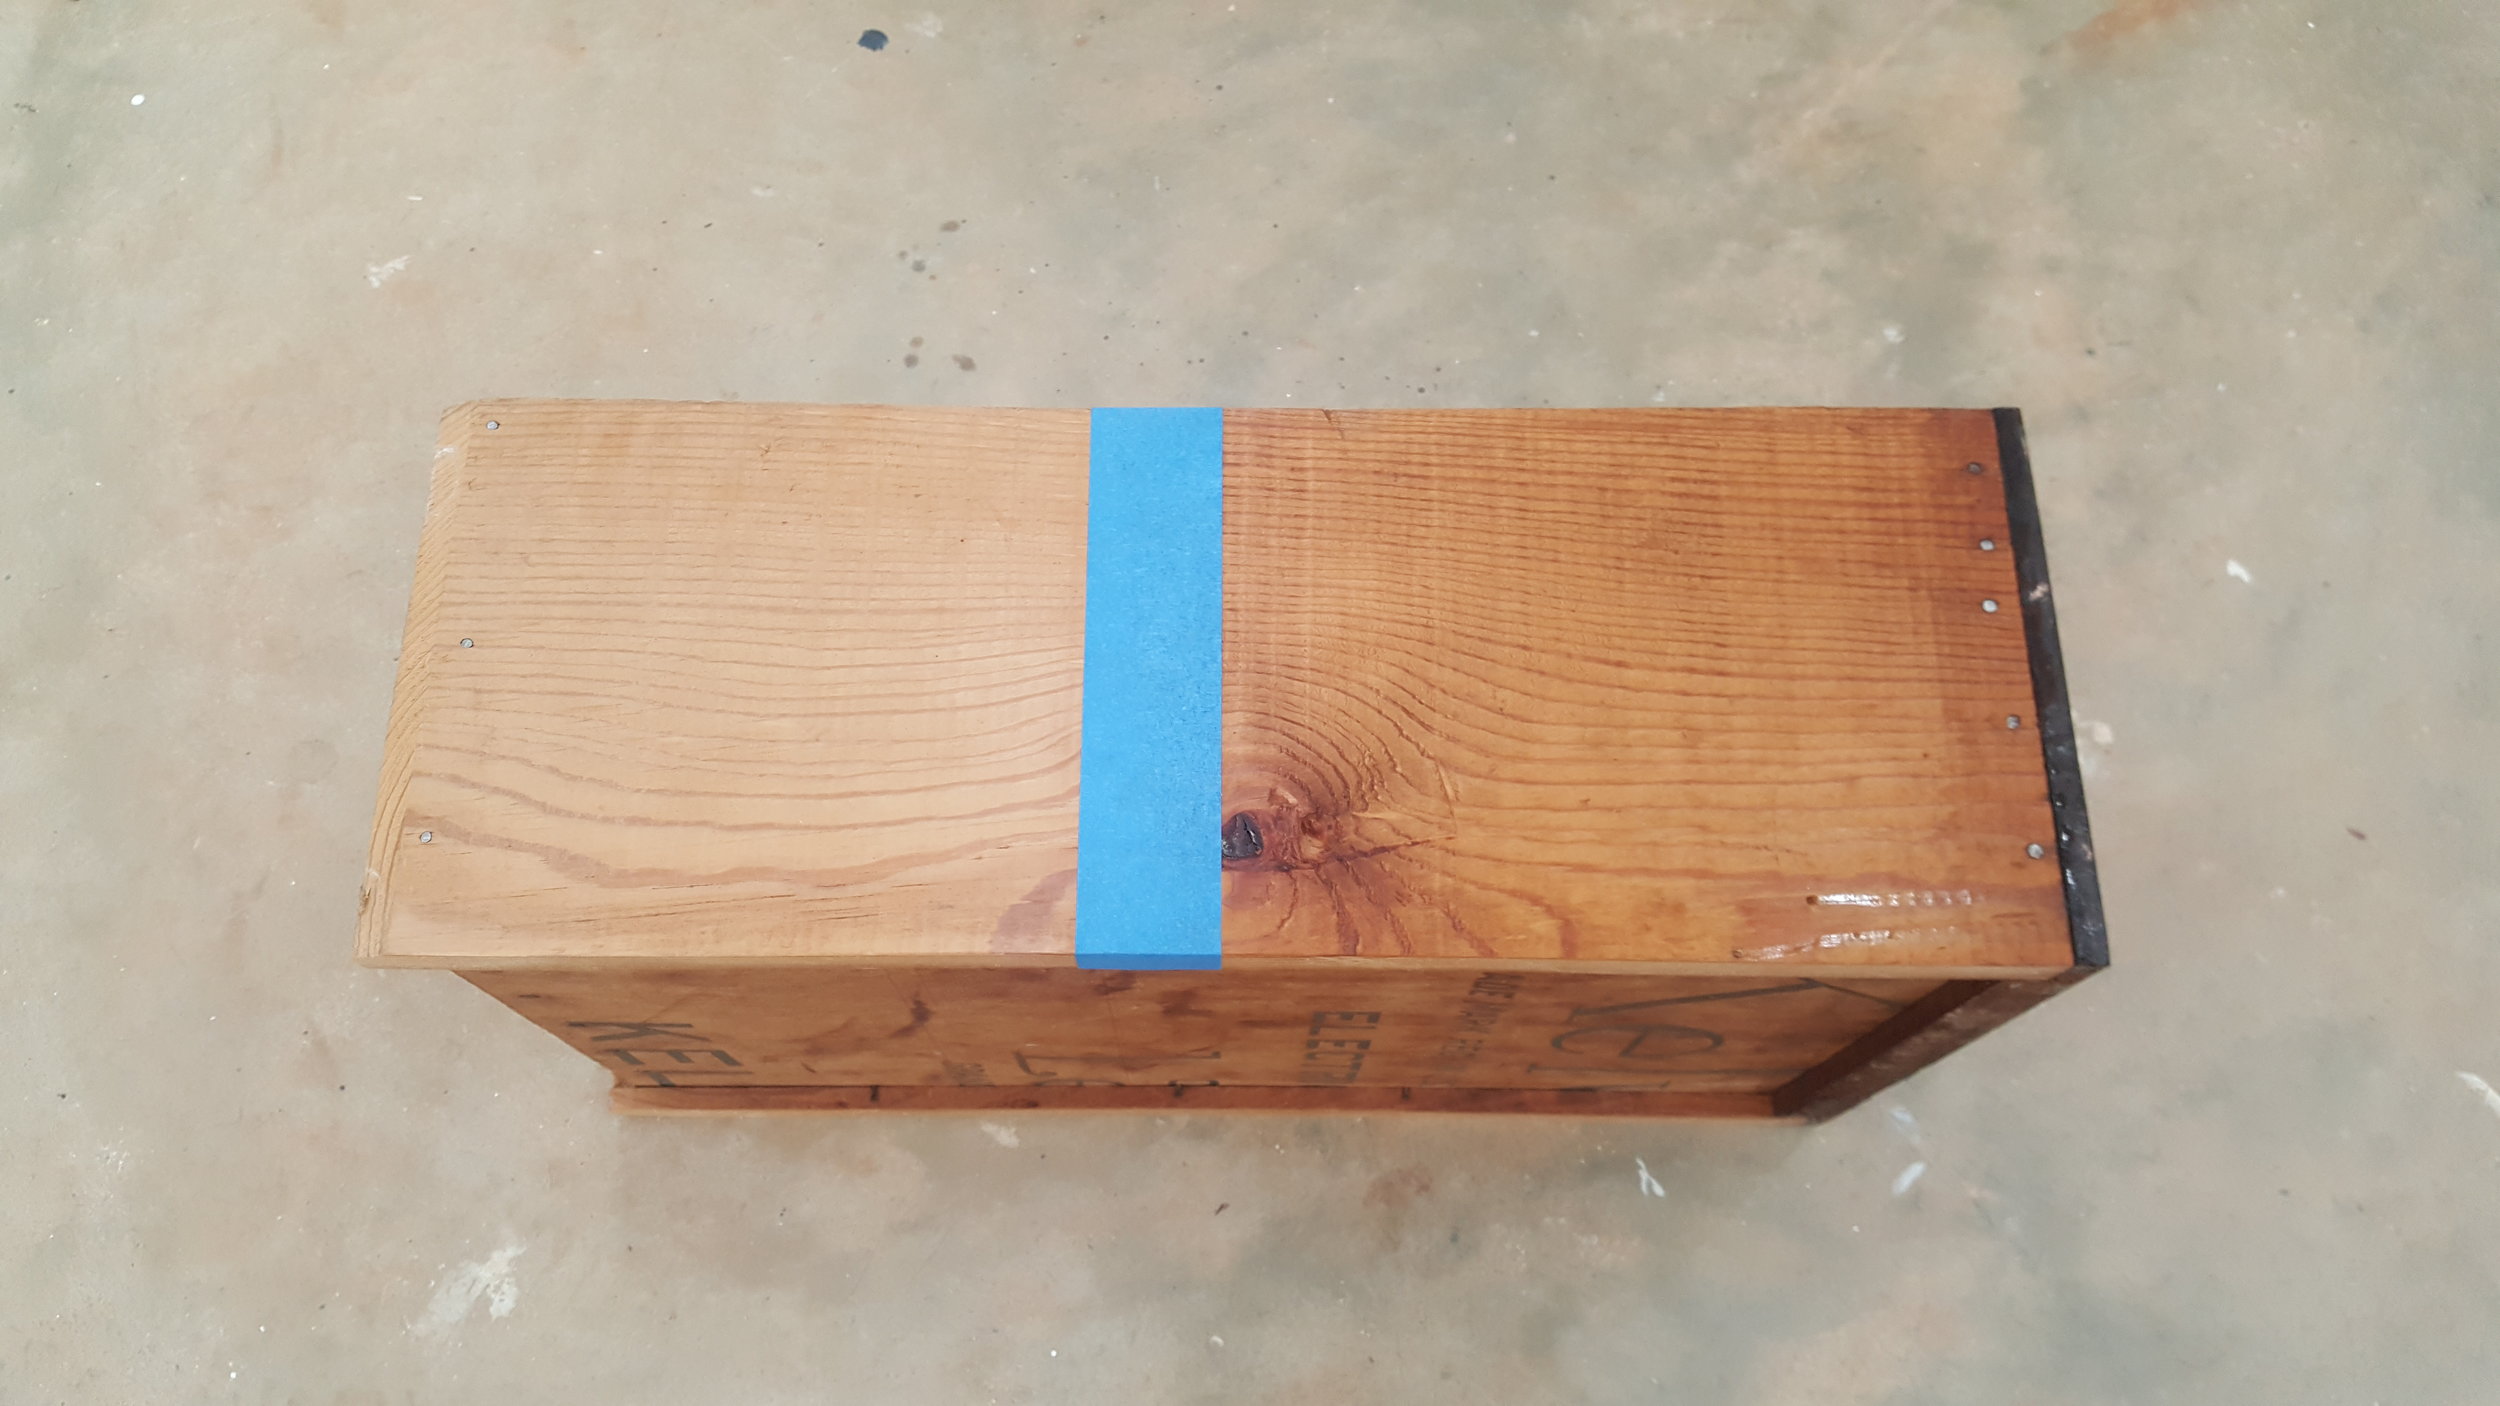
Before you get started, since this product relies on chemical reactions, it’s important to test it on a small area to make sure the wood doesn’t resist the product. I suggest testing it on underside or backside of the wood.
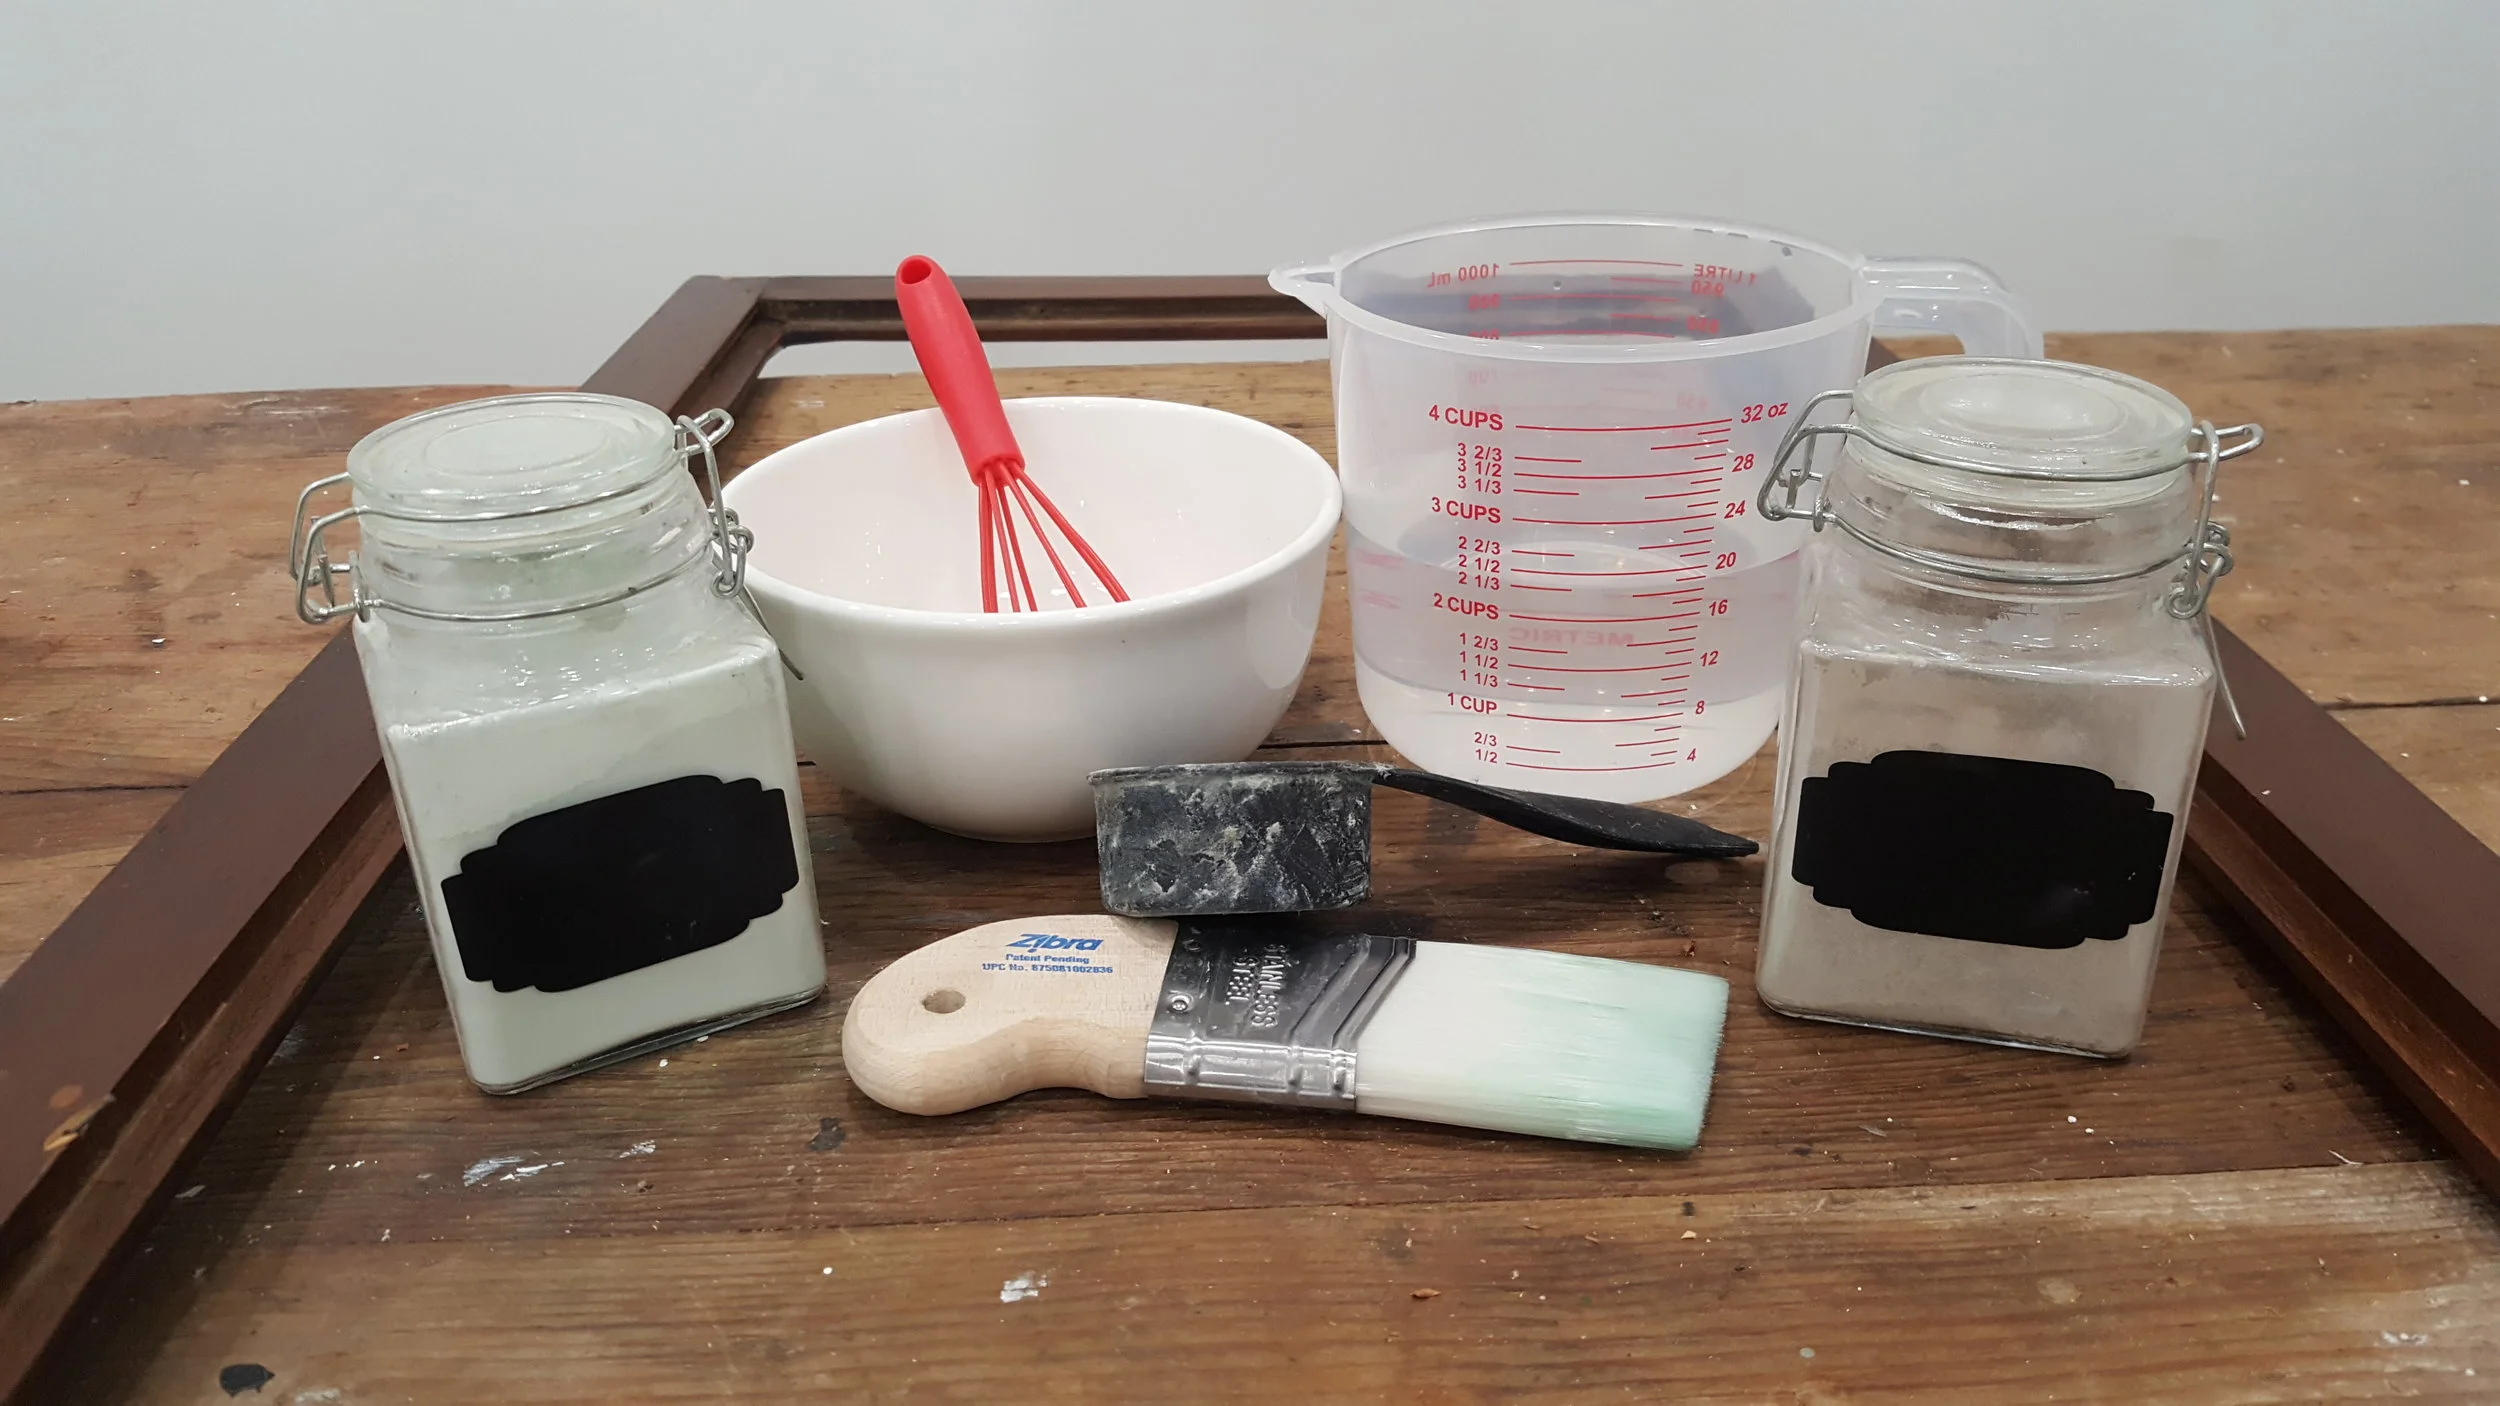
Directions:
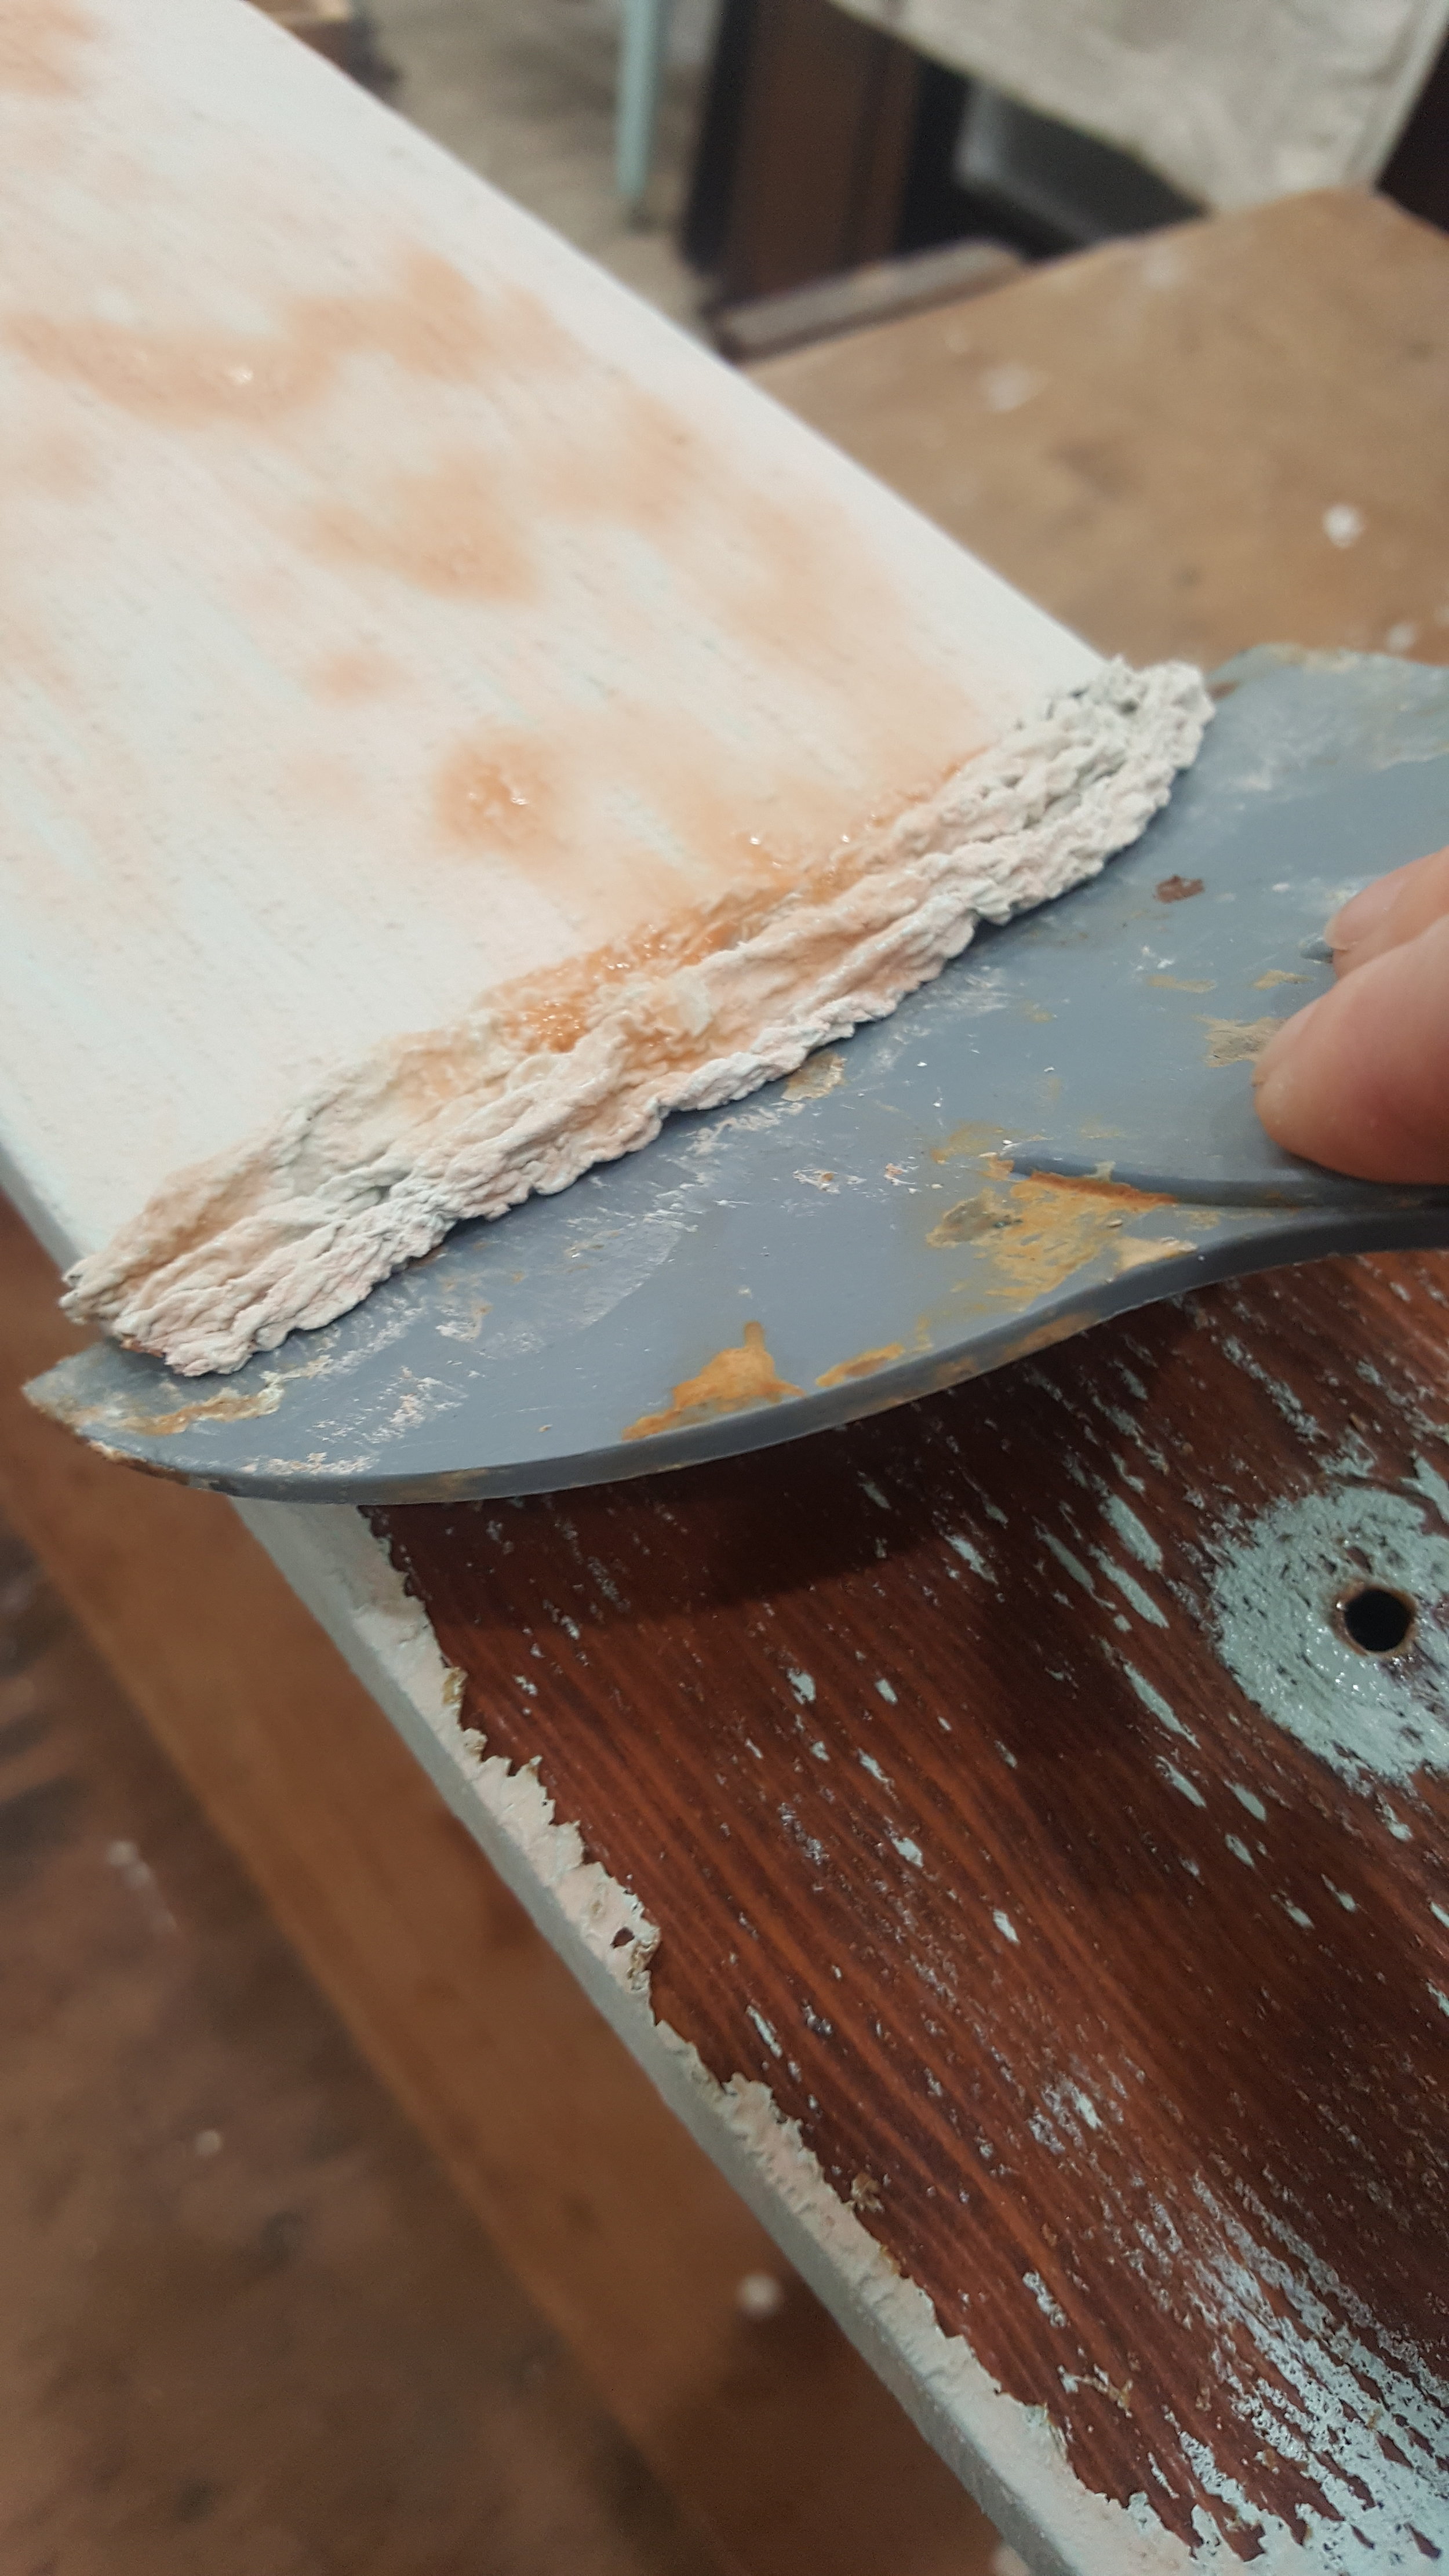
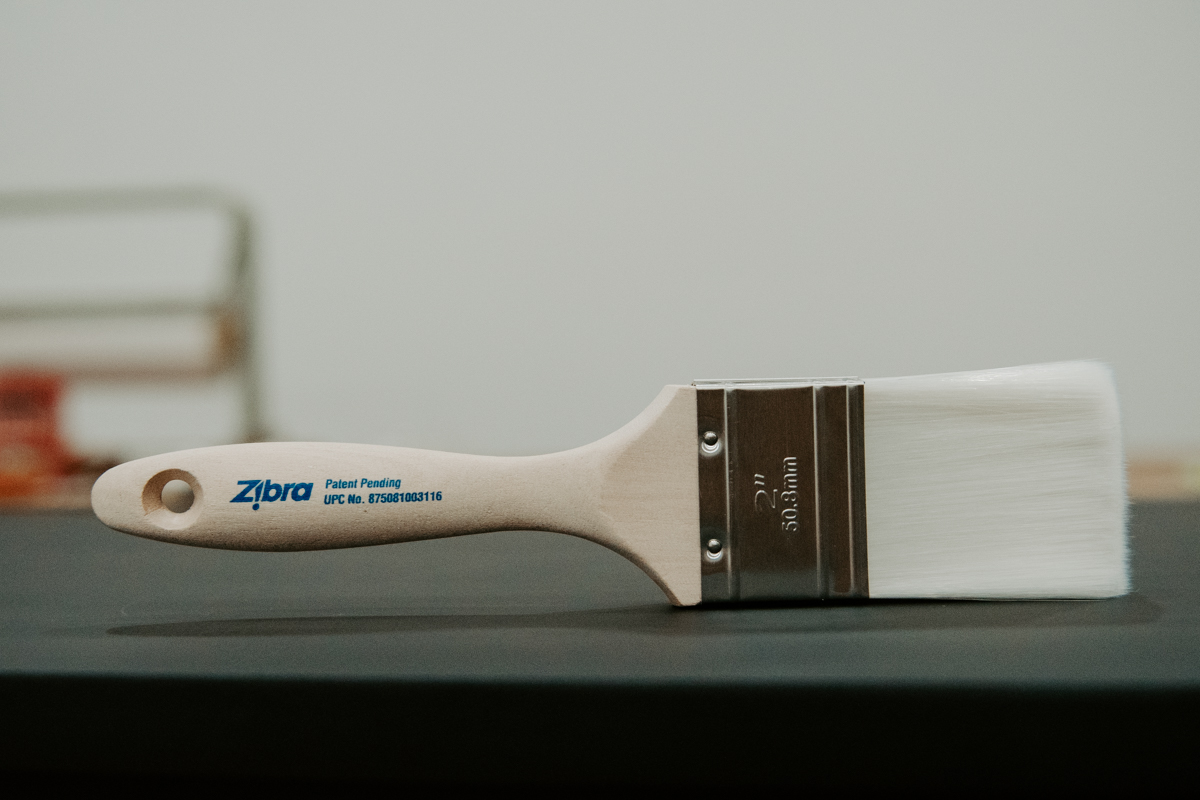
Step 1: Sparingly apply the wood bleacher with a brush (or applicator of choice) on the affected area. Allow the product to dry, check the progress and if necessary, apply another coat. You may have to repeat this process 2 or 3 more times depending on the severity of the stain.
Step 2: Once you are happy with the result, rinse the area with clean water 2 or 3 times.
Step 3: After the area is completely dry, sand the top of the whole piece so it blends well with the rest of the wood.
Step 4: Per the manufactures recommendations, water-based products may be effected by the wood bleacher. Just a personal preference, but I like using a dark stain to help cover up any leftover imperfections.
Now that you have fixed that dark area, you can stain your piece as planned. .

Check out the before and after below! Awesome, right!? Just as an FYI, the other dark spot that you see on the top of the piece (below and to the left of the stain) is an actual knot in the wood. This, of course, cannot be removed since it’s part of the wood.

Thank you so much for stopping by for #TuesdayTipsWithFallon! Make sure you tune in every other Tuesday for a new tip! If you want to save this blog post, just pin it to your Pinterest page and/or feel free to share it elsewhere. Happy Painting!!
*Please note, this blog post does contain affiliate links
Make sure you check out my other #TuesdayTips videos and blog post’s below!